
Inconsistent branding creates a scattered, unprofessional image for your company. Maintaining a consistent brand identity across all documents and sites can be challenging. SharePoint’s brand center in Microsoft 365 simplifies this task. This easy-to-use tool lets you bring your own fonts, colors, and images to create a unified look 🎨🖌. It’s a one-stop shop for managing your brand, ensuring everything looks professional. Brand center in SharePoint is currently in preview and allows only one brand center per tenant.
Let’s check out how to use this feature to easily improve and unify your branding.
What is a Brand Center in SharePoint Online?
The SharePoint Online Brand Center provides a centralized branding management application for customizing the appearance of your SharePoint sites. With this new feature, organizations can easily apply custom branding to both SharePoint sites and Viva Connections, enhancing the user experience. The brand center relies on SharePoint’s Organization Asset Library (OAL) to manage and store all brand assets.
Integration with SharePoint Organization Asset Library (OAL)
The SharePoint brand center’s integration with the SharePoint Organization Asset Library (OAL) is a key feature that boosts its functionality. The OAL acts as a storage hub, organizing and storing brand assets for easy access and management through the brand center app.
Why SharePoint Branding is Important?
Using the brand center app ensures:
- Simplified management process, ensuring all digital assets are secure & centralized.
- Consistent and professional organization branding across all communication channels.
- Efficient resource management by preventing duplication and confusion of brand assets.
- Simplified creation of high-quality branded content by employees.
- Authentic reflection of your organization’s identity, enhancing stakeholder connection.
- Provides a solid foundation for consistent branding across organization’s digital platforms.
Note: Branding your SharePoint site does not change the overall appearance of Microsoft 365 services. You need to use Microsoft 365 Company Branding for that.
How to Set up a Brand Center in SharePoint Online?
To enable the SharePoint brand center, you need to first activate the brand center app. Global admins can follow a few straightforward steps in the Microsoft 365 admin center to activate it.
Activating the SharePoint brand center in the Microsoft 365 admin center enables the use of custom fonts in SharePoint and Viva Connections.
While it currently streamlines font and asset management, upcoming features like color and graphic controls will offer even greater control over brand consistency.
- If your organization isn’t already using SharePoint Organization Assets, the brand center will set up a new site for you.
- If you currently use SharePoint Organization Assets with a private CDN, enabling the brand center will require agreeing to activate the Public CDN.
Follow the steps below if your organization isn’t currently using the SharePoint Organization Assets feature.
Create the Brand Center App in the Microsoft 365 Admin Center
Global admins can activate the SharePoint brand center app from the Microsoft 365 admin center by following the steps below.
Step 1: Head to the Microsoft 365 admin center.
Step 2: Navigate to Settings –> Org settings in the left navigation.
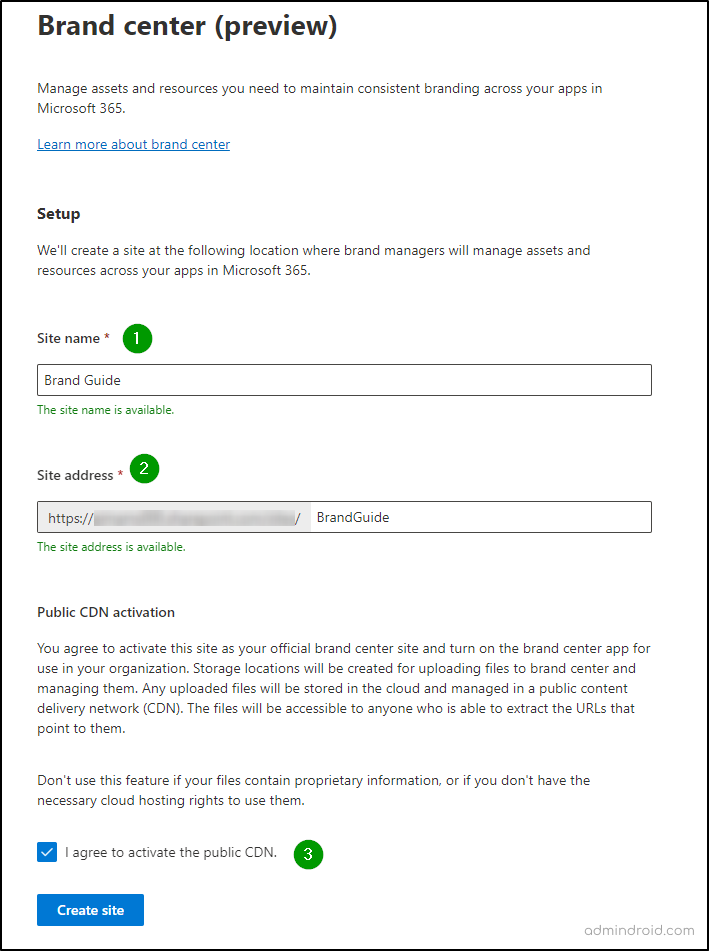
Step 3: Select Brand center (preview) under ‘Services’.
Step 4: Create a site by entering the site name and address. Or set up your brand center quickly with the suggested name ‘Brand Guide,’ and activate the public CDN by giving your consent. Your brand center is now set up and ready to use!
Step 5: Click on ‘Create site’. Your brand center is now set up and ready to use!
Step 5: On the next page, you’ll find links generated for both the brand center site and the brand center app. Simply copy the link you need and sign in with your credentials to access.
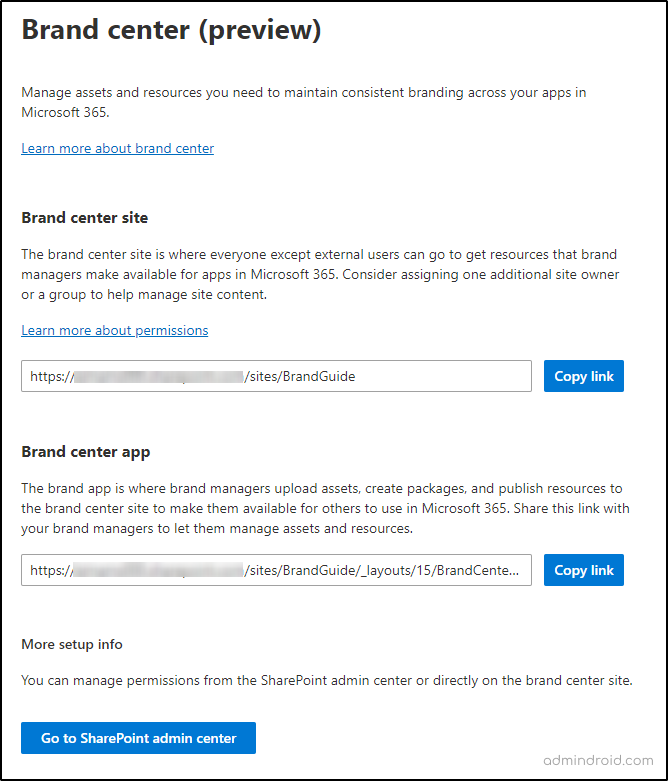
Difference Between Brand Center App and Brand Center Site
Brand center app: Brand managers use this app to upload assets, create packages, and publish resources to the brand center site, making them accessible for use across Microsoft 365.
Brand center site: This is where everyone, except external users, can access resources (colors, fonts, images, assets) curated by brand managers within Microsoft 365.
Managing Brand Center in the SharePoint Admin Center
Once your SharePoint brand center setup is complete, admins can manage access to the brand center app by customizing site permissions for the brand center site. One who activates the brand center preview automatically becomes both the site admin and site owner of the brand center site. Site owners of the brand center site will have exclusive access to the brand center app.
You can access the brand center application through the URL path: https://<yourtenantname>.sharepoint.com/sites/BrandGuide/_layouts/15/BrandCenter.aspx
The SharePoint brand center has two levels of management: the Microsoft 365 admin center and the SharePoint admin center.
- In the Microsoft 365 Admin Center, global administrators control the activation of the brand center and have easy access to the associated site.
- Within the SharePoint admin center, global administrators, site administrators, and site owners can adjust permissions for the brand site as needed.
Use the Brand Center to Create Custom Fonts in SharePoint Online
To use the brand center app in SharePoint, follow the steps below.
Step 1: Navigate to the brand-associated site in your SharePoint Online. You can find it in the list of sites within your SharePoint Online start page.
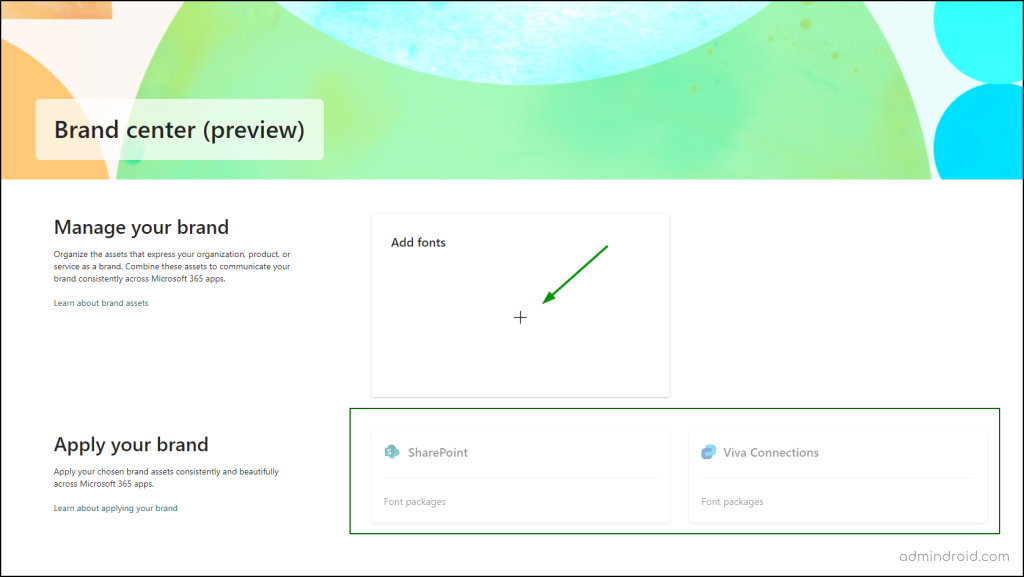
Step 2: Go to Settings, and select Brand center (preview) app. This will take you to the brand center app. Click on Add fonts.
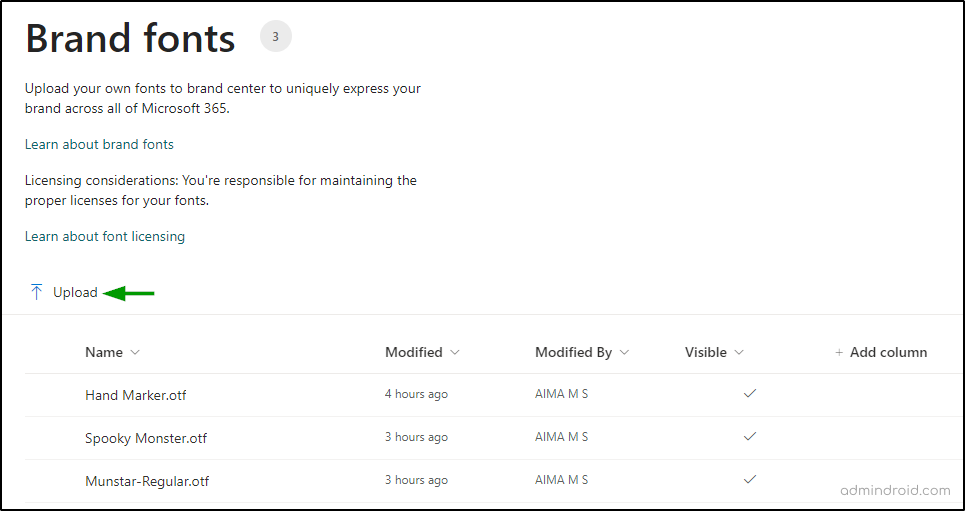
Step 3: Next, you’ll need to upload your custom fonts to the brand center. Simply click on the Upload button and select your desired file. Ensure that you extract the contents of the zip file into one of the supported formats listed below.
- True Type fonts (.ttf)
- Open Type fonts (.otf)
- Web Open Format Font (.woff)
- Web Open Format Font (.woff2)
Step 4: Then, to apply your selected brand assets to SharePoint, click on SharePoint.
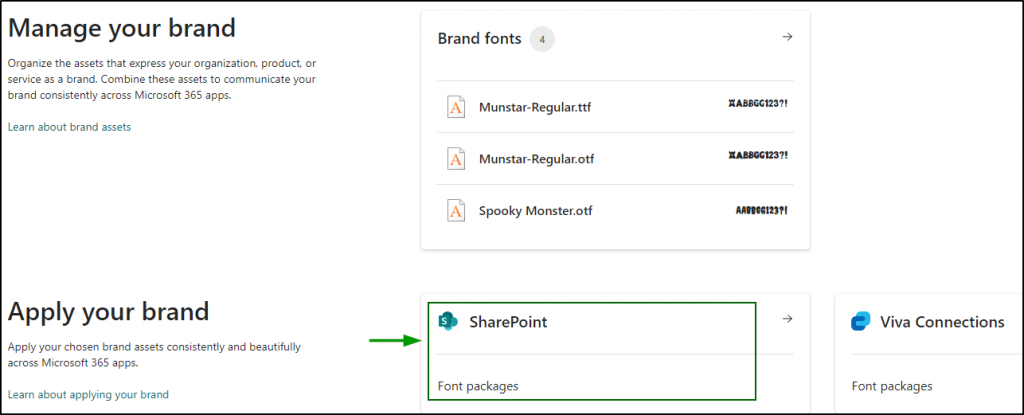
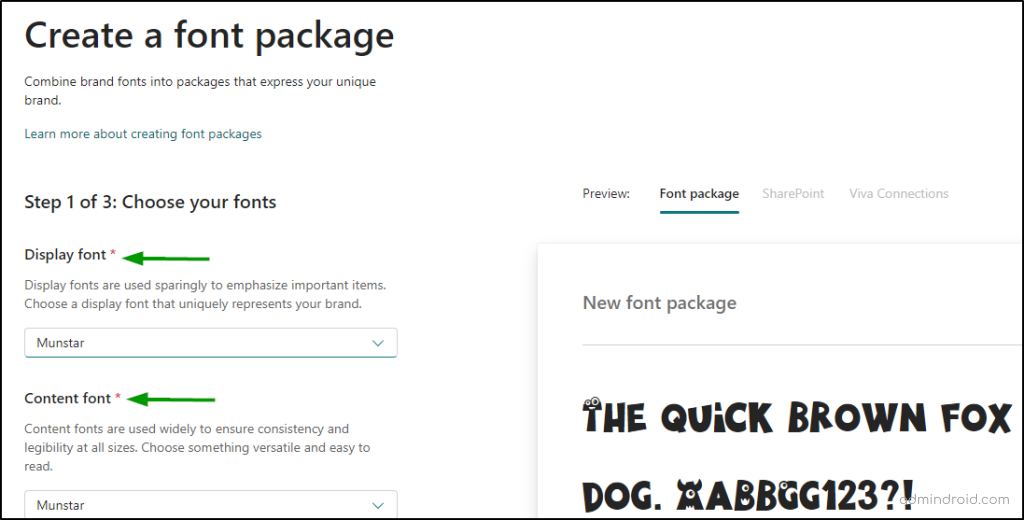
Step 5: Choose your font in the ’Display font’ and ’Content font’ section.
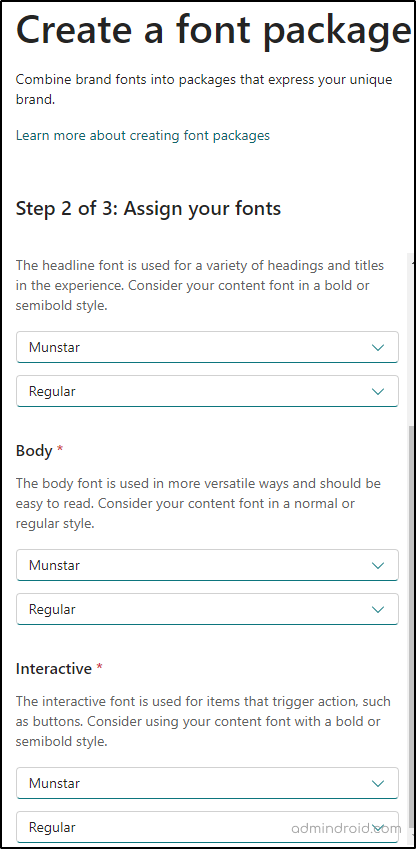
Step 6: Select & assign the fonts required for setting up titles, headlines, body text, and interactive elements like buttons and triggers.
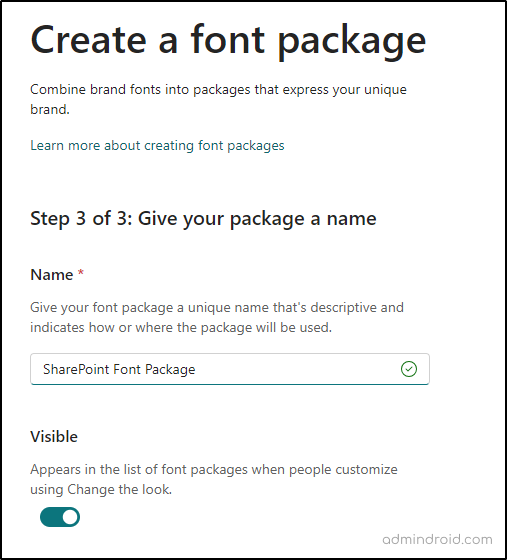
Step 7: The final step is to give your font package a unique name and save the configuration right away. Toggle the Visible button to ‘yes so that the font package gets listed on the ‘Change the look’ page.
User Experience:
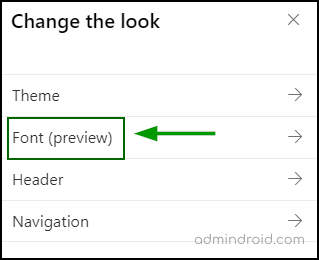
Now that we’ve covered how admins can add new fonts to the brand center app, let’s explore how users can make the most of these new fonts. For that, navigate to a SharePoint site -> gear icon -> Change the look.
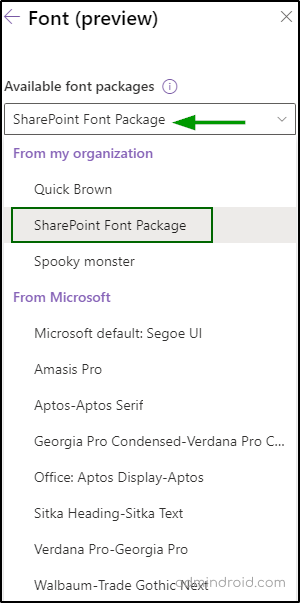
From the list, choose the name of the font package you just uploaded. Then hit ‘Save’.
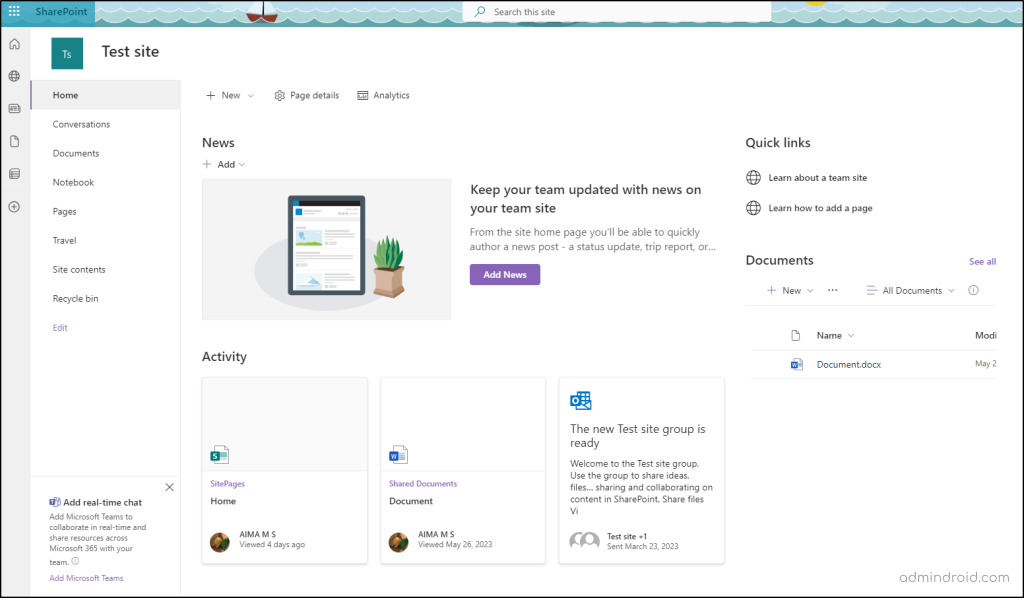
Old Experience:
New Experience:
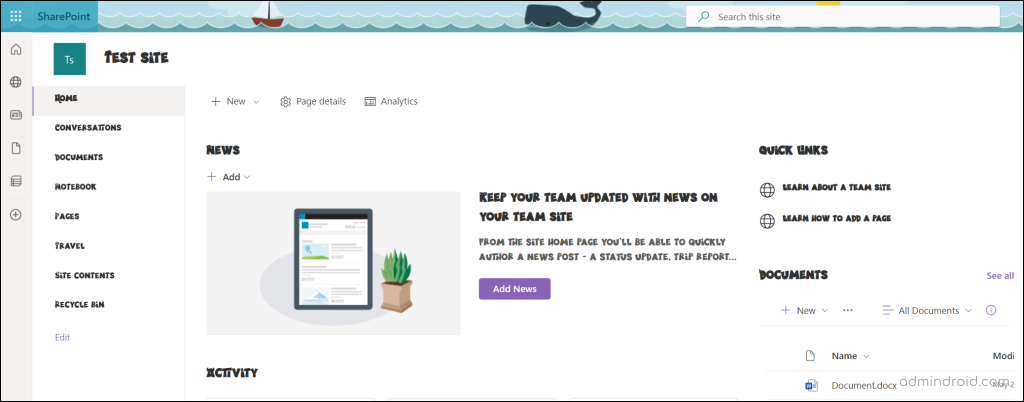
Ta-da! ✨ Fonts are now distributed across the site. In the same way, you can personalize your sites’ appearance by selecting these newly added fonts via brand center.
We hope that this blog provides a comprehensive introduction to using Brand Centre in SharePoint. Thanks for reading. For any questions, please leave a comment below—we’re here to help!
Related Posts:
 Data Access Governance Reports in the SharePoint…
 Unlock SharePoint Usage & Sharing Reports - M365…
 Viva Engage Analytics Reports in Microsoft 365 Admin Center") 6 Insightful (Yammer) Viva Engage Analytics Reports…
6 Insightful (Yammer) Viva Engage Analytics Reports… 15 Must Know Exchange Online Reports in Microsoft…
 Built-in Teams Usage & Activity Reports in Admin Center
 How to Effectively Use Microsoft 365 Admin Center Reports?