
For system administrators, joining a computer to an Active Directory environment is a fundamental and frequently performed administrative task. This process is essential for transitioning a standalone machine into a fully managed asset within the corporate network infrastructure. A successful domain join provides centralized authentication, stronger security, simplified administration, and seamless access to enterprise resources.
This guide covers everything you need to know to add a device to your Active Directory domain, whether it’s for an end user or part of your server infrastructure.
Prerequisites for Joining a Computer to a Domain
Before initiating the domain join, ensure that the following prerequisites are met:
- Ensure the computer is on the same network and can reach a domain controller via LAN or VPN. You can confirm connectivity by pinging a domain controller from the computer that needs to be joined.
1Ping <DomainControllerIP/HostName>
- The user performing the domain join must have local administrator rights on the computer.
- If your domain restricts standard users from joining computers, ensure you have the required permissions.
- Verify that your Windows edition supports domain join. Only Windows 10/11 Pro, Education, Pro for Workstations, and Enterprise editions can join an Active Directory domain. Windows Home editions do not support domain join.
How to Add a Computer to the Domain
To successfully add a computer to an Active Directory domain, follow these steps:
- Prestage a computer account in Active Directory (optional)
- Configure DNS settings on the client machine
- Join the Windows computer to the domain
1. Prestage a Computer Account in Active Directory (Optional)
Prestaging a device in Active Directory means creating its computer account before it joins the domain. This lets you place the computer directly in the correct OU ahead of time, ensuring it receives the appropriate group policies, security settings, and delegated permissions immediately after the domain join.
Prestaging is especially useful in environments where users aren’t allowed to join computers themselves. When you pre-stage a computer account, you can specify which user or group is allowed to complete the domain join for that specific device. This ensures only the specified identity can join the pre-staged computer, without granting them broader rights to join additional machines.
To create a computer object in the Active Directory Users and Computers console, follow the steps:
- Log on to a domain controller and open Server Manager → Tools → Active Directory Users and Computers (ADUC).
- In the left pane, navigate to the OU where the computer account should be created.
- Right-click the OU, select New → Computer.
- Enter the exact computer name the device will use during the domain join.
- In the User or group field, specify the account authorized to join this device. By default, this is Domain Admins.
- Click OK to create the pre-staged computer account.

2. Configure DNS Settings to Join a Computer to a Domain
For a successful domain join, the computer must use the Active Directory DNS server. AD relies heavily on DNS to locate domain controllers, authenticate users, and process the join request. If the DNS settings are incorrect, the domain join will fail.
Follow these steps on the client machine that needs to be joined to the Active Directory domain.
- Open Control Panel → Network and Internet → Network and Sharing Center. You can also open this window by running ‘ncpa.cpl’ from the Run dialog (Win + R).
- Click Change adapter settings.
- Right-click your network adapter and select Properties.
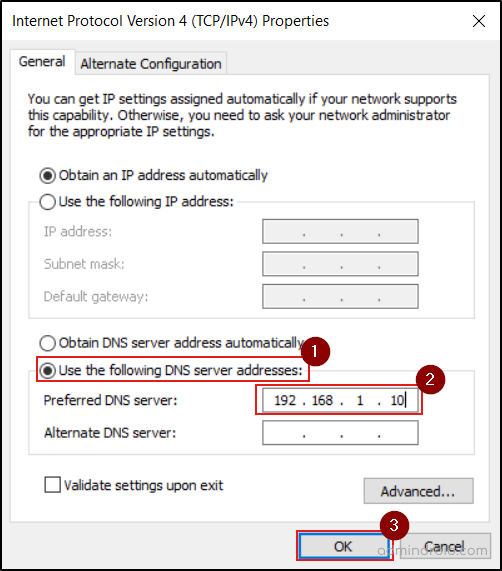
- Select Internet Protocol Version 4 (TCP/IPv4) and click Properties.
- Choose the Use the following DNS server addresses option.
- In the Preferred DNS server field, enter the IP address of your domain controller (e.g., 192.168.1.10). To find the IP address of a domain controller, run ipconfig in the Command Prompt on the DC.
- Remove any external or public DNS servers (such as 8.8.8.8 or 1.1.1.1) to avoid domain resolution issues.
- Click OK to save.
3. Join a Windows Computer to an Active Directory Domain
The domain join procedure is the same for both servers and workstations. The differences come later in permissions and post-join configuration. Using the following methods, you can join a computer to Active Directory. The first two methods allow you to join via the terminal, and the remaining two allow you to join using GUI tools.
- Join a computer to a domain using PowerShell
- Add a computer to a domain using the command line
- Connect a computer to a domain using System Properties
- Add a workstation to active directory via Settings app
a. Add a Computer to a Domain Using PowerShell
You can join a computer to a domain using the Add-Computer cmdlet. This cmdlet also allows you to rename the device and place the machine account into a specific OU.
Basic Domain Join
This method joins a computer to the domain and places it in the default Computers container. Run the cmdlet below, replacing <DomainName> with your domain name.
|
1 |
Add-Computer -DomainName "<DomainName>" -Credential (Get-Credential) -Restart |
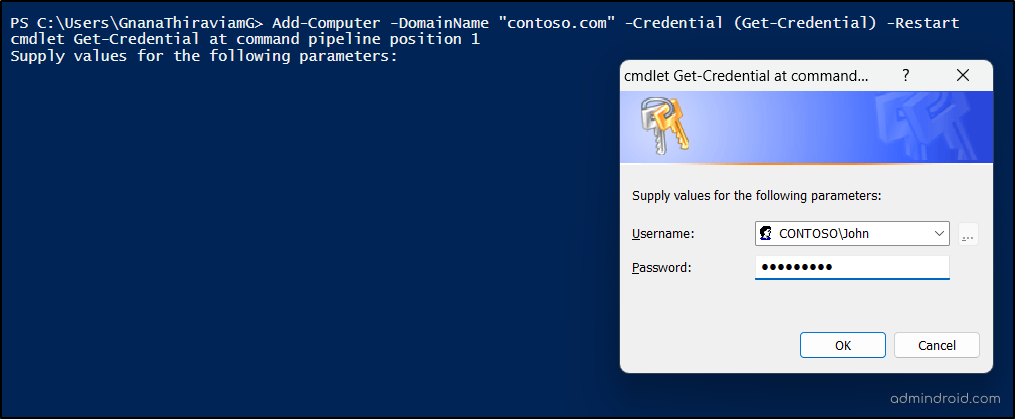
You will be prompted to enter valid domain user credentials for an account that is allowed to join devices in AD. After successful authentication, the device will restart automatically to complete the domain join.
Join a Domain and Move the Computer to a Specific OU
If you want the computer account to reside in a specific OU immediately after the domain join, use the -OUPath parameter.
|
1 |
Add-Computer -DomainName "<DomainName>" -OUPath "<OUDistinguishedName>" |
This command places the computer account directly in the specified OU instead of the default Computers container.
Rename the Computer and Join a Domain
If you want to rename the computer and join it to the domain in a single step, use the following cmdlet.
|
1 |
Add-Computer -DomainName "<DomainName>" -NewName "<ComputerName>" |
This command renames the computer, and the machine account will be created in the default Computers container. If a matching pre-staged computer account already exists, the device will be associated with that object and placed in OU where the pre-staged device resides.
b. Add a Computer to a Domain Using Command Prompt
You can also add a Windows computer to a domain via Command Prompt using netdom.exe. However, unlike PowerShell, the netdom command does not support renaming the device or placing it into a specific OU in the same execution. Those actions must be done separately.
- Open an elevated Command Prompt.
- Run the following command, replacing <DomainName> and <DomainUserName> with your values.
1netdom join %COMPUTERNAME% /domain:<DomainName> /userd:<DomainUserName> /passwordd:*

- The system prompts you for the password of the specified domain user.
- After authentication, restart the device. Once it reboots, the computer will be joined to the domain.
c. Join a Computer to a Domain Using the System Properties Window
This method is available on all Windows editions—client and server. To add a computer to an Active Directory domain via the System Properties Window, follow the steps in the computer that need to be joined.
- Open the Run dialog (Win + R), type sysdm.cpl, and press Enter to open System Properties.
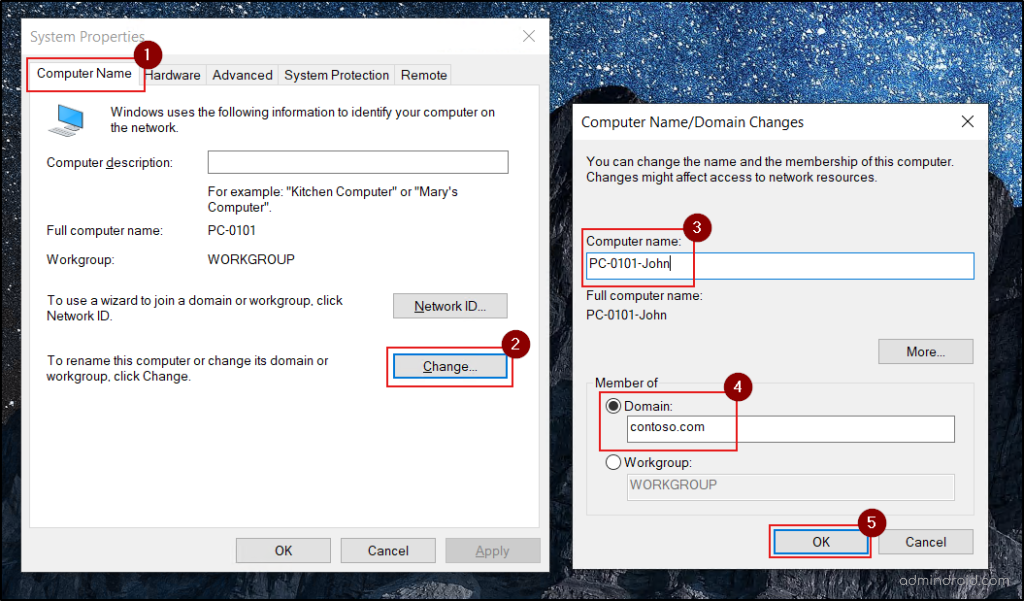
- Go to the Computer Name tab and click Change.
- If needed, rename the computer by entering a new value in the Computer name field. If the computer account is already pre-created in Active Directory, ensure the name matches the pre-staged object.
Note: Since renaming a computer after it joins the domain requires a reboot and re-establishes the trust relationship, it’s recommended to rename it beforehand. - In the Member of section, select the Domain radio button and enter your domain name (e.g., contoso.com). Click OK.
- Enter the credentials of a user who is authorized to join machines to the domain.
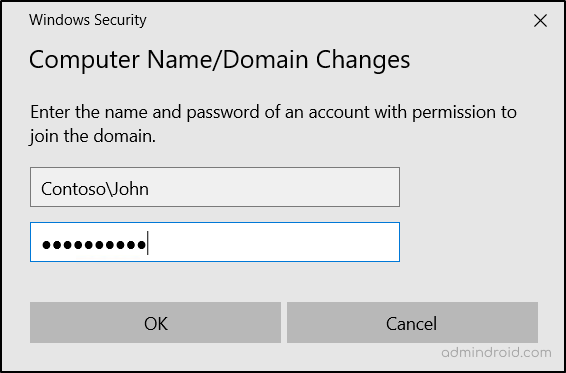
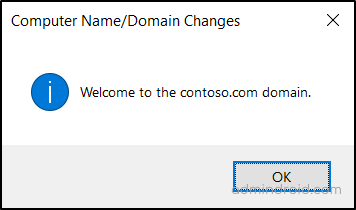
- After successful authentication, you will see: “Welcome to the <domain-name> domain.”
- Restart the device.
- On the login screen, select Other user and log in with a domain account.
d. Add a Windows PC to an AD Domain Using the Settings App
The later versions of Windows 10 and Windows 11 allow Active Directory users to join the computer to the domain directly from the Settings application. To do so, follow the steps below.
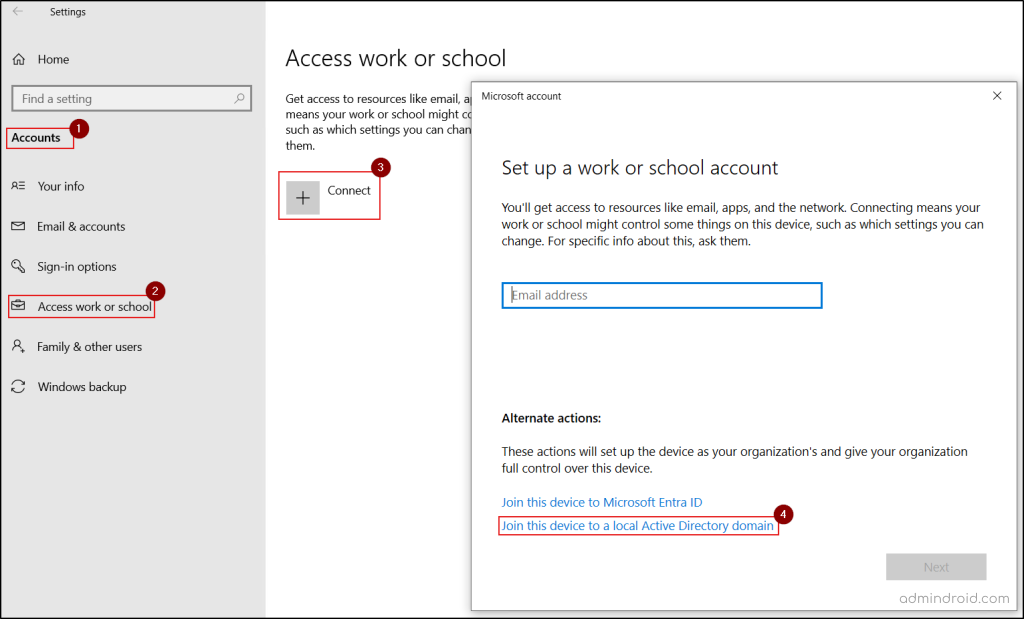
- Open Settings (Win + I) and navigate to Accounts → Access work or school → Connect.
- Under Alternate actions, select Join this device to a local Active Directory domain.
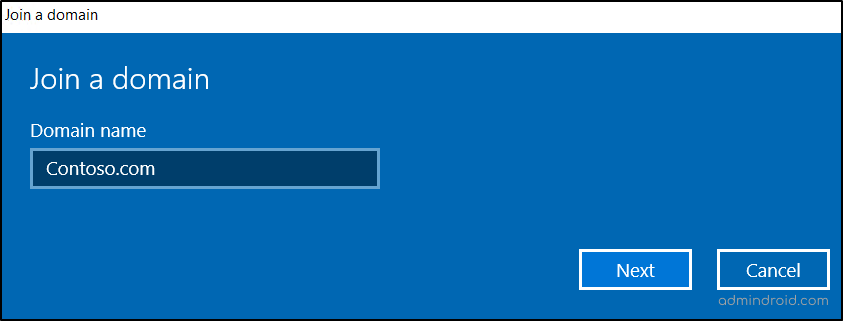
- Enter the domain name (e.g., contoso.com) and click Next.
- Provide the domain user credentials when prompted and click OK.

- Click Next. Then, hit Restart Now the computer to finish completing the domain join process.
Common Domain Join Errors and How to Fix Them
1. Error: An Active Directory Domain Controller (AD DC) for the domain “<DomainName> ” could not be contacted. Ensure that the domain name is typed correctly. If the name is correct, click Details for troubleshooting information.
Cause: The error occurs when the computer cannot locate or communicate with a Domain Controller (DC) for the specified domain.
Fix: Check the domain name, verify the preferred DNS entry, and ensure the domain controller is online.
2. Error: An account with the same name exists in Active Directory. Re-using the account was blocked by security policy.
Cause: This happens when an account with the same name already exists in AD, or the current user is not allowed to join that pre-staged object.
Fix: Join the device using the same user account that was assigned during pre-staging. If an existing computer account with the same name is no longer needed, delete the object in the AD and then join the new device. If the existing account must be kept, use a different name for the new computer.
Alternatively, if a trusted security principal owns the existing computer account and you want to reuse it, set the Group Policy (GPO) setting ‘Domain controller: Allow computer account re-use during domain join’ .
3. Error: The security database on the server does not have a computer account for this workstation trust relationship.
Cause: This error occurs when the workstation’s machine account password becomes out of sync with the domain controller. It can also occur if the computer account in Active Directory was deleted, disabled, or became corrupted.
Fix: Reset the computer account in Active Directory and rejoin the workstation to the domain.
4. Error: Your computer could not be joined to the domain. You have exceeded the maximum number of computer accounts you are allowed to create in this domain. Contact your system administrator to have this limit reset or increased.
Cause: By default, standard users can join up to 10 computers to a domain. Once this limit is reached, any new domain join attempts fail.
Fix: Ask an administrator to increase the “ms-DS-MachineAccountQuota” value or to pre-create the computer account in Active Directory for you.
|
1 2 |
#To define how many computers a user can join to your domain Set-ADDomain -Identity "<DomainName>" -Replace @{"ms-ds-MachineAccountQuota" = "<CountInFigures>"} |
⚠️ Note: This is an organization-wide setting, so change it with caution.
Conclusion
Joining a device to a domain is a foundational step in creating a secure, centrally managed enterprise environment. With the methods covered in this guide, you can confidently onboard both workstations and servers while maintaining control. To further strengthen your domain-joined environment, be sure to follow Active Directory best practices, including a well-designed OU structure, proper delegation, and consistent GPO management.
Stay tuned for more insights on Active Directory management!


