SharePoint Online is the backbone of document management in many organizations, enabling teams and groups to create, share, and edit files effortlessly. But as time goes on, the volume of data keeps growing—it never shrinks, which makes the management of those files necessary. Even though there are many ways to organize documents in SharePoint Online document library, a structured approach is essential. Without it, even a well-managed SPO document library can quickly turn into a chaotic mess of misplaced files, making it difficult to find what you need.
If your SharePoint environment feels like a digital junk drawer, you’re not alone! In this blog, we’ll explore the best ways to organize SharePoint Online documents, helping you bring order to the clutter and boost productivity. Let’s get started!
Best Practices for Organizing SharePoint Online Documents
We all know there are folders, libraries, and more to store and organize data in SharePoint Online. But if we ask ourselves—are we using them the right way? The truth is, most of us don’t. Over time, finding what you need feels like searching for a needle in a haystack.
That’s why following best practices for SharePoint Online document management is essential. Find the best ways to organize documents in SharePoint Online below to ensure they remain structured, searchable, and easy to manage.
- Create SPO sites for document management
- Organize documents through folders in SPO
- Leverage metadata for easy identification
- Create custom views for quick retrieval
- Implement content types for consistency
- Use document sets to group related files
1) Create Sites for Better SharePoint Online Document Management
Irrespective of an organization’s size, every company has multiple departments—some with just a few, others with over 50 and more. Each department manages files that should be accessed only by its team members. Storing all department files in a single location leads to clutter, security risks, storage issues, and inefficiencies.
Imagine employees from every department searching through a shared repository to find their documents. This chaotic approach slows productivity and makes file management a challenge. By creating a SharePoint Online site for each department, documents remain organized, secure, and easy to manage. This structured site setup ensures better access control, improves collaboration, and streamlines document retrieval.
2) Organize Documents in SharePoint Online Using Folders
Folders are a familiar and effective way to group similar files. When files are scattered, the first instinct is to sort them into folders based on common attributes to locate files easily. This same approach applies in SharePoint Online, where organizing files into structured folders improves navigation and ensures quick access to relevant documents.
A well-planned SharePoint folder structure, such as organizing by project, team, or document type, helps streamline retrieval and keeps the workspace clutter-free. With the SharePoint folder structure best practices, users can locate files efficiently without wasting time searching through disorganized content.
You can also use the color code feature to differentiate each folder, making it easier to identify and organize documents in SharePoint Online efficiently.
How to Create a Folder in the SPO Document Library?
- Login to the SharePoint Online site where you wish to create folders.
- Navigate to Documents and click the respective library.
- Select +New and choose Folder.

Tip: You can track the SharePoint folder activity log to prevent unauthorized actions and ensure proper access control for folders in document libraries.
3) Use SharePoint Metadata to Organize Documents
Imagine a SharePoint Online document library used for report collection in a reporting site. Typically, you might create folders for each report type like Sales, Finance, Marketing, and within each folder, have subfolders for countries like India, Australia, etc. Each of these could have deeper layers for states, cities, and offices, leading to complex nesting that makes navigation tedious.
In this structure, finding the documents you need becomes very complex and time-consuming, as you may have to go through numerous folders just to find a single document. To avoid deep folder nesting, we can use SharePoint Online metadata.
Metadata is something we use daily without realizing it. For example, when searching for a song in a music app, we filter by artist, album, or genre—all of which are metadata. In SharePoint Online, metadata acts as a column that defines and categorizes data which makes document retrieval more efficient.
By using SharePoint managed metadata, you can tag documents with key attributes like report type, country, and period instead of burying them in folders. With this approach, rather than searching through multiple layers, you can keep all related documents in a folder and apply filters on the SharePoint metadata tags to quickly locate specific files.
How to Create Metadata in a SharePoint Document Library?
Follow the steps below to create a Managed Metadata column in SharePoint Online for a library and map that to a new term set (values).
- Open the SharePoint site where you want to create the Managed Metadata column.
- Navigate to the SPO document library → Settings → Library settings → More library settings.
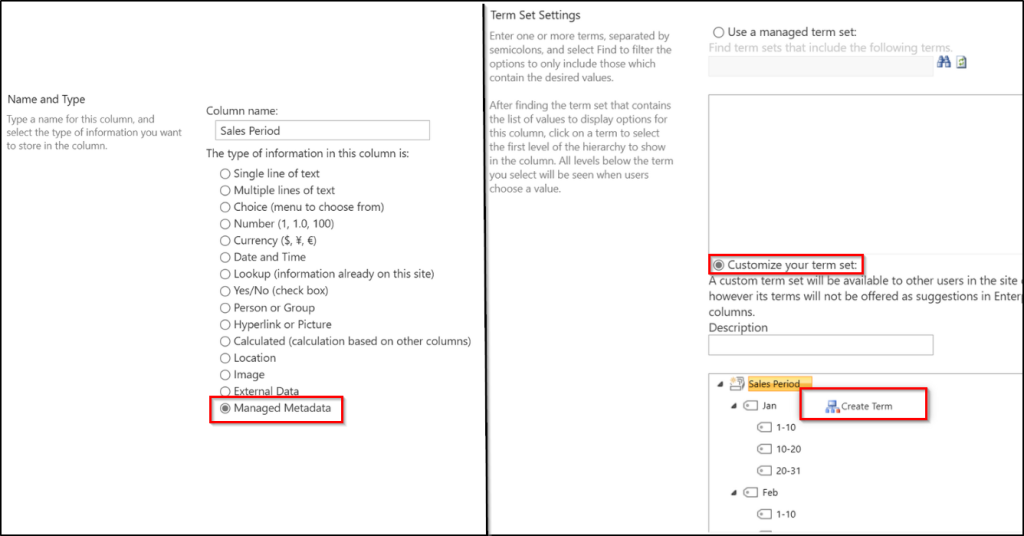
- In the Columns section, click Create column, then enter a name for the column in the Name and Type section.
- Select Managed Metadata under The type of information in this column section.
- In Additional Column Settings, enter a description and choose whether the column is required or should have unique values.
- Check Allow multiple values if users can enter multiple values; otherwise, leave it unchecked. If you allow multiple values, users will not be able to sort on this column in list views.
- To map the Managed Metadata column to a new term set, go to Term Set Settings, choose Customize your term set, and enter a description.
- Click the term set (column name) under the Description section and select Create Term.
- Enter the term name (value) for the column. Repeat this process to add all required terms.
- To add a sub-term, click on the created term, select Create Term, and enter the name for the sub-term. Repeat this step to add all required sub-terms.
- Click OK to save the changes.
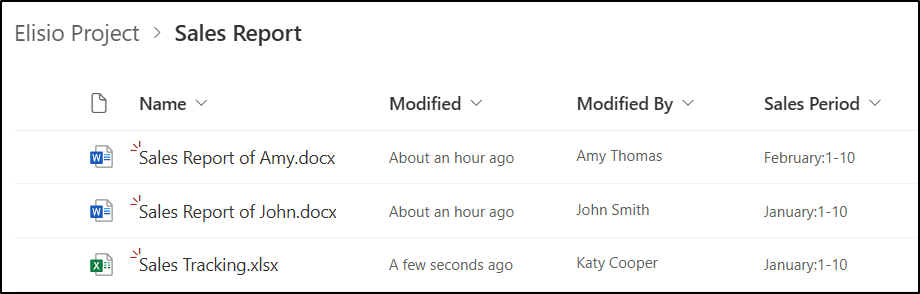
After creating the Managed Metadata column in the SharePoint library, you will see the column added to the library. This metadata column helps in organizing and categorizing documents efficiently, making it easier to filter and search for files without relying on deep folder structures.
If you want to add the same column to another library within the site, you don’t have to start from scratch, as it is available to all libraries in the respective site.
Follow the steps below to map a Managed Metadata column to an existing term set.
- Click the + Add column in any library within the site and choose Managed Metadata, then click Next.
- Enter all the required details and click Select under Term set or term to browse the available term sets.
- Choose the appropriate term set from the list and click Save.
Now, the Managed Metadata column is mapped to the existing term set and ready for use in the selected library.
4) Create Custom Views of Document Libraries in SharePoint Online
Views in SharePoint Online help streamline document management by filtering and sorting files based on specific criteria. By utilizing metadata, you can create dynamic views that display only the most relevant documents. For instance, filter invoices by payment status, group reports by quarter, or display contracts expiring within 30 days—all without manually searching each time.
Once created, SharePoint document library views remain accessible, ensuring quick retrieval of critical files with just a click. There’s no need to sort and filter every time you load a library. Simply change the default view, and everything you need appears instantly.
How to Create a View for a SharePoint Document Library?
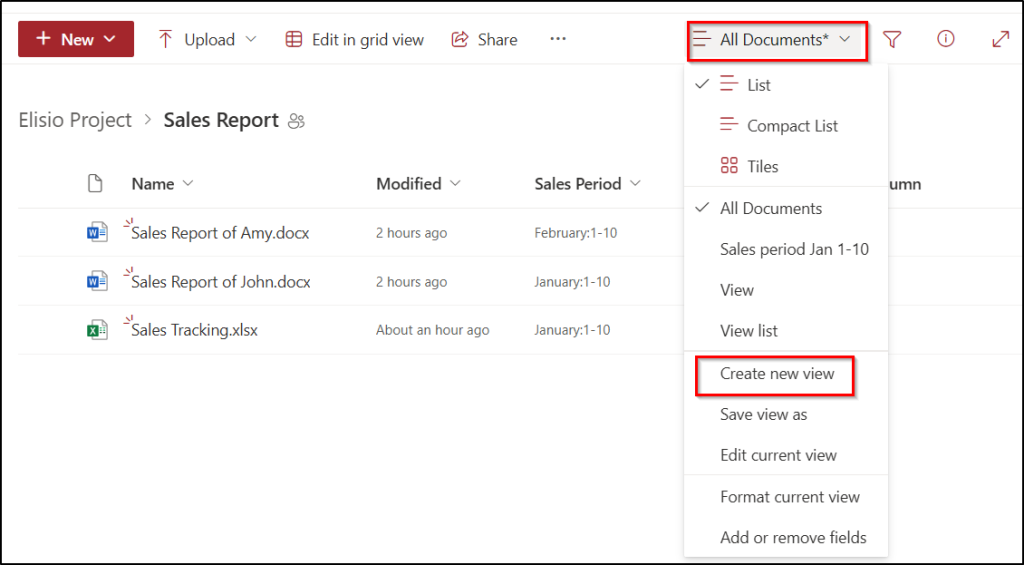
- Navigate to the respective document library in your SharePoint Online site.
- Click All Documents in the toolbar and select Create new view.
- Enter a name for the view and choose the preferred view type under Show as.
- Set the visibility options for the view and click Create.
- Click the newly created view name in the toolbar to access it.
Once a view is created, it initially displays all data. To edit a custom view in SharePoint Online, click the newly created view name at the toolbar and select ‘Edit current view’.
5) Implement SharePoint Online Content Types to Manage Documents
Content types in SharePoint Online act as a reusable template that defines a document’s structure, metadata, and so on. Each content type has a unique collection of metadata columns. It helps standardize documents by assigning specific fields, workflows, and templates based on the document type.
Imagine you have a document library in SharePoint Online that stores two types of reports: Sales Reports and Purchase Reports. If you add metadata to the library, it applies to all documents, meaning both Sales and Purchase Reports will have the same fields. But what if Sales Reports need a “Sales By” field while Purchase Reports need a “Purchased By” field? If you try to add both fields to the document library, every file will have unnecessary columns, making data management messy.
With SharePoint Online content types, you can create separate templates—one for Sales Reports with a “Sales By” field and another for Purchase Reports with a “Purchased By” field. This ensures that each report type has only the relevant metadata, improving organization, searchability, and consistency across your SharePoint environment. When a user chooses this template from the New Item menu in the document library, you can ensure that customized content is used.
Let’s explore how to create a content type in SharePoint Online for Sales reports.
How to Create a Content Type in the SharePoint Admin Center?
To add a custom content type to a SharePoint document library, first create the required content type in the SharePoint Content Type Gallery using the steps below.
- Navigate to the Content type gallery in the SharePoint admin center.
- Click + Create content type and enter the name and description for the new content type.
- In the Category section, select Create a new category and provide a name (e.g., Custom Content Types).
- Under the Parent category dropdown, select Document Content Types, and under Content type, choose Document.
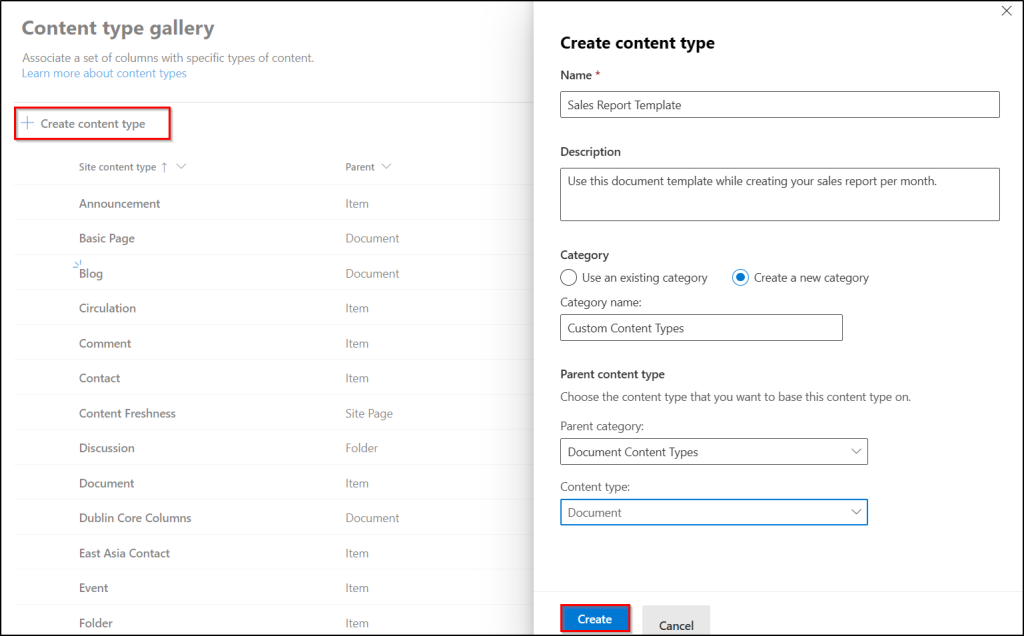
- Click Create. On the next page, select + Add site column, then choose Create new site column to add new metadata for this document template.
- To keep document content consistent across a site, you can link a Word, Excel, or PowerPoint template to a site content type. To set up a standard document structure, go to Settings > Advanced settings > Document template, upload your template, and click Save.
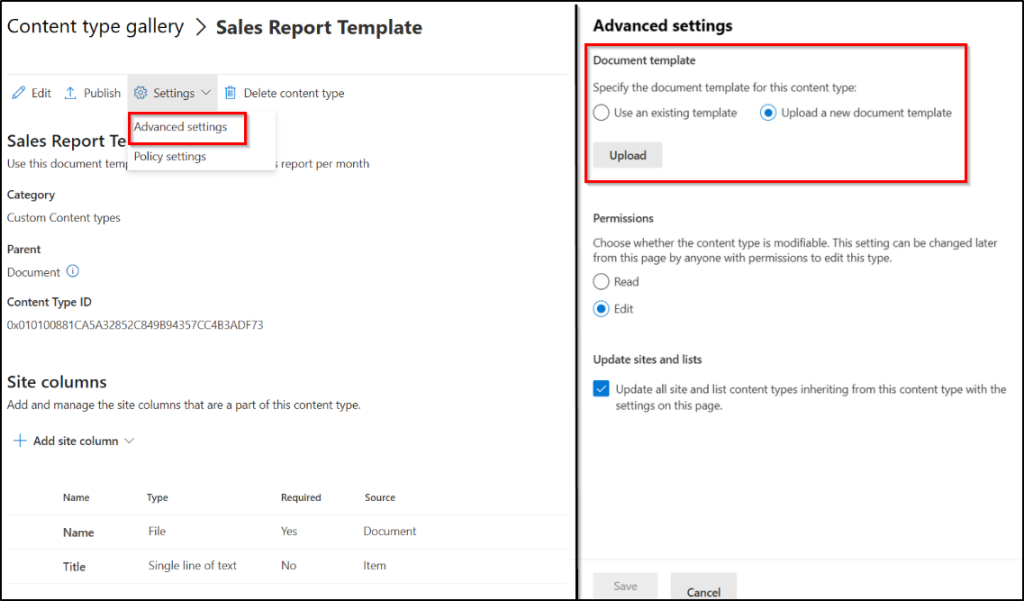
- Click Publish to save the content type in SharePoint Online.
After creating a tenant-level site content type, you can add the SharePoint content type to a document library to standardize metadata and improve document management.
Once the content type is added to the document library, go to the library and click + New to view the predefined document template. When you create a document using this template, the columns assigned to the content type will automatically appear. This content type can be used across all sites within your SharePoint tenant.
To easily find documents created using a specific content type, you can set a filter where the Content Type is equal to in a custom view’s settings.
6) Use Document Sets in SharePoint Online to Group Related Files
A Document Set is a powerful feature in SharePoint that allows you to manage a group of related documents as a single entity. Unlike regular folders, Document Sets support metadata tags, enabling better organization and searchability.
One of the key advantages of using SharePoint Document Sets is metadata inheritance. This eliminates the need to configure metadata for each file individually. Using this, you can assign metadata and permissions at the set level, ensuring consistency across all included documents. Additionally, metadata-driven views and filters make it easier to retrieve relevant files, streamlining document management in SharePoint.
Thus, enable Document Sets for a site collection and create a new Document Set in SharePoint Online to organize and manage documents efficiently.
By leveraging these features, you can significantly improve document organization in SharePoint Online. Hope this blog has helped you gain a better understanding of these best practices for managing documents in SharePoint Online. Let us know in the comment section if you have any questions!


