Imagine you are five minutes into a client demo. You switch slides, start talking, and the chat fills with, “We can’t hear you.” That awkward moment is exactly what the mic volume indicator was built to avoid. It gives instant visual feedback, so you know your mic is picking up sound or not while you’re speaking.
Why the Mic Volume Indicator in Teams is Useful
Checking your mic status before speaking reduces interruptions, avoids low volume issues, and gives you more confidence when presenting. After all, good audio is the foundation of smooth communication in any Teams meeting.
How to View the Mic Volume Indicator in Microsoft Teams
This feature quietly rolled out in June 2025, so there’s a good chance you may not have noticed it yet. If you haven’t tried it before, here’s how you can find it in your Teams meetings.
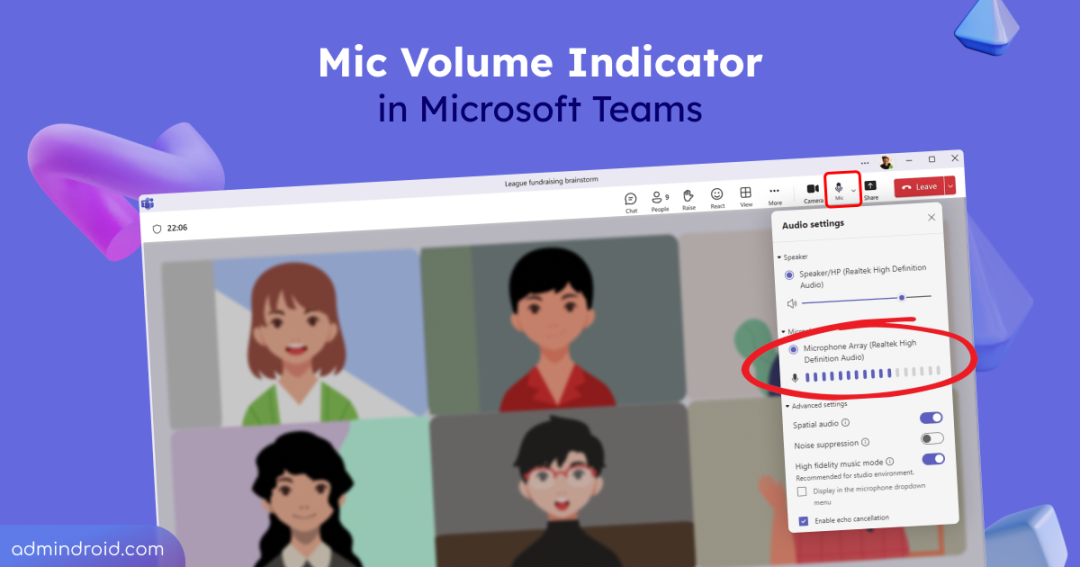
- During a meeting, look for the microphone icon on the user bar. This now displays a live volume indicator showing your real-time audio levels.
- For detailed volume levels, open the microphone drop-down and view the segmented input bar under the Microphone section.

Quick Tip for Better Audio in Teams Meetings
Next time you join a Teams call, glance at the mic icon on your user bar. If needed, click it to review your microphone settings and adjust before speaking.
This simple update is already here, making your Teams meetings smoother and more professional.
Key Insights About the Teams Mic Volume Feature
- Available on Teams for Windows and Mac desktop apps.
- Active for all users by default.
- No admin action is required.
Clear audio sets the tone for any successful meeting. With the Teams mic volume indicator, you can present without worry or awkward interruptions. Make it a habit to check your levels, it’s a simple step that gives you a professional edge.


