
Managing content in SharePoint Online often involves approvals to ensure that documents or list items meet your organization’s standards before publishing. But relying solely on built-in content approvals in SharePoint Online often means waiting for responses and manually sending reminders. What if you could speed things up by automating the approval process instead? 🤔 That would improve efficiency, eliminate the need for manual follow-ups, and reduce the risk of delays from missed approvals.
This blog will guide you through automating content approval in SharePoint Online using Power Automate, Microsoft’s workflow automation tool. 🚀 With this, you can streamline approvals, minimize delays, and keep your SharePoint environment organized and compliant.
Why Automate Content Approval in SharePoint Online with Power Automate?
Manual content approval may work for small teams, but as content volume grows, it becomes time-consuming and prone to errors. One must always visit the document library to approve and reject documents, but this can be tedious.
What if you could receive notifications about pending documents, approve items, and input commands to approve or reject, all in one place? That would be a game-changer, right? ⚡That’s where Power Automate comes in!
While the modern approval functionality for SharePoint Online offer an experience with Teams integration, you might wonder—why use Power Automate instead? 🤨
The answer: Power Automate is ideal for more complex scenarios and plays a key role in automating admin tasks. It supports custom notifications, multi-stage approvals, logic-based conditions, and more, going beyond the built-in SharePoint content approval functionality. Approvers can complete their tasks directly from their inboxes, making the process faster and more efficient. 🎯
👉Here’s why automation of SharePoint Online content approvals with Power Automate is worth it:
- Better tracking: Full visibility into who approved or rejected content and when the action occurred.
- Reduced human effort: Ensures approval policies are consistently followed without more human effort.
- Standardization: Enforces a uniform approval process across different document libraries or lists.
- Flexibility: Allows you to customize approval workflows to align with business rules, including multi-level approvals.
In short, automating content approval in SharePoint Online helps maintain governance that’s efficient, scalable, and reliable as your organization grows.
Pre-requisites to Automate SharePoint Online Approval Workflow Using Power Automate
Before you begin creating an automated content approval workflow in Power Automate, ensure the following requirements are met:
- Set up a SharePoint Online site with a document library or list where content approval is required.
- Make sure you have a Microsoft 365 account with a Power Automate license that allows you to create and run workflows.
- Enable content approval in SharePoint library or list via the Versioning settings.
- For lists:
Settings » List settings » Versioning settings » Content Approval » Require content approval for submitted items » Yes. - For document libraries: Settings » Library settings » More library settings » Versioning settings » Content Approval » Require content approval for submitted items » Yes.
- For lists:
Ready to supercharge your SharePoint Online governance? Start automating your content approvals with Power Automate today and streamline your content management like never before!
Create Content Approval Workflow in SharePoint Online Using Power Automate
Now, let’s walk through the steps to require approval of documents in SharePoint Online using Power Automate for a faster and more reliable process.
- Create an automated cloud flow
- Configure flow trigger
- Add approval status condition
- Notify content approvers
- Store approval details in HTML table
- Check approval outcome
- Update SharePoint item
- Notify users via email
- Save and test the flow
📌Keep in mind: This flow triggers for both newly created SharePoint items and when existing items are edited. This allows users to request re-approval for previously rejected items after making necessary updates.
1. Create an Automated Cloud Flow for Content Approval
- Sign-in to Power Automate with your Microsoft 365 credentials and navigate to Create » Automated cloud flow.
- Enter a Flow name (e.g., “SharePoint Content Approval Automation”).
- Choose the trigger When an item is created or modified under SharePoint and click Create.
📝Note: This trigger works only for lists. To work with a document library, use the trigger When a file is created or modified (properties only) under SharePoint.
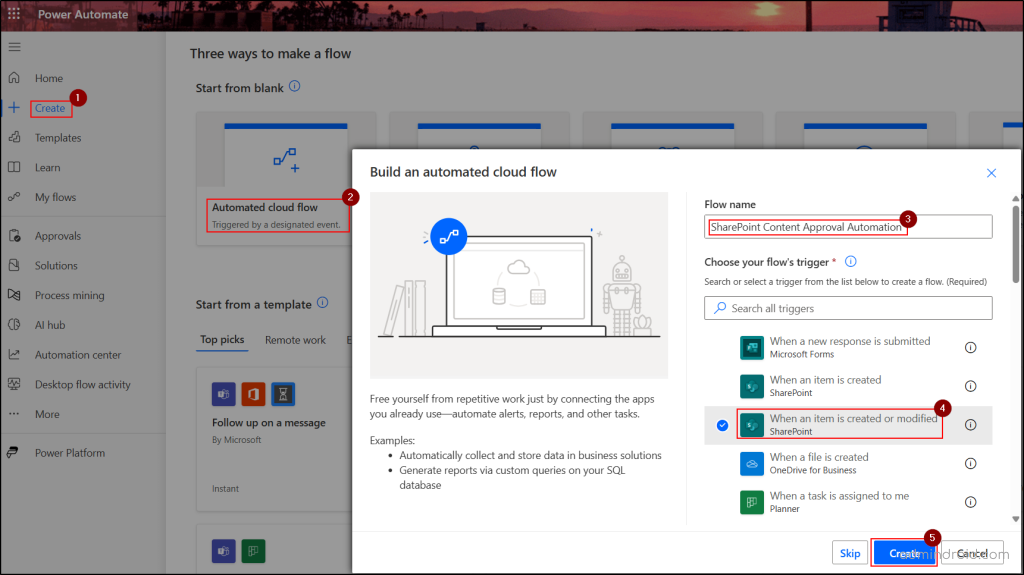
This step creates an automated cloud flow in Power Automate for content approval. It sets up the flow to trigger whenever the respective SharePoint item or file is created or modified.
2. Configure the Trigger to Start the Flow Whenever a New Item Is Added
Click on the When an item is created or modified card and set up the trigger with the following parameters:
- Site Address: Choose the site address in which the list or library item’s approval must be automated.
- List Name: Choose the list where content approval is required. In case of a document library, select the library from the Library Name option.
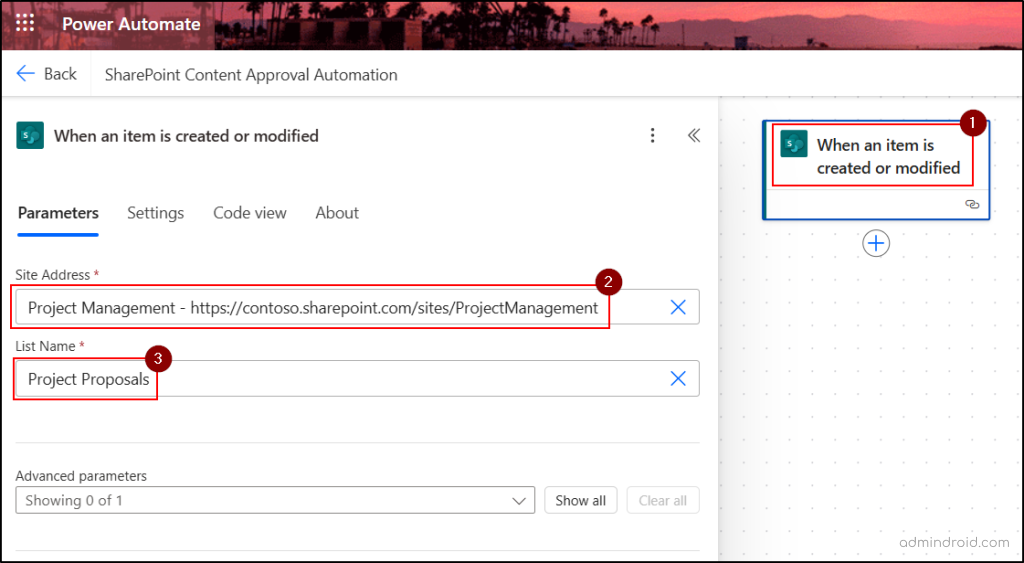
The above trigger will start the flow whenever an item in a list or document library is added or updated.
3. Add a Condition to Check the Approval Status of a New Item
- To add the next action for your flow, click the + button below the trigger action (When an item is created or modified).
- Then, search for and select the Condition action under Control.
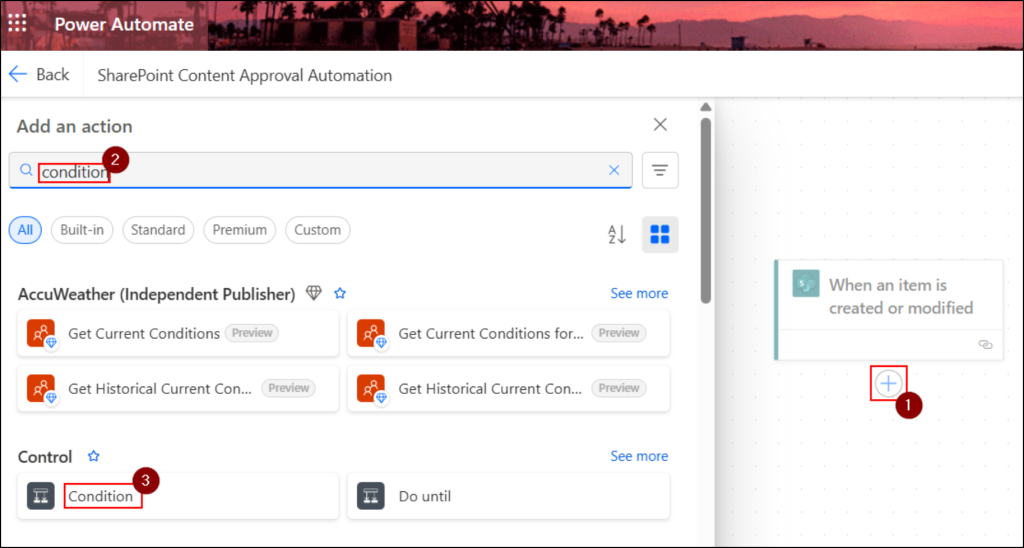
- In the Choose a value field, use the dynamic content option (⚡) to search for Content approval status and select it.
- Set the condition to ‘is equal to’ and type ‘Pending’ in the last field.
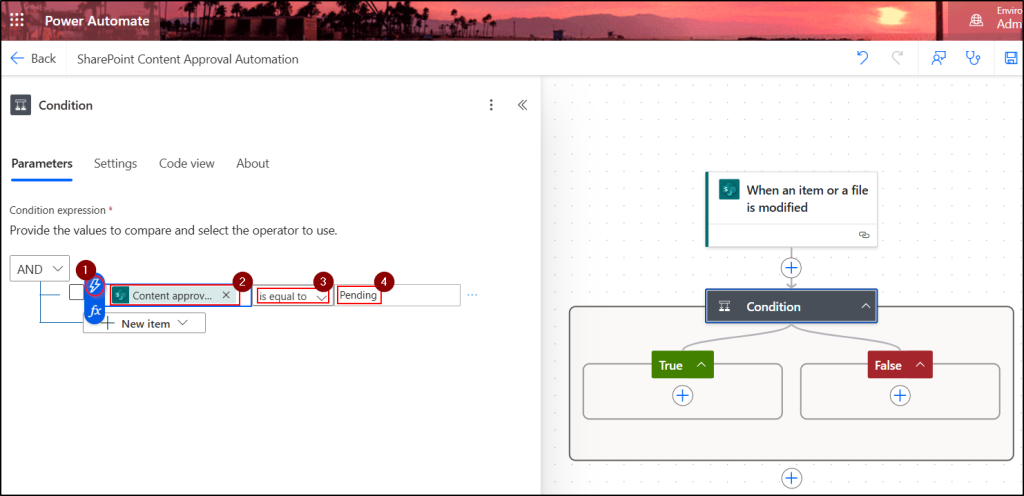
This ensures the flow starts the approval process only when a list or document library item is in Pending status.
4. Start Content Approval Process for the List or Document Item
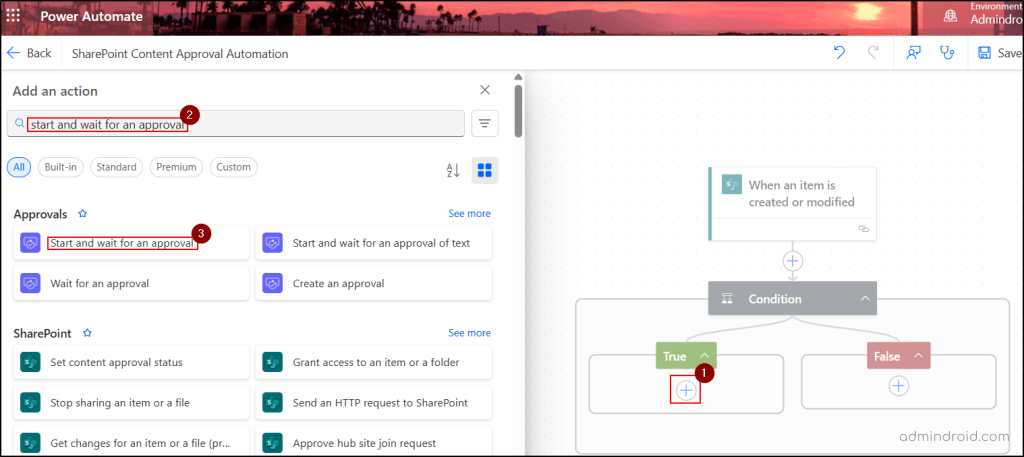
- Inside the True branch under the condition that checks the approval status of an item, click the + button.
- Search for and choose the option Start and wait for an approval.
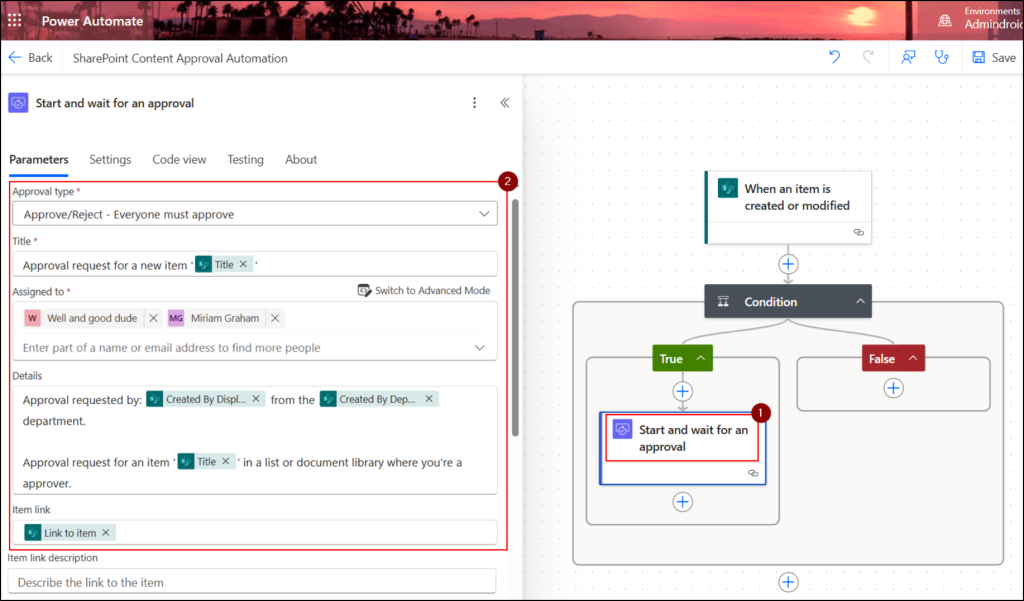
- Then, click Create new under Create connection and choose the Approval type:
- Select ‘Approve/Reject – First to respond’ if you want the approval process to finish after the first response (either Approve or Reject).
- Select ‘Approve/Reject – Everyone must approve’ if you want a SharePoint document approval workflow with multiple approvers. A single rejection will end the process with the status “Rejected.”
- In the Title field, input the subject for the mail content by combining text and dynamic content based on your need, as shown below.
- Include all approvers’ emails (UPNs) in the Assigned to field to send approval requests to all relevant approvers.
- In the Details field, enter the body content of the email, combining text and dynamic expressions.
- Using the dynamic expression, include the Link to item in the Item link field.
The above process will request SharePoint Online document approval through Microsoft Outlook with the respective approvers.
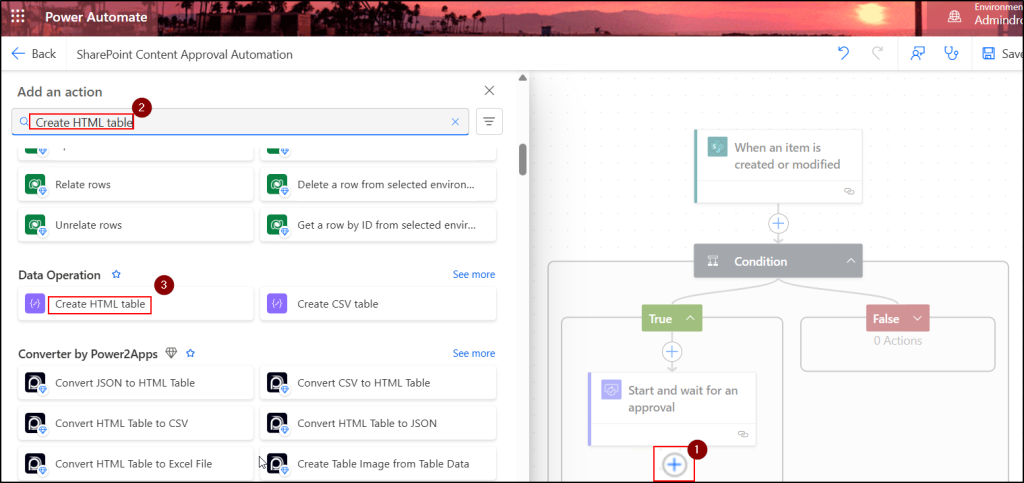
5. Store the Content Approval Details as an HTML Table
- Click the + button after the approval action and select the Create HTML table action under Data Operation.
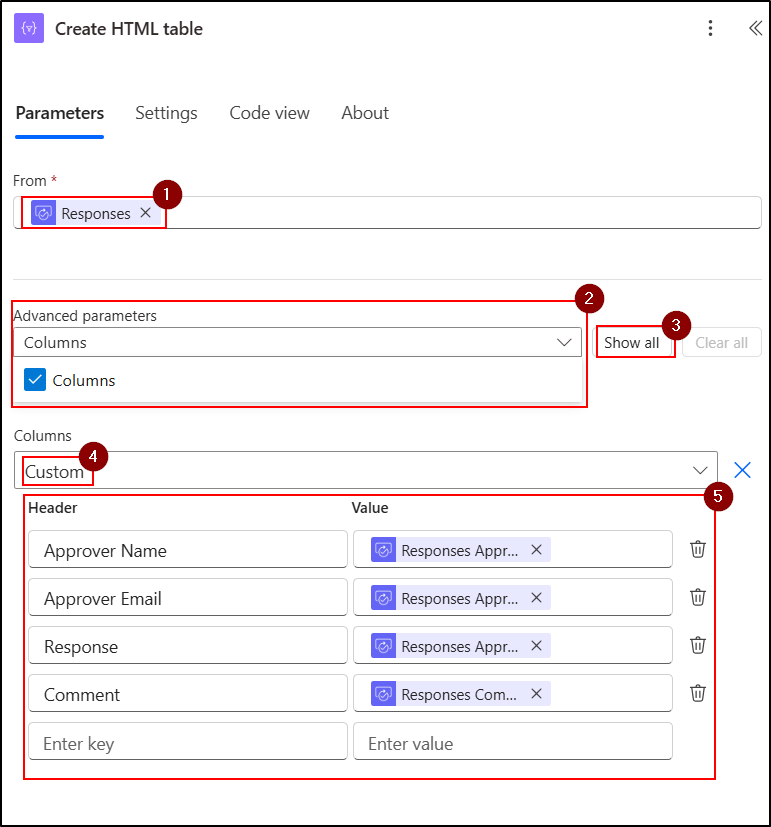
- In the From field, choose Responses as the value using the dynamic content button (⚡).
- In the Advanced options section, select Columns and choose Show all.
- In the Columns drop-down, select Custom and apply the following dynamic values for the appropriate headers.
- Approver Name –Responses Approver name
- Approver Email – Responses Approver email
- Response – Responses Approver response
- Comment – Responses Comments
You might wonder why we need to store this as HTML. The simple answer is that displaying the approval info in the email works for one approver, but can get messy with multiple approvers. Therefore, storing the data in a table makes it clear and organized.
6. Check SharePoint Online Item’s Approval Outcome
- Still within the True branch (following the HTML table), add another Condition action to check the outcome of the approval, and configure it as follows:
- In the Choose a value field, use the dynamic content option to search for Outcome and select it.
- Set the condition to ‘does not contain’ and type Reject in the last field.

This checks whether the SharePoint Online item’s approval outcome is not rejected, allowing the flow to proceed based on the approval status.
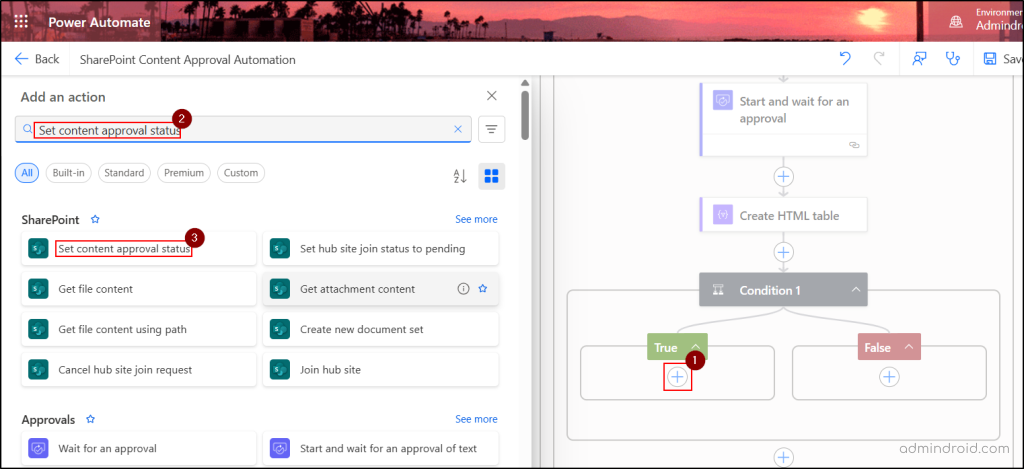
7. Update the SharePoint Item Based on Approval Outcome
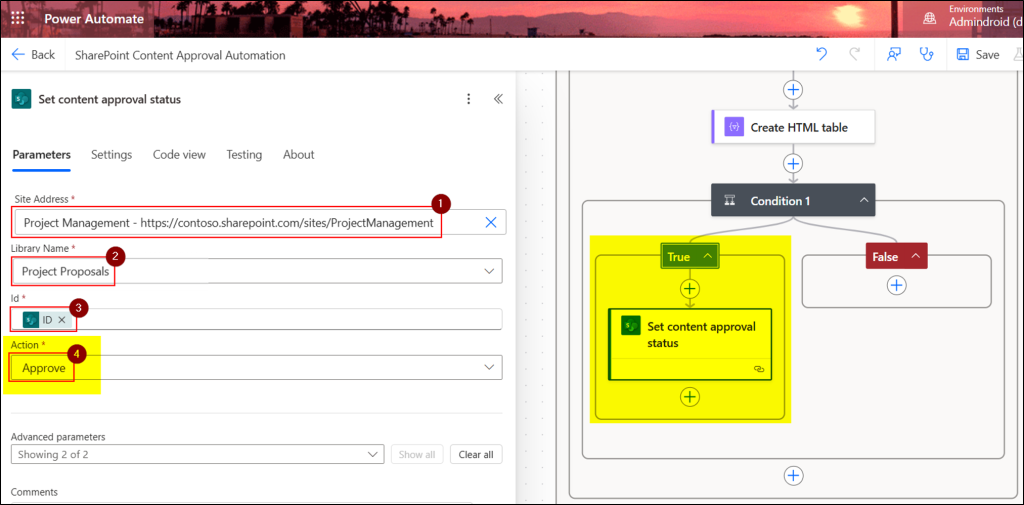
- To update the status of approval in the list or document library item, click on the + icon under the True block of the outcome condition. Then, choose the Set content approval status trigger.
- Choose the Site Address, Library Name, and Item Id using expressions. Then, set the Action to Approve.
- Similarly, perform the same operation under the False block and set the Status as Reject.
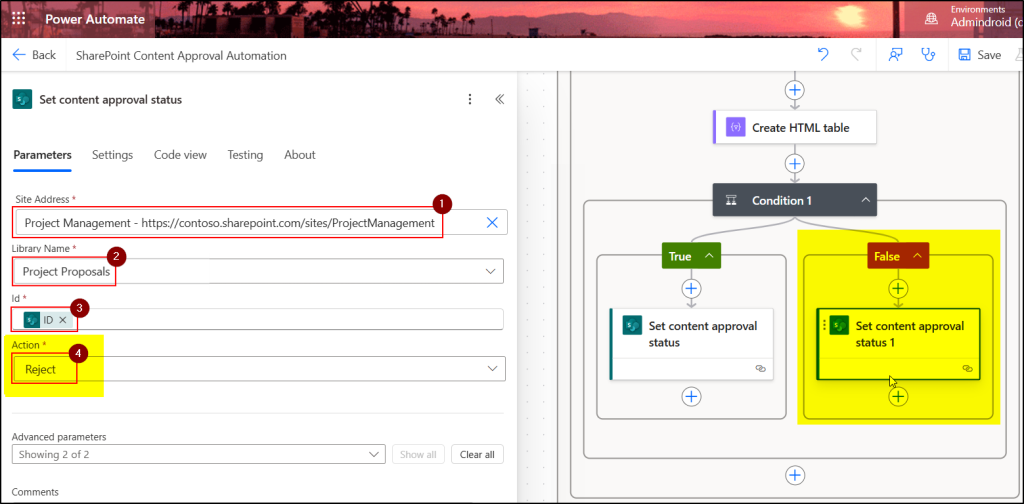
The above steps update the SharePoint item’s approval status to Approved or Rejected based on the outcome of the approval process.
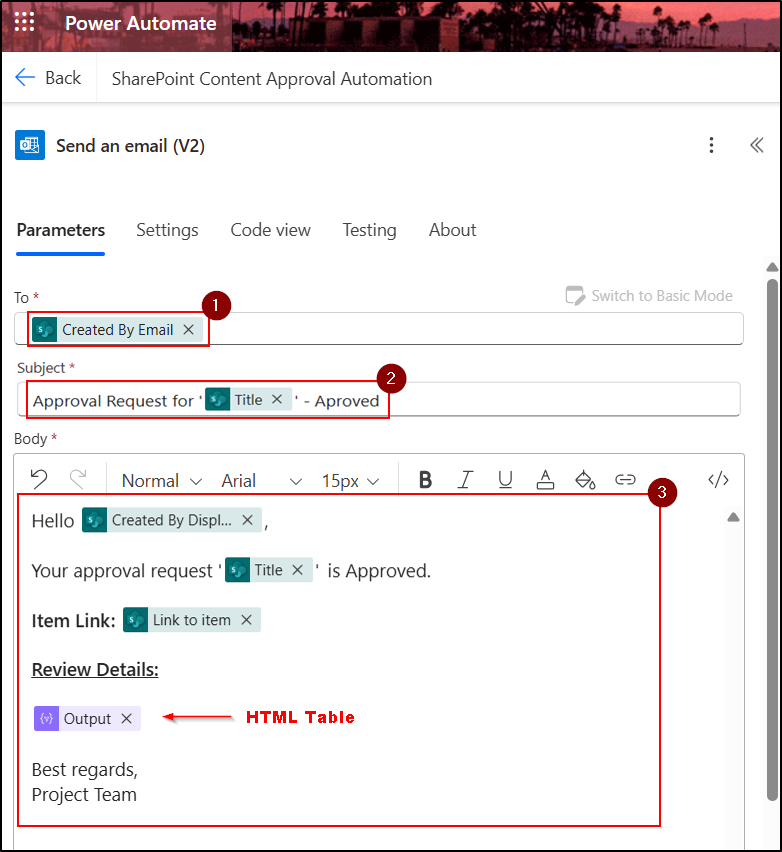
8. Send Content Approval Status to Users via Microsoft Outlook
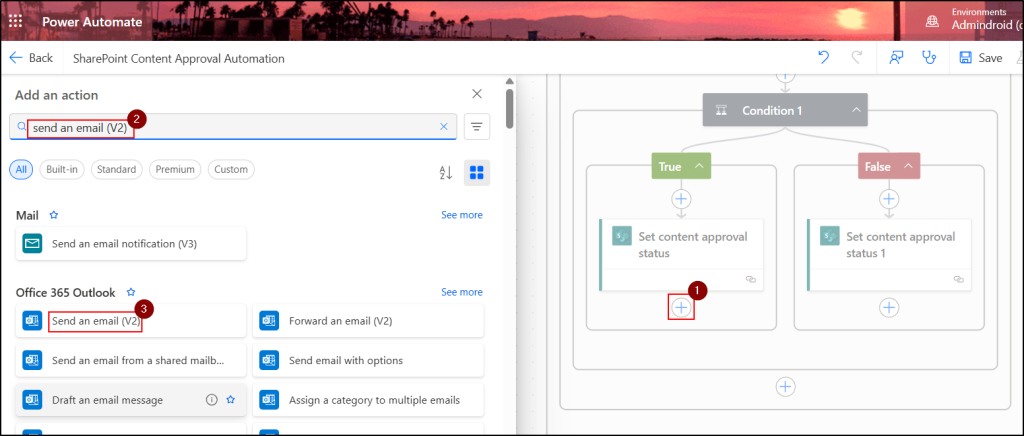
- After updating the item’s approval status, add a new action under the True branch to notify users of the outcome.
- Click the + icon and select the Send an email (V2) action to send the approval status to the user via Outlook.
- In the To field, choose Created By Email using dynamic content. If the dynamic value isn’t selectable, click Switch to Advanced Mode and proceed.
- Prepare the Subject and Body of the email using a mix of text and dynamic expressions to clearly communicate the approval status (Approved) to the user.
- Make sure to include the HTML table we created earlier to give a clear view of the approval responses and comments.
- Similarly, add an email action under the False branch with the content indicating that the approval status is Rejected.
This will send an email notification to the document creator, informing them of the approval status (Approved or Rejected) with the review details.
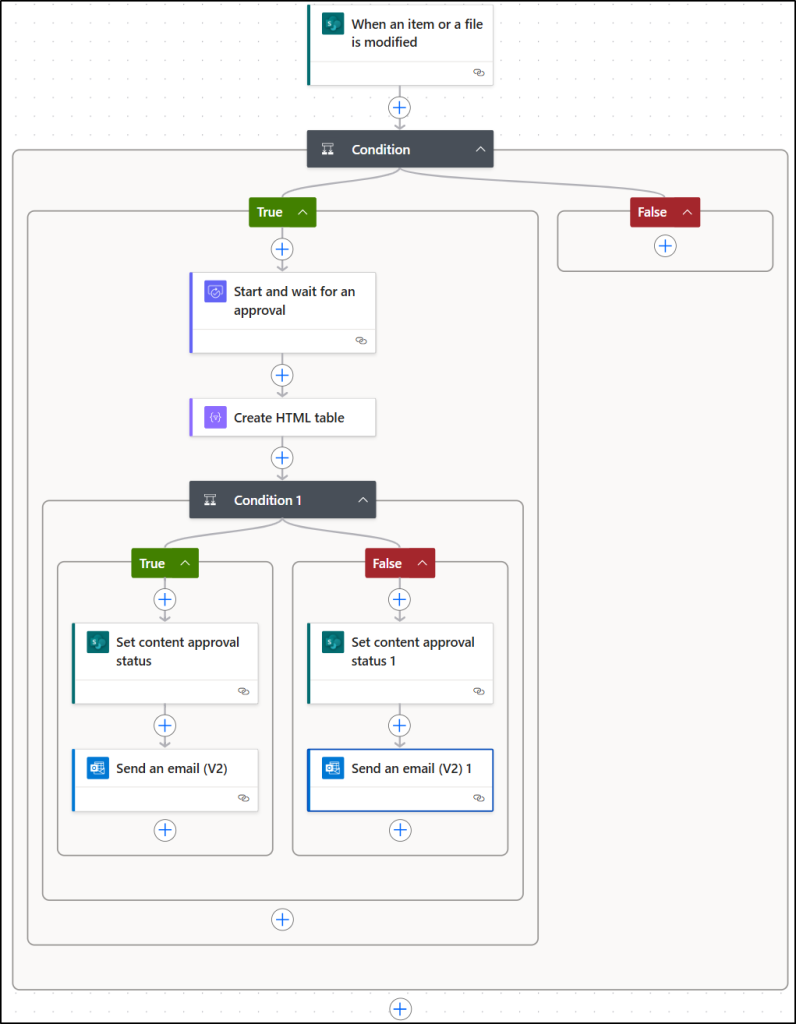
9. Save and Test the SharePoint Content Approval Flow
- Save the workflow using the Save option available from the tool bar. Your SharePoint content approval automation flow is now ready and should look like below.
- After saving it, click Test from the toolbar.
- In the Test Flow flyout pane, select Manually and click on Test.
- Then run the SharePoint Online approval workflow by creating an item in the list to verify the flow is executing as expected.
Verify that:
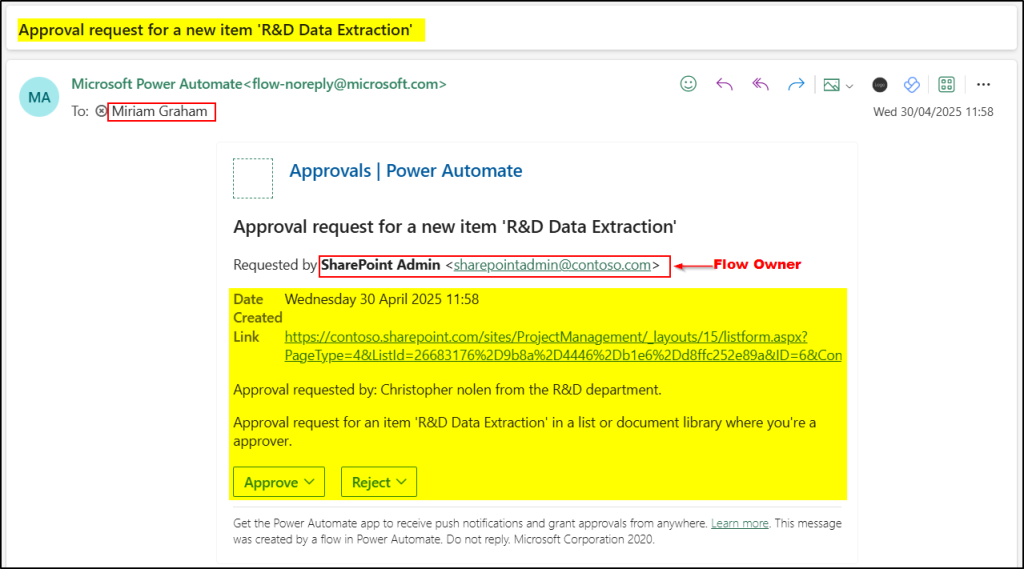
- An approval email/request is sent to the approver.
- A content approval status email triggered to the user through Power Automate indicating whether it was approved or rejected.
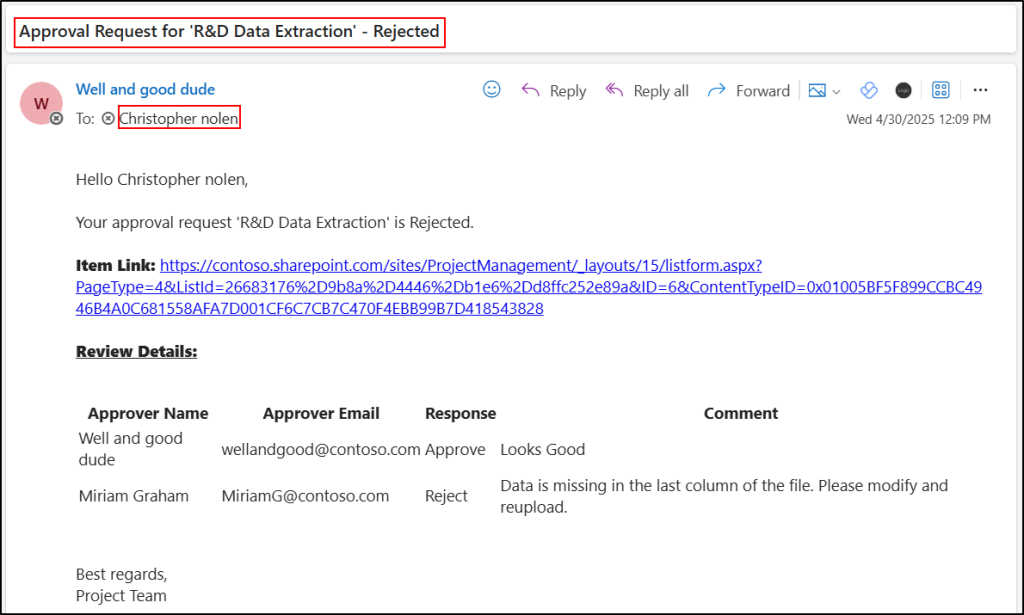
- Based on their response, the document’s Approval Status in SharePoint is updated automatically.
🔎 Tip: Use the “Flow Run History” in Power Automate to troubleshoot any failed runs. It provides detailed error messages and the exact step where the flow encountered an issue.
Conclusion
Automating SharePoint content aprovals with Power Automate removes the manual effort from managing document governance. It ensures a smooth and consistent review process across your organization. You can also extend automation beyond content approvals — for example, by setting up flows to automate guest access approvals in SharePoint using Power Automate.
I hope this blog has provided valuable insights to create and test an approval workflow with Power Automate for document approval. If you have any questions about the flow, feel free to reach out in the comments.
For more workflows on Microsoft 365 user onboarding & offboarding, refer our AdminDroid GitHub.


