
On Day 7 of Cybersecurity awareness month, learn the top Microsoft Secure Score recommendations to improve your Exchange Online security. Stay tuned for the upcoming blogs in our M365 Cybersecurity blog series.
As cyber threats continue to evolve, it’s essential for organizations to prioritize email security in the Exchange Online environment. Microsoft Secure Score provides a valuable tool to help assess your security posture and pinpoint areas for improvement. By following tailored suggestions, defenses against potential attacks can be strengthened, thereby enhancing compliance.
In this blog, we’ll explore how to effectively use Microsoft Secure Score recommendations to boost your Exchange Online security.
Top Secure Score Recommendations to Improve Email Security
Wondering which recommendations can significantly enhance your Exchange Online security? Here are the top configurations you should prioritize to strengthen your email communications:
- Restrict additional storage providers in Outlook on the web
- Enable MailTips for end users
- Enable mailbox auditing for all users
- Activate the customer lockbox feature
- Turn on modern authentication for Exchange Online
- Prevent users from installing Outlook add-ins
- Enable external email warning tags in Microsoft Outlook
Note: In addition to these actions, admins should consistently review Microsoft 365 email security reports to address various risk scenarios in a streamlined way.
Where Can You Access and Implement Secure Score Recommendations? 🔎
By navigating through Exposure management → Secure score → Recommended actions in Microsoft 365 Defender, you can quickly locate and implement these recommendations.
1. Ensure Additional Storage Providers Are Restricted in Outlook on the Web
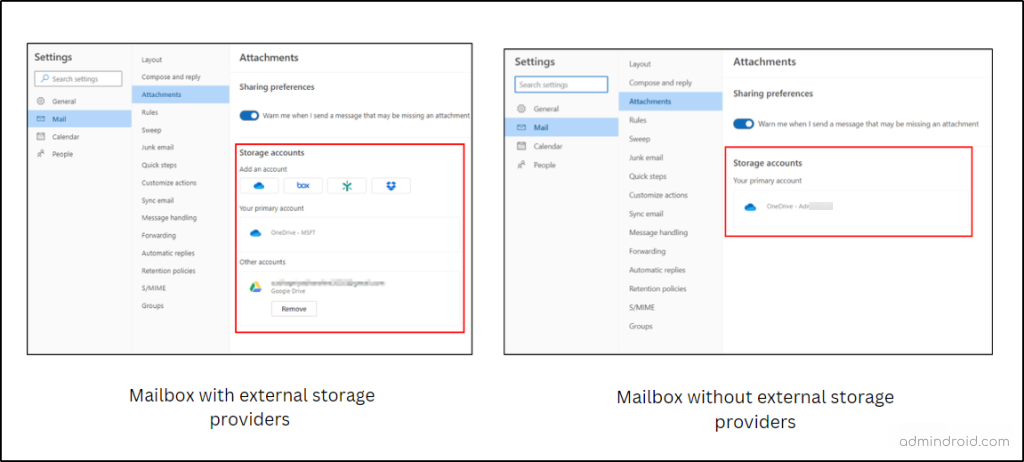
Restricting additional storage providers in Outlook on the web prevent users from connecting to external services like Google Drive, Dropbox, etc. Allowing these providers can expose your organization to potential risks, as Microsoft does not govern the terms of use or privacy policies of these third-party services. Implementing this setting helps safeguard sensitive information and maintain control over data access.
How to Restrict Additional Storage Providers in Outlook on the Web?
To limit access to additional storage providers in Outlook on the web, you can utilize the Exchange Online PowerShell module and adjust the ‘AdditionalStorageProvidersAvailable’ parameter to $false.
The default setting for this parameter is $true, which allows users to connect additional storage providers. Setting it to $false will prevent users from linking their extra storage services or sharing files through email.
1. Begin by connecting to Exchange Online PowerShell using the following command:
|
1 |
Connect-ExchangeOnline |
2. Then, run this command to modify the settings:
|
1 |
Set-OwaMailboxPolicy -Identity OwaMailboxPolicy-Default -AdditionalStorageProvidersAvailable $false |
You can check its enforcement on Outlook web by following the navigation below.
Outlook Web App → Settings (Gear icon) → Mails → Attachments → Storage accounts
2. Ensure MailTips are Enabled for End Users
Enabling MailTips enhances email security by helping end users recognize unusual patterns in their outgoing emails, thereby protecting against data exfiltration and account breaches. By default, MailTips for external recipients are disabled, but implementing this feature provides visual cues when users send emails. This awareness can help prevent potential security risks by encouraging more cautious email practices among all Microsoft 365 users.
How To Enable MailTips in Exchange Online?
Enabling MailTips activates notifications related to external recipients, group metrics, and mailbox statuses, such as out-of-office alerts or full mailbox notifications. This cmdlet sets the large audience MailTip threshold to 25, triggering a MailTip when the sender includes a distribution group with more than 25 members.
To enable MailTips in Outlook, execute the following cmdlet in the Exchange Online PowerShell module.
|
1 |
Set-OrganizationConfig -MailTipsAllTipsEnabled $true -MailTipsExternalRecipientsTipsEnabled $true -MailTipsGroupMetricsEnabled $true -MailTipsLargeAudienceThreshold '25’ |
3. Ensure Mailbox Auditing for All Users is Enabled
Activating mailbox auditing enables Microsoft 365 to monitor mailbox logins and record actions such as reading, moving, deleting, and creating items during those sessions. After enabling mailbox audit logging for a specific mailbox, admins can use the quick checklist for efficient mailbox auditing. Additionally, with this logging feature turned on, mailbox activities performed by administrators, delegates, and mailbox owners are automatically tracked by default.
How to Turn on Mailbox Auditing in Office 365?
To enable mailbox auditing for Microsoft 365 users, you can use the following PowerShell cmdlet:
|
1 |
Set-OrganizationConfig -AuditDisabled $false |
This command turns on mailbox auditing for your entire organization, ensuring that all actions taken by mailbox owners, delegates, and administrators are automatically logged.
Key Points About Mailbox Auditing
Default Auditing: When mailbox auditing is turned on for your organization, it cannot be disabled for individual mailboxes. If you try to turn off auditing for a specific mailbox, it will be ignored, and auditing will stay active.
Bypassing Mailbox Audit Logging: Although you can’t turn off auditing for specific mailboxes, you can use the ‘Set-MailboxAuditBypassAssociation’ cmdlet to exclude specific users from having their mailbox actions logged. This means that any actions taken by those users will not be recorded, including actions they perform on other users’ mailboxes (like shared mailboxes).
To bypass mailbox auditing for a specific user, run this command:
|
1 |
Set-MailboxAuditBypassAssociation -Identity <MailboxIdentity> -AuditByPassEnabled $true |
This command allows the specified user to perform actions without those actions being logged in the audit trail.
4. Ensure the Customer Lockbox Feature is Enabled
When technical issues occur in Microsoft 365, users might require assistance from Microsoft support. However, allowing support personnel to access user accounts can raise concerns about sensitive information. This is where Customer Lockbox becomes crucial. It ensures that any access request from Microsoft engineers requires your explicit approval, enabling you to maintain control over your data and decide who can access it.
How to Enable Customer Lockbox in Office 365?
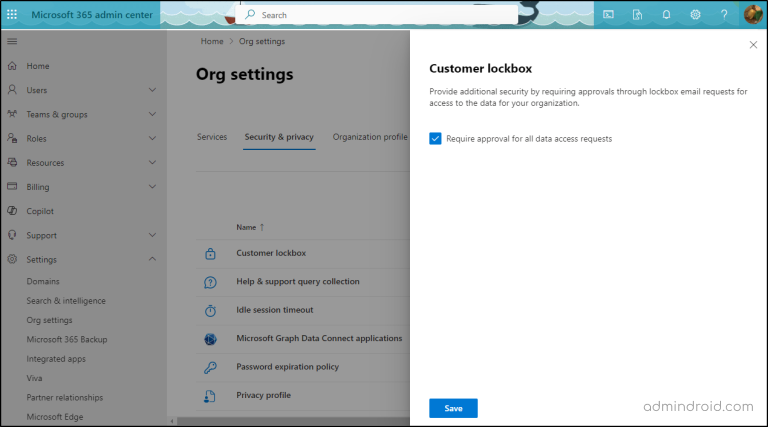
By default, customer lockbox access request is not enabled. To turn on the customer lockbox, follow the steps below.
- Sign in to the Microsoft 365 admin center.
- Navigate to Settings → Org Settings → Security & Privacy.
- In the ‘Security & Privacy’ section, select Customer Lockbox.
- Check the box labeled ‘Require approval for all data access requests’.
- Click Save.
5. Ensure Modern Authentication for Exchange Online is Enabled
When modern authentication is enabled in Exchange Online, users are required to authenticate using MFA, smart cards, or certificate-based authentication (CBA) to access their mailboxes. This helps prevent security breaches by reducing vulnerability to password-based attacks. If modern authentication is turned off, basic authentication will be utilized instead, which is less secure and is recommended by Microsoft to be disabled.
Note: Users of older email clients like Outlook 2013 and Outlook 2016 will no longer be able to authenticate to Exchange Online using Basic Authentication. They will need to switch to Modern Authentication.
How to Enable Modern Authentication in Outlook?
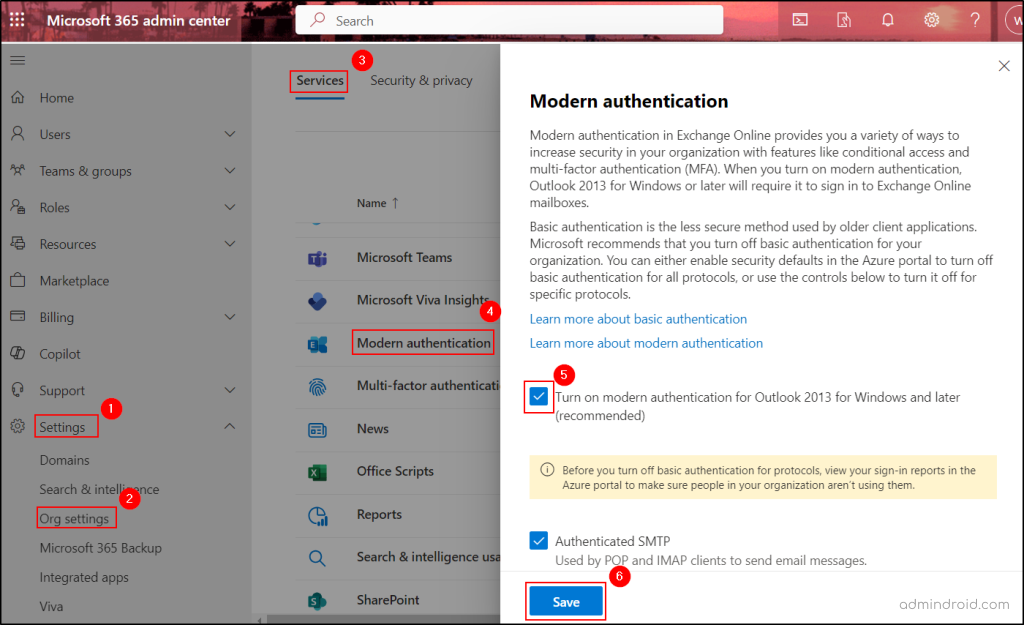
To enable modern authentication in exchange online, follow the steps below:
- In the Microsoft 365 admin center, go to Settings → Org Settings → Services → Modern Authentication.
- Ensure the checkbox ‘Turn on modern authentication for Outlook 2013 for Windows and later (recommended)’ is enabled in the Modern authentication flyout pane.
- Click Save.
6. Ensure Users Installing Outlook Add-ins is Not Allowed
Restricting users from installing add-ins for Outlook in Exchange Online is crucial for maintaining security within your organization. By restricting add-in access, you can prevent unauthorized tools from compromising sensitive data. This ensures that users cannot integrate applications that access or manage your organization’s information.
How to Disable Outlook Add-Ins for All Users?
To block the usage of Outlook add-ins for all Microsoft 365 users, follow the steps below in the Exchange admin center.
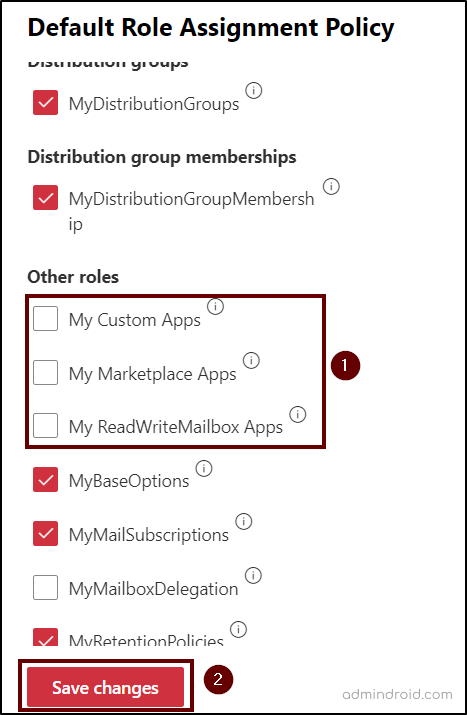
- Navigate to the ‘Roles’ tab and select the ‘User roles’ page.
- Select the ‘Default Role Assignment Policy’ and click on the ‘Manage permissions’ option.
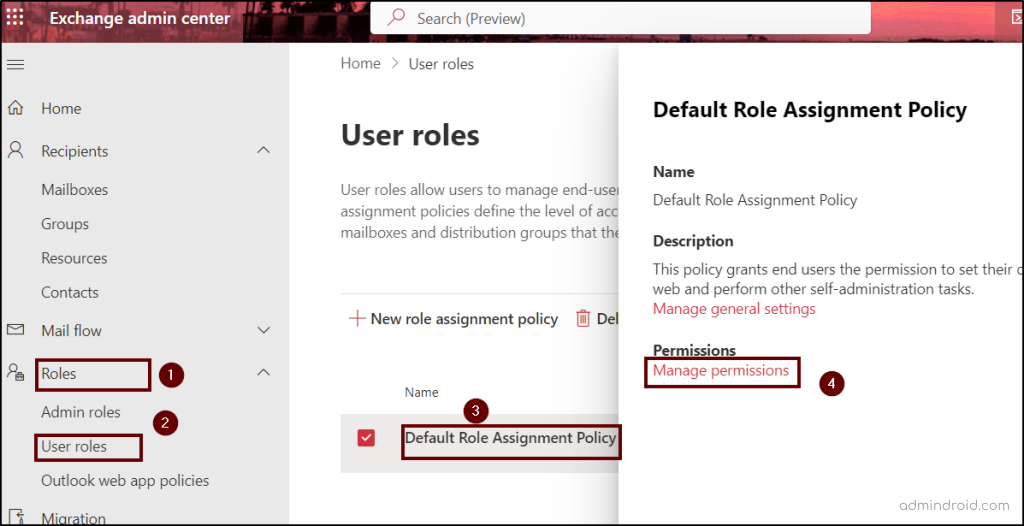
- Uncheck the options “My Custom Apps, My Marketplace Apps, My ReadWriteMailbox Apps” and select Save changes.
Note: To ensure tighter control over add-ins, these three permissions prevent users from installing or using any custom, marketplace, or mailbox-integrated apps. Therefore, apply the above settings to all policies if you have any other than the default role assignment policy.
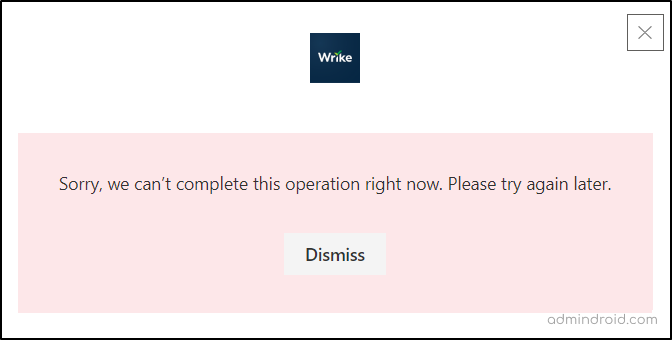
After implementing these modifications in the Exchange admin center, users will no longer be able to install new add-ins in their Outlook, and they will encounter one of the following errors.
- Sorry, we can’t complete this operation right now. Please try again later.
- Access is denied. Please contact your administrator.
7. Enable external email warning tag in Microsoft Outlook
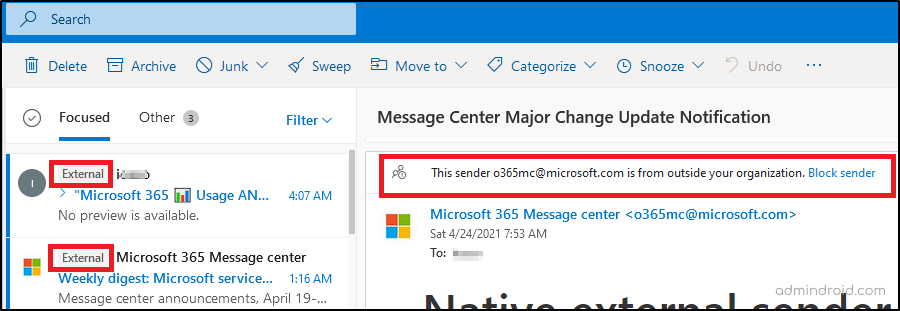
To strengthen security, Microsoft 365 admins should enable the ‘External email tagging’ feature, which adds an “External” tag to emails from outside the organization. This alerts users to handle these messages with extra caution, promoting greater awareness of potential scams.
How to Enable External Email Tagging in Exchange Online?
Microsoft 365 admins can enable external email tagging by running ‘Set-ExternalInOutlook’ cmdlet and setting its enabled state to true.
|
1 |
Set-ExternalInOutlook -Enabled $true |
You can also exclude specific domains from external tagging by adding those domains through the ‘AllowList’.
After enabling external email tagging in Exchange Online, users will see a warning like the one below for emails from external senders.
In summary, focusing on email security in your Exchange Online setup is important to fight against growing cyber threats. Using Microsoft Secure Score recommended actions and following these steps, you can build a stronger workspace that upholds email security best practices.


