Multi-factor authentication is one of the foremost things to rely on when it comes to an organization’s security. Strong MFA practices are required to keep your users away from famous identity attacks such as phishing, MFA fatigue, sim swapping, replay, etc. To deploy this highest security feature easily, Microsoft introduced the new Adaptive MFA using Conditional Access Policies. This feature determines the best conditional access policy templates to protect admins and users based on the tenant’s license, only a click away!
Configure MFA within the Microsoft 365 Admin Center
Security is the primary element to consider for an organization’s safety. Day by day, it is becoming more complex to set up. As admins always have a soft spot for approachable settings, Microsoft brought everything under one single wrap that allows admins to manage Adaptive MFA, Conditional access, and other security default settings from within the Microsoft 365 Admin Center itself, which is a go-to tool for them.
Now, admins don’t have to allocate time for configuring MFA all by themselves. ‘Adaptive MFA’ is for the rescue. Let’s check how!
When you configure MFA within the Microsoft Admin Center, three methods are offered to enable MFA. Among the three, any one method is required to protect your organization.
- Adaptive MFA using Conditional Access
- MFA using Security Defaults
- Legacy MFA
Let’s have a look at each method briefly.
What is an Adaptive MFA?
Adaptive MFA is an advanced form of multi-factor authentication that uses pre-defined conditional access templates to enable MFA for admins and users in your organization.
It is a Microsoft-recommended method for enabling MFA and it automatically configures policies by setting rules based on different criteria.
MFA using Security Defaults
Security defaults target MFA for tenant-wide users by using a defined set of security settings. It can be enabled for every Office 365 license. The security defaults go as the following.
- Requiring all users to register for Azure AD Multi-Factor Authentication.
- Requiring administrators to do multifactor authentication.
- Requiring users to do multifactor authentication when necessary.
- Blocking legacy authentication protocols.
- Protecting privileged activities like access to the Azure portal.
Legacy MFA
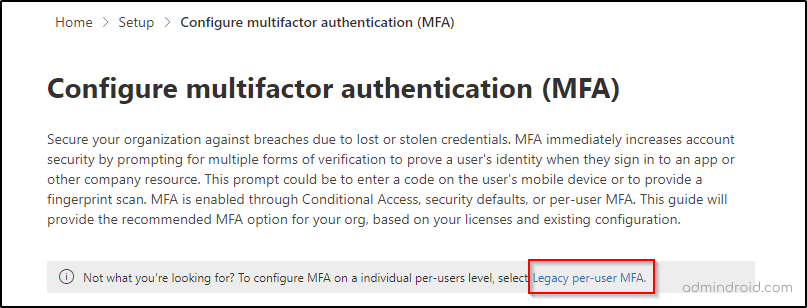
Legacy MFA, also referred to as ’Per-user MFA’ is used for enabling MFA for individual users. These users are required to pass the MFA challenge each time they sign in to a resource. As you cannot define your own rules using security defaults, enabling legacy MFA for individual users can be practiced.
For a few tenants, you may not find this method for enabling MFA as Microsoft provides options based on your MFA requirements. Still, those tenants can find this option on the starting page of this configuration.
Why Adaptive MFA Enablement is the Best?
Adaptive MFAs are made to be dynamic in nature and require more strong authentication requirements. It has pre-defined conditional access policy templates to enhance the security structure of an Office 365 organization. With adaptive MFAs, we can require and enforce policies based on users, roles, locations, etc. Moreover, these enforce policies for the user based on the license they have.
Among the methods (Security defaults and legacy MFA), Adaptive MFA ensures the highest security posture using a single click effortlessly. Therefore, there is no doubt that it is the most robust of all.
Important: It is suggested to turn off legacy MFA for users who are to be included in this policy to avoid redundancies.
What License is Required for Enabling Adaptive MFA?
This setting can be configured by global admins and it requires an Azure AD Premium P1 license. However, for risk-based policies, an Azure AD Premium P2 license is required.
How to Configure Adaptive MFA in the Microsoft 365 Admin Center?
To configure Adaptive MFA from the Microsoft Admin Center, you can follow the steps below.
Step1: Sign in at the Microsoft 365 Admin Center as a global administrator.
Step2: Reach out to the navigation pane and select ‘Setup’.
Step3: Under ‘Sign-in and security’, choose ‘Configure multifactor authentication (MFA)’.
This step takes you to the following page.
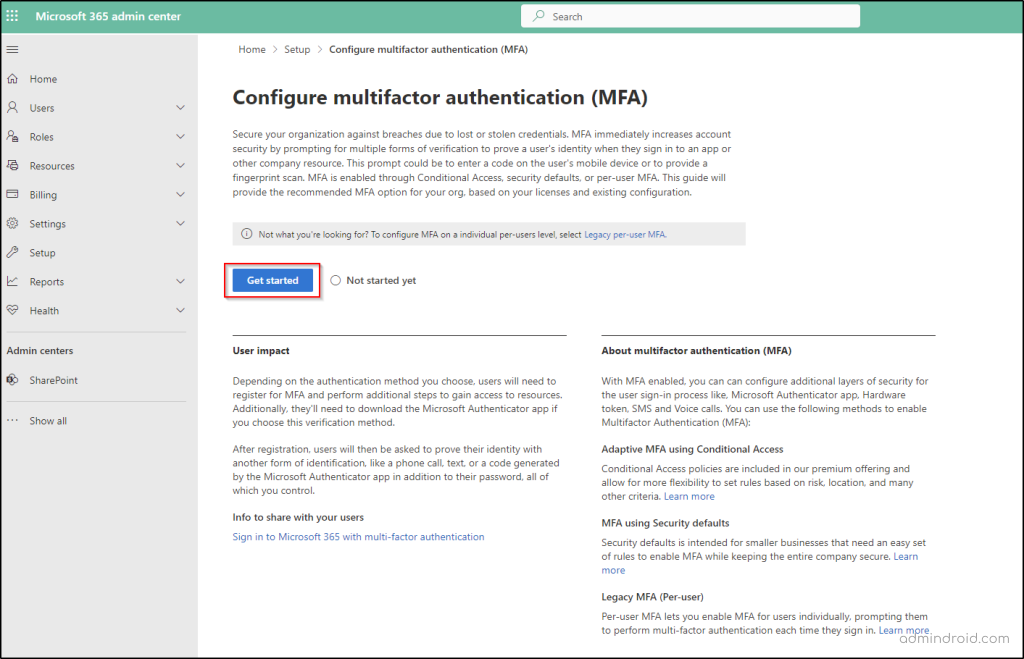
Step 4: After getting started, the next screen you see shows the enforcement details such as current MFA status, and the insights on the number of admins protected by MFA in the last 30 days.
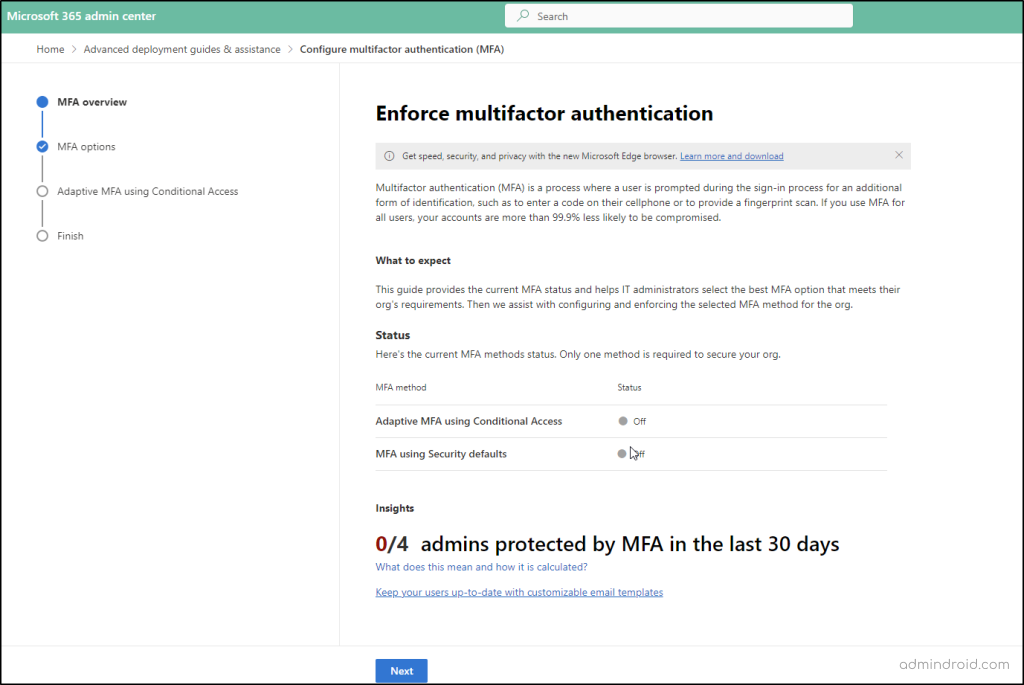
Step5: On the next screen, you can choose to enable Adaptive MFA using Conditional access policies.

Step6: Selecting the Adaptive MFA option, takes you to the following screen from where you can define policies by either selecting all or the template of your choice.

Let’s look at each template with definitions that may help you to pick one for your policy.
Select All
‘Select All’ is the recommended option for Adaptive MFA. If you ‘select all’, all the following templates are defined for the policy, and the layer of security is increased ton times. Admins can also choose one or more templates from the below-mentioned ones according to their requirements.
Require MFA for Admins
As admin accounts are easily prone to compromise, this policy requires MFA for admins and thereby preventing their accounts from major identity attacks. However, high-privileged accounts such as glass break accounts can be excluded to prevent accidental locks.
Block All Legacy Sign-ins that Don’t Support MFA
The easiest way to block all the legacy services in an organization is by configuring Conditional Access policies. It improves protection by blocking some legacy authentication protocols like POP, SMTP, IMAP, and MAPI which cannot enforce MFA.
Require MFA for External and Guest Users
To make sure your content is accessed safely outside your organization, it is necessary to enable MFA for all external and guest users. These users are then enforced with an MFA challenge before accessing the shared resource.
Require MFA for All Users – Advanced Risk Detection
For this template to be available, an Azure AD Premium P2 license is required. Advanced risk detection protects against various threat events such as malware-linked IP addresses, unfamiliar sign-in properties, suspicious inbox forwarding, etc. for the user accounts in your directory. It is suggested to exempt service accounts while configuring the policy to avoid tenant-wide lockouts.
Important: Each template has the option to exclude specific users or groups from the defined policy.
Step7: Click on Save configuration and review your policy.
Step8: On the Finish setup page, you can use the ‘Manage Conditional Access’ button to do further customizations> Done.

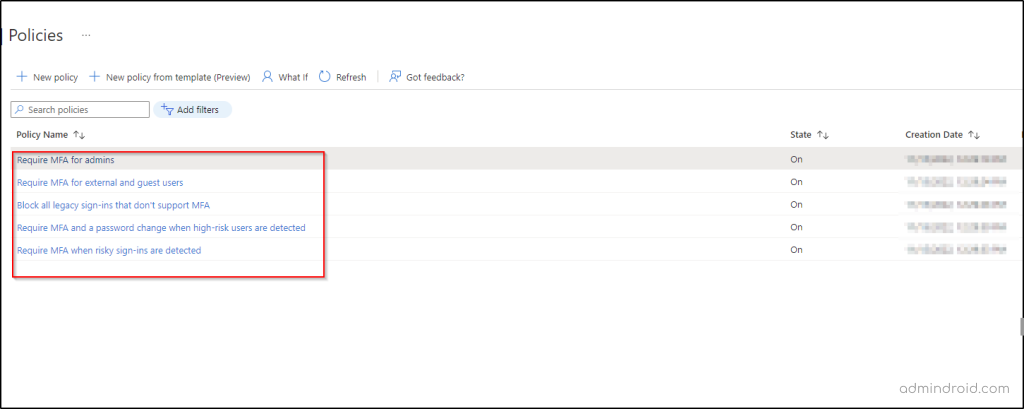
It is important to note that the Manage Conditional Access option redirects you to the Azure portal where you can check the status and other details of the policies that are created automatically as a result of enforcing Adaptive MFA as shown below.
Hope this blog will help you to learn the concepts of Adaptive MFA using conditional access. Feel free to reach us in the comments for any assistance.


