Protecting data within an organization is a complicated process to deal with. Classifying & protecting the data is something that eases this attempt. The Microsoft 365 Sensitivity labels protects data by classifying and enforcing them with labels. Most of us may be familiar with this concept. But Microsoft added a new experience to the Microsoft 365 app’s sharing dialog box recently. In order to draw the picture perfectly, we will start from the basics.
What are Microsoft 365 Sensitivity Labels?
Sensitivity labels are used to label sensitive documents that roam within or outside your organization. It classifies documents based on the pre-configured protection settings and extends security by using encryption and content markings. After applying sensitivity labels to documents, they are always protected no matter wherever they are!
With sensitivity labels, you can decide which users and groups can use the labels, and can be applied either manually or automatically. By default, a global administrator can create and manage sensitivity labels. Admins need to give compliance officers delegated access or add them to role groups that support sensitivity labels to manage labels. Once created, users can apply the labels manually or get them applied automatically. Not only can you apply sensitivity labels to protect documents, but you can also prevent sharing across Microsoft 365 by creating custom Sensitive Information Types (SITs) that detect your organization’s unique confidential data.
Note: Creating and publishing sensitivity labels is also recommended as part of Microsoft’s Secure Score under Microsoft Information Protection. Therefore, implementing these labels can significantly enhance your organization’s overall security posture.
License Requirements for Sensitivity Labels
Users with the following licenses are eligible to benefit from the features of sensitivity labels in Microsoft 365.
- Microsoft 365 E5/A5/G5/E3/A3/G3/F1/F3/Business Premium
- Enterprise Mobility + Security E3/E5
- Office 365 E5/A5/E3/A3
- AIP Plan 1
- AIP Plan 2
Why Sensitivity Labels for Office Files?
SharePoint and OneDrive are collaborative Office 365 services where people work with important documents that sometimes are sensitive to handle. In order to protect these documents from being compromised, security practices are followed. By labeling a document in Microsoft 365, it can be kept out of serious exploits. A sensitivity label protects a document’s privacy and security when deployed properly.
Sensitivity labels can be applied to a specific file and it is completely customizable. You can configure a sensitivity label to encrypt a document or mark the content with watermarks, headers, and footers.
Supported File Types for Microsoft 365 Sensitivity Labels
The following file types are supported for applying sensitivity labels in SharePoint and OneDrive.
- Word: .docx, .docm
- Excel: .xlsx, .xlsm, .xlsb
- PowerPoint: .pptx, .ppsx
How to Apply Microsoft 365 Sensitivity Labels for Files?
Create and apply sensitivity labels to files by following the steps given below.
Creating the label
Step 1: Sign in to the Microsoft Purview compliance portal as a global administrator.
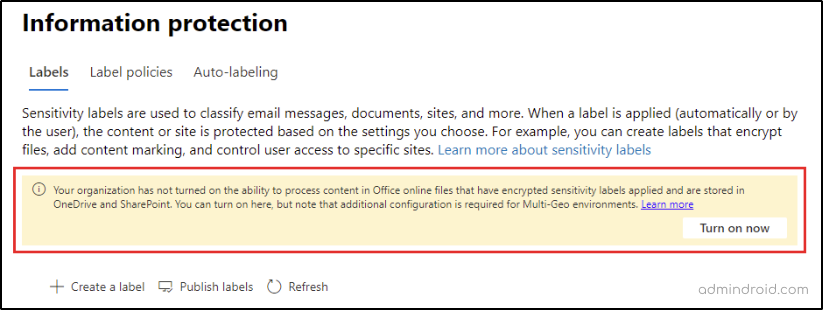
Step 2: Reach out to ‘Information Protection’ under ‘Solutions’.
Note: If you have not enabled this feature for your organization, a message will be displayed as shown in the screenshot below. You can turn it on right away there!
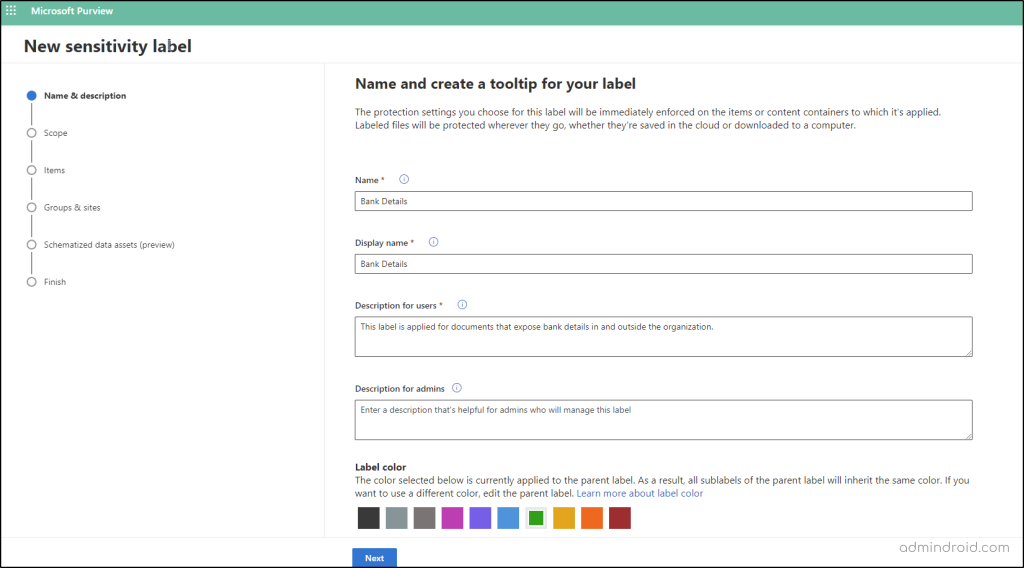
Step 3: From the ‘labels’ tab, create a label and configure protection settings for it.
Step 4: Give name and description for your label and then give ‘Next’.
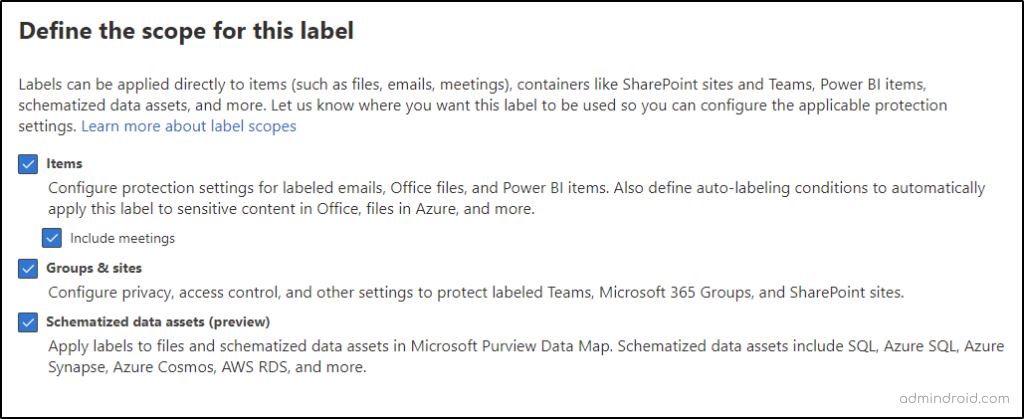
Step 5: Define where you want to apply the label by defining the scope. Additional steps need to be done to enable this feature for groups and sites.
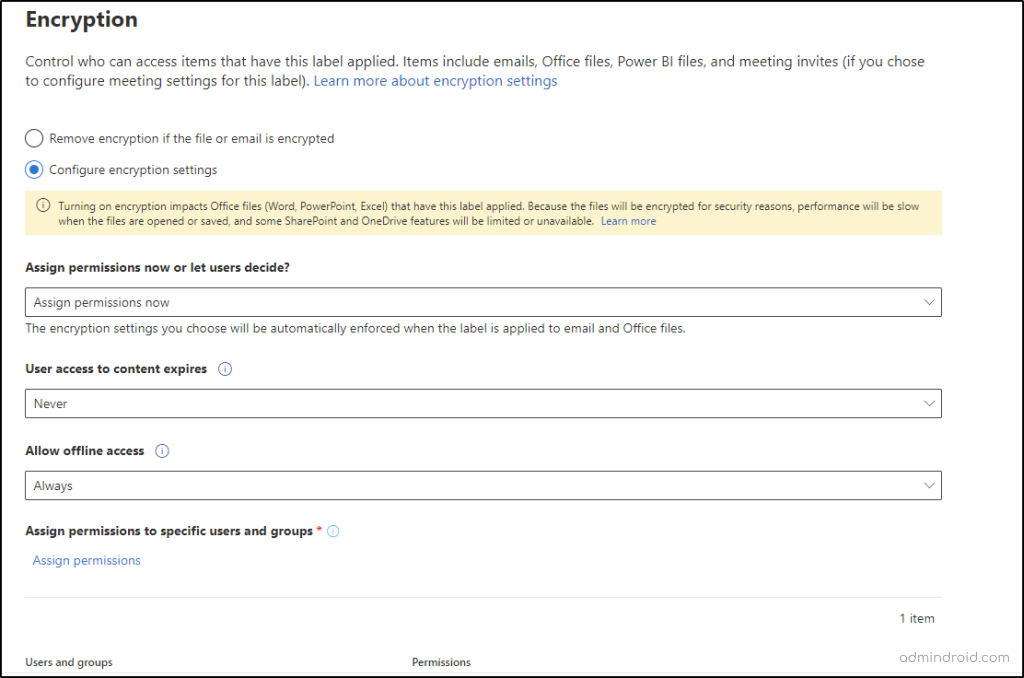
Step 6: Under ‘Items’ category, configure protection settings for the labeled items. There are two protection configurations – Encryption and content marking. In the ‘Encryption’ section, you can assign permissions to specific users and groups so that only they can use the content that has this label applied. ‘Teams Premium’ users can utilize the option to configure protection settings for Teams meetings and chats.
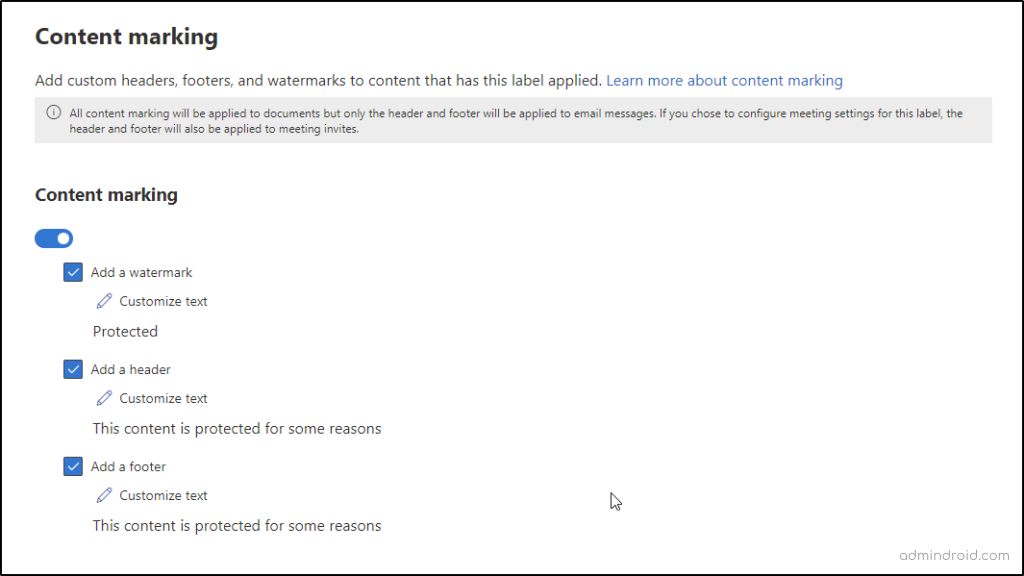
For content marking, select the option you want to use and add customized text for the watermark, header, or footer.
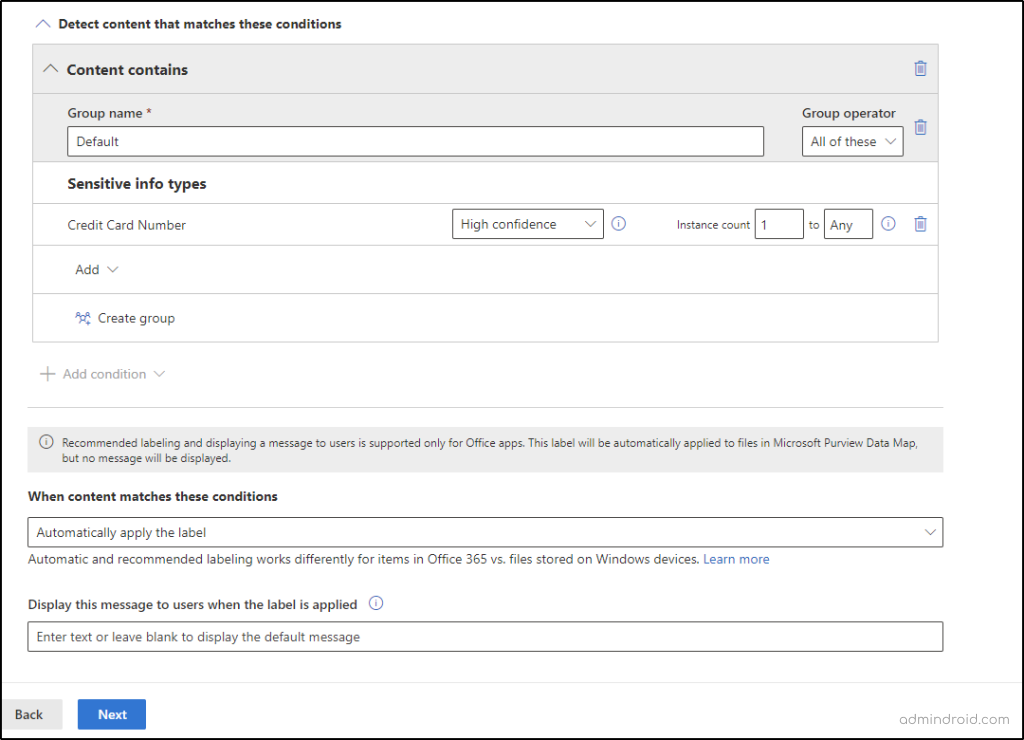
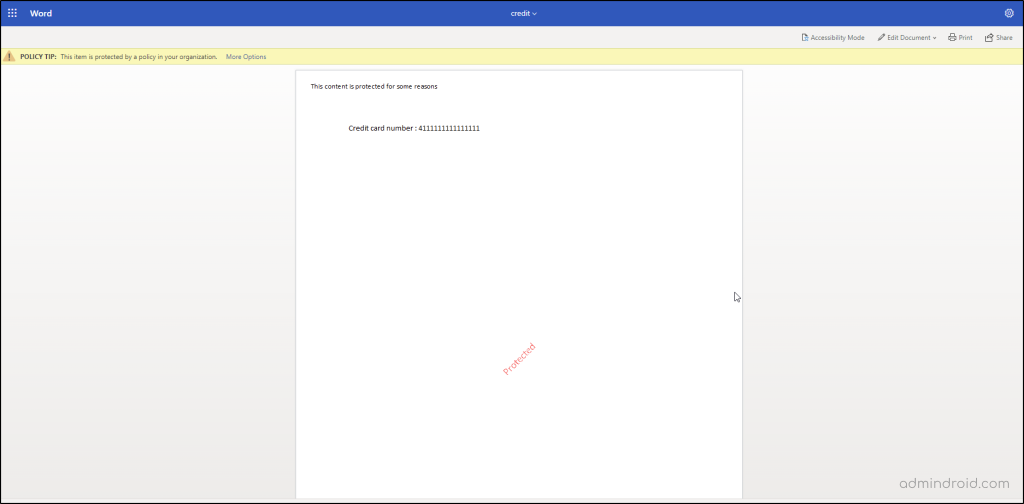
Step 7: In the next step, you can set up an auto-labeling policy to automatically apply the label to any content that meets the specified conditions in your label settings. In this case, I have enabled it and selected the condition to automatically label the content if it has a credit card number in it.
Step 8: You can define protection settings for groups and sites as the next step and finish creating the label. Before publishing the label, editing it can also be done.
‘Auto-labelling for schematized data assets’ is another option you can configure to apply labels to data assets in Microsoft Purview data map. It allows you to automatically label database columns in SQL, Azure SQL, Azure Synapse, Azure Cosmos, AWS RDS, and various other data sources governed by Microsoft purview data map.
After reviewing your settings, create the label and enhance protection for your confidential office files.
Publishing the Label
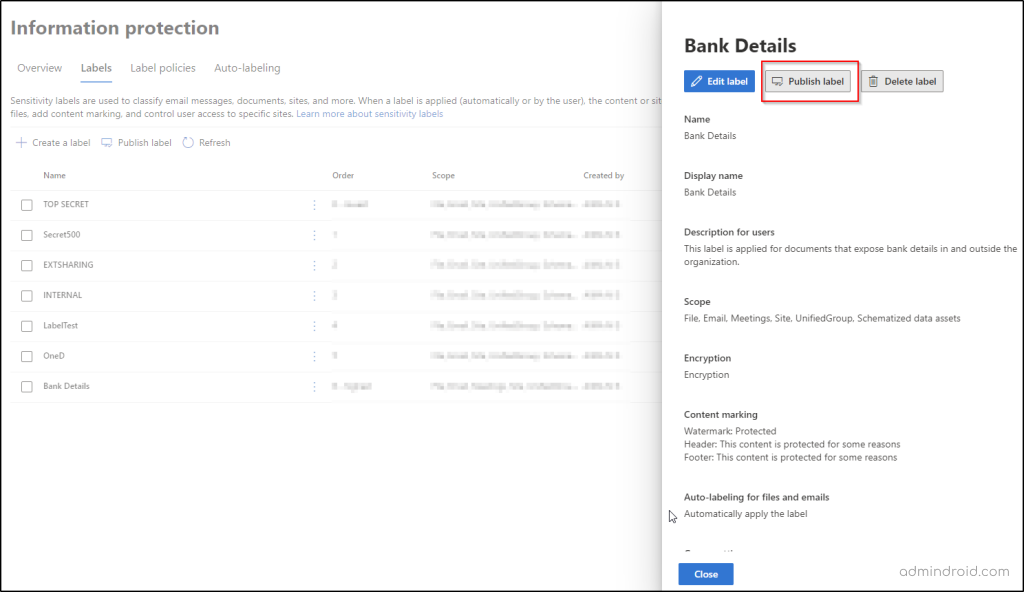
Step 9: After creating a label, you will have to publish it to be available for the users. To do so, select the label you just created from the list of labels -> A flyout page appears -> Review your policy settings -> Publish label. You can also publish it from the final page of the label creation step by selecting the label from the “Sensitivity labels to publish” option.
When you publish a label, you can choose users and groups to whom the label should be applied and configure default settings for documents, emails, meetings, sites and groups, and Power BI separately.
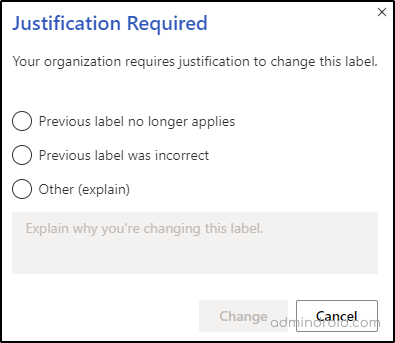
Step 10: From the ‘Users and groups’ section, select the users to whom you want the label to be applied. In the next section ‘Policy Settings’, select ‘Users must provide a justification to remove a label or lower its classification’, so that users will be asked to provide justification for any label removals.
Step 11: After choosing the default label, name it and ‘Submit’.
Important: Note that it may take up to 24 hours for the sensitivity labels to be available for the users after creation.
How Microsoft 365 Sensitivity Labels Work?

You can test it by applying the label manually from the ‘Sensitivity’ button from the ribbon and opening the document in the ‘Viewing mode’
What’s New? – Sensitivity label info in the Sharing Dialog!
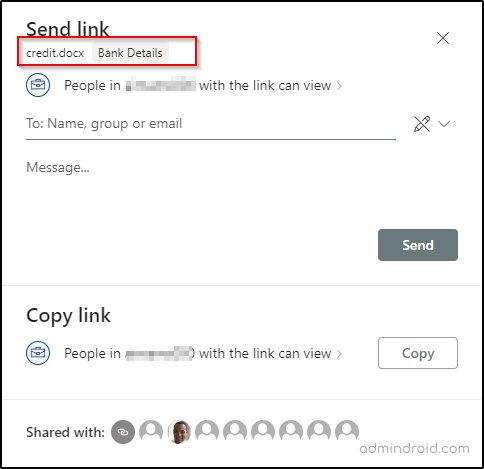
After the rollout of Sensitivity labels, new features that support those labels are developed following it. One such feature is its addition to the shared dialog. That is, when you try to share a labeled document in OneDrive or SharePoint, the sensitivity label’s name and description (on hovering over the label) are displayed in the shared dialog. As a result, people who are sharing can ensure what type of file they are attempting to share.
I hope this blog will help you understand the concepts of Sensitivity labels in Microsoft 365.
Feel free to reach us in the comments for any assistance.


