Microsoft has introduced a long-awaited undo capability for tenant object configurations using Backup and Recovery in Entra ID. This feature automatically backs up configurations, allows you to compare changes, and restore the tenant object settings from any point within the last five days.
Whether it’s an accidental change, data loss, or a tenant compromise, even a small misconfiguration can cause major disruptions in Microsoft 365. In such situations, admins often have to reconfigure settings from scratch, which can lead to missed or incorrect configurations. But that’s no longer the case.
Microsoft Entra Backup and Recovery, a preview feature lets you safeguard your tenant’s object configurations and roll back unwanted changes with ease. It automatically backs up tenant object settings daily, helping you compare changes and restore configurations. In this blog, let’s explore how Microsoft Entra Backup and Recovery works and how it helps you stay in control of your tenant environment.
Overview of Backup and Recovery in Microsoft Entra ID
Before this feature, admins often relied on tools such as Entra Exporter to back up and restore tenant objects. These tools allowed configurations to be exported as JSON files for recovery, but required manual setup and regular monitoring.
Features like Unified Tenant Configuration Management (UTCM) could track changes and detect drifts, but couldn’t undo them. As a result, many organizations depended on third-party solutions for configuration backup and recovery.
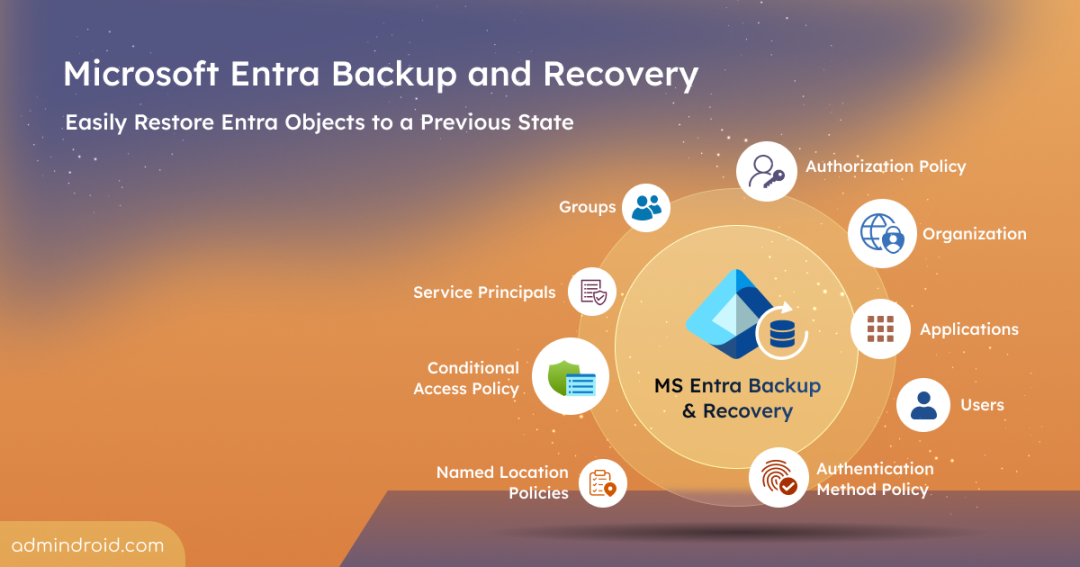
To address these limitations, Microsoft introduced Entra Backup and Recovery, which is a native solution built directly into Entra ID. With automated backups and granular recovery capabilities, it helps minimize downtime and ensures business continuity during unexpected disruptions. This feature backs up the following supported tenant objects once every day and retains them for up to five days.
Users
Groups
Applications
Service principals
Conditional access policies
Named location policies
Authentication method policy
Authorization policy
Organization
Note: This feature also supports Agent IDs, as it includes user and service principal objects with distinct types and characteristics. Microsoft plans to further enhance and expand this feature to support more directory objects and attributes over time.
Capabilities of Microsoft Entra Backup and Recovery
Microsoft Entra Backup and Recovery has the following key capabilities:
Easily view all available backups from the past 5 days within your tenant.
Compare differences between the current state and previous backups before restoring.
Restore all objects’ configuration or selectively recover specific objects based on type or specific object ID.
Monitor recovery activities with detailed history of completed and ongoing operations.
Prerequisites for Using Backup and Recovery in Microsoft Entra ID
Before you start using Backup and Recovery in Entra ID, ensure the following prerequisites are in place.
Tenant configuration: The tenant must be a workforce tenant and should not be an External ID or Azure AD B2C tenant.
License requirements: Your tenant must have Microsoft Entra ID P1 or P2 licenses.
Role requirements: You must be assigned one of the following roles based on your needs:
Microsoft Entra Backup Reader: Admins assigned with this role can view backups, view comparison differences, and review recovery history.
Microsoft Entra Backup Administrator: Has all the permissions of a Microsoft Entra Backup Reader, along with the ability to run difference reports and restore modified objects. By default, the Global Administrator has these permissions.
Once these requirements are in place, you can start restore object configuration using Microsoft Entra Backup and Recovery in your tenant.
How to Restore Object Settings Using Microsoft Entra Backup and Recovery
You can do recovery form a backup in the Microsoft Entra admin center by following the steps below.
You can use the difference report to compare the current settings with those from a previous backup. This helps you understand what has changed before taking any action and let you decide whether to compare all objects or only specific ones.
To create a difference report, follow the steps below:
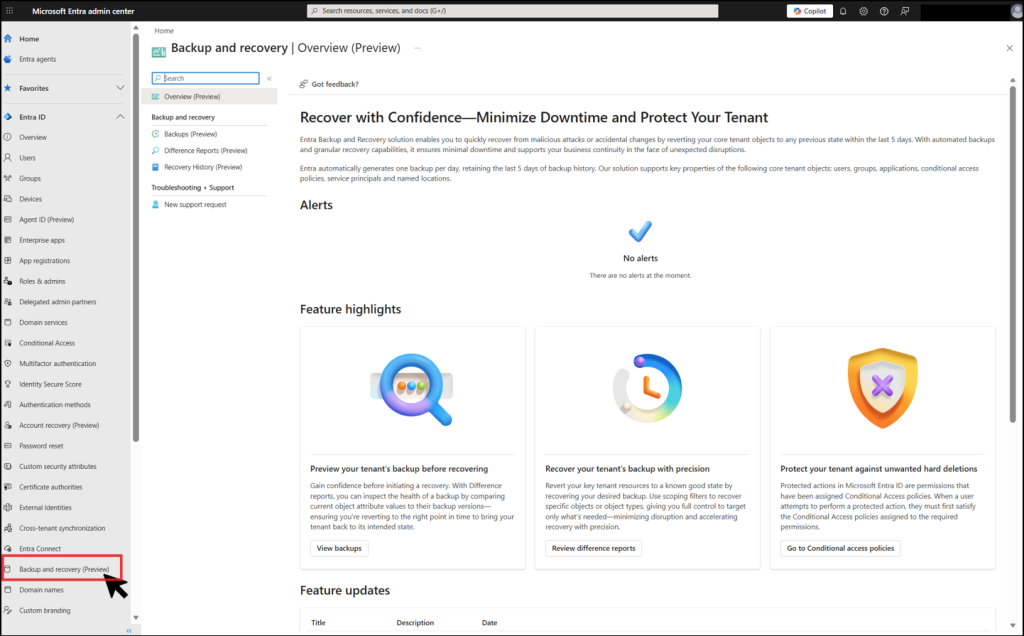
Navigate to the Backup and recovery (Preview) in Entra admin center and select Difference reports (Preview).
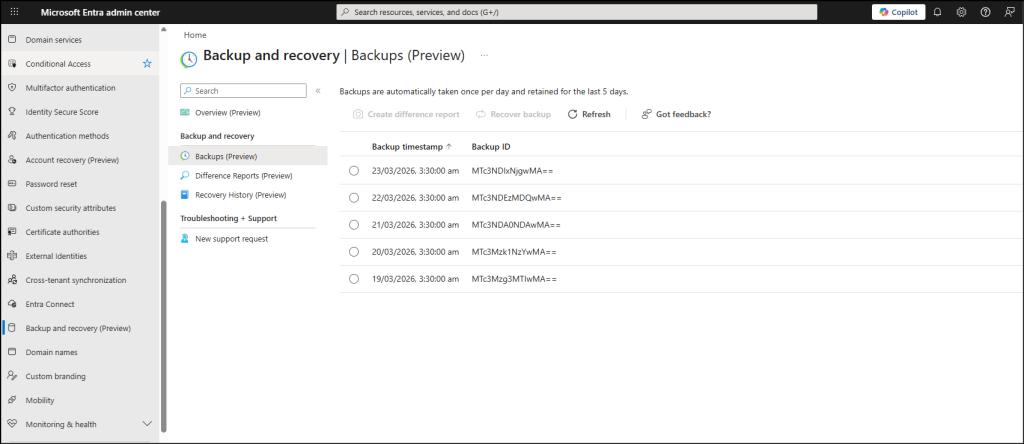
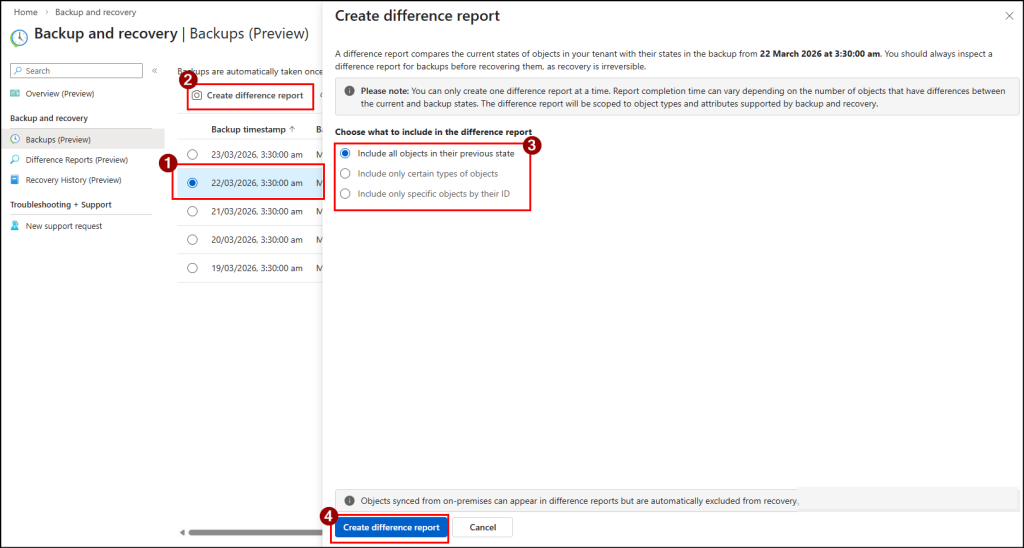
Select a backup based on the timestamp and click Create difference report.
Choose one of the following options based on your needs and Create difference report.
Include all objects in their previous state – Includes all core objects such as users, groups, service principals, and more.
Include only certain types of objects – Allows you to select one or more object types to generate a targeted difference report.
Include specific objects by their ID – A more granular option where you can generate a report for particular objects by specifying their object IDs. You can enter up to 100 object IDs across different objects here.
Important: The first difference report for a specific backup may take longer depending on the tenant size, as the backup data needs to be loaded. Subsequent difference reports for the same backup will be faster, since the loading step is skipped.
Tenant size
Estimated data loading time for first-time report generation
1-50,000 objects
Up to 1 hour
50,000-300,000 objects
Up to 1 hour 30 minutes
300,000-1,000,000 objects
Up to 2 hours
More than 1,000,000 objects
Up to 2 hours and 30 minutes
3. Restore Objects Using Entra Backup and Recovery
When you need to restore tenant settings, you can choose to recover all settings or perform a targeted recovery for specific objects. You can recover your tenant configurations in two ways:
If some settings were accidentally modified or unexpected changes appeared after an update, a difference report helps recover only the required object changes. It is also useful when you want to restore specific attributes without affecting recent legitimate changes.
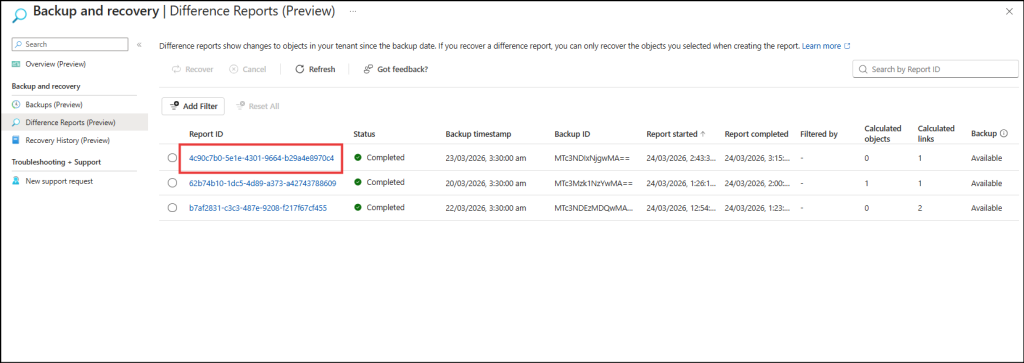
Go to the Backup and recovery (Preview) tab and select Difference Reports (Preview).
Here, you can also view all generated reports here along with key details like report ID, status, backup timestamp, backup ID, report started, report completed, filtered by, calculated objects, calculated links and backup.
You can check the status of generated difference reports such as Loading data, In progress, Completed, Failed, or Cancelled. Also, you can also filter the report by the object type based on your requirements.
You can click on the report ID of any report you need. Note: If the report ID is not clickable, check the status, wait for the process to complete, and then try again.
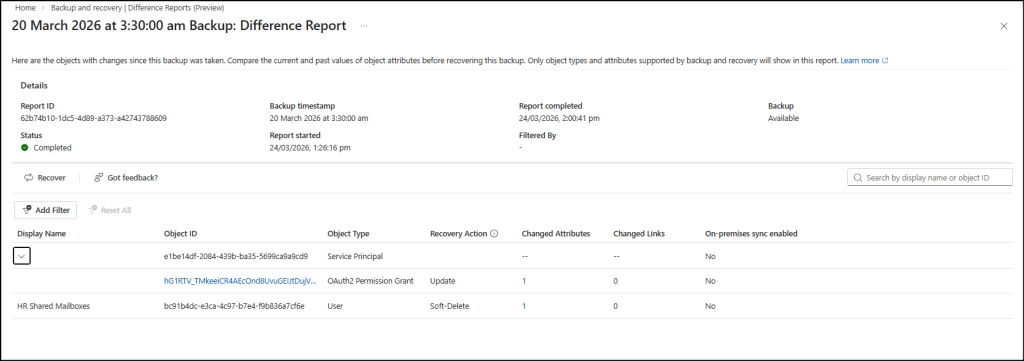
You can view detailed insights, including the display name, object ID, object type, recovery action, changed attributes, changed links, etc.
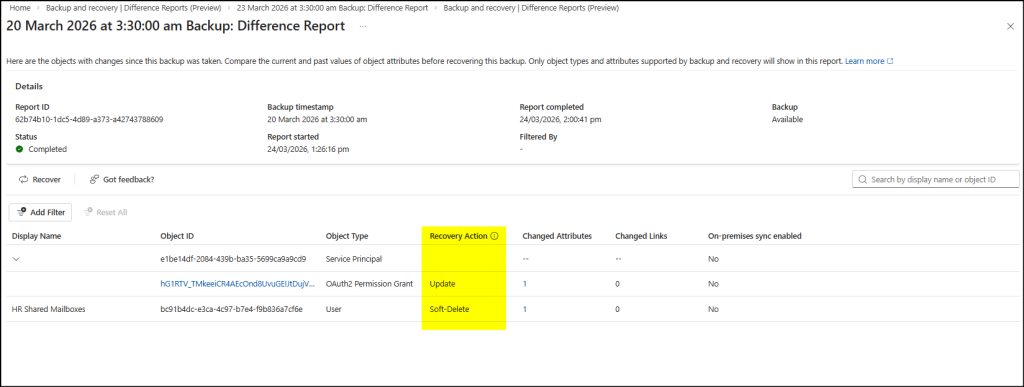
The Recovery Actions column shows the action suggested for each object in the report, based on the detected changes:
Update – Reverts modified attributes or relationships of an existing object.
Restore – Recovers a soft-deleted object.
Soft delete – Soft-deletes objects that were created after the backup point.
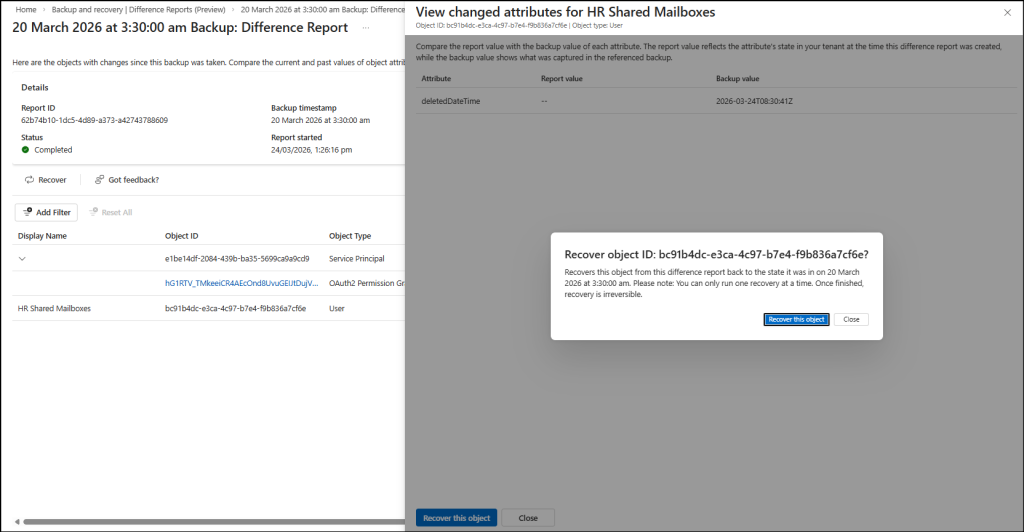
You can click on the values in the Change Attribute column to view details such as the attribute name, current value, and backup value.
Click Recover this object to recover the specific object.
Similarly, you can click on the values in the Change Links column to view details such as the object ID, recovery value, current state, and backup state. Click Recover this object to start the recovery process.
Alternatively, you can use the Recover option to recover settings directly from the backup. This behaviour will prompt you to either recover the entire backup or to select specific objects for recovery.
Note:
If a difference report was created using filters, the recovery will follow the same scope. To include more objects than those selected in the difference report, create a new difference report on the Backups page and proceed from there.
You can run only one recovery at a time, and the duration depends on the number of objects that need to be modified. Once completed, the recovery is irreversible.
B) Restore Object Settings Directly from a Backup
If a major configuration issue, accidental bulk change, or security incident affects multiple objects, you can restore them directly from a backup to return them to a previously known good state. This approach is useful when you already trust a backup point and need a broader recovery instead of reviewing individual changes.
In such cases, follow the steps below to restore objects directly from a backup:
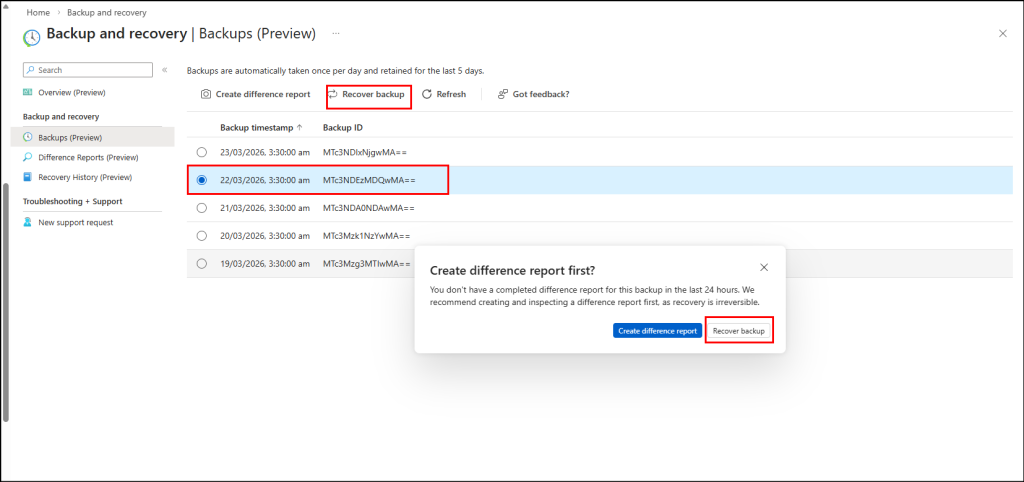
Go to the Backups page in the Backup and recovery (Preview) section in Entra admin center.
Select the required backup and click Recover backup.
Once initiated, choose Recover backup in the confirmation prompt.
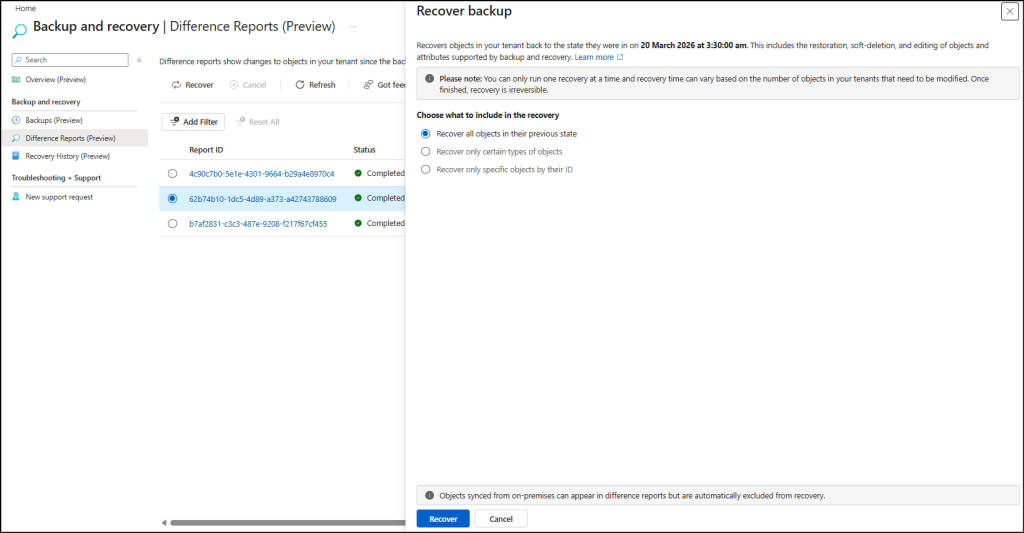
You can also apply filters to control what gets restored such as recover all objects, specific object types, or individual objects by ID.
Finally, click Recover to start the recovery process.
4. View Recovery History in Microsoft Entra ID
Once the objects are recovered, you can track and verify the recovery process using the Recovery History page in Entra ID. To access recovery history, follow the steps below.
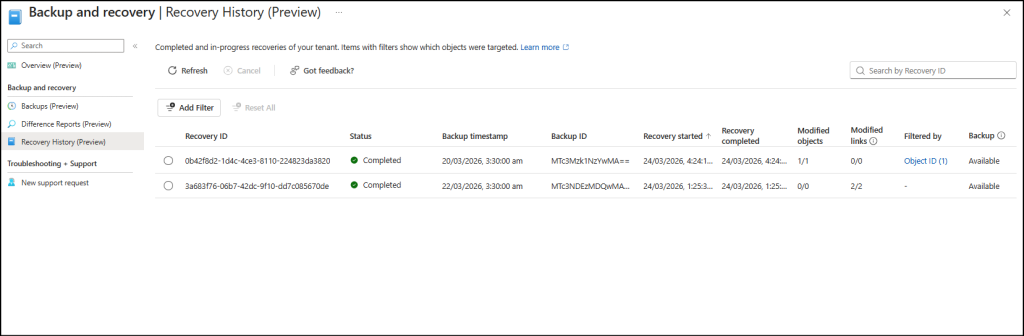
Navigate to Backup and recovery (Preview) in Entra admin center and select Recovery history (Preview).
This page gives you a complete view of all recent recovery operations performed in your tenant along with details like recovery ID, status, modified objects, modified links, filtered by, etc.
If needed, you can cancel an ongoing recovery by selecting the in-progress job and clicking Cancel.
Important Things Admins Should Know About Microsoft Entra Backup
Here are some key things every admin should know about Microsoft Entra Backup and Recovery.
The apps or users without the required privileged roles, even those with other higher privileges, cannot perform recovery. Other users cannot turn off, delete, or modify these recovery settings.
Only soft-deleted or modified objects can be restored. Hard-deleted objects cannot be recovered. To add an extra layer of protection, you can apply protected actions through Conditional Access policies. This ensures that even admins cannot modify, delete, or restore objects marked with protected actions without following the required process.
Objects synced from on-premises directories may be listed in the difference report, but you won’t be able to recover them since their source is Active Directory. For some objects, like users and groups, you can change their source from on-premises to the cloud. Once converted, you can use all Backup and Recovery features on them.
If a user or group is converted to cloud-managed after a backup is taken, restoring from that backup will not change its source of authority back to on-premises Active Directory. However, other supported attribute changes will still be recovered.
It is always a good practice to run a difference report first, review the changes carefully, and then proceed with recovery as recovered objects cannot be rolled back again.
Closing Lines
Microsoft Entra Backup & Recovery may not solve every recovery challenge, but it gives administrators a valuable safety net for recovering critical directory objects when things go wrong. The key is choosing the right backup point and recovery mode carefully, since the wrong choice can lead to extra effort or the loss of legitimate post-backup changes.
And that’s it! We hope this blog helped you understand the importance of Microsoft Entra Backup & Recovery and how it works. Have you tried using this feature yet? Share your thoughts, experiences, or questions in the comments section below. We’d love to hear from you! Stay tuned for more updates.
Blesslin is a Microsoft 365 and Active Directory contributor focused on feature behavior analysis and investigation workflows, helping administrators connect platform changes with operational decisions.