As businesses continue to digitize their operations, data protection has become a top priority. Microsoft SharePoint Online, a cloud-based collaboration and document management solution, offers a built-in Data Loss Prevention (DLP) solution to help safeguard sensitive information. In this article, we’ll discuss SharePoint Online DLP and how it can protect your organization’s sensitive data.
What is SharePoint Online DLP?
Data loss prevention in SharePoint Online is a built-in solution that helps organizations prevent the unauthorized sharing of sensitive information. It works by scanning documents and other content for specific patterns that indicate the presence of sensitive information, such as social security numbers, credit card numbers, and other personal identifiable information (PII). If SharePoint Online detects this type of information, it can take several actions, including blocking the content from being shared or notifying administrators of a potential security breach.
Why SharePoint Online DLP is Important?
DLP in SharePoint Online is important because it helps organizations protect their sensitive information from being shared with unauthorized parties. This is especially critical in industries that are highly regulated, such as healthcare and finance. Microsoft SharePoint Online DLP can help these organizations in the following way.
- DLP Policy for Finance: A financial institution can create a DLP policy to identify and block any sharing of customer financial information, such as credit card numbers or account numbers, within SharePoint Online.
- DLP Policy for HR Department: An HR department can create a DLP policy to identify and block any sharing of employee personal information, such as social security numbers or home addresses, within SharePoint Online.
- DLP Policy for Legal Firm: A legal firm can create a DLP policy to identify and block any sharing of confidential client information, such as case details or privileged communications, within SharePoint Online.
- DLP Policy for Healthcare Organization: Healthcare organizations handle sensitive patient data covered under privacy regulations such as HIPAA (Health Insurance Portability and Accountability Act). DLP in SharePoint Online ensures compliance and prevents accidental or intentional leaks of patient information.
Implementing at least one DLP policy in your environment not only enhances your organization’s data security but also improve your Microsoft Secure Score.
Who Can Create a DLP Policy in Microsoft 365?
Users who are assigned roles such as global administrator, SharePoint administrator, compliance administrator, information protection administrator, security administrator, etc. can create, edit, and delete DLP policies. As admins, you can also add users into specific role groups in the compliance portal and grant them permission to access DLP policies.
License Requirement to Create DLP Policy
Users must be assigned with any one of the following Office 365 licenses to benefit from DLP for SharePoint Online, Exchange Online, and OneDrive for Business.
- Microsoft 365 E5/A5/G5/E3/A3/G3, Microsoft 365 Business Premium, SharePoint Online Plan 2, OneDrive for Business Plan 2, Exchange Online Plan 2
- Office 365 E5/A5/G5/E3/A3/G3
- Microsoft 365 E5/A5/G5/F5 Compliance and F5 Security & Compliance
- Microsoft 365 E5/A5/F5/G5 Information Protection and Governance
Default Office 365 DLP Policy
Microsoft provides a default Office 365 DLP policy that automatically identifies sensitive information such as credit card numbers, content containing source code, content matching U.S HIPAA enhanced template, and content containing intellectual property details whenever shared outside your organization from Exchange, SharePoint Online, and OneDrive. Upon detecting sensitive data, end users are prompted with a recommendation to either remove the data or restricted from sharing.
Note: This default org-wide DLP policy will be in place even before you create your first Microsoft Purview Data Loss Prevention policy and is fully customizable.
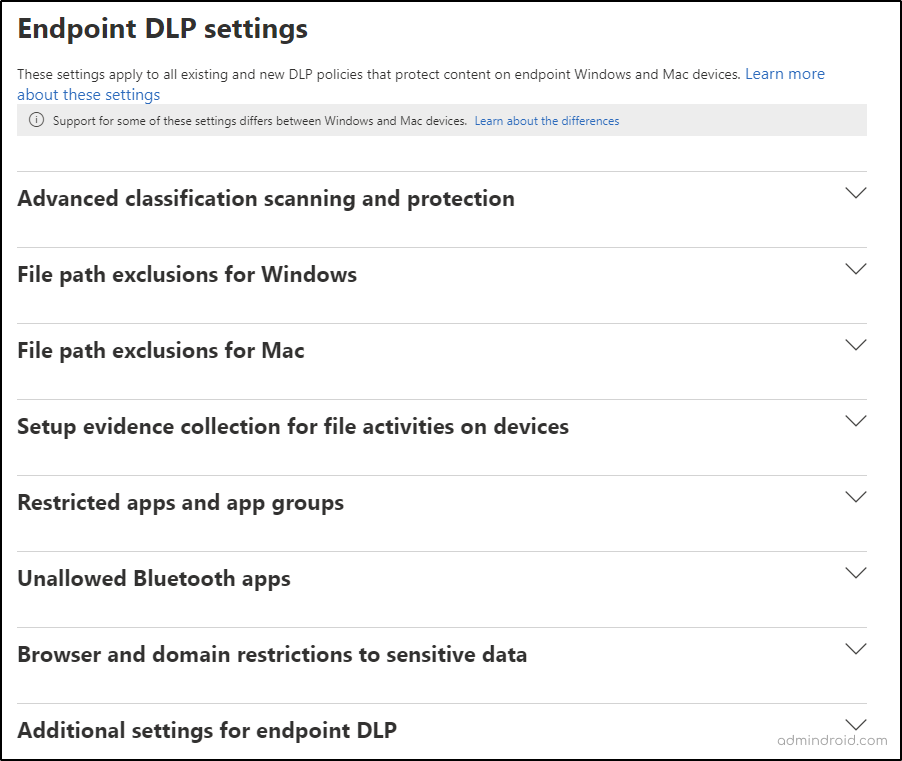
Microsoft 365 Endpoint Data Loss Prevention
Endpoint Data Loss Prevention is a security technology that helps organizations protect their sensitive data stored on Windows 10, Windows 11, and macOS devices. Once devices are enrolled in Microsoft Purview solutions, organizations can use the pre-built Endpoint DLP policy templates to monitor and control all actions taken on sensitive data. This can include actions like blocking access or encrypting data. Below are the license requirements for Endpoint DLP.
- Microsoft 365 E5/A5/G5.
- Microsoft 365 E5/A5/F5/G5 Compliance and F5 Security & Compliance.
- Microsoft 365 E5/A5/F5/G5 Information Protection & Governance.
Configure Data Loss Prevention for SharePoint Online
However, you can create a custom DLP policy tailored to your organization’s requirements using the steps below.
Step 1: Go to the Microsoft Purview compliance portal and navigate the Data loss prevention page under ‘Solutions’.
Step 2: Click on Policies -> Create policy button to create a new policy.
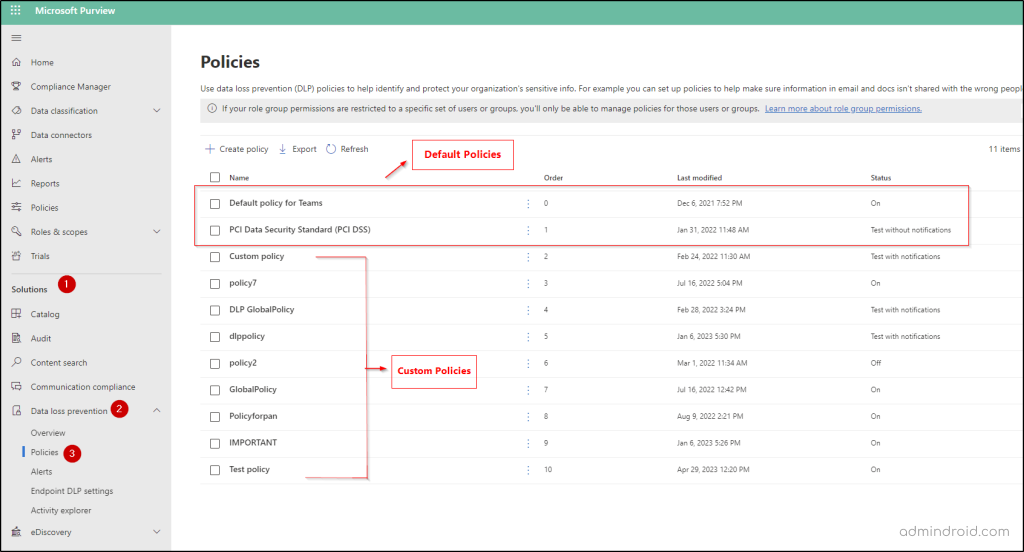
Then, select ‘Custom policy’ from the templates. You can also choose to create a policy from the available Microsoft 365 DLP policy templates based on your requirement. Name your policy and proceed with the next step.
Step 3: If you want to restrict the policy to a specific set of users or groups, you will have to assign admin units that are created in the Azure Active Directory. You can proceed to the next step if you want to assign the policy to all users and groups in your organization.
Note: This feature is currently in preview and requires an E5 license to configure.
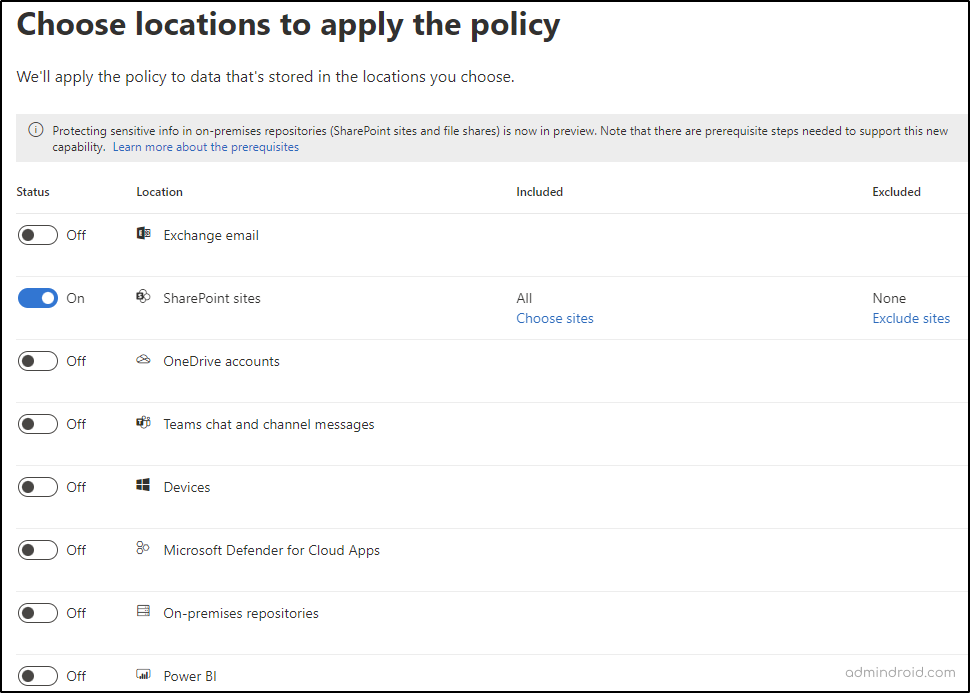
Step 4: Select SharePoint sites from the list of locations and choose any additional locations based on your requirements, such as OneDrive accounts, Exchange email accounts to apply the policy. You can either include/exclude specific accounts, sites, and distribution groups from the policy based on the locations you choose.
Step 5: Then, create a DLP rule by choosing the sensitive information types you want to protect (e.g., credit card numbers, social security numbers, etc.). Here I have selected ‘India Unique Identification Number’.
Step 6: Configure user actions and notifications to protect content when the conditions are met.
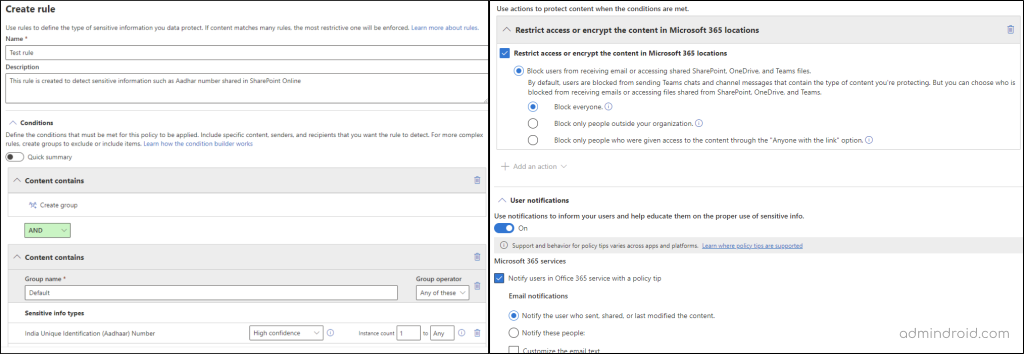
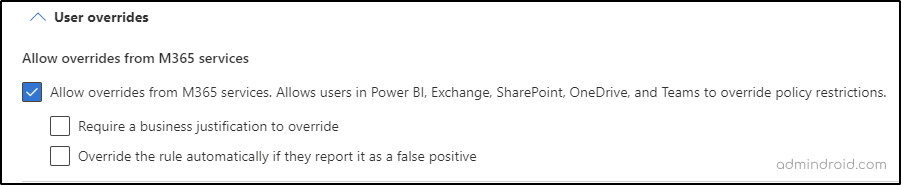
Note: User overrides are a feature within DLP policies that allow individual users to override a DLP policy violation and continue to share sensitive information. Admins can choose between requiring a justification or just allowing the user to override the rule by reporting it as a false positive. However, this is not a recommended practice considering security!
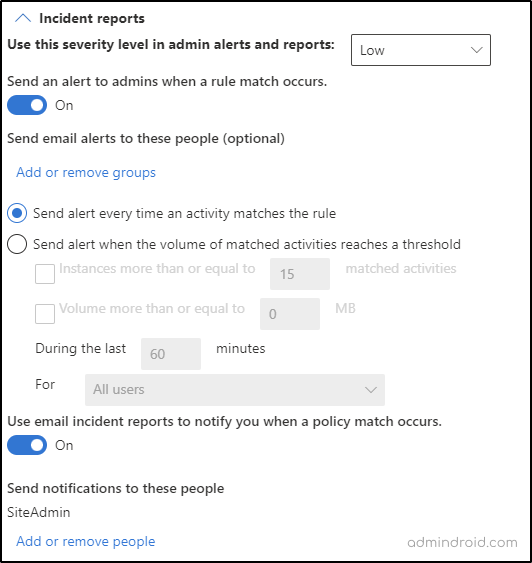
In the incident reports section of the DLP policy, you can configure settings such as the severity level in alerts and reports, the frequency of the reports, and the recipients who should receive the reports.
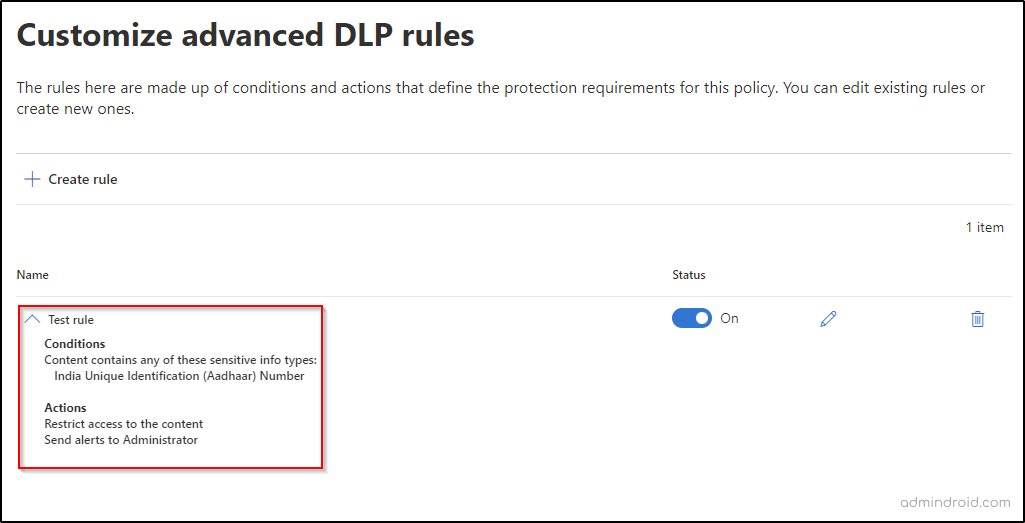
Step 7: Save and publish the policy.
End User Experience
Once the ‘Test rule’ is applied and when the user tries to share a document containing the Indian unique identification number, they can’t share the file, and the following error appears.
“The item is protected by a policy in your organization”
As a result, the document containing the sensitive information can now be shared only with people who have existing access and is restricted from sharing with others.

How Long Does It Take to Apply DLP Policy?
After creating a new DLP policy in SharePoint Online, it’s important to note that the policy may not take effect immediately. In many cases, it can take between 1 to 24 hours for the policy to become fully active and begin enforcing the configured rules.
View Data Loss Prevention Reports
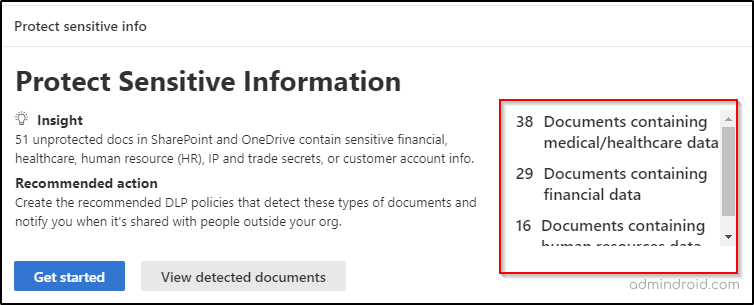
Monitoring DLP reports can help you identify and mitigate potential damage that could result from data breaches or other security incidents. You can get an overview of sensitive information in your organization such as the number of documents containing medical/ health care data, financial data, human resource data by navigating to Microsoft Purview compliance portal –> Solutions -> Data Loss Prevention page.
Along with DLP reports, Microsoft Purview’s Data Security Posture Management (DSPM) feature helps you assess your organization’s overall data security health, detect gaps, and refine your existing DLP and compliance policies.
Manage DLP Alerts
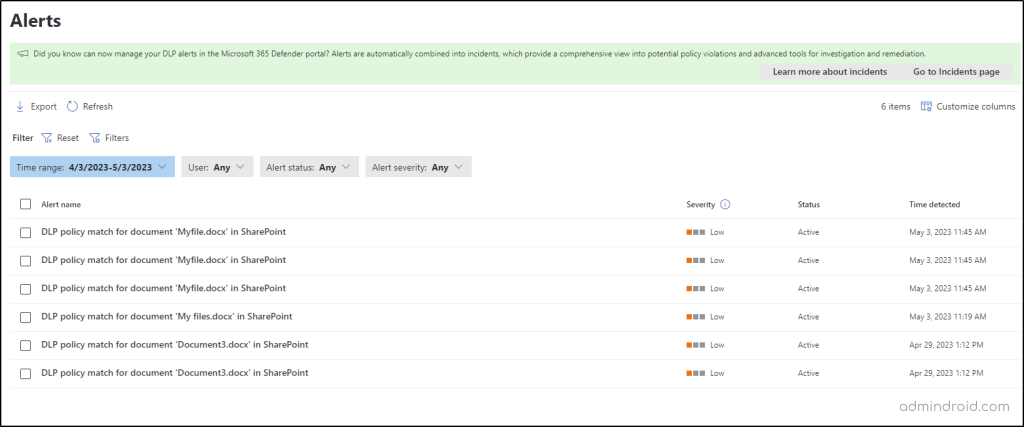
After enabling email alerts, admins can view those email alerts by navigating to Microsoft Purview compliance portal –> Solutions –> Data loss prevention —> Alerts. You can get alert details such as alert name, detected time, severity, and status with filtering options and help admins to know about the DLP policy match detection for documents in SharePoint Online.
Monitor DLP in Activity Explorer
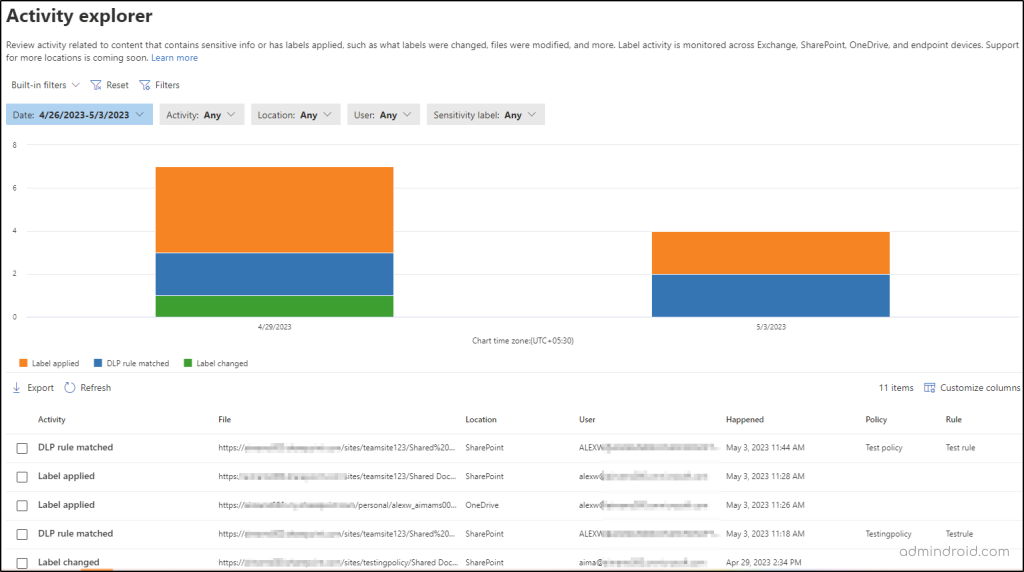
The Activity Explorer tab when navigating through Microsoft Purview compliance portal –> Solutions –> Data loss prevention allows administrators to monitor data loss prevention policy violations, including the date and time of the violation, the user who triggered the policy, and the type of sensitive information that was involved.
This information can help administrators get DLP reports that identify patterns or trends in policy violations and take corrective actions to improve their organization’s data protection measures.
You can also manage DLP using PowerShell, which include Get-DlpDetectionsReport, New-DlpCompliancePolicy, Set-DlpComplianceRule, Get-DlpSiDetectionsReport, Get-DlpDetailReport cmdlets etc.
Points to Remember
- Once a DLP policy is published, admins cannot change the name of the policy. If you need to update the policy name, you will need to create a new policy with the desired name and configure the rules accordingly.
- DLP policies use machine learning to detect sensitive content. Machine learning algorithms identify patterns and characteristics of sensitive information, making it easier to detect and protect sensitive content.
- Microsoft includes built-in SITs for common data like credit cards or SSNs, but you can also create custom SITs and apply them in DLP policies to secure unique business data in SharePoint.
- DLP policies can be integrated with sensitivity labels to classify and label sensitive information, as well as to enforce encryption and other protection measures.
Throughout this discussion, we have explored the concept of SharePoint DLP in detail, including its benefits and the various use cases across different industries, license requirements for creating DLP policies, key features of endpoint DLP, as well as the end user experience. Finally, we have covered the steps involved in configuring DLP policies and leveraging the available reports to monitor them effectively.
I hope this blog will help you gain a solid understanding of SharePoint Online DLP, from the basics all the way up to some interesting facts and tips. If you have any questions or comments, please don’t hesitate to reach out and let us know!


