Microsoft Entra ID Security Defaults are preconfigured baseline security settings that help admins protect user accounts without creating and maintaining their own policies. These protections cover multiple security requirements, including multifactor authentication (MFA), blocking legacy authentication, etc.
Until now, admins had to manage these protections through a single toggle. If a specific protection causes compatibility issues with an application or device, admins may need to disable Security Defaults entirely, leaving other baseline protections disabled as well.
To address this limitation, Microsoft has introduced a private preview experience that splits Security Defaults into 4 individually managed rules. Let’s explore what’s changing, how it affects your tenant, and what admins can do while waiting for access.
Individual Security Defaults Protections in Entra ID
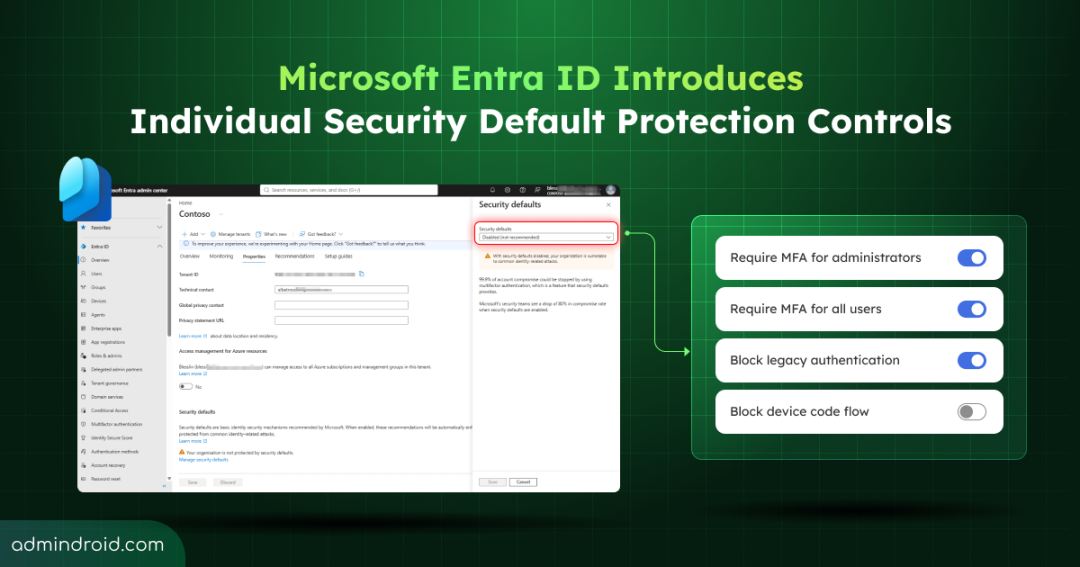
Individual Security Defaults protections split the existing baseline into four Microsoft-managed security rules. Each rule applies a specific security protection to the sign-ins within its scope. Admins can enable or disable each rule independently, allowing them to adjust specific protections. This means they can change one protection without turning off the others.
The four individual Security Defaults rules are:
- Require MFA for administrators: Administrator accounts have elevated access to tenant settings, user accounts, and sensitive resources, making them attractive targets for attackers. Requiring multifactor authentication (MFA) adds another layer of protection if an administrator’s password is compromised.
👉 Admins can review the roles and resources covered by this rule to understand which administrator sign-ins require MFA. - Require MFA for all users: Protecting administrator accounts alone isn’t enough, as compromised user accounts can also expose organizational data. This rule extends MFA requirements to all users within its scope, including administrators. Unlike the original Security Defaults behavior, which required MFA when necessary, this rule requires MFA for every sign-in it covers.
👉 Admins should check whether users have registered authentication methods, as those who have not may be prompted to set them up during sign-in. - Block legacy authentication: Legacy authentication protocols often lack modern security features such as MFA, making accounts more vulnerable to password-based attacks. This rule blocks sign-ins using legacy protocols, such as basic authentication in older mail clients and applications.
👉 Admins should identify applications, mail clients, and devices that rely on legacy protocols and plan their transition to modern authentication. - Block device code flow: Device code flow allows users to sign in to an application or device by entering a code in a separate browser. While useful for devices with limited input options, attackers can exploit this process by tricking users into entering a code that grants them access to their accounts.
👉 Admins should identify applications and devices that depend on device flow and determine whether alternative sign-in methods are available.
Important: Admins can enable or disable individual rules, but they cannot edit the conditions or settings that determine how each rule applies as they are Microsoft-managed.
Rollout of Individual Security Defaults Protections
Microsoft is rolling out the updated controls in phases. The experience is currently in private preview for selected Microsoft Entra ID Free tenants. Eligible tenants will receive an invitation link, and no additional licenses are required to use these protections. Availability may vary during the preview.
Security Defaults and Conditional Access Can Now Work Together
A significant impact of individual security default protection is that admins no longer need to disable Security Defaults for creating custom Conditional Access policies. Previously, admins had to disable Security Defaults before creating custom Conditional Access policies. With individually managed Security Defaults protections, they can retain the Microsoft-managed security baseline while creating custom policies for specific access requirements, such as device compliance or location-based access controls.
However, enabling custom policies alongside Security Defaults does not mean one can override the other. At sign-in, users must satisfy every applicable Security Defaults rule and Conditional Access policy. This means admins must consider how these controls interact before making changes.
This has two important implications for admins:
- Custom policies do not override baseline requirements: A custom Conditional Access policy does not cancel a requirement enforced by an applicable Security Defaults rule.
- Review the scope before disabling a rule: Check which users, roles, and resources are covered to understand which sign-ins may lose a particular safeguard.
In addition, the management experience differs between tenants based on their Microsoft Entra ID license:
- Microsoft Entra ID Free: Admins must manage individual protections on the Security Defaults page in the Microsoft Entra admin center.
- Microsoft Entra ID P1 or P2: Admins manage the Microsoft-managed Security Defaults policy plan within Conditional Access, alongside their custom policies.
With these differences in mind, let’s look at how to configure individual Security Defaults protections.
How to Manage Individual Security Defaults Protections in Microsoft Entra ID?
Before changing any Security Defaults protection, make sure you have the required Microsoft Entra role. You need a Conditional Access Administrator, Security Administrator, or Global Administrator role to change protections, while Global Reader and Security Reader roles allow view-only access.
Once you have the required role and access to a tenant included in the private preview, follow these steps:
- Sign in to the Microsoft Entra admin center and switch to the free tenant enabled for your private preview.
- Open the preview access link included in the private preview invitation from Microsoft. Use that link to access the updated Security Defaults experience in your enrolled tenant.
- On the Security Defaults page, select the protection you want to manage.
- Review the protection’s description, current state, and the users, roles, or resources it covers.
- Turn the protection on or off and follow the confirmation prompt. If you turn it off, provide the requested feedback.
- Once done, verify that the updated state is shown on the page.
Each rule can be enabled or disabled independently, and the change affects all users covered by that rule. For example, disabling the administrator MFA rule does not exempt admins from MFA if the all-users MFA rule still requires it.
Final Thoughts
Individual Security Defaults protections give admins more flexibility to manage baseline security. Since these rules are Microsoft-managed, admins can manage them individually without having to recreate them. Microsoft recommends keeping these protections enabled unless there is a clear reason to turn them off, as doing so reduces security for the sign-ins they cover.
As Microsoft expands the preview, we’ll keep you updated on availability and further changes. We hope this blog helps you manage individual Security Defaults protections. If you have any questions or experiences to share, let us know in the comments. Stay tuned for more updates!