In today’s ever-changing landscape of cyber threats 🌎, multi-factor authentication serves as a digital shield against security vulnerabilities. We’ve got choices like MS Authenticator, FIDO2 keys, SMS MFA, and more to add extra layers of protection. Yet, numerous users favor the accessibility ease of weaker authentication methods like SMS and voice calls for daily authentication processes, even though these may not be as robust! This convenience often leads users to make them their default MFA option. Sadly, not many realize the hidden dangers like SIM swapping attacks, tricky Man-in-the-Middle (MitM) attacks, and other exploits😟.
However, even though users can move to a safer zone by simply changing their default MFA method, some fail to set it up. But that’s not the case anymore! Microsoft has introduced a new UI for admins to make the change right away💯. Admins can change the default MFA method of users in MS Entra ID (Azure AD). Let’s explore how administrators can switch the user’s default MFA method in detail.
Microsoft Dumps Weaker MFA with System-preferred MFA
Microsoft has recently enabled system-preferred MFA by default, which makes user authenticate via secured MFA method.
With the system-preferred MFA enabled, Microsoft identifies the most secure method among the registered methods and prompts it for users during their sign-in process, irrespective of the default MFA method. Though the system-preferred MFA sets the secure method as default, it may not align with administrators’ preferences of setting a specific method as the default MFA.
So, admins cannot rely on the system-preferred MFA to set their desired MFA method. However, there are some other ways to set the default MFA method of users as an admin. Let’s explore it now!
How do Admins Change the default MFA Method for Microsoft 365 Users?
Here are the five methods that administrators can utilize to change the default MFA method.
- Manage default MFA method for users in Microsoft Entra ID
- Configure default MFA method via Microsoft Graph API
- Remove Weaker MFA Authentication Methods for Microsoft 365 users
- Push Users to Setup MS Authenticator App as Default MFA Method
- Change the default MFA method for all M365 users using PowerShell
1. Manage Default MFA Method for Users in Microsoft Entra ID
Previously, admins were unable to change the default sign-in method in the UI. But now, Microsoft has introduced a preview setting that lets Microsoft 365 admins change the default MFA authentication method using Microsoft Entra ID. This setting is ideal for admins who want to help users move from not-so-safe MFA methods to a stronger choice as the default. So, admins can follow the steps below to update the default MFA for all the users individually. Also, admins should disable system-preferred MFA in the tenant before delving into the steps below.
- Navigate to Microsoft Entra admin center → Users → All Users.
- Choose the specific user whose default MFA method needs to be modified.
- Under the respective user’s page, click ‘Authentication methods’ from the left tab.
- Now, click the edit icon near the ‘Default sign in method’ option.
- Then, choose the preferred MFA method from the drop-down box and save the changes.
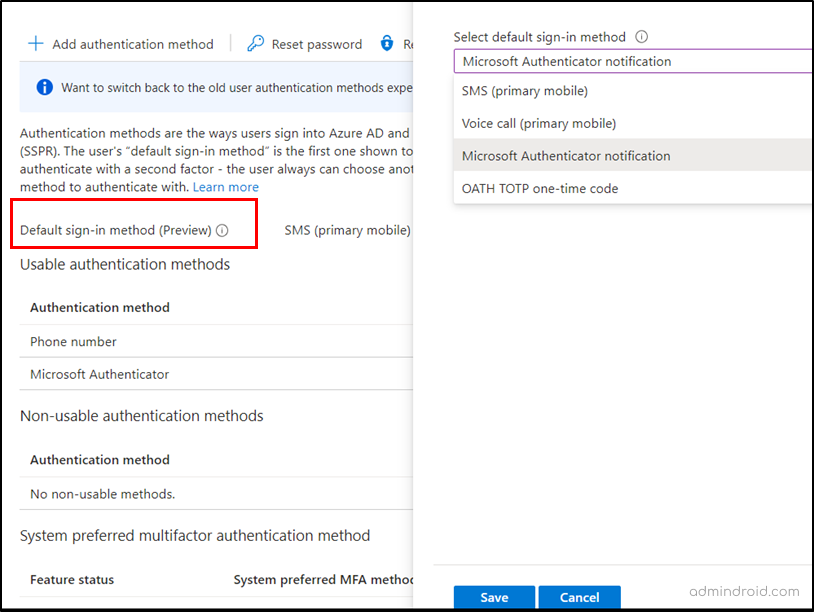
Once configured, the specified method will automatically become the default multi-factor authentication method for that user and will be prompted during the sign-in process.
2. Configure Default MFA Method Using Microsoft Graph API
Admins can make use of Microsoft Graph Explorer to update the default MFA method for a single user. To do so, admins need to use the Graph API below.
Note: The below API currently supports under ‘beta’ version alone.
| HTTP Method | API Endpoint |
| PATCH | https://graph.microsoft.com/beta/users/<Respective UserId>/authentication/signInPreferences |
Admins should specify the respective user ID in the API and grant consent for “UserAuthenticationMethod.ReadWrite.All” and “UserAuthenticationMethod.ReadWrite” permissions in MS Graph Explorer. After completing the permission setting, admins can run the API with the JSON format given below.
JSON Format:
|
1 2 3 |
{ "userPreferredMethodForSecondaryAuthentication": "<MFAMethod>" } |
Upon executing the API with this JSON format, a “No Content – 204” response will appear, indicating the successful implementation of the changes.
3. Remove Weaker MFA Authentication Methods for Microsoft 365 Users
Even though users are encouraged to use the secure MFA method as their first choice, they’re still allowed to use alternative MFA methods during sign-ins! This opens the door for users to sign in using less secure MFA options, creating a potential vulnerability that attackers could exploit to compromise accounts
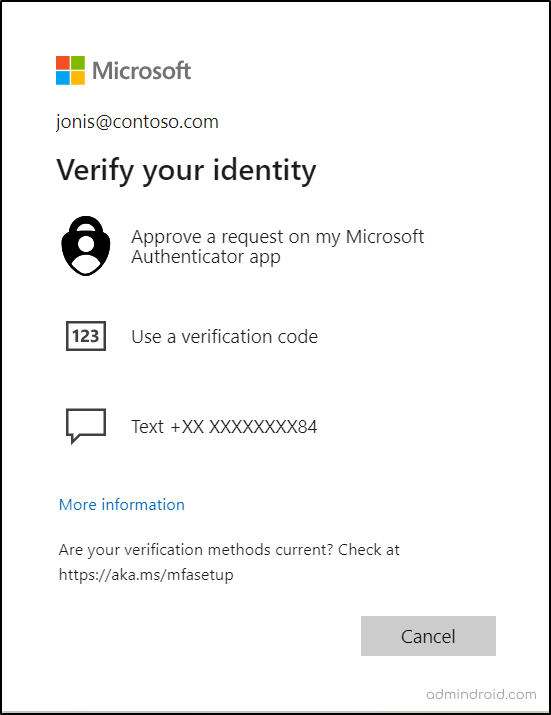
To avoid this, admins can remove or delete other multi-factor authentication methods for those users in the Azure portal. If done so, users will authenticate via only one secure method. Admins can follow the navigation below to delete the MFA methods in Azure AD.
Microsoft Entra admin center → Users → All Users → select the respective user → Authentication methods → three dots (…) in the respective MFA method → Delete → Yes

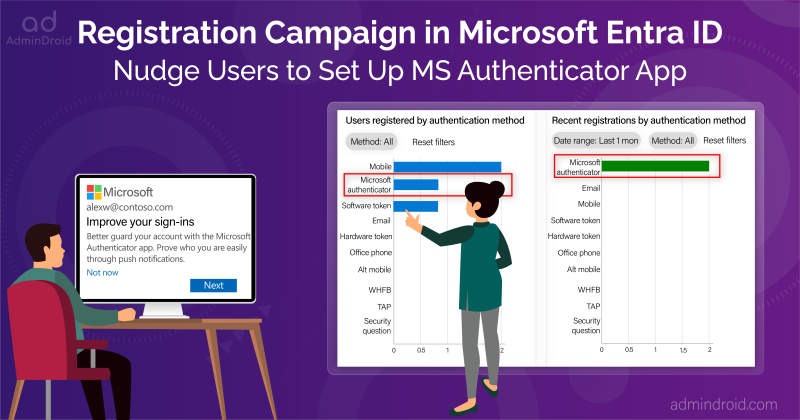
4. Use Registration Campaign to Setup MS Authenticator as Default MFA Method
Out of 10 in 100, some users are still using SMS & voice calls for MFA, and this is where the real risk unfolds! For example, if an attacker steals a user’s SIM card, they can simply perform MFA and start doing malicious actions in the organization. So, it’s the admin’s responsibility to make them authenticate via secure MFA methods. In such cases, admins can start a registration campaign in Microsoft Entra ID.
The registration campaign works by nudging the users to set up the robust Authenticator app; once done, their default MFA method will be automatically switched to MS Authenticator.
This approach paves the way for the organization to let attackers back off from MFA attacks, as the Authenticator app has now come with new enhancements like MFA number matching, risky notification suppression, geo-graphic location display, and more.
5. Change the Default MFA Method for All Users Using PowerShell
Updating the default MFA for all the users ensures that users authenticate through a secure method, leaving no space for risky sign-ins. However, it is difficult to change the default method one by one for all the users using UI. So, admins can change the default multi-factor authentication method using PowerShell for all the users at a time. To do so, admins need to install Microsoft Graph PowerShell module
Then, admins can use the following PowerShell script to update users’ default multi-factor authentication method.
|
1 2 3 4 5 6 7 8 9 10 11 12 13 14 15 16 17 18 19 20 21 |
$preferredMethod = "<MFAMethod>" # Replace with the desired MFA method code $allUsers = Get-MgUser -All $bodyJson = @{ userPreferredMethodForSecondaryAuthentication = $preferredMethod } | ConvertTo-Json $updatedUsers = @(); $failedUsers = @() $allUsers | ForEach-Object { $uri="https://graph.microsoft.com/beta/users/$($_.Id)/authentication/signInPreferences" $result = [PSCustomObject]@{ UPN = $_.UserPrincipalName } try { Invoke-MgGraphRequest -Uri $uri -Body $bodyJson -Method Patch -ErrorAction Stop $updatedUsers += $result.UPN } catch { $failedUsers += $result.UPN } } $outputData = [PSCustomObject]@{ "Default MFA Authentication - Successfully Updated Users" = $updatedUsers -join "," "Default MFA Authentication - Failed Users" = $failedUsers -join "," } $outputData | Export-Csv -Path <CSVFilePath> -NoTypeInformation # Replace with the respective file path |
Admins need to specify the preferred MFA method, such as ‘sms,’ ‘push,’ ‘oath,’ ‘voiceMobile,’ and others in the script. They should also provide the file path in the respective place inside the script. For this script to be effective, users must have already registered the preferred MFA method you have chosen. Otherwise, it won’t have any impact on users who haven’t set up the specified MFA for their accounts.
Once the script completes its run successfully, it will generate an “output report” detailing the success rate of the process.
- Default MFA Authentication – Successfully Updated Users: This column showcases the users for whom the default MFA method has been successfully updated.
- Default MFA Authentication – Failed Users: In this column, you will find the usernames of individuals whose default MFA method couldn’t be updated successfully. This is because they might not have registered the specified MFA method in Microsoft Entra ID. Overall, this report will help admins identify users using less secure methods and then prioritize the implementation of a strong authentication through a targeted registration campaign.
Sample Report:

How to Change Default Two-step Verification Setting in Microsoft 365?
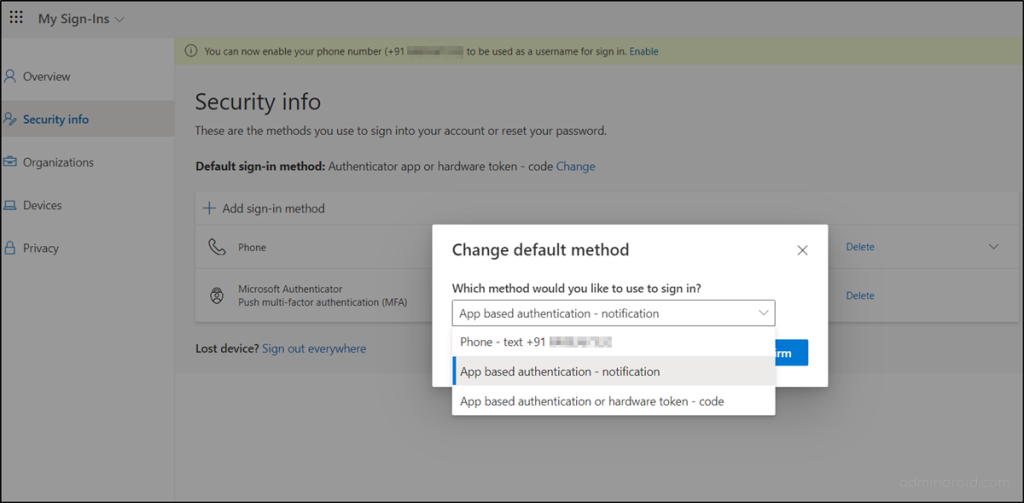
Previously, it was possible only for the respective users to change their default MFA method. Let’s see how users can change their default MFA method of their own.
- Users need to log in to their Microsoft account via https://myaccount.microsoft.com.
- After that, they have to select the “Update Info” option from the “Security Info” section.
- Now, they need to click the “change” option that appears at the top.
- Then, the user can select any of the MFA methods from the drop-down box.
Simplify Microsoft Entra MFA Monitoring with AdminDroid
To do the above steps, it’s important to first identify those who are still using the less secure default MFA option. In that way, admins can move weak MFA users towards a secure alternative. However, the process of scouring through every tab in Entra ID is a hassle process!
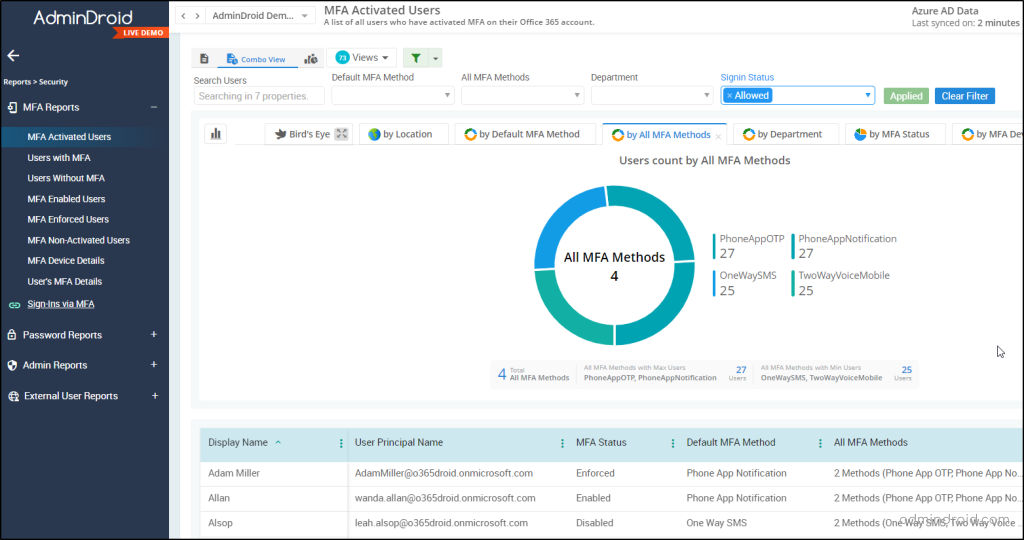
But there’s no need to worry! AdminDroid comes to the rescue. The “MFA Activated Users” report within AdminDroid offers consolidated information about the users’ default MFA method under a single roof. This report not only provides insights into the default MFA method but also offers details on other registered MFA methods, the MFA status of users, and more crucial MFA details.
With AdminDroid, there’s no need to constantly switch between tabs in Microsoft Entra ID. We’ve streamlined the process for you!
AdminDroid offers not just the MFA report we mentioned earlier, but a wide range of detailed MFA reports, including:
- MFA enabled users
- MFA disabled users
- Users without MFA
- Device details of MFA-enabled users
- Users failed to pass the MFA requirement
- MFA-configured CA policies
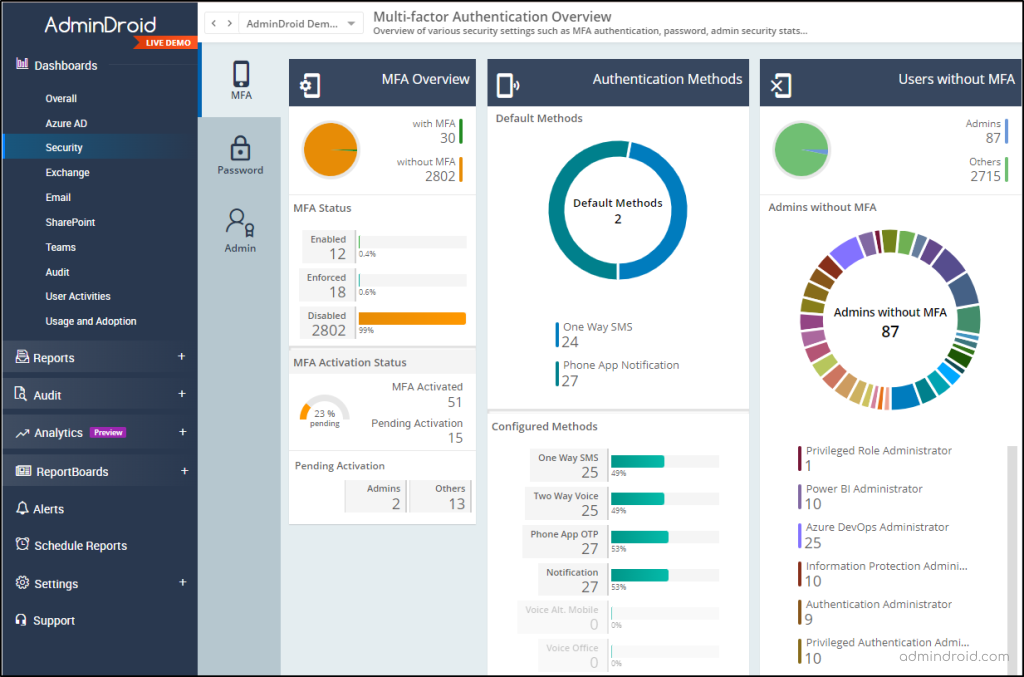
Also, AdminDroid’s exclusive MFA dashboard provides valuable insights into default MFA methods, configured MFA methods, MFA activation status, and more. It is now easier than ever to discover users without MFA or users with MFA disabled in AdminDroid! Moreover, the ‘admin MFA status dashboard‘ provides a clear visual representation of admins’ MFA status, breaking down the counts of MFA-enabled, MFA-disabled, and enforced administrators. Your MFA management tasks just got a whole lot easier and more efficient!
By the way, don’t end up with MFA reports and dashboards alone. Still AdminDroid has more to offer! The AdminDroid Microsoft 365 reporting tool offers insights into all Microsoft 365 resources, including Exchange Online, OneDrive, SharePoint, Teams, and more. Also, AdminDroid’s versatile functionality makes it an ideal tool for you to effectively manage your Office 365 environment. Let’s see how the functionalities below drag you to go with AdminDroid.
- Advanced Scheduling: This feature automates report delivery via email, saving you from manual distribution.
- Enriched Filters: You can filter the desired reports in AdminDroid by applying filters to get only the information that’s relevant to your needs.
- Instant Alerts: Use AdminDroid alerts and create alerts to receive real-time notifications for any risky events.
Still waiting? Download AdminDroid for effective Microsoft 365 management.
I hope this blog helps you to update user’s default method as an admin effectively. Furthermore, if you have any questions or require additional assistance, don’t hesitate to reach out to us in the comments section below.


