When securing admin accounts, it’s essential to plan recovery steps to regain access in case of unexpected situations. While break-glass accounts are a Microsoft-recommended best practice, relying on them alone may not always be reliable. Despite being excluded from Conditional Access policies, unexpected issues—like accidental deletions, incomplete exclusions, or MFA misconfigurations—can still make them unusable.
That’s why setting up an emergency access application in Microsoft Entra adds a critical second layer to your recovery strategy. It uses non-interactive sign-ins and helps restore access when user-based recovery fails. Every tenant deserves this safety net.
In this blog, we’ll walk you through the steps to configure a break glass access application in Microsoft Entra for admin recovery during account lockout scenarios.
Break Glass Account vs. Break Glass Application
| Break Glass Account | Break Glass Application |
| A highly privileged user account configured for emergency access when all other admin accounts are locked. | A workload identity in Microsoft Entra ID configured with elevated permissions, such as global admin privileges. |
| Interactive sign-in with user account that requires often MFA. | Non-interactive sign-in to the app using certificate-based authentication ideal for emergency operations. |
| It can be blocked by Conditional Access misconfigurations or MFA failures. | Typically, not affected by CA policies for users, offering a more stable recovery path. |
| Risk of being deleted or disabled due to inactivity. | Stays active as long as the app and its certificate are valid. |
| It requires manual login to access the admin portal or resources. | It can be executed via scripts/API calls for recovery tasks like modifying policies or user settings. |
| ⚠️ Important Security Note: Be more cautious with assigning Application Administrator and Cloud Application Administrator roles in your tenant. These roles are considered privileged, because users in this role can add, manage, and configure service principals & app registrations. Which allows them to add credentials to existing applications including highly privileged ones like break glass app. This means they could misuse the app and gain Global Admin level access. To stay away from this kind of privilege escalation risk, avoid assigning these roles broadly and never assign them to users who don’t absolutely need it. |
Why and When Use Break Glass Access Application in Microsoft 365?
- Admin Account Lockouts: When all admin accounts are inaccessible due to compromised accounts, or account lockouts.
- Misconfigured Policies: If Conditional Access policies or Privileged Identity Management (PIM) settings accidentally block or hold the emergency access accounts to access the Microsoft 365 services.
- MFA Outages: During widespread multi-factor authentication failures, where admins can’t pass the second-step verification, this app can bypass the issue and restore access.
- Security Incidents: During a security breach like a ransomware attack or compromised admin credentials—where you need to swiftly regain control and mitigate damage.
- System Failures or Outages: When normal authentication methods fail due to infrastructure issues, requiring a reliable fallback to restore access.
- Single device reliance: Admins might have their Microsoft Entra ID accounts and emergency access accounts tied to specific devices. If that device is lost, stolen or malfunctions, the broken glass access app can resolve this type of lockout.
Security Practices for Emergency Access Application in Entra
- Store app id and certificate thumbprint safely, just like account credentials.
- Regularly review the application’s certificates to stay ahead of expiration issues.
- Follow common guidelines to secure applications like break glass access app to prevent unauthorized usage and prevent risk of attacker persistence.
- Always maintain at least two well-secured break glass accounts with best practices as recommended by Microsoft.
How to Create Break Glass Access Application in Microsoft Entra
You can follow the steps below to create the emergency access application in Entra to perform recovery steps without interactive login.
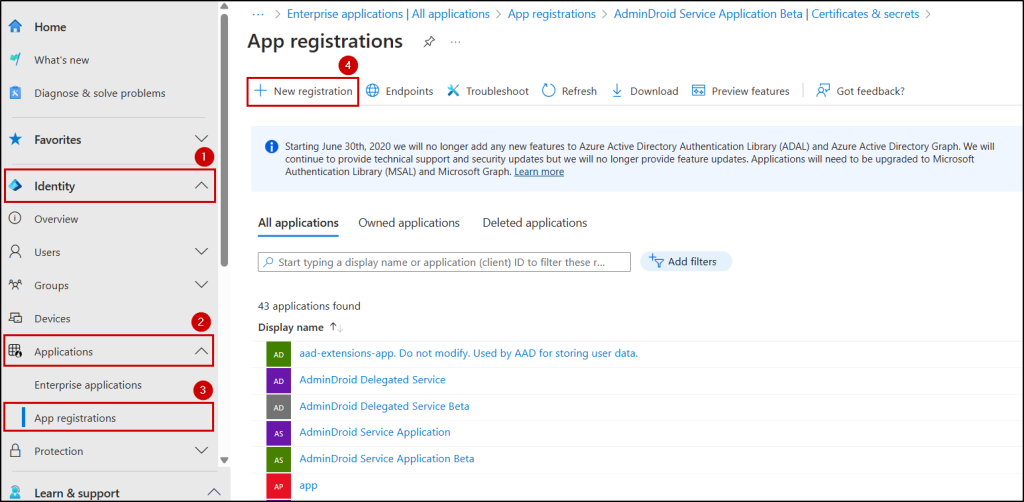
- Login to Microsoft Entra admin center and navigate to Identity -> Applications –> App registrations. Click New registration.
- In the Register an application page, set the following values.
- Enter Name for your application. Don’t use unfamiliar names or names that indicate high privilege access to avoid attention from attackers in case any security break scenarios.
- Specify who can access the application through Supported account types and set this value as Accounts in this organizational directory only.
- Leave the Redirect URI blank and click Register to complete the initial app registration.
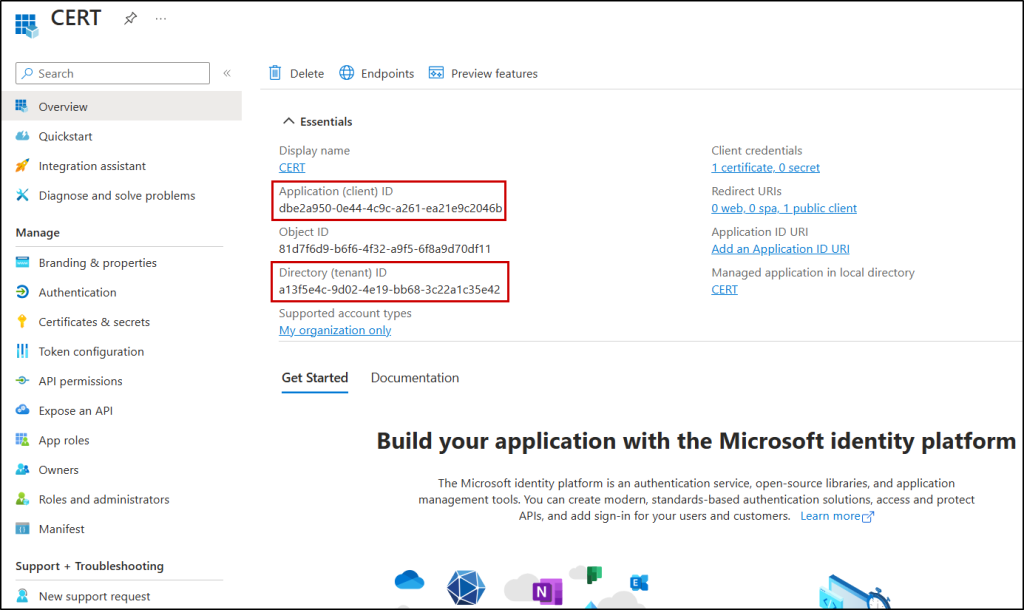
- When registration finishes, the Entra ID displays the app on the All applications tab on App registrations page. Now click on the registered app, then copy and save the Client ID and Tenant ID for later use.
- Configure permissions for the app:
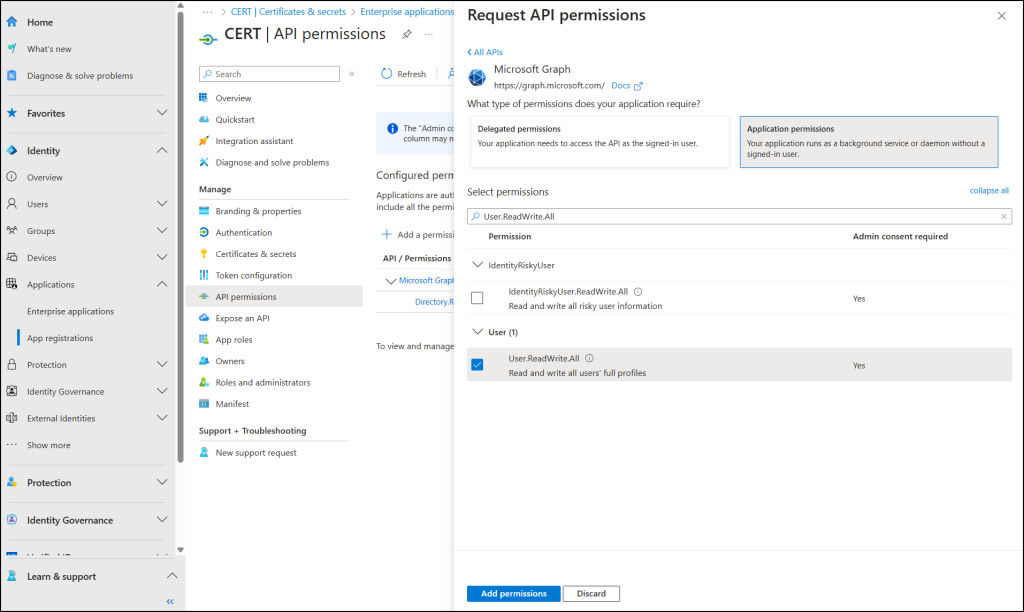
- Go to API permissions under Manage.
- Remove the default permission User.Read (Delegated type), which is not needed.
- The application should be assigned the following high-privilege Microsoft Graph application permissions:
- User.ReadWrite.All – To manage user accounts and details.
- Directory.ReadWrite.All – To read and update directory data.
- Policy.Read.All – To view details of Conditional Access policies.
- Policy.ReadWrite.ConditionalAccess – To modify Conditional Access policies.
- RoleManagement.ReadWrite.Directory – To assign or remove admin roles.
- UserAuthenticationMethod.ReadWrite.All – To reset or change user authentication methods.
- These permissions are essential for this app to perform critical recovery actions such as modifying users, updating Conditional Access policies, managing authentication methods, and reassigning roles during emergency situations.
- Grant admin consent in app registration: Select the ‘Grant admin consent for <domain>’ button, then select Yes to grant admin consent for the configured permissions.

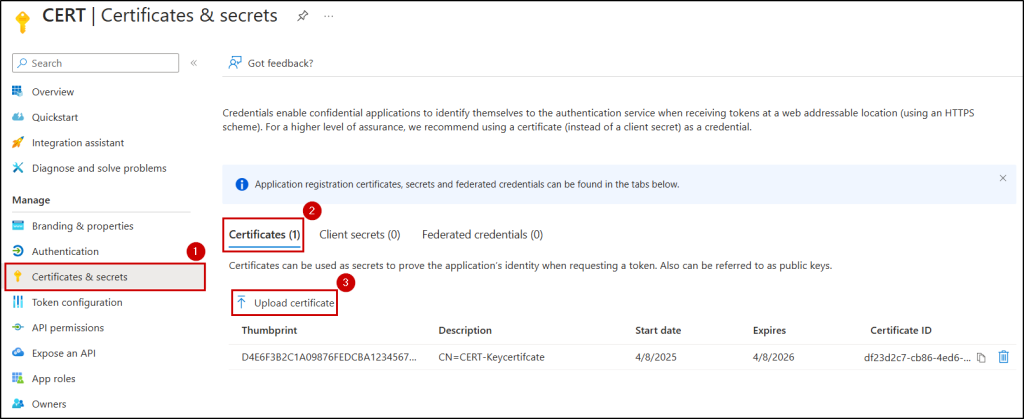
- Add certificate to Azure app registration:
- Certificate must be used to sign-in interactively. Based on your flexibility, you can obtain one from a certificate authority (CA) or create a self-signed certificate using PowerShell.
- Select Certificates & secrets under Manage. In the Certificates tab, select the Upload certificate button. Browse to your certificate and select Add.
- Now, copy and save the Thumbprint of the certificate for later use.
- To connect with the break glass application, you need to use the following connection cmdlet by replacing appropriate values in the place holders.
|
1 |
Connect-MgGraph -ClientId <Client ID> -TenantId <Tenant ID> -CertificateThumbprint <Thumbprint> |
Note: User-targeted policy misconfigurations typically don’t affect service principal access. But if your tenant uses policies that restrict service principals based on location or risk level, it will affect this app access functionality.
Monitor Entra Break Glass Application Operations
Microsoft Entra break glass apps hold high-privilege permissions. Any unauthorized changes could cause security risks to the organization. Tracking when and why the app was used helps validate emergency access.
You can monitor the break glass application sign-in activities and operations performed through
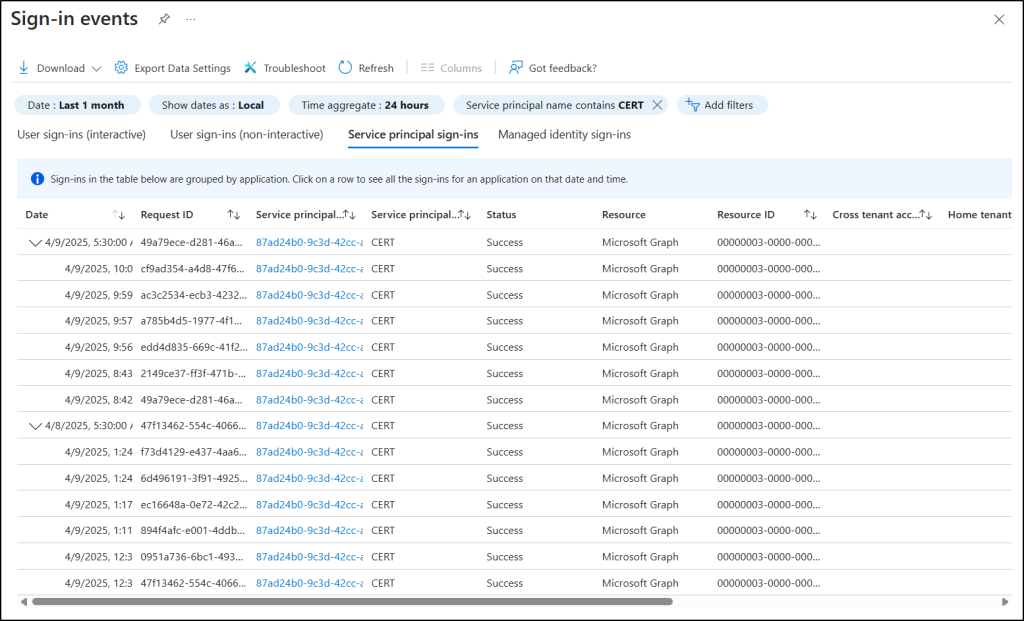
Track Break Glass App sign-in Through Entra Sign-in Logs
- Navigate to the Sign-in logs under Identity -> Show more -> Monitoring & health in Entra admin center.
- Now, click on the Date filter, select Last 1 month, and hit Apply.
- Next, go to Service principal sign-ins tab, click Add filters and choose Service principal name, then hit Apply.
- Finally, enter the break glass app name and click Apply to view all the sign-in activities of emergency access application from last 30 days.
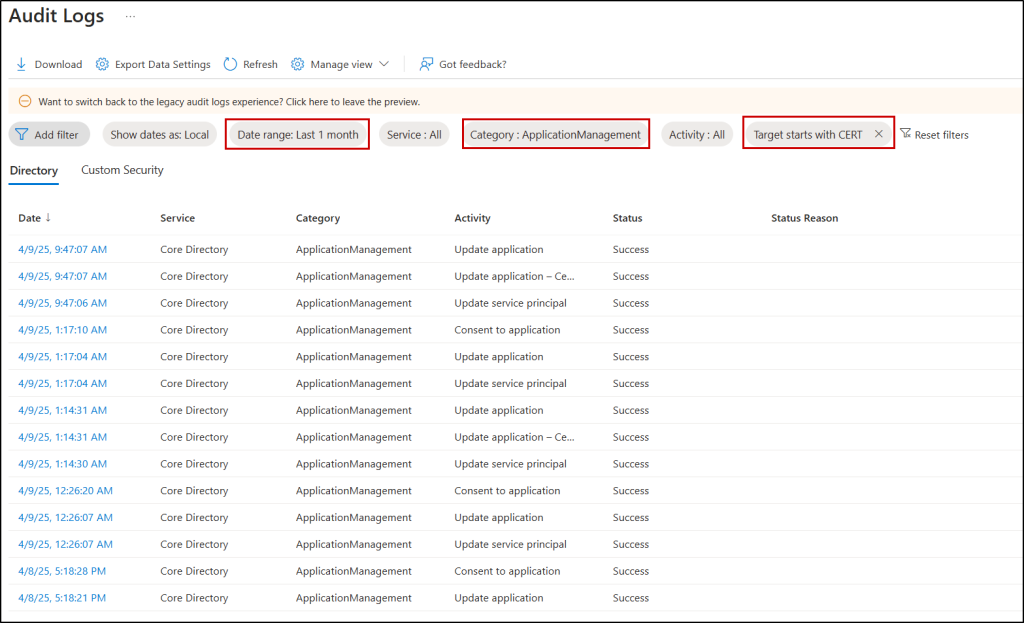
Monitor Break Glass App Operations Through Entra Audit Logs
You can use the Entra audit log to track actions performed on the break-glass application, such as policy changes, authentication resets, or permission updates. This helps ensure the emergency access app is not being misused.
- Navigate to the Audit logs under Identity -> Show more -> Monitoring & health in Entra admin center.
- Click on the Date range filter, select Last 1 month, and hit Apply.
- Select Category filter and choose ApplicationManagement from the drop-down list, then hit Apply.
- Next, select Add filters. Click Target from the ‘Filter’ drop-down list and enter break glass application name in the ‘Value’ field, then hit Apply.
- Now you can view all the operations performed on the emergency access application from the last 30 days.
Implementing a break glass access application in Entra ID is an essential work around for disaster recovery and incident response. But it’s equally important to secure it against misuse. Being prepared isn’t just about having a plan—it’s about maintaining it. How are you strengthening your recovery path in Microsoft Entra ID? Share your approach in the comments!


