Microsoft Teams has become a go-to platform for communication and collaboration in many organizations. It offers a variety of features that help teams work together seamlessly. To improve collaboration and avoid excessive team creation, Microsoft Teams shared channel has been introduced. It allows users from both inside and outside the organization to collaborate in a channel without the need to add them to the respective team. As we all know, information barriers can be applied to prevent communication between any two identities across Microsoft 365 like email, Microsoft Teams, SharePoint Online, and OneDrive.
In this blog post, we will explore how the information barrier policies impact communication on shared channels and how they can be used together to enhance secured collaboration within your organization.
What is a Shared Channel in Teams?
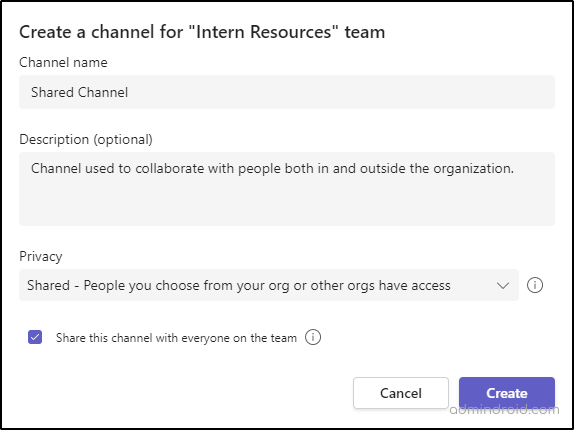
Shared channels (Teams Connect) are collaboration spaces where we can invite people to a channel who are not a part of the team. People outside the organization can also be invited without having to add them to a team. It is enabled by default for all organizations. Shared channels can be set up between different organizations that have established an Azure B2B collaboration in Microsoft Teams.
What is an Information Barrier?
Information barriers can be used to create boundaries between different users, groups, departments, or teams within an organization to ensure that sensitive information of a specific team or department is not shared with users in other departments.
License Requirement for Information Barriers
To create an information barrier policy, you must be assigned with any one of the following licenses.
- Microsoft 365 E5/A5 subscription
- Office 365 E5/A5/A3/A1 subscription
- Office 365 Advanced Compliance add-on
- Microsoft 365 E3/A3/A1 subscription + the Microsoft 365 E5/A5 Compliance add-on
- Microsoft 365 E3/A3/A1 subscription + the Microsoft 365 E5/A5 Insider Risk Management add-on
Prerequisites for Creating an IB Policy
To manage IB policies, you need to be assigned one of the following roles.
- Microsoft 365 global administrator
- Office 365 global administrator
- Compliance administrator
- IB Compliance Management
How to Create an Information Barrier Policy?
To create an information policy, you must first create information segments. Segments are sets of groups and users that are used as attributes for defining an information barrier policy. To create an IB segment, follow the steps given below.
Step 1: Navigate to the Microsoft Purview Compliance portal.
Step 2: Select ‘Segments’ from the Information barriers dropdown. Create two segments by giving an appropriate name.
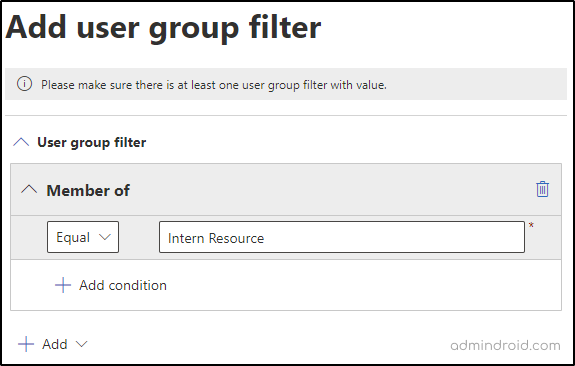
Step 3: Then, add ‘User group filter’ by defining required attributes.
Step 4: Review your settings and then ‘Submit’.
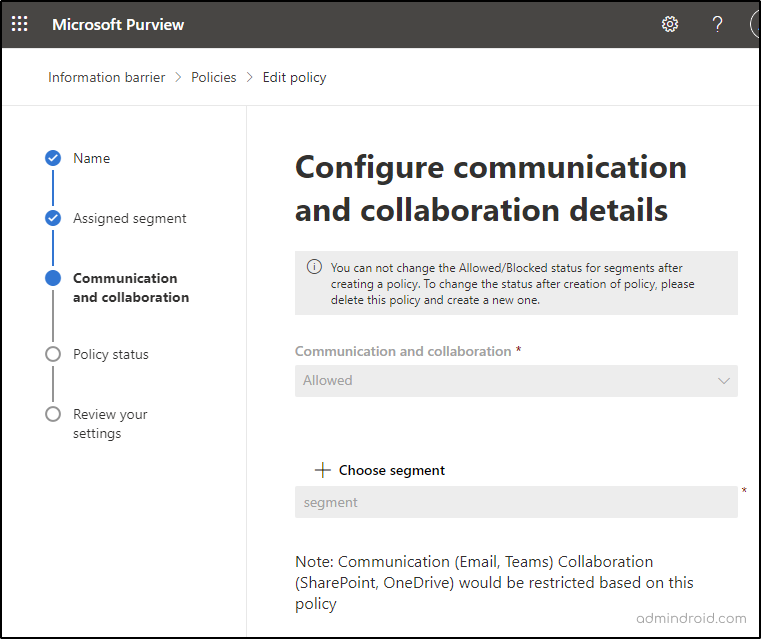
Step 5: Now, create two policies for allowing/blocking communication between the segments. That is one for preventing communication from segment A to B and another one from segment B to A. Otherwise, you can’t successfully apply the policy.
Note: You can’t edit the ‘allow or block’ status once you create an IB policy. You need to delete the policy and create a new one for changing the status.
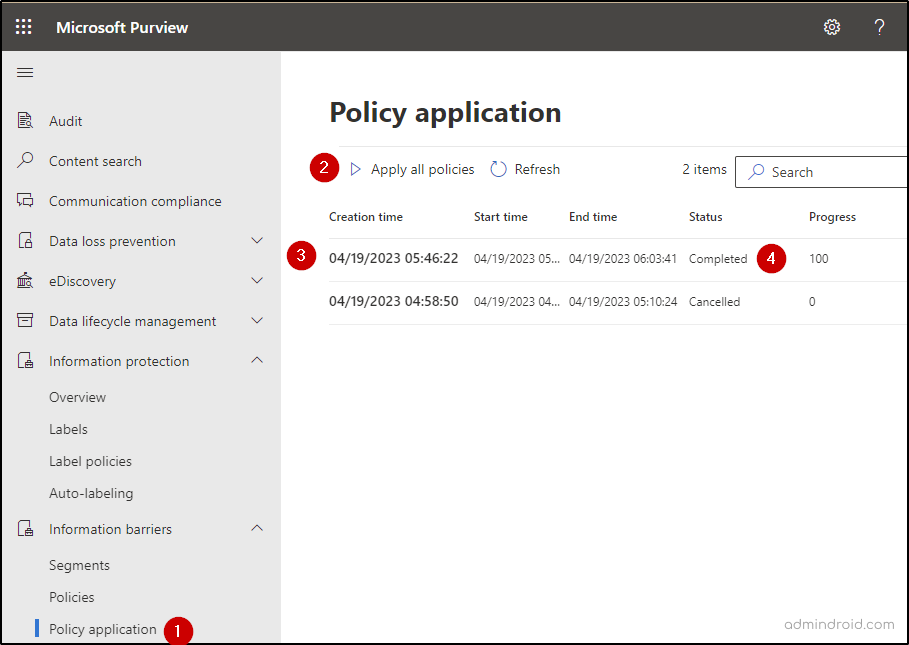
Step 6: The final step is Policy application. Select ‘Apply all policies’ to apply the configured policy to the organization and wait for 30 mins for the policy application to start.
There are a few useful PowerShell cmdlets that assist you in managing the Information barriers policy after creating them.
- Get-InformationBarrierRecipientStatus -Identity <value> – returns information about users such as attribute values and IB policies.
- Get-OrganizationSegment – displays all the segments defined in your organization.
- Get-InformationBarrierPolicy – displays a list of IB policies and their status.
- Get-InformationBarrierPoliciesApplicationStatus –All – displays information about whether policy application completed, failed, or is in progress for all IB policy applications in your organization.
Information Barriers in Microsoft Teams
Information barriers in Microsoft Teams allow organizations to prevent/allow users from communicating with each other based on predefined policies.
Information barrier policy enables organizations to set up communication restrictions between different teams or groups. For instance, if there is a need to prevent/allow communication between two teams due to conflicts of interest or compliance requirements, the information barriers policy can be configured to block/allow communication between those teams. This helps in maintaining data integrity, confidentiality, and compliance with internal and external regulations.
Note: Information barriers policies on internal and external organizations don’t restrict communications between users from the different organizations.
Information Barriers and Shared Channels
Information barrier policies impact the collaboration between the restricted identities in various ways in Microsoft Teams. Let’s explore the scenarios where information barriers impact communication in shared channels below.
Scenario 1: When you can create an information barriers policy that restricts a specific user from communicating with any of the shared channel members, the restricted user will not be displayed in the user search and the channel can’t be shared with the team. The following message appears as a result.
“We didn’t find any matches. Talk to your IT admin about expanding the scope of your search.”
Scenario 2: Imagine you are the owner of two teams in your organization, Team A and Team B. You cannot share a channel from Team A with Team B if some users in Team B are restricted from communicating with members of a shared channel in Team A due to an information barriers policy and will receive the following message.
“The channel can’t be shared with this team. Pick another team or contact your admin for more info”.
Scenario 3: Sometimes, you might want to share a channel from your team with another team that you don’t own. However, if any users of the other team are prevented from communicating with any of the members of shared channels in your team, the channel can’t be shared. You may see a message saying
“The channel can’t be shared with this team. Pick another team or contact your admin for more info.”
Scenario 4: Imagine that Team A has shared a channel with Team B. When you create an information barrier policy that restricts a user from communicating with the members of the shared channel team, adding the user to team A is not possible. However, if the team has six or more shared channels, the new user is allowed to join, they will be immediately added to the shared channels and be able to communicate with team members. If the user cannot be added due to an information barriers policy, you will see a message saying,
“Unable to add user due to an information barriers policy.”
Scenario 5: When you share a channel with an external team, information barriers policies don’t restrict communications between users from different organizations. That is, IB policies don’t affect sharing shared channels with external guests.
If you’re encountering unexpected issues with information barriers, Microsoft has compiled a troubleshooting documentation that addresses common problems and provides solutions for issues.
I hope this blog will help you understand the concepts of information barriers and different scenarios where you can utilize information barrier policies to prevent communication in shared channels in your organization. Feel free to reach us in the comments section for any assistance.


