With greater power comes greater responsibility – and risks too!
Yeah, talking about the risks of users accessing Exchange Online PowerShell. When it comes to managing Exchange Online, you’ve got it all under control with built-in protection, outbound spam filtering, zero-hour auto purge, etc. But are you aware of the risks associated with allowing users access to Exchange Online PowerShell or remote PowerShell?
Although it offers powerful tools for managing your organization’s email, a minor misuse can lead to accidental or intentional harm, privilege escalation, and unauthorized access! Therefore, not everyone can be trusted with this potent tool.
That’s why many IT pros have started to disable access to Exchange Online PowerShell altogether – and the benefits are nothing short of impressive. Therefore, let’s examine why disabling remote PowerShell access is a smart move and how to do it.
Top Reasons to Disable Access to EXO PowerShell
Any Office 365 user in your organization generally has access to EXO PowerShell, but don’t fret! Because that doesn’t give additional administrative powers. And moreover, users’ capabilities are still determined based on role-based access control (RBAC) and their assigned roles. However, you may wonder then why the user access should be removed? I got you! Let us look at some potential reasons that answer your questions, and you can then decide whether to grant access.
- Privilege Escalation: If a user gains access to PowerShell, they could use it to escalate their privileges and potentially obtain sensitive information or execute unauthorized actions, such as manipulating system settings, executing malicious code, or creating new user accounts with elevated permissions.
- Unauthorized access: If an attacker gains access to a user’s credentials with Exchange Online PowerShell access, they can view sensitive data in your environment.
- Compliance violations: Allowing users access to Exchange Online PowerShell can create potential compliance issues, such as unauthorized access to personally identifiable information (PII) or violations of regulatory requirements.
- Effective Risk Management: One of the best effective risk management strategies is to disable Remote PowerShell access for users as a precautionary measure, which can yield significant advantages by reducing the potential entry points for attackers and minimizing the damage caused by any security breaches.
I hope the above reasons answered your question on why to restrict remote PowerShell. Now let’s see how to disable Exchange Online PowerShell to mitigate all these potential risks.
Manage Remote PowerShell Access to Exchange Online
As we now go into the steps to know how to block remote PowerShell access for users, it is essential to note that only Office 365 global administrators can perform this operation. Therefore, make sure to have it! And moreover, blocking access can be done in two ways, via PowerShell or via client access rules in Exchange Online.
Here, let’s look at the PowerShell method elaborately. But before jumping into the procedure, ensure to connect to the Exchange Online PowerShell and Microsoft Graph module and proceed. Instead of sticking to an all-or-nothing approach and blocking all users, let’s explore different scenarios in this blog.
- Check Exchange Online PowerShell Access Status of Users
- Disable Access to Exchange Online PowerShell for Non-admins
- Restrict Exchange Online PowerShell Access for All Users
- Disable Remote PowerShell Access for Bulk Users (Import CSV)
- Enable Remote PowerShell Access to Exchange Servers
- Enable Exchange Online PowerShell Access for Admins
- Unlocking Your Admin Accounts in PowerShell: Troubleshooting Tips
- Disable RPS Access to Specific Users by Specific Attributes
Check Exchange Online PowerShell Access Status of Users
First things first, let’s see which users have access to Exchange Online in your organization, which will help you better understand your organization’s status and data. Here, we can use the ‘RemotePowerShellEnabled’ cmdlet to determine whether users have EXO PowerShell access or not.
|
1 |
Get-User -ResultSize unlimited | Format-Table -Auto Name,DisplayName,RemotePowerShellEnabled |
- Upon running the above cmdlet, you will see all user’s statuses; if the property value is “True”, the user has remote PowerShell access to Exchange Online, and if it is “False,” the user does not.
And here if you want to check a specific user’s access to remote PowerShell, use the below cmdlet and specify the user principal name.
|
1 |
Get-User -Identity <UserPrincipalName> | Format-List RemotePowerShellEnabled |
Say, if you need to get remote PowerShell disabled users, you can use the cmdlet below. And simultaneously, you can change the value to $true to find the contradiction.
|
1 |
Get-User -ResultSize unlimited -Filter 'RemotePowerShellEnabled -eq $false' |
Disable Access to Exchange Online PowerShell for Non-admins
Moreover, when a new user is created in your organization, they get remote PowerShell access by default. As an administrator, it is typically very challenging for administrators to manually restrict access to Exchange Online PowerShell.
But don’t worry, we’ve got a way for you! You can schedule the script below to run every week to disable remote PowerShell access for all user accounts, including newly created accounts, except the users with any admin roles.
Script execution:
You can copy the script below, save it as DisableRPSforNonAdmins.ps1 and place it in the C:\scripts\folder.
|
1 2 3 4 5 6 7 8 9 10 |
Connect-MgGraph $allUsers = Get-MgUser foreach($allUser in $allUsers) { $AdminMemberOf=Get-MgUserMemberOf -UserId $allUser.UserPrincipalName|Select-Object -ExpandProperty AdditionalProperties $AssignedRoles=$AdminMemberOf | where{$_.'@odata.type' -eq '#microsoft.graph.directoryRole'} if($AssignedRoles.Count -eq 0) { Set-User -Identity $allUser.UserPrincipalName -RemotePowerShellEnabled $false } } |
Now, to automate the PowerShell script, simply create a scheduled task. Follow the steps outlined at the end of the blog to schedule a PowerShell script and ensure that it runs automatically.
Restrict Exchange Online PowerShell Access for All Users
And here is where the major business of the blog starts! By using a simple cmdlet, you can quickly and easily disable access to Exchange Online PowerShell for all users in your organization with just one click. This will set their status to false, effectively preventing them from accessing EXO PowerShell in the future.
|
1 |
Get-User | Set-User -RemotePowerShellEnabled $false |
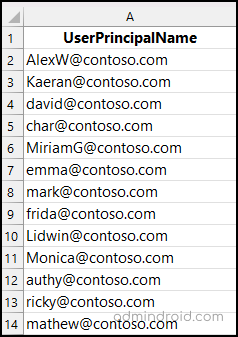
Disable Remote PowerShell Access for Bulk Users (Import CSV)
When it comes to restricting access, there are two scenarios to consider. The first involves limiting access based on specific user attributes, while the second involves blocking access for specific users regardless of their department, role, or location.
➤ Therefore, to do this, admins can import a CSV file with the specific users and remove remote PowerShell access with just one click.
|
1 2 3 4 5 6 7 8 9 10 11 12 13 |
$User = Import-Csv C:\DisableRPSAccess.csv foreach($user in $user){ Write-Progress -Activity "Blocking Access to -$user..." Set-User -Identity $User.User -RemotePowerShellEnabled $false If($?) { Write-Host Blocked EXO PowerShell Access Successfully to $User.user -ForegroundColor Green } Else { Write-Host Error occurred while blocking EXO PowerShell Access to $User.user -ForegroundColor Red } } |
Sample Input file:
Enable Remote PowerShell Access to Exchange Servers
The -RemotePowerShellEnabled parameter controls a user’s ability to access remote PowerShell. Disabling this parameter restricts access to all functionalities, including cloud services, Exchange Management Shell, and the Exchange Admin Center (EAC) on local mailbox servers.
However, not all organizations need this level of restriction. For those admins looking to specifically block access to Exchange Online PowerShell and only have access to Exchange Management Shell, the -EXOModuleEnabled parameter is the solution.
Note: The -EXOModuleEnabled parameter helps to manage the user’s access to cloud-based services.
- First, check if the user is currently enabled for Exchange Online PowerShell access. If the output shows True, the user has access.
|
1 |
Get-User -Identity <UserPrincipalName> | Format-List EXOModuleEnabled |
- Since the output is true, we can set the -EXOModuleEnabled value to False and enable only remote PowerShell access to Exchange servers, blocking cloud services.
|
1 |
Set-User -Identity <UserPrincipalName> -EXOModuleEnabled $false |
Enable Exchange Online PowerShell Access for Admins
The major problem here is that the above method also locks the admin accounts! Do we have any way to escape it? Fortunately, we have. Let’s take a closer look at a way to skip this step.
➤ You can block remote PowerShell for all users except admin accounts by using the below command. This method would be suitable if you want to give access to only a specific number of admins.
|
1 |
Get-User | Where-Object {$_.UserPrincipalName -ne '<Admin1UserPrincipalName>' -and $_.UserPrincipalName -ne ' <Admin2UserPrincipalName> '} | Set-User -RemotePowerShellEnabled $false |
Unlocking Your Admin Accounts in PowerShell: Troubleshooting Tips
But what if you accidentally lock yourself out of remote PowerShell access? Is there any way to regain access? Yeah, there is! First, create a new admin account in the Microsoft 365 admin center, and then use that account to give yourself remote PowerShell access by following the steps below.
|
1 |
Set-User -Identity <UserPrincipalName> -RemotePowerShellEnabled $true |
➤ Enabling remote PowerShell access for a large tenant’s 20+ administrators can be tedious if done manually. Therefore, to simplify the process, one can import the admins’ user principal names (UPN) into a text file and enable access for them using PowerShell.
|
1 2 3 4 |
$AdminList = get-content "C:\EnableRPSAccess.txt" foreach($user in $AdminList){ Set-User -Identity $user -RemotePowerShellEnabled $true } |
Disable RPS Access to Specific Users by Specific Attributes
Sometimes admins need to restrict access based on attributes. For instance, users in marketing or finance may never work with PowerShell, so blocking their access is a better option than blocking access for everyone. As an example, here I’ve disabled the access for users with the “department” attribute.
|
1 2 3 4 |
$users = Get-User -ResultSize unlimited -Filter "(RecipientType -eq 'UserMailbox') -and (Department -like 'Marketing')" $users | ForEach-Object { Set-User -Identity $_.WindowsEmailAddress -RemotePowerShellEnabled $false } |
How to Schedule a PowerShell Script Using PowerShell?
As of now, you would’ve saved the script as DisableRPSforNonAdmins.ps1 and placed it in the C:\scripts\folder. Now, it’s time to take your automation skills to the next level by scheduling the script. This involves following three simple steps, which we will explore in detail so that you can effortlessly automate the disabling access to remote PowerShell.
Define Time for Scheduler:
To define the timing of a scheduled task, you can use the New-ScheduledTaskTrigger cmdlet to create a trigger object. This cmdlet allows you to specify when the task should start, as well as how often it should run (such as on a daily or weekly basis).
➤ For example, if you want your task to start every seven days at 4 PM, you can use the following command to create a scheduled task trigger object:
|
1 |
$Time=New-ScheduledTaskTrigger -At 4.00PM -Daily -DaysInterval 7 |
Set Actions to be Performed During Execution:
To specify what actions should be performed when a scheduled task runs, you can use the New-ScheduledTaskAction cmdlet in PowerShell. By using this cmdlet, you can define one or more actions that will be executed periodically by the Task Scheduler.
➤ For example, to execute a PowerShell script named “DisableRPSforNonAdmins.ps1” located in the “C:/Scripts” directory, you can use the following command. This command creates an action that launches PowerShell and then executes the “DisableRPSforNonAdmins.ps1” script with the specified username and password arguments.
|
1 |
$Action = New-ScheduledTaskAction -Execute PowerShell.exe -WorkingDirectory C:/Scripts -Argument "C:\Scripts\DisableRPSforNonAdmins.ps1 -UserName XXXX -Password YYYY" |
Save Scheduler:
To save a scheduled task locally, use the Register-ScheduledTask command with the desired task name, trigger, and action parameters.
For example, to create a task called “Schedule Disable RPS Access for Non-admins,” use the $Time and $Action variables to define the task’s frequency and actions.
|
1 |
Register-ScheduledTask -TaskName "Schedule Disable RPS Access for Non-admins" -Trigger $Time -Action $Action -RunLevel Highest |
- Once saved, the scheduled task will run on a weekly basis, automatically removing remote PowerShell access for new users. This ensures that only users with any admin roles can continue to access Exchange Online PowerShell.
By setting up this scheduled task, you can enhance the security of your system by enabling remote PowerShell access to only authorized users and preventing unauthorized access to your EXO. Overall, this scheduling task is an efficient way to automate routine tasks and safeguard your system against potential threats.
Lock Out – Threats and Lock in – Security:
As we reach the end of our discussion on disabling access to Exchange Online, it’s essential to remember that cybersecurity is a continuous effort. By using the PowerShell cmdlets outlined earlier, you can ensure that only authorized users have access to your Exchange Online environment, preventing any potential chaos from unauthorized access.
Don’t let malicious actors invade your digital space! Get started now and take the necessary Microsoft 365 security measures such as moderating Office 365 emails and be confident that your organization’s data is in competent hands. 💯
And remember, cybersecurity is everyone’s responsibility – so stay informed, stay alert, and safe!
Protect What Matters Most – Your Data, Your Exchange Online Security.


