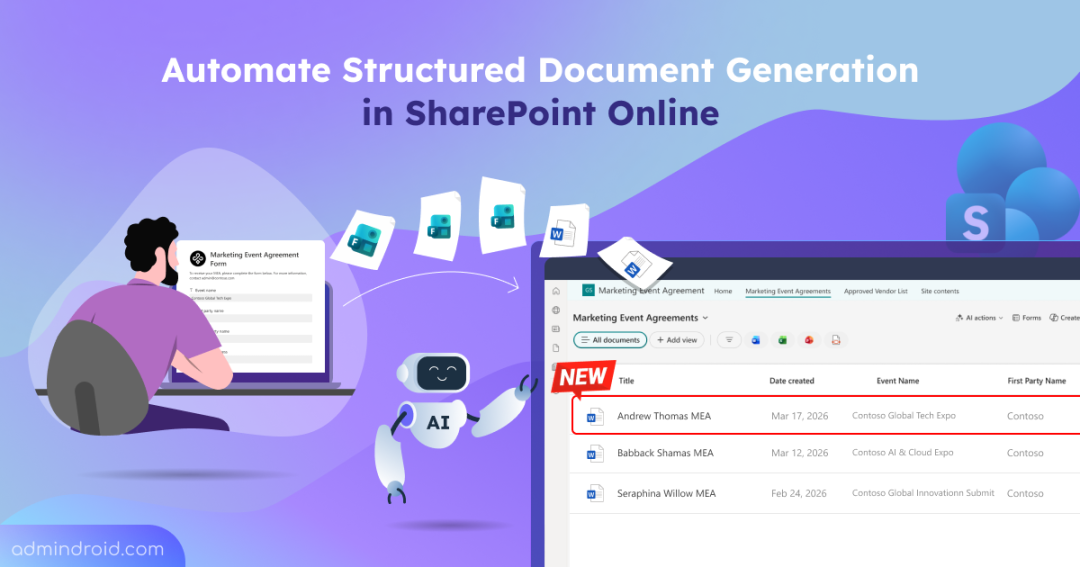
Microsoft recently unveiled a new SharePoint experience in Microsoft 365, bringing several UI improvements such as a redesigned app bar, cleaner layouts, and a more modern interface. Beyond the visual updates, one of the most notable additions is the new AI-powered capability in SharePoint Online – Structured Document Generation.
For years, creating standardized Word documents like offer letters, invoices, and contracts meant choosing between tedious manual editing or setting up multiple Power Automate flows. While these approaches work, they often require additional maintenance, permissions management, and troubleshooting. This new feature simplifies that entire lifecycle by bringing document automation directly into the SharePoint interface.
In this blog, let’s take a deep dive into structured document generation in SharePoint Online and how to set it up to automate Word document creation.
What is Structured Document Generation in SharePoint Online
Structured document generation in SharePoint Online is a feature that lets you generate documents directly through SharePoint forms. The feature uses built-in AI capabilities in SharePoint to easily convert a Word template into an intelligent form. This automated process involves two roles:
- Content Manager (Template Creator) – This user is responsible for creating and configuring the Word template, defining input fields, setting up conditional logic, and publishing the form. The content manager requires Edit permission on the SharePoint library to configure structured documents.
- Content Consumer (Form Submitter) – End users who interact with the published form. By providing the required input values, they trigger the automated generation of the final document. No explicit permissions are required for the form submitters, as read access to the template is granted automatically.
The process begins when a content manager uploads a Microsoft Word template and converts it into a structured form using SharePoint AI. Once the form is published, content consumers can access it via a shared link. Upon submission, SharePoint generates a new document using the template and maps the submitted values to the corresponding fields. The generated document is then stored in the specified folder within the document library.
This provides two major advantages:
- Controlled permissions: Users can generate documents without requiring “Edit” access to templates or the document library, reducing permission sprawl.
- Consistent document output: Ensures every document generated follows the defined template, maintaining consistent branding and formatting.
Microsoft has announced that structured document generation in SharePoint Online will begin rolling out to customers starting in April 2026.
Now, let’s explore how to configure structured document generation in a SharePoint document library.
Prerequisites to Generate Structured Documents in SharePoint Online
Before proceeding to automate document generation, ensure that the following requirements are in place.
- You must enable the new SharePoint experience in your tenant.
- The content manager responsible for creating and configuring structured documents must have a Microsoft 365 Copilot license.
- The designated content managers must have Edit permissions on the SharePoint document library to create forms and manage structured documents.
- Only Microsoft Word (.docx) files can be used as templates for structured document generation.
How to Generate Structured Documents in a SharePoint Library
Follow these steps to generate a structured document and turn a standard Word template into an intelligent, AI-powered form in SharePoint Online.
- Create the document generation form
- Map form input fields
- Set conditions in the Word template
- Customize and share the form
Create the Document Generation Form
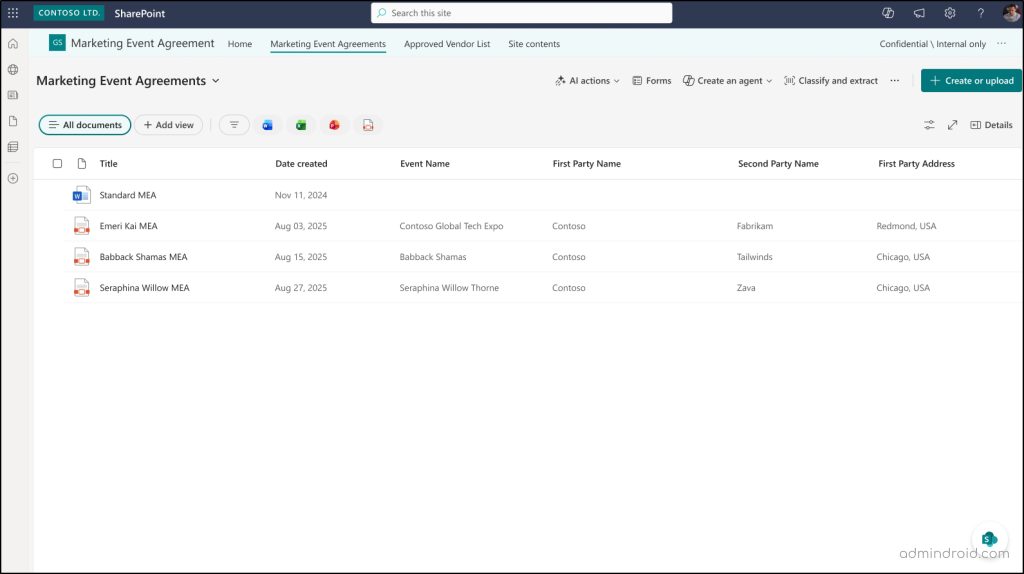
- Open the SharePoint Online site where you want to generate structured documents.
- Navigate to the specific SharePoint document library and select Forms from the command bar.
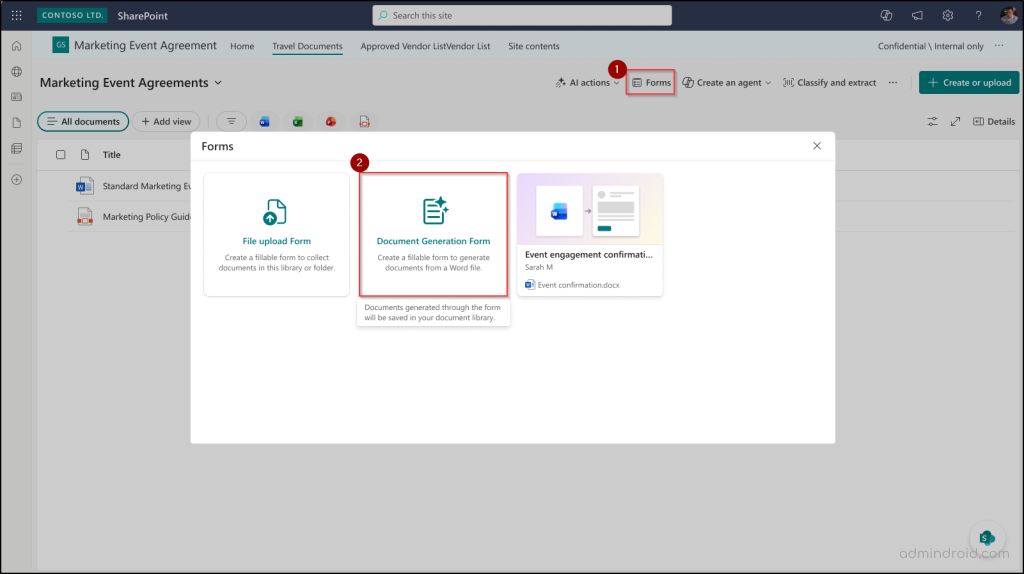
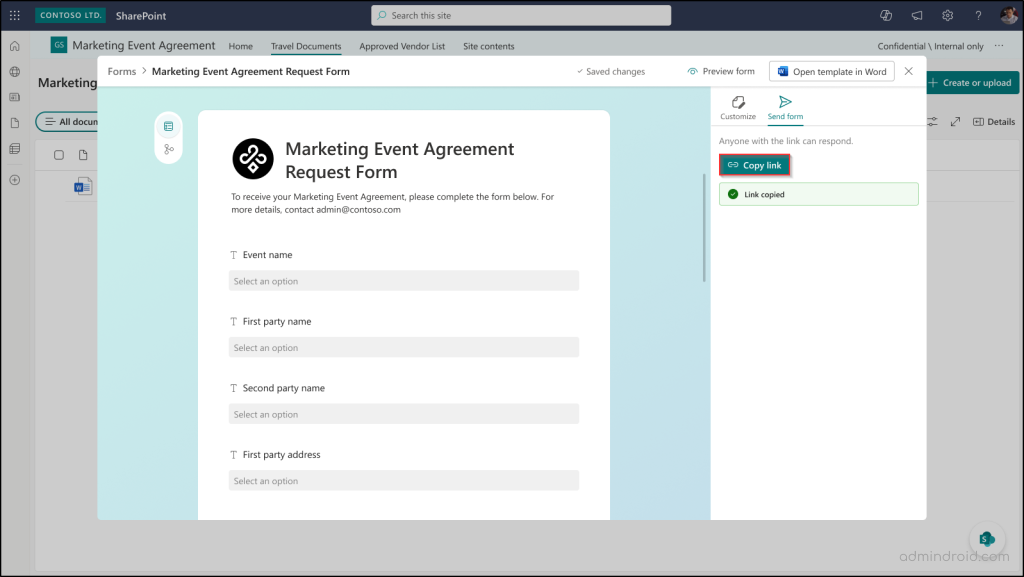
- Choose Document Generation Form, select your Word document template, and click Create a form.
Note: You can upload any Word document from the current SharePoint document library, local machine, or OneDrive to create a form.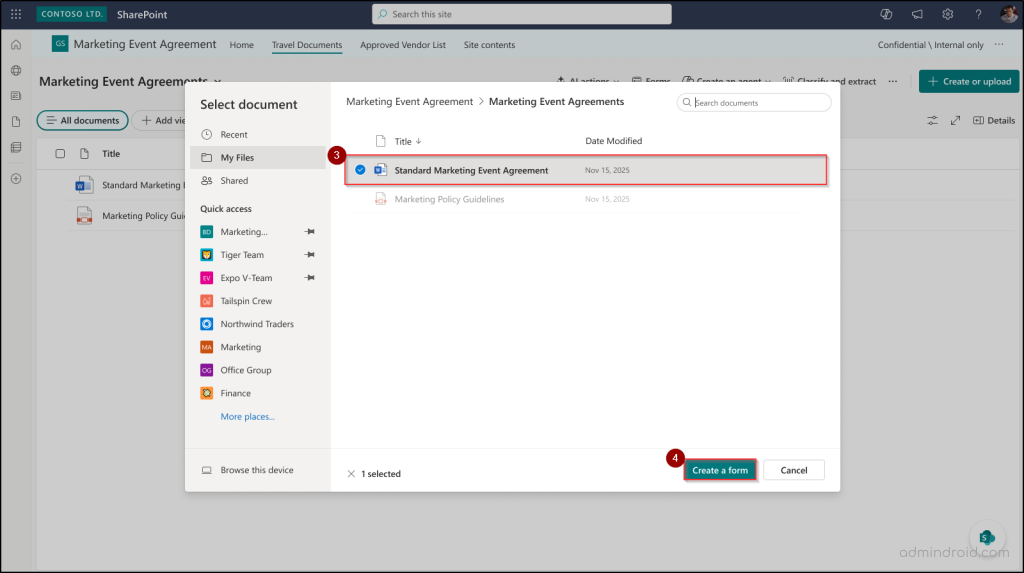
Map Form Input Fields
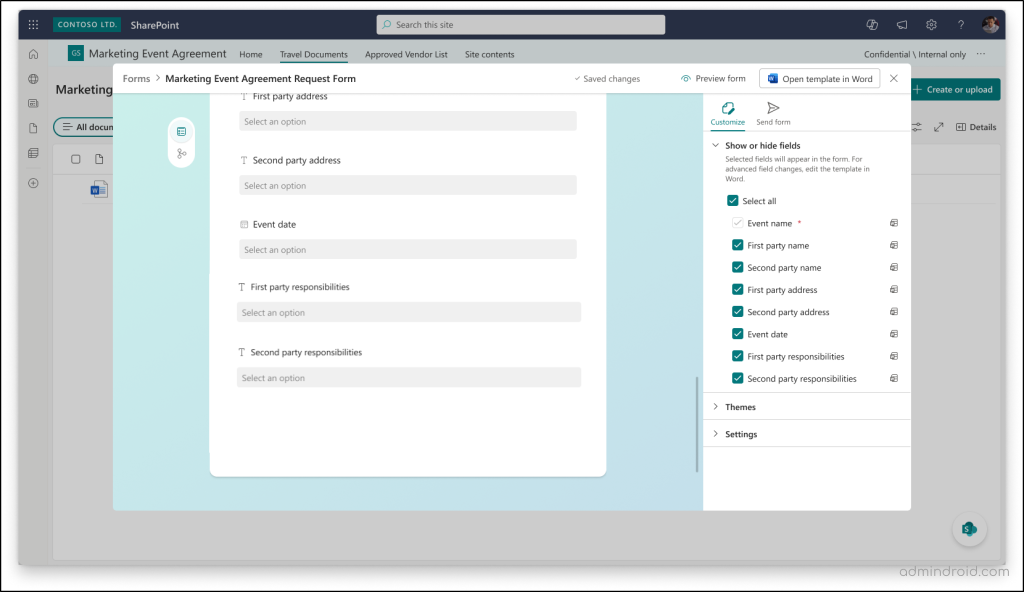
Once the template is uploaded, SharePoint AI analyzes the document and automatically generates a form with suggested fields based on the detected placeholders.
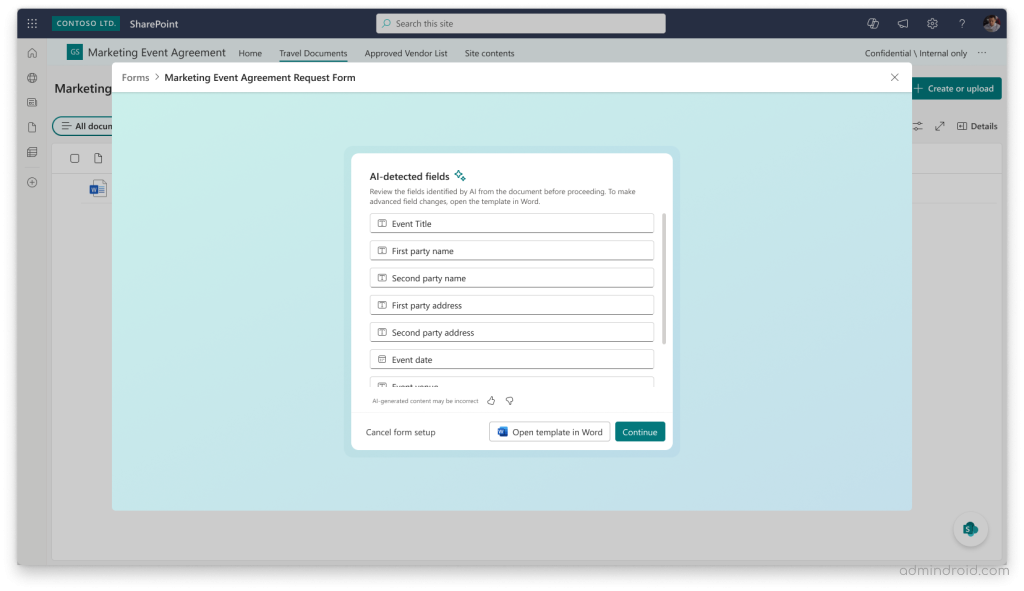
You can review and refine the generated fields by performing the following actions:
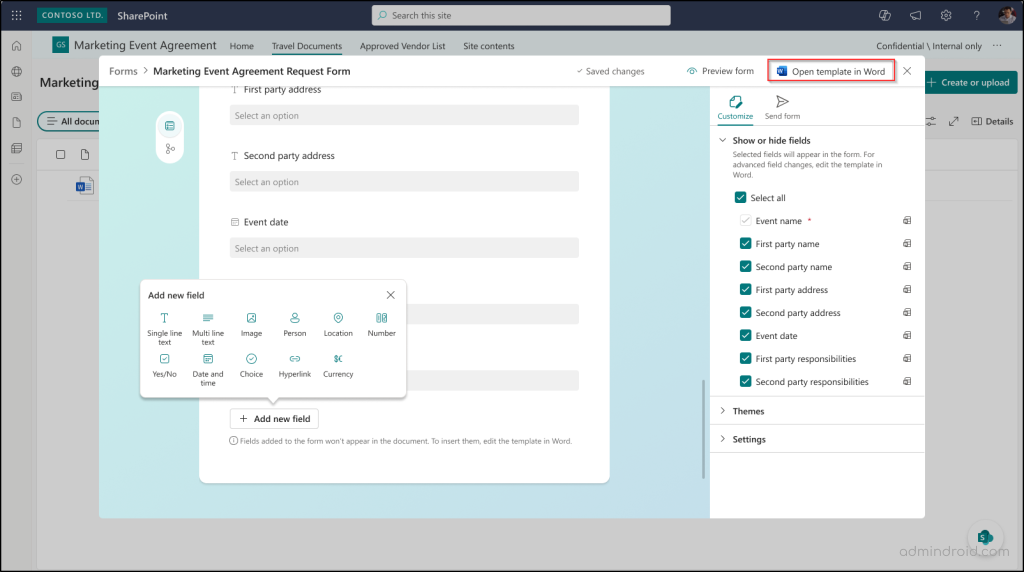
- Add new input fields in the form: Select Add new field and manually add inputs like field name, input field type, and choose whether the field is required. The following types are supported for the input fields:
- Single line of text
- Multiple lines of text
- Number
- Date
- Choice
- Yes/No (Boolean)
- Hyperlink
- Image
- SharePoint List
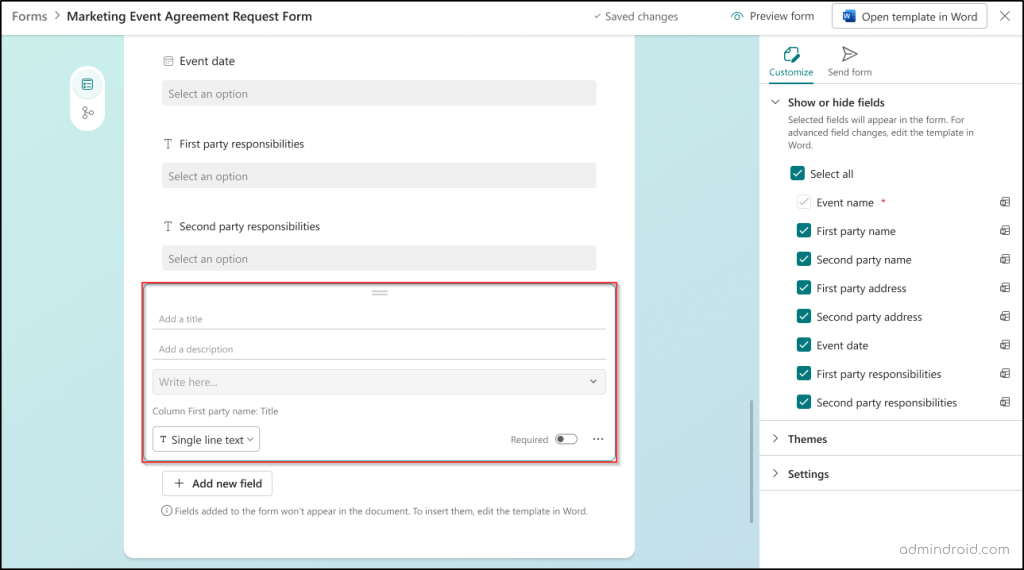
- Adjust document mapping: Ensure each form field maps to the correct location in the document.
- Edit name terminology: Rename fields to match your organization’s internal naming conventions and set mandatory requirements.
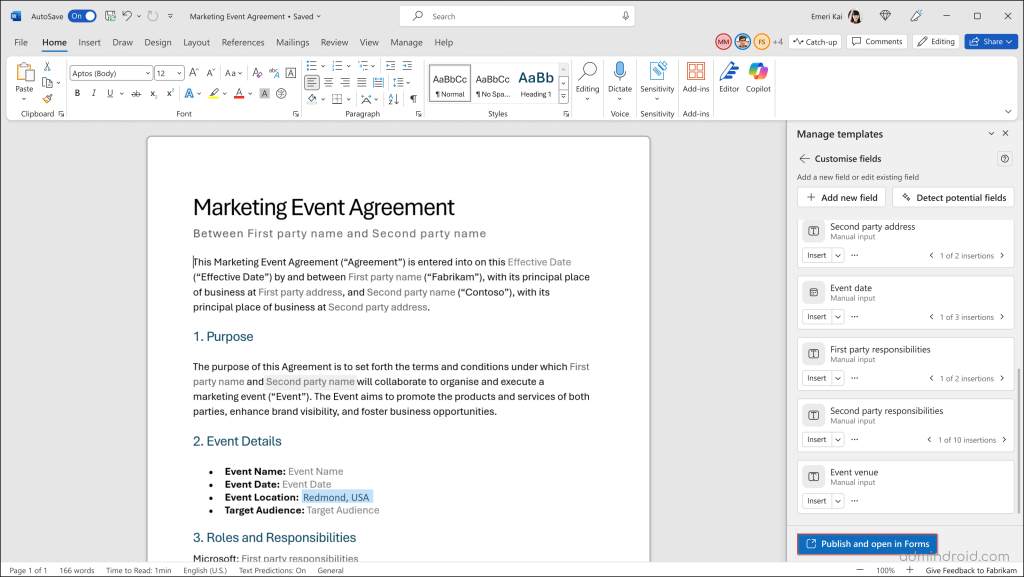
You can also edit the form in the Microsoft Word app using the Open template in Word option in the top pane. This also allows you to perform advanced configurations like adjusting standardized clauses, formatting, or setting up conditional logic.
Set Conditions in the Word Template
One of the most powerful features in creating structured documents is the conditional section. They allow documents to adapt automatically based on form responses, showing or hiding content as needed.
For example, an offer letter can include a Relocation Bonus section only if the candidate is moving from another city, while keeping it hidden for local hires to maintain a clean and professional document.
To set up conditional sections, open the template in Microsoft Word and follow the steps below:
- In the Manage Templates pane, navigate to “Conditional Sections” and select + New.
- Enter a name for the conditional rule and define your business rules under Set up condition. You can also add multiple conditions using AND or OR logic.

- Select Map to associate the rule with the specific content in your Word document.
- To map the input fields to the relevant sections in the document, you can use the Insert drop-down.
- Click Publish and open in Forms to finalize your changes and open the form view in SharePoint.
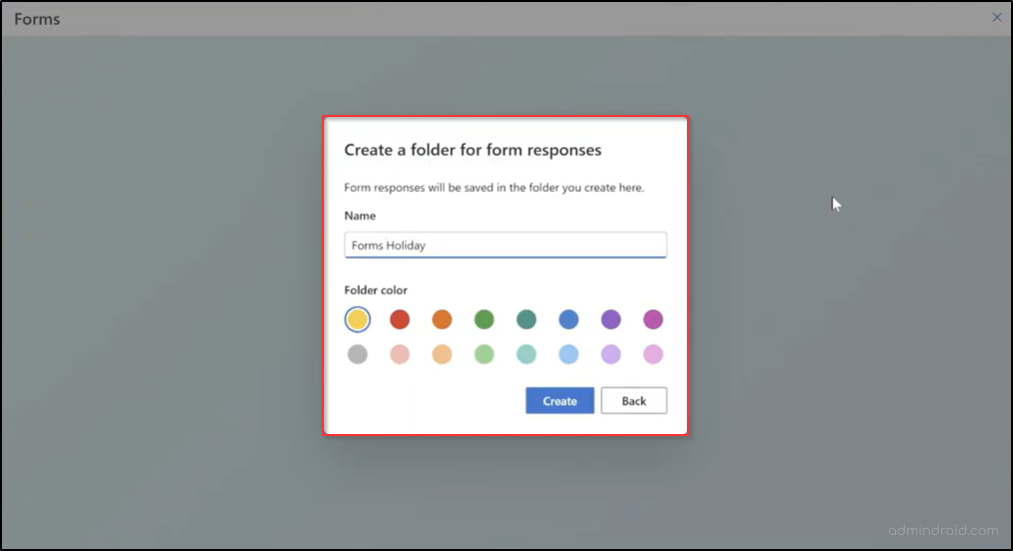
- Once the form is published, configure the storage location for the form responses when the prompt appears.
- Enter a name and select a color for the folder in the Create a folder for form responses window. Then click Create.
Customize and Share the Form
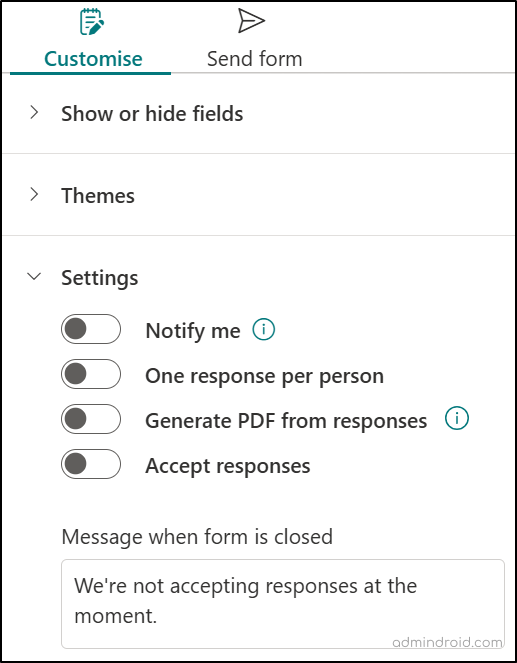
After publishing the form, you can adjust the user experience in the Customize tab. Here, you can update the visual theme and toggle the visibility of specific fields. Under Settings, you can configure the following form-level options:
- Notify me – Receive notifications when a form response is submitted.
- One response per person – Restrict users to submitting the form only once.
- Generate PDF from responses – Automatically generate a PDF version of the document.
- Accept responses – Enable or disable form submissions.
- Message when form is closed – Display a custom message when the form is no longer accepting responses.
After configuring all these settings, navigate to the Send form tab to copy the unique form link. You can now share this link via Microsoft Teams, Outlook, or embed it directly on a SharePoint page.
Structured Document Generation: End-User Experience
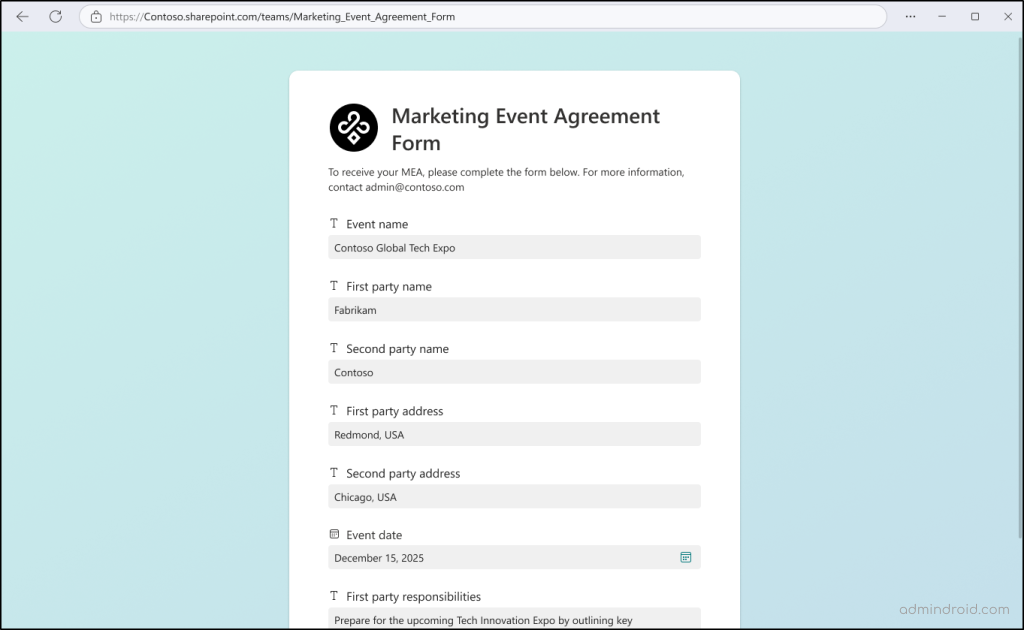
Now that the structured document form is configured, let’s see how it works from an end user’s perspective. When a user clicks the shared form link, it opens directly in their browser. The user can simply fill in the required fields and select Submit to generate the document.
Note: Users submitting the form do not need access to the destination document library in SharePoint Online. However, if the user needs to view the generated document, you should grant access to the document library separately.
Behind the scenes, SharePoint Online automatically inserts the submitted values into the corresponding placeholders in the Microsoft Word template. A new document is then generated and saved in the response folder that was configured during setup.
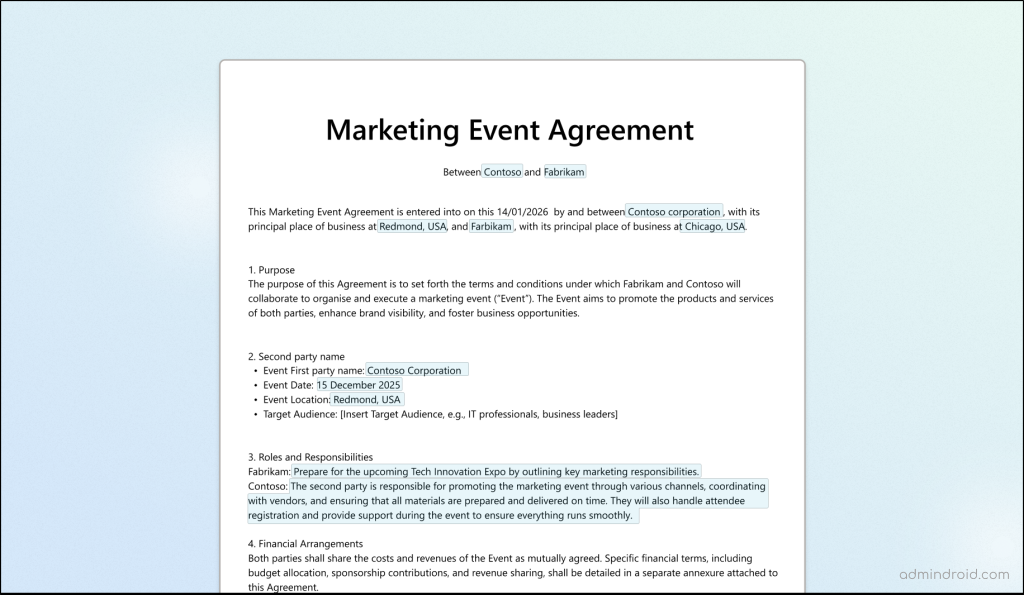
To review the generated Word documents, admins or content managers can navigate to the SharePoint document library where the form was created and open the folder designated for form responses. Each submission creates a new document automatically.
An additional advantage is that every form field is stored as metadata columns in the document library. This enabled easy filtering, sorting, and review of document details directly from the library view without even opening the files.
How to Manage Published Forms in SharePoint Online
After publishing a form for structured document generation in SharePoint Online, you may occasionally need to review, update, or manage the form configuration.
To access your published forms, follow the steps below:
- Go to the SharePoint document library where you created the form.
- Select Forms from the command bar and click the three-dot menu next to the specific published form. This lets you perform common actions such as deleting the form or starting and stopping form responses.

- If you need to adjust the theme, hide certain fields, or modify submission settings, select Edit form. This opens the SharePoint form view, where you can update the options available under the Customize tab.
- After publishing the form, the form fields become read-only in the SharePoint Online form view. Therefore, to modify those or update the document structure, you should open the template using Open template in Word.
- Then, select Edit template in the ‘Manage Templates’ pane to update fields, adjust document logic, or refine the template layout.
- After completing the changes, select Publish and open in Forms to republish the template and return to the form view.
The form link remains unchanged even after you update and republish the template. This means you don’t need to redistribute a new sharing link for every update.
Final Thoughts
Document creation has always been more complicated than it needs to be. Structured documents strip away that complexity, allowing you to generate standardized Word documents with a simple, one-time setup.
As this feature hits general availability sooner, it’s the perfect time to audit your manual “copy-paste” workflows and replace them with a system that works for you. We hope this blog helps you understand how to generate structured documents in SharePoint Online. If you have any doubts or a use case to discuss, feel free to share it in the comments section. We’re happy to help. 🤗


