Conditional Access policies in Entra ID are the ones known for granular access control in Microsoft 365, no doubt! 😎 You can configure Conditional access policies manually or by using automation tools like Microsoft365DSC. But is merely configuring CA policies in your organization enough? The answer is a big NO! 😲
As an IT admin, it’s essential to ensure that you haven’t missed any crucial applications, critical Microsoft 365 users, or location conditions in CA policy. But how do you find those missed ones? Are you going to click and open every Conditional Access policy? That’s a tough job!
Well to help you with this, Microsoft itself offers a feature – “Entra workbooks” to help you detect any gaps in your Conditional Access policies. Let’s see them in detail.
What are Workbooks in Entra ID?
Entra workbooks in Microsoft 365 offer a personalized dashboard to visualize your Entra ID logs. Workbooks enable users to generate visually appealing reports and charts, offering a comprehensive overview of crucial Entra data.
Entra workbook offers you a ready-to-use set of templates, which acts as a starting point for your Entra monitoring. Some of them are,
- Authentication prompt analysis workbook
- Sign-in failure analysis workbook
- Multifactor authentication gaps workbook
- Cross-tenant access activity workbook
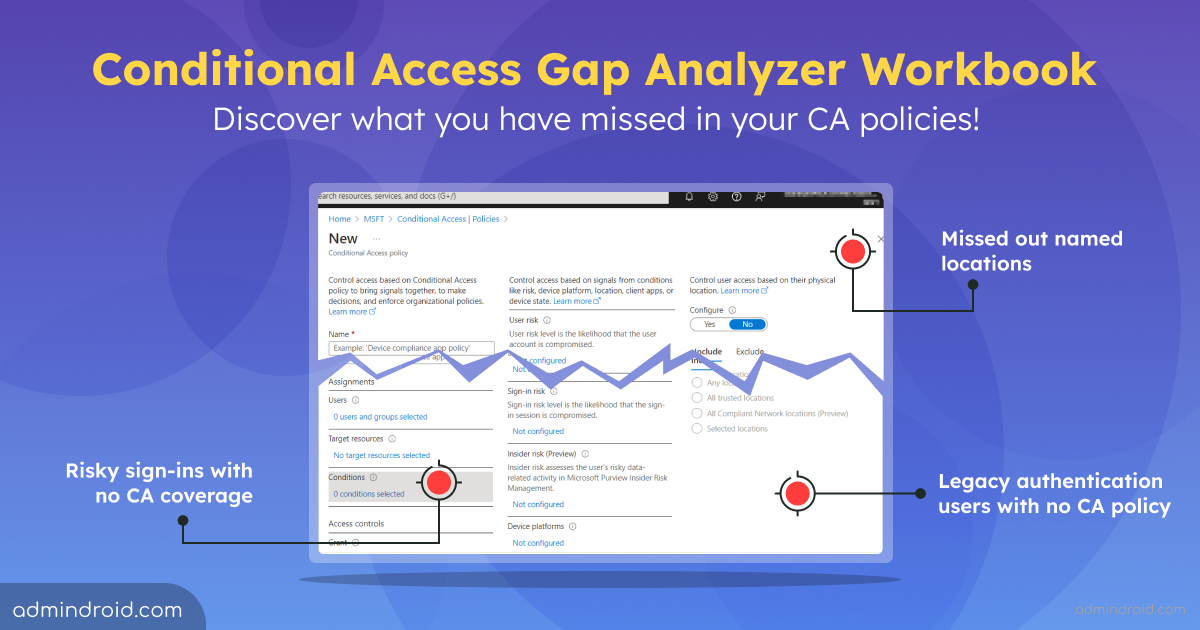
Now, for our need to identify loopholes and the parts that’s been missed in CA policies, “Conditional Access Gap Analyzer” is here to help! Let’s see that in detail.
What is Conditional Access Gap Analyzer in Microsoft Entra ID?
This Conditional Access gap analyzer workbook is designed to minimize the risk of unauthorized access in Microsoft 365 by assisting admins in two crucial areas:
- Identifying users with no Conditional Access policies applied.
- Ensuring that your Conditional Access policies cover critical users, applications, and locations, thereby reducing the possibility of unintentional oversights.
By finding the above-missed resources using workbooks, admins can configure and enforce strict conditions in their Conditional Access policies.
How to Use Conditional Access Gap Analyzer Workbook?
To view and access the Conditional Access gap analyzer workbook, follow the steps below.
- Log in to Microsoft Entra admin center.
- Navigate to the Monitoring & health section and select “Workbooks” options.
- Select the “Conditional Access Gap Analyzer” workbook from the Conditional access section.
This pre-built workbook offers detailed insights into potential gaps in your Conditional Access policies, divided into five deep-drilled sections:
- Identify users with legacy authentication with no Conditional Access policy
- Identify applications without Conditional Access policies
- Get risky sign-ins with no Conditional policies applied
- Identify sign-ins from unknown locations with no Conditional Access applied
- Get named locations with no Conditional Access policies
1. Identify Users with Legacy Authentication in Microsoft 365:
As we all know, password spray attacks and brute-force attacks are increasing faster. If your users still rely on legacy authentication, then they may undoubtedly fall prey to such attacks, as there is no MFA requirement! So, it’s highly recommended to migrate users to modern authentication methods to significantly improve Microsoft 365 security.
With this section, you can easily identify users with legacy authentication and take the necessary steps. The legacy authentication section comprises 3 segments, providing comprehensive insights into the usage of legacy authentication in Microsoft 365.
✅ Users Sign-in Using Legacy vs Modern Authentication:
While some users might have migrated to modern authentication, others may still be relying on the older method. This section helps you identify users who use modern and legacy authentication for sign-ins.
Next Step: Once you identify users with legacy protocols, your next step is to configure Conditional Access policies to block legacy authentication for those users in Microsoft 365.
✅ Users Using Legacy Authentication Classified by Application:
The above section helps identify users utilizing legacy authentication, but for a deeper dive into which specific apps are allowing it, this section enters!
This sub-section provides you with a list of apps allowing legacy authentication and the total number of allowed sign-ins for each application. This helps you identify apps that permit users to use legacy authentication in Microsoft 365.
Next Step: Like before, include the identified apps into the “Conditions” section of an existing CA policy or create a new one.
Once you click the applications shown in the above section, you can get the respective users signed in to the selected option in the “Select an application and user to learn more” segment. Additionally, if you click the respective user in this section, comprehensive details like sign-in time and correlation ID are displayed in parallel accordingly.
The workbook provides a “Time Range” parameter to analyze Conditional Access gaps for specific periods. While it applies to the entire workbook, you can customize it by adding time ranges for specific sections.
2. Identify Applications Without Conditional Access Policies
This section highlights applications that users are accessing without any Conditional Access restrictions! You can view the respective applications and the sign-in counts in this section.
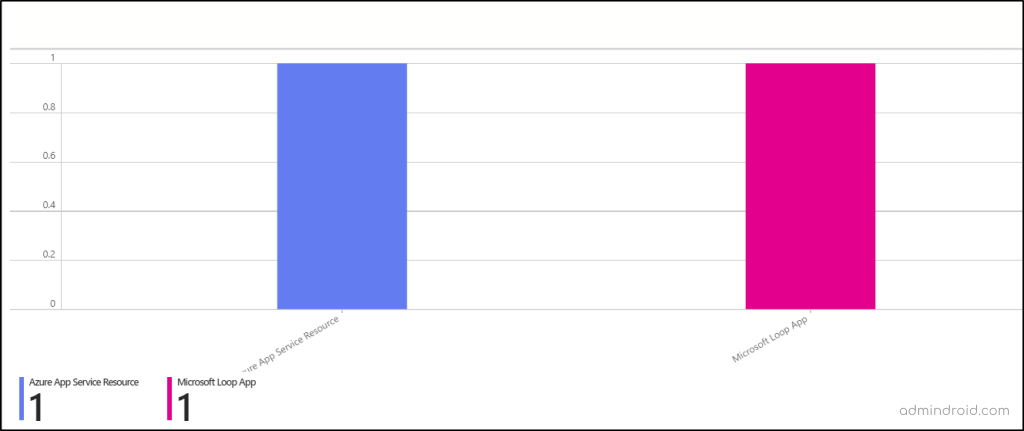
The following segment “Select an application and user to learn more” will help you analyze in depth the applications and users who have accessed those applications without being limited by CA policy. Also, when you click on the users shown, you will see the breakdown details like correlation ID, sign-in time, and operation system of the users. This allows you to identify users and applications that may have been missing out from the Conditional Access policies.

Next Step: It is recommended that each sign-in to an application has a Conditional Access policy applied to it.
3. Identify Risky Sign-ins with No Conditional Policies Applied
Microsoft Entra Identity Protection provides comprehensive reports on suspicious sign-ins and risky users. These reports help identify activities such as sign-ins from suspicious IP addresses, leaked credentials in Microsoft Entra ID, and accounts targeted in password spray attacks.
But simply monitoring risky sign-ins in Entra ID is not enough! It’s crucial to ensure that these risky sign-ins and users are protected by Conditional Access policies to mitigate potential risks. How will you do that?
To help you with this, the “Compromised User Sign-ins” section in the Conditional Access gap analyzer workbook comes to the front.
- Here, you’ll find a comprehensive overview of all risky sign-ins, specifically those involving user accounts flagged as compromised and bypassing Conditional Access policies.
Upon selecting the respective user from this section, you’re instantly presented with detailed insights in the “Risky sign-ins from {user} with no CA policies” section. These insights include the location of the sign-in attempt, the associated risk level, and other information regarding the risky sign-in.
Next Step: You need to create a risk-based Conditional Access policy that needs to block all risky sign-ins in Microsoft 365.
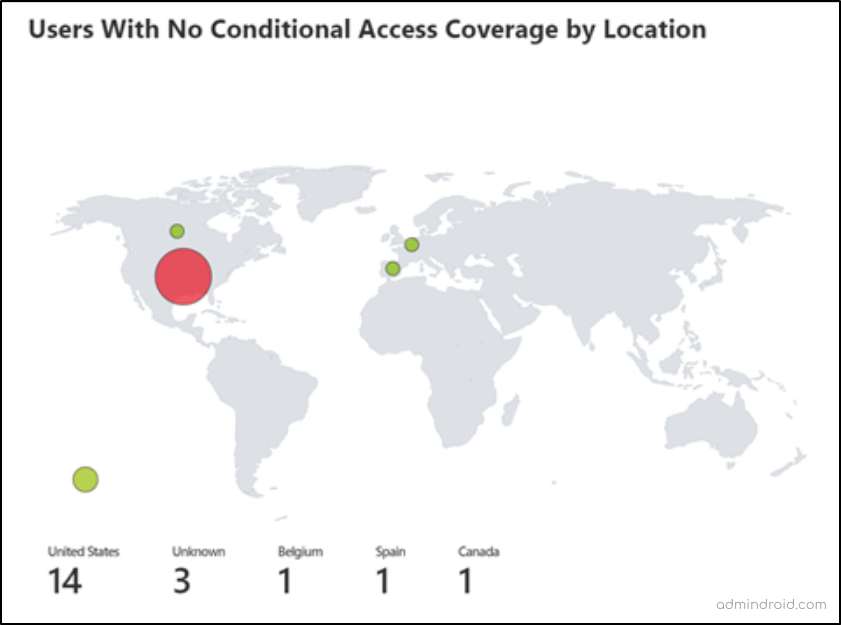
4. Identify Sign-ins from Unknown Locations with No Conditional Access Applied
This section identifies locations from where users access Microsoft 365 resources without Conditional Access restrictions. This will help you prevent attacks attempting to exfiltrate sensitive data from unknown locations.
✅ Sign-in Locations that are not Included in Any Conditional Access
This segment facilitates the viewing of a list of locations & corresponding sign-in counts with no Conditional Access policies applied. It simplifies the identification of sign-ins from unknown locations, which needs to be incorporated into any CA policy.
Following this, two additional segments are seamlessly linked with the above segment. These segments automatically populate relevant details based on the parameter specified in the previous segment. Here’s a detailed breakdown of how they function.
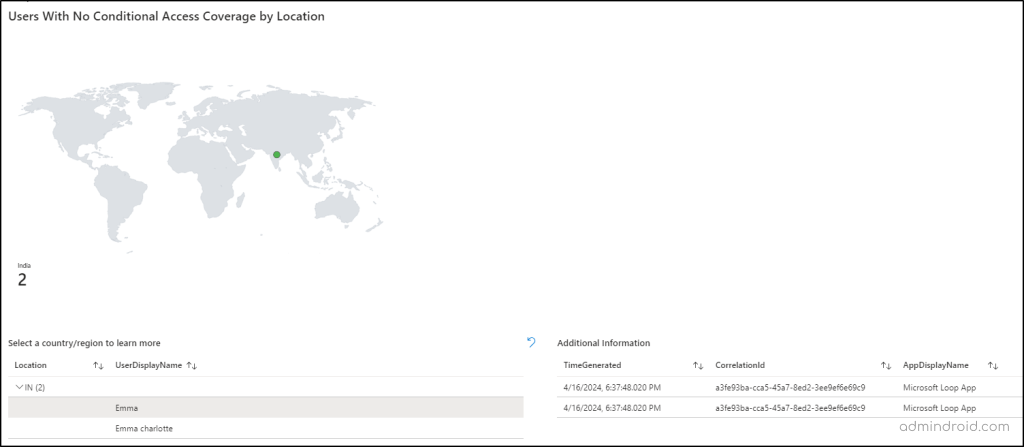
- Select a country/region to learn more: This section enables you to click on a location from the previous segment, automatically populating details about users who signed in from that location without Conditional Access policies applied.
- By clicking on users in the above section, you can access further details such as sign-in time, signed-in application, correlation ID, facilitating deeper analysis and investigation into specific sign-in events.
By pinpointing these issues, organizations can better protect against unauthorized access from different locations.
Next Step: Create a Conditional Access policy to block sign-ins from untrusted locations.
5. Identify Named Locations with No Conditional Access Policies
Named location in Conditional Access enforces granular access controls based on the user’s location. Sometimes, we may configure a named location, but fail to include location conditions in Conditional Access policies, which is a must!
That kind of case can be avoided with the help of the “unprotected named locations” section of this Entra workbook. This section consists of three segments, which are in preview.
✅ Named Location with No Conditional Access Coverage (Preview)
In this segment, you’ll find a list of all named locations not included or excluded in any Conditional Access policies! Additionally, it provides sign-in counts from named locations not subject to any CA policy.
Next Step: You need to include/exclude the configured named location in any of the Conditional access policies, which is needed to prevent logins from unknown locations.
✅ Users from IPv6 Addresses & Not Covered in Named locations (Preview):
With Microsoft’s recent introduction of IPv6 support in Microsoft Entra ID, you can now incorporate IPv6-based named locations in your organization. This section assists in setting up IPv6-based named locations, providing insights into user sign-ins from IPv6 addresses not covered in any named location.
Next Step: You can include these IPv6 addresses in your existing named locations (or create new ones).
✅ Users Sign in from IPv6 Addresses by Application (Preview):
This segment serves as a more detailed view of the previous segment, providing insights into the applications users signed in from IPv6 addresses.
Next step: You can include the IP address in named locations and can add the application in conditions for granular access control via CA policy.
Create Own Workbook in Microsoft Entra ID
You’ve now explored all the sections available in the Conditional Access gap analyzer workbook. But what if you’re not finding the insights you need? Don’t worry! You have the flexibility to customize this workbook and get the precise insights you require.
Even better, you can create your own Entra workbook focus solely on the insights about Conditional Access policies. Microsoft provides you with six components to build an interactive dashboard of CA policy insights.
Let me simplify it: I used the “Query” component to find the total number of risky sign-in events without Conditional Access policies applied.
SigninLogs
| project UserDisplayName, ConditionalAccessStatus, RiskLevelDuringSignIn, Status, ResultType
| where ResultType == 0 // sign-in was successful
| where RiskLevelDuringSignIn != "none" and RiskLevelDuringSignIn != "low" and RiskLevelDuringSignIn != "medium"
| where Status.additional details != "MFA requirement satisfied by claim in the token" and Status.additional details != "MFA requirement skipped due to remembered device" // Sign-in was not strong auth
| summarize Count = count() by RiskLevelDuringSignIn
Likewise, you can combine all the available components to write descriptions, jump links, and link reference guides in the Entra workbook.
Bridge Gaps in Conditional Access Policies Now!
Now, with this analyzer in your hands, you’re free from worrying about missing crucial configurations in CA policies. Everything you need is detailed in this workbook, so effectively monitor Conditional Access policies from now on!
I hope this blog has provided you with more information about the Conditional Access gap analyzer workbook. If you have any questions, feel free to reach out in the comments section. And stay tuned for the next Entra workbook!
Related Posts:
 Multifactor Authentication Gaps Workbook in Entra ID
  Authentication Prompts Analysis Workbook in Entra ID
  Risk-based Conditional Access Policies in Microsoft Entra ID
 Auto Rollout of Conditional Access Policies in…
 Adaptive MFA Using Conditional Access in the Microsoft 365
 5 Must Know Device-based Conditional Access Policies…