“Effective teamwork begins and ends with communication” – that’s true! Better communication will help you increase productivity and collaboration in your Microsoft 365 environment. Sure, we have emails, Yammer posts, MS Teams, and other ways to communicate, but sometimes, important messages can get lost in the hustle. But don’t worry! 😎There’s a solution called Organizational messages in Microsoft 365 admin center, which is currently in public preview. Let’s take a closer look at what it does. 👇
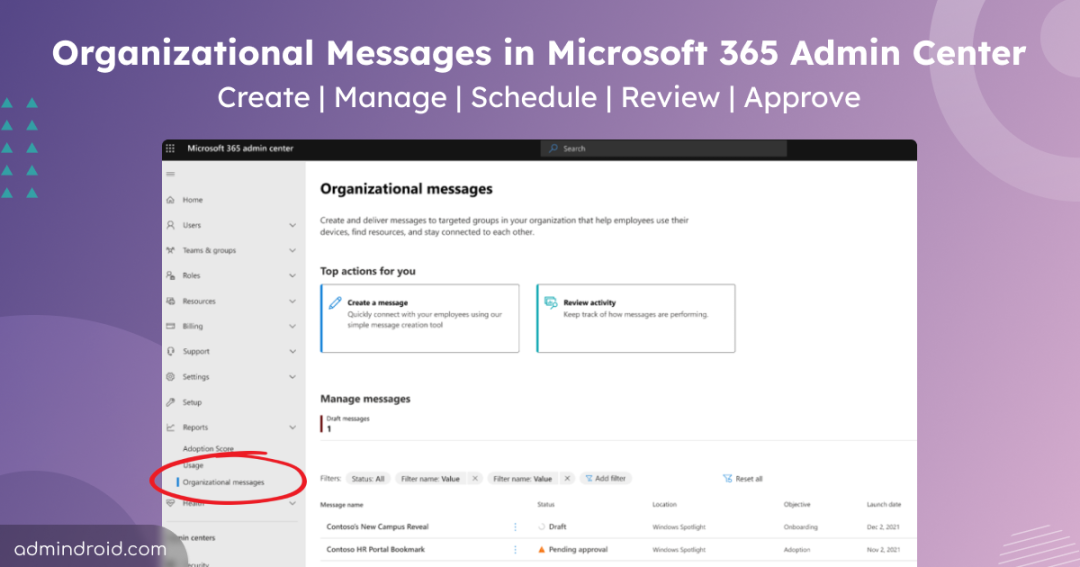
What is Organizational Messages in Microsoft 365 Admin Center ?
Organizational messages in the M365 admin center lets you send concise, actionable, and customized messages directly to specific users within the Microsoft products they use like Microsoft Windows 11 or Microsoft 365 apps. These messages are invaluable for improving in-product experiences, especially in scenarios like remote or hybrid work setups.
You can use organizational messages to,
✅Encourage Microsoft 365 security best practices.
✅ Update users with new policy enforcement.
✅ Inform about new products/features.
✅ Distribute educational resources for employees.
✅ Share updates on Microsoft 365 services or licenses.
✅ Inform about organizational projects and goals.
✅ Deliver service health notices.
✅ Facilitate Microsoft 365 user onboarding.
This organizational message experience in the M365 admin center serves as a comprehensive hub, allowing you to view and manage all the messages in one place, regardless of their origin.
Key Features of Organizational Messages in Microsoft 365
The new organizational messages feature in Microsoft 365 offers several enhancements:
- Centralized Location: It now has as a centralized hub for managing all activities related to organizational messages. This includes creating, managing, and reviewing messages all within the Microsoft 365 admin center.
- Customization: You have the flexibility to customize messages according to your needs. This includes adding CTA, URLs, specifying frequency and timeframes for message delivery, customizing message titles, and adding images for additional information.
- Targeted Delivery: You can precisely target your messages to specific users or groups within your organization, ensuring that the right information reaches the right people at the right time.
- Approval Flows: With the introduction of approval flows, you can maintain control over the content being delivered. This ensures that messages undergo proper review before being sent out, minimizing the risk of inaccuracies or inappropriate content.
These enhancements make the organizational messages feature more versatile and user-friendly, empowering administrators to effectively communicate with their organization. Let’s explore how to access organizational messages within the Microsoft 365 admin center. But wait, there are some prerequisites!
Prerequisites to Use Organizational Messages in Microsoft 365
- To create organizational messages in the M365 admin center, i.e., Author, you should be a Global administrator or Organizational Messages Writer.
- To review organizational messages i.e., Approver, you should be a Global Administrator or Organizational Messages Approver.
- Recipients should have access to the Microsoft products specified in the ‘Location’. For example, if the message is set to be delivered to the Windows spotlight channel, the recipient must have Windows 11 Enterprise.
- Make sure to enable all organizational message policy requirements in Microsoft 365.
View Organizational Messages in the Microsoft Entra Admin Center
To access organizational messages, follow the steps below.
- Sign in to the Microsoft 365 admin center.
- Navigate to the “Reports” section.
- Expand it and select “Organizational messages” in Microsoft 365.
Now, you can view three actionable options, highlighting the centralization aspect of the new feature.
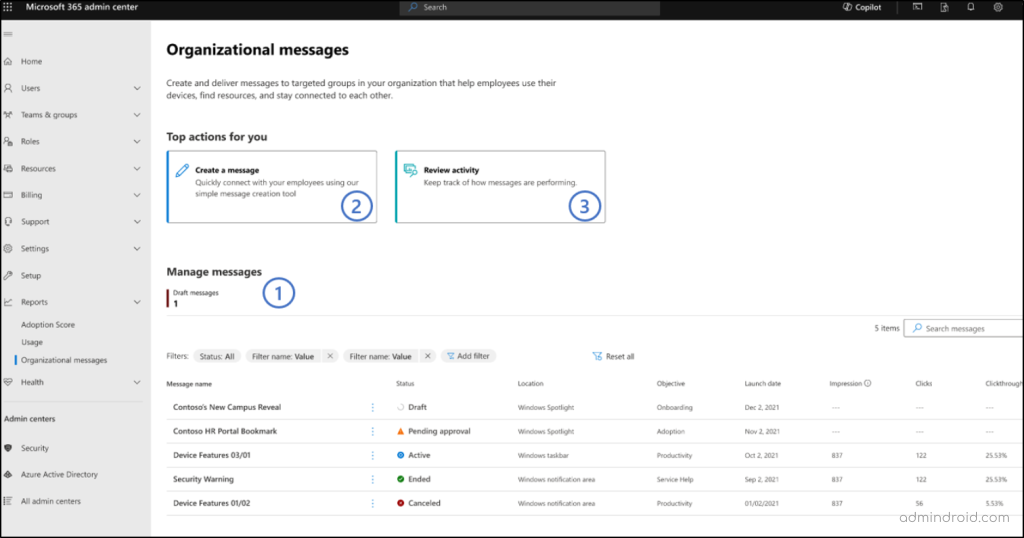
Let’s see how these three options help!
1. Manage Organizational Messages in the Microsoft 365 Admin Center:
You can review and control the messages for any users in the organization from this central spot. Also, you can view details such as the location of the message to appear at the user’s end, objectives, impressions, clicks, and other details of the organizational messages. From here, you can do the following:
- Filtering: Utilize filtering options to sort through the details of organizational messages, making it effortless to find specific messages or information you need.
- Approval and Deletion: Take charge of organizational messages by approving, canceling, or deleting them directly within the Microsoft 365 admin center. This ensures that only relevant and approved messages are circulated within your organization.
- Drafted Messages: Easily locate drafted messages by setting the filter to “Draft” and making modifications as necessary directly from the manage section of this feature. This streamlines the process of refining and finalizing messages before distribution.
Let’s dive into the next option now.
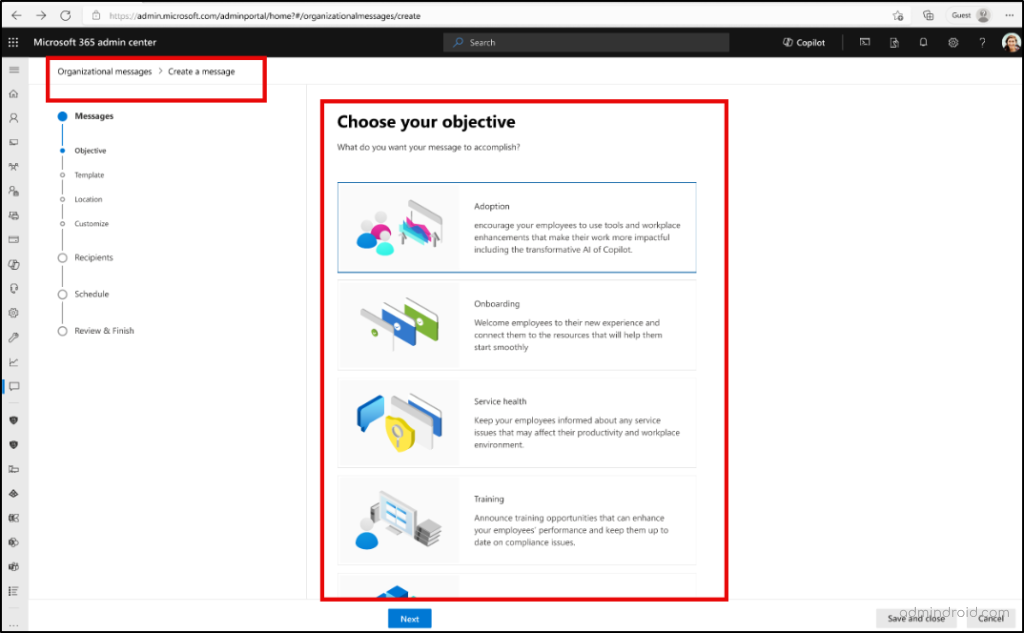
2. Create Organizational Messages in the Microsoft 365
To create an organizational message in Microsoft 365, follow these simple steps:
Step 1: Objective- Begin by selecting the purpose or objective of your message. This helps ensure that your message is aligned with its intended goals.
Step 2: Template- Decide on the format of your message. You have two options:
- Create your own: Design a message from scratch, incorporating your own words, company logo, and other custom elements to fit your specific requirements.
- Templated messages: Choose from pre-designed templates provided by Microsoft, making it easy to create a message without starting from scratch.
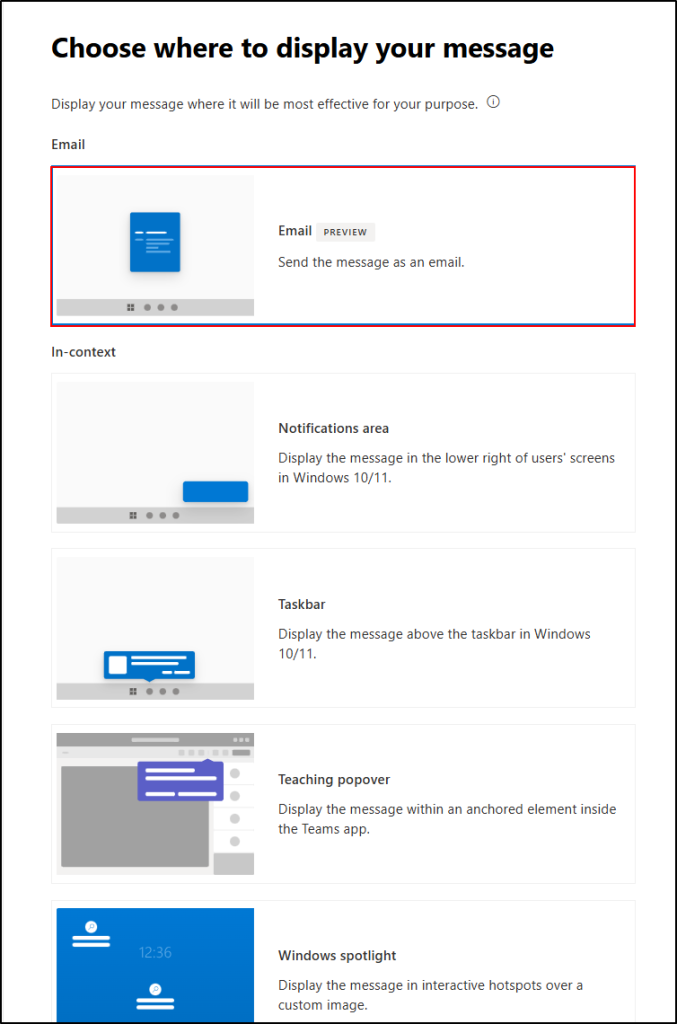
Step 3: Location- Next, choose where the message will be displayed for users. There are four placement options available: Notifications area, Taskbar, Teaching Popover, and Windows Spotlight.
Step 4: Customize- Add customization to your message, such as full text and custom URLs, to tailor it to your audience’s needs.
Step 5: Recipients- Select the recipients for your message, ensuring that it reaches the appropriate users within your organization.
Step 6: Schedule- Set the start and end dates and choose how often the message will be sent to the same user. This helps ensure timely delivery and relevance.
Step 7: Review & Finish- Review the message before scheduling or sending it for approval to your organization’s approvers. This ensures that the message meets quality standards and is ready for distribution.
3. Review Organizational Messages Activity in Microsoft 365
When you check out the “Review Activity” section, you’ll find useful info to see how well your messages are doing:
Advanced Insights: Here, you can dig deeper:
- Filtering: Pick specific periods, status, or others to focus on specific organizational message details.
- Graphs: See trends of organizational messages over time with easy-to-understand graphs.
- Data Export: You can download the data for further analysis.
Time-Series Data Charts: At the top, three graphs show how your message views, clicks, and click-through rates change each day.
Points to Note:
- At present, organizational messages are not restricted based on the licenses possessed by the participating tenants, authors, approvers, and recipients. But in the future, the organizational messages features might be restricted to specific Microsoft licenses.
- If you use fully customized messages, an approval process is required. However, no approval process is needed if you use pre-made templates.
- Messages not reviewed within the specified end time will automatically get rejected by the system.
- If an approver rejects the message, the message will be marked as “rejected” and the author needs to withdraw it. After that, the author should modify the new draft.
- The approvers cannot approve/reject their own messages.
- If you save your draft before the ‘Schedule’ step without assigning a custom name, it will automatically be given a name based on the date and time of the save.
- Once you select the “Send for approval” option while creating your customized messages, anyone with an approver role can be able to review it.
- When sending a new message to the same channel, the images from the previous message are automatically populated. You need to replace them with a new image for your new message.
- In spring 2024, the organizational messages will have another feature called “Sent urgent message” to allow admins to send messages out fast during time-sensitive events like service outages.
- Adoption Score organizational messages on Office or Outlook channels are not visible in the centralized experience. Additionally, Intune organizational messages can only be read in the centralized experience; they cannot be canceled or deleted.
Update (25/11/2025) – New Capabilities in Organizational Messages
Microsoft has introduced two major enhancements to Organizational Messages:
- Email as a Delivery Channel for Organizational Messages — allowing messages to be sent directly to users’ inboxes for greater visibility and engagement.
- Action Segments in Organizational Messages — enabling targeted delivery based on real user behavior rather than static groups, ensuring messages reach the most relevant audience.
Microsoft Adds “Email” as a Delivery Channel for Organizational Message
Microsoft has expanded the capabilities of Organizational Messages by introducing a new delivery channel in Public Preview: Email.
Until now, organizations could target users only within Windows and Teams through the four existing placement options : Notifications area, Taskbar, Teaching popover, and Windows spotlight. With this update, organizational messages can now be delivered directly to users’ inboxes, allowing teams to:
- Communicate through a familiar and high-visibility channel.
- Improve read rates and user engagement.
- Accelerate feature onboarding and product adoption.
Ready-to-use Templates for Simplified Adoption
As part of the Public Preview, Microsoft is also introducing pre-built email templates, so admins can quickly deliver engaging messages without creating content from scratch.
Templates available in preview include:
- Two welcome messages
- Welcome to Copilot
- Welcome to Copilot Chat
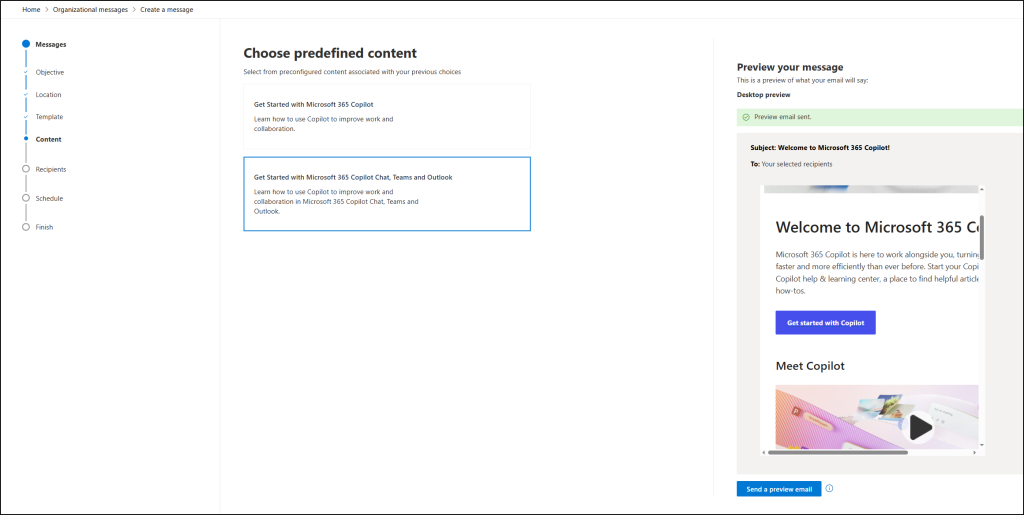
- Six weekly “Great M365 Copilot Journey” emails
- Focused on showcasing Copilot features, best practices, and tips to guide users through onboarding and continuous adoption.
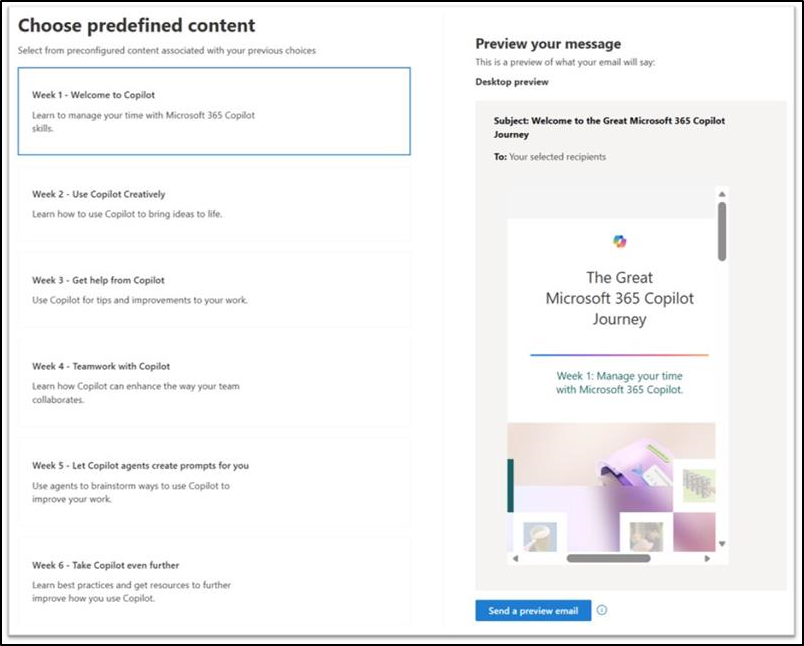
Admins can preview these templates and even send a sample email directly from the preview screen to see how the message will look for end users.
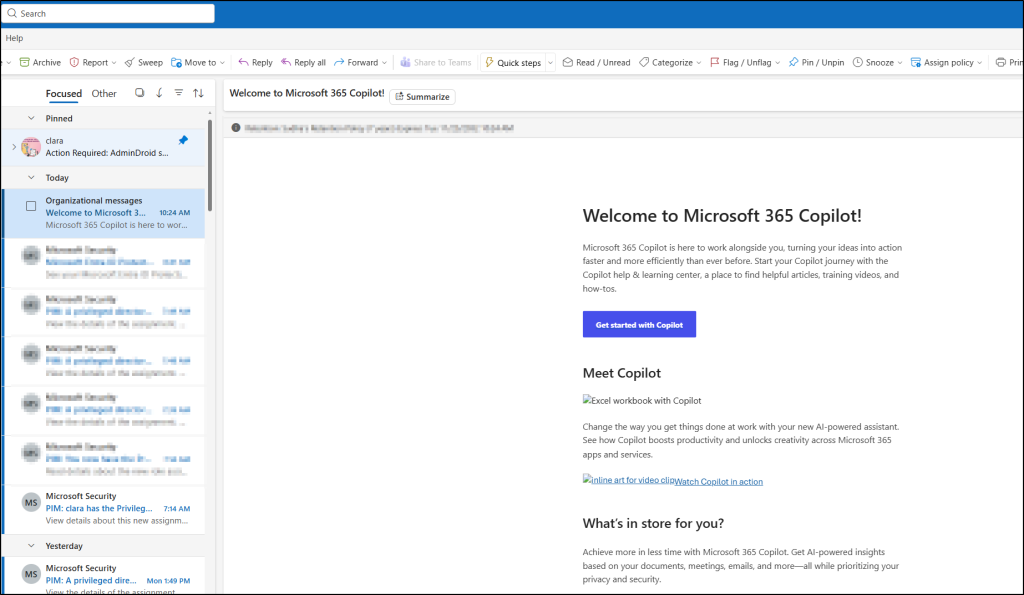
Sample Email:
Action Segments in Organizational Messages
In addition to email delivery, Microsoft now supports Action Segments in Organizational Messages. Action Segments enable IT admins to target users based on real usage behavior, rather than relying only on static groups. This means messages can be sent to users who are most likely to benefit from them — for example, users who recently began using Copilot or those who haven’t engaged with it yet.
By targeting the right users at the right moment, organizations can deliver more relevant and impactful communication that drives adoption and behavior change. During the Public Preview, two predefined Action Segments are available for Copilot usage:
- Inactive Copilot Users in Teams
- Inactive Copilot Users
Also, during the Public Preview, Action Segments cannot be combined with Email delivery. They can only be used with the existing message surfaces — Windows Spotlight, Taskbar, Notification Center, and Teams Popover.
That’s all. Hope this blog brings you more information about organizational messages in the Microsoft 365 admin center. If you have any doubts regarding this, you can reach us via the comments section. Happy reading!


