In Microsoft 365 organizations, various applications are registered and integrated to support different business needs. These applications authenticate using client secrets, symmetric keys, or certificates to request access tokens. Therefore, managing these credentials is crucial for securing access, as they can become a significant security risk if left unmanaged or allowed to exist for too long.
To address these risks, Microsoft Entra provides application management policies, which allow admins to enforce specific rules on how application credentials, such as secrets and keys, are created, stored, and maintained. By implementing these policies, you can ensure that credentials are properly managed, reducing the likelihood of unauthorized access and enhancing your overall security posture.
In this blog, let’s explore how to set up Microsoft Entra application management policies. These policies help enforce robust credential governance and enhance app security in Microsoft 365.
Entra ID Application Management Policies
Application Management Policies in Microsoft Entra allow admins to enforce security best practices for applications, such as blocking passwords, disallowing custom secrets, and controlling their expiration based on the app’s creation date. By leveraging the creation date of applications or service principals, admins can not only ensure that new applications comply with strict security standards but also apply the same policies to existing applications over time.
These policies can be applied globally (tenant-wide) or specifically to individual applications. This approach helps organizations assess app security, enforce tailored controls, and strengthen control over application identities to reduce unauthorized access.
Tip: To ensure applications’ client secrets and certificates are renewed before they expire, you can export a list of all applications with expiring credentials using PowerShell.
Two Types of Policy Controls in Microsoft 365
Tenant Default App Management Policy
A tenant default policy is a single object that applies to all applications and service principals within the tenant.
It includes two key properties:
- applicationRestrictions: Targets applications owned by the tenant (application objects).
- servicePrincipalRestrictions: Targets service principals provisioned from another tenant (service principal objects).
These properties allow organizations to separately control the configuration of apps originating from their tenant and externally owned applications that their tenant interacts with.
App Management Policy
App management policies in Microsoft Entra allow admins to create and customize restrictions for specific applications or service principals. These policies override the tenant default policy settings. Only one app management policy can be assigned to an application or service principal at a time.
Points to Remember:
| Scenario | Outcome |
| Both the tenant default policy and app management policy define the same restriction. | App management policy takes precedence. |
| A restriction is disabled in the app management policy. | The restriction will not apply to linked apps, even if it’s enabled in the tenant default policy. |
| A restriction is not defined in the app management policy. | The restriction from the tenant default policy will apply. |
How to Set Up App Management Policies in Microsoft Entra using Graph API?
Let’s explore how to configure app management policies in Microsoft Entra using the Graph API. Depending on your requirements, you can work with either the default tenant policy or create custom app policies.
Requirements: You need to be an Application Administrator or Cloud Application Administrator to manage authentication method policies.
How to Configure the Default Tenant App Management Policies
By default, the tenant app management policy is disabled. You can follow the steps below to enable and update the default tenant policy using Graph Explorer.
View the Default Tenant App Management Policy
Before updating the default app management policy in Microsoft Entra, it’s crucial to first understand how it is currently configured. This helps ensure any changes align with your organization’s existing security posture and policy requirements.
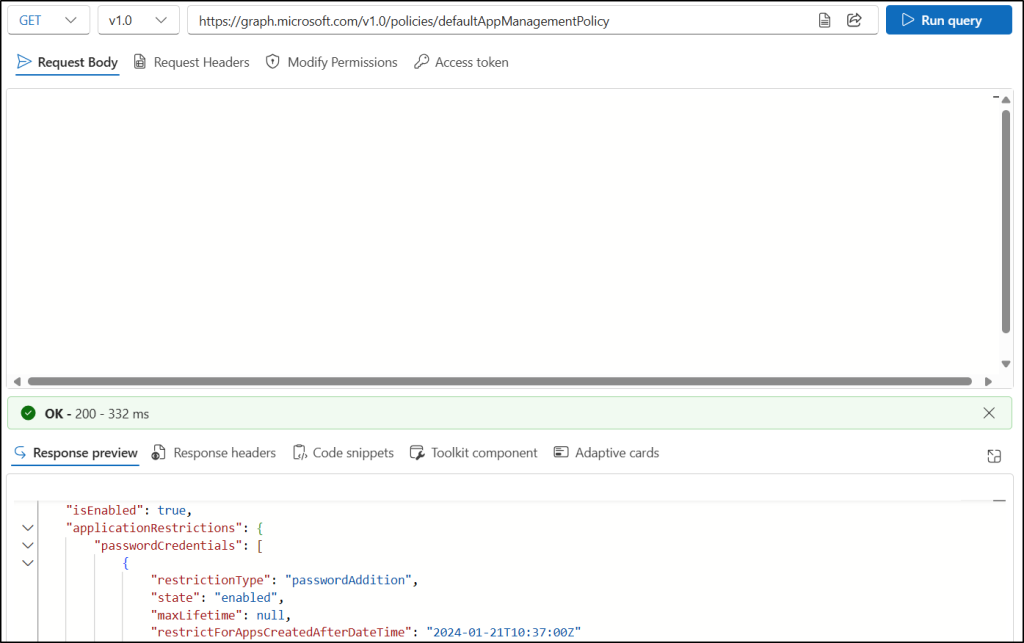
You can view how the default tenant app management policy is set in your organization using the following steps.
- Sign in to Microsoft Graph Explorer using your Microsoft 365 account.
- Set the HTTP request method to GET.
- Enter the following API in the HTTP request URL:
https://graph.microsoft.com/v1.0/policies/defaultAppManagementPolicy - On the Modify Permissions tab, click Consent on the Policy.Read.All permissions.
- Click Run Query to execute the request.
This retrieves how the default Microsoft Entra app management policy is configured for all your applications and service principals, allowing you to track the necessary updates needed for the policy.
Update the Tenant App Management Policy
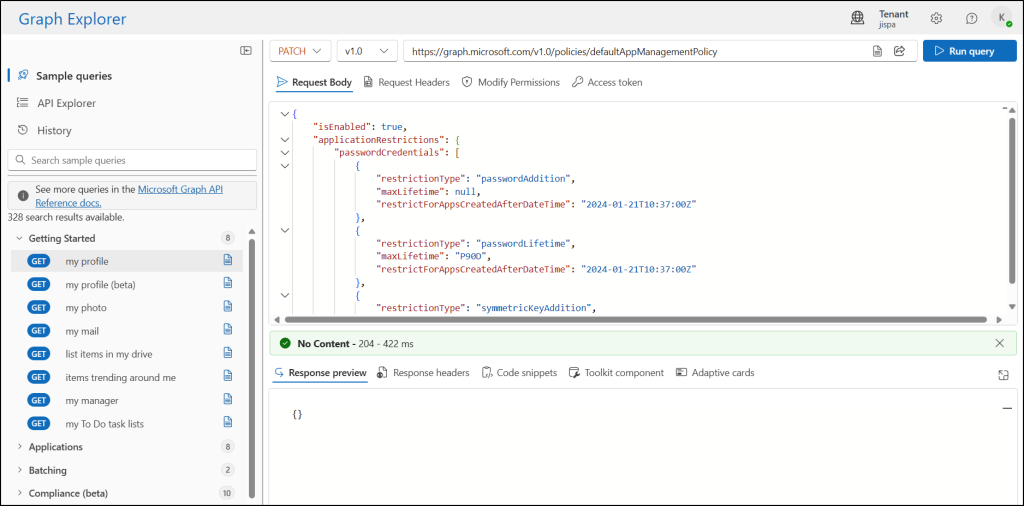
Once you’ve reviewed the current settings, follow the steps below to enable and update the policy using the Graph API.
- Sign in to Microsoft Graph Explorer using a M365 account.
- In the HTTP request bar, set the HTTP method to PATCH.
- Set the HTTP request URL to the following API:
https://graph.microsoft.com/v1.0/policies/defaultAppManagementPolicy - Go to the “Modify Permissions” tab and click the “Consent ” button near the “Policy.Read.ApplicationConfiguration” to grant the required permission to Graph Explorer.
- Enter the following JSON format in the Request Body and click Run query.
|
1 2 3 4 5 6 7 8 9 10 11 12 13 14 15 16 17 18 19 20 21 22 23 24 25 26 27 28 29 30 31 32 33 34 35 36 37 38 39 40 41 42 43 44 |
{ "isEnabled": true, "applicationRestrictions": { "passwordCredentials": [ { "restrictionType": "passwordAddition", "maxLifetime": null, "restrictForAppsCreatedAfterDateTime": "2024-01-21T10:37:00Z" }, { "restrictionType": "passwordLifetime", "maxLifetime": "P90D", "restrictForAppsCreatedAfterDateTime": "2024-01-21T10:37:00Z" }, { "restrictionType": "symmetricKeyAddition", "maxLifetime": null, "restrictForAppsCreatedAfterDateTime": "2024-01-21T10:37:00Z" }, { "restrictionType": "customPasswordAddition", "maxLifetime": null, "restrictForAppsCreatedAfterDateTime": "2024-01-21T10:37:00Z" }, { "restrictionType": "symmetricKeyLifetime", "maxLifetime": "P90D", "restrictForAppsCreatedAfterDateTime": "2024-01-21T10:37:00Z" } ], "keyCredentials":[ { "restrictionType": "asymmetricKeyLifetime", "maxLifetime": "P90D", "restrictForAppsCreatedAfterDateTime": "2024-01-21T10:37:00Z" }, ] } "servicePrincipalRestrictions": { "passwordCredentials": [], "keyCredentials": [] } } |
The above JSON format enables the tenant app management policy and applies various restrictions on passwords and key credentials. This includes setting a maximum lifetime of 90 days for password secrets, symmetric keys, and asymmetric keys for all applications created after January 21, 2024.
Note: You can modify the policy settings configuration as per your organization’s requirements.
If successful, this method returns a “204 No Content response” code. It doesn’t return anything in the response body.
Setting Up Custom App Management Policies
Every application in your environment has unique security needs. While some applications may only require basic security settings, others may demand more specific, granular controls to meet compliance or organizational requirements. In these cases, Microsoft Entra allows you to create and assign custom app management policies tailored to the specific needs of each application, ensuring optimal security and control for your entire application landscape.
Now, let’s see how to create and assign app authorization policies in Microsoft Entra.
- Create an app management policy in Microsoft Entra
- Assign the policy to an application
- Update the app management policy
- Remove the policy from an application
- Delete the app management policy
1. Create an App Management Policy in Microsoft Entra
Follow the steps below to create an app management policy in Microsoft Entra.
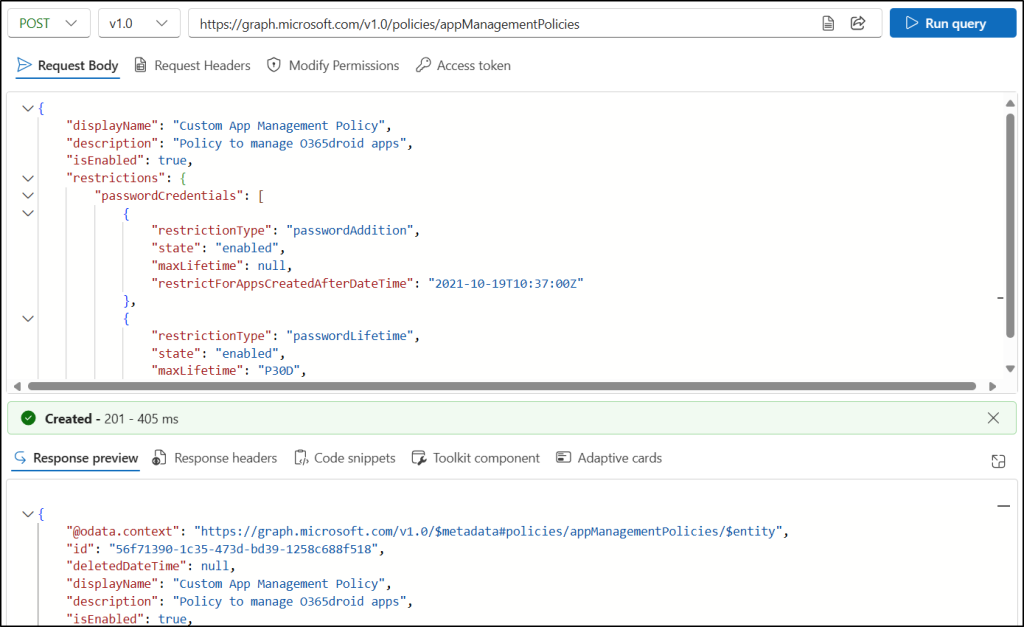
- Sign in to Microsoft Graph Explorer with a Microsoft 365 account.
- In the HTTP request bar, set the HTTP method to POST.
- Set the HTTP request URL to the following API:
https://graph.microsoft.com/v1.0/policies/appManagementPolicies - Go to the “Modify Permissions” tab and click the “Consent” button near “Policy.Read.ApplicationConfiguration” to grant the required permission to Graph Explorer.
- Enter the following JSON format in the Request Body and click Run query.
|
1 2 3 4 5 6 7 8 9 10 11 12 13 14 15 16 17 18 19 20 21 22 23 24 25 26 27 28 29 30 31 32 33 34 35 36 37 38 39 40 41 42 43 44 45 46 47 |
{ "displayName": "Custom App Management Policy", "description": "Policy to manage contoso apps", "isEnabled": true, "restrictions": { "passwordCredentials": [ { "restrictionType": "passwordAddition", "state": "enabled", "maxLifetime": null, "restrictForAppsCreatedAfterDateTime": "2021-10-19T10:37:00Z" }, { "restrictionType": "passwordLifetime", "state": "enabled", "maxLifetime": "P30D", "restrictForAppsCreatedAfterDateTime": "2021-10-19T10:37:00Z" }, { "restrictionType": "customPasswordAddition", "state": "disabled", "maxLifetime": null, "restrictForAppsCreatedAfterDateTime": "2021-10-19T10:37:00Z" }, { "restrictionType": "symmetricKeyAddition", "state": "enabled", "maxLifetime": null, "restrictForAppsCreatedAfterDateTime": "2021-10-19T10:37:00Z" }, { "restrictionType": "symmetricKeyLifetime", "state": "enabled", "maxLifetime": "P30D", "restrictForAppsCreatedAfterDateTime": "2021-10-19T10:37:00Z" } ], "keyCredentials": [ { "restrictionType": "asymmetricKeyLifetime", "state": "enabled", "maxLifetime": "P30D", "restrictForAppsCreatedAfterDateTime": "2021-10-19T10:37:00Z" }, ] } } |
The above format creates a custom app management policy named “Custom App Management Policy” and sets the following restrictions:
- Blocks the creation of new passwords and symmetric keys.
- Limits the lifetime of passwords and symmetric keys to 30 days for applications created on or after October 19th, 2021, at 10:37 AM UTC.
If successful, this method returns a “201 Created response code” with the new app management settings in the response payload.
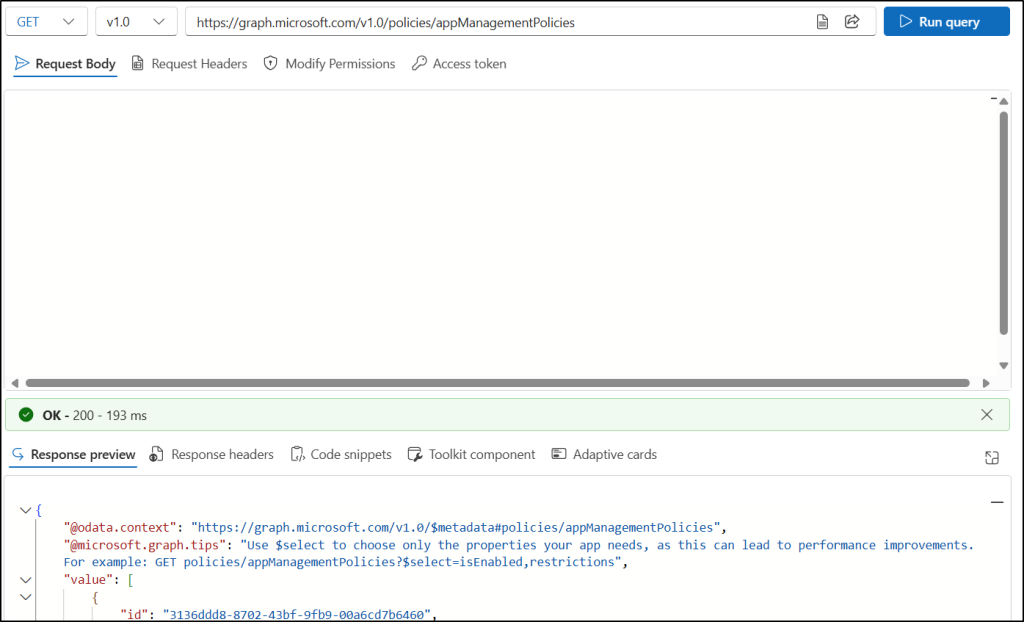
After creating app management policies, you can list all the ones configured in your organization by following these steps.
- Set the HTTP request method to GET.
- Enter the following API in the HTTP request URL:
https://graph.microsoft.com/v1.0/policies/appManagementPolicies - On the Modify Permissions tab, click “Consent ” next to the Policy.Read.All permission.
- Click Run query to execute the request and retrieve the list of app management policies.
This retrieves detailed information about all created policies, including their IDs, and configuration settings.
Note: The policy ID retrieved in this method will be used for all the processes below.
Handy Tip: To view the settings of a specific app management policy, use the following API in the HTTP request URL.
https://graph.microsoft.com/v1.0/policies/appManagementPolicies/<id>
Replace <id> with the ID of the policy you want to view.
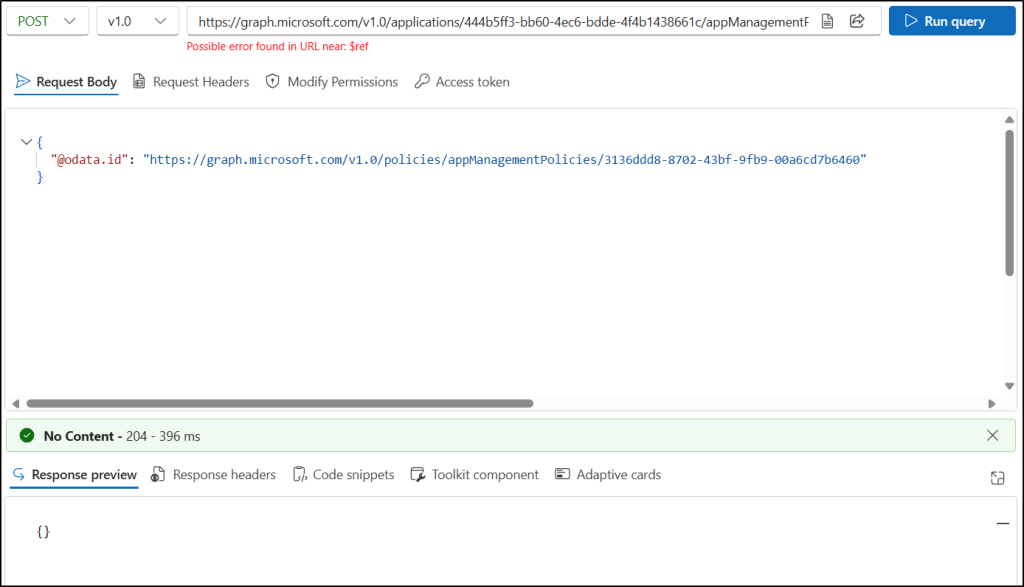
2. Assign the App Management Policy to an Application
After creating a custom policy, you need to assign the app management policy object to a specific application to override the default tenant policy.
Follow the steps below to assign the policy to a Microsoft Entra ID application.
- Sign in to Microsoft Graph Explorer using a Microsoft 365 account.
- In the HTTP request bar, set the HTTP method to POST.
- Set the request URL to the following API:
https://graph.microsoft.com/v1.0/applications/<id>/appManagementPolicies/$ref
Replace <id> with the object ID of the application to which you want to apply the policy. - Go to the Modify Permissions tab, then grant consent for the Policy.ReadWrite.ApplicationConfiguration and Application.ReadWrite.All permissions, if not already granted.
- In the Request Body, enter the following JSON format. Replace <PolicyID> with the object ID of the app management policy you created.
{
“@odata.id”: “https://graph.microsoft.com/v1.0/policies/appManagementPolicies/<PolicyID>”
} - Click Run query to assign the policy to the application.
If successful, this method returns a “204 No Content response” code. It doesn’t return anything in the response body.
Note: You can use the following API in the HTTP request URL to assign an appManagementPolicy to a service Principal.
https://graph.microsoft.com/v1.0/servicePrincipals/<ServicePrincipalObjectID>/appManagementPolicies/$ref
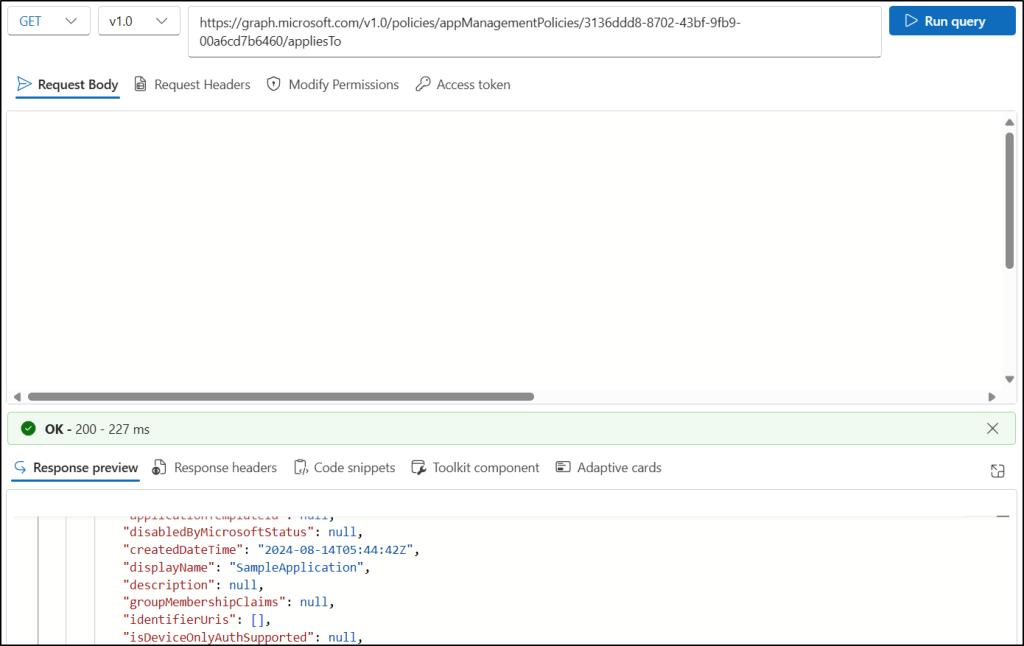
You can track all applications and service principals where a specific app management policy is applied by following the steps below.
- Set the HTTP request method to GET.
- Enter the following API in the HTTP request URL:
https://graph.microsoft.com/v1.0/policies/appManagementPolicies/<id>/appliesTo
Replace <id> with the ID of the app management policy you want to view. - On the Modify Permissions tab, click Consent next to Policy.Read.All if required.
- Click Run query to execute the request.
If successful, this method returns a “200 OK response” along with a collection of application and service principal objects to which the policy is currently applied.
Note: Only one custom policy can be applied to a Microsoft Entra app.
3. Update the App Management Policy
As organizational requirements change over time, you may need to adjust the restrictions defined in your application management policies. Microsoft Entra allows you to update existing policies easily, helping you maintain strong security controls while adapting to evolving app governance needs.
Follow the steps below to update a custom app management policy.
- Sign in to Microsoft Graph Explorer using a Microsoft 365 account.
- In the HTTP request bar, set the HTTP method to PATCH.
- Enter the following API in the HTTP request URL:
https://graph.microsoft.com/v1.0/policies/appManagementPolicies/<id>
Replace <id> with the ID of the app management policy you want to update. - On the Modify Permissions tab, click ” Consent ” next to the Policy.ReadWrite.ApplicationConfiguration permission.
- In the Request Body, supply only the values for properties to update and click Run query.
If successful, the request returns a “204 No Content response”.
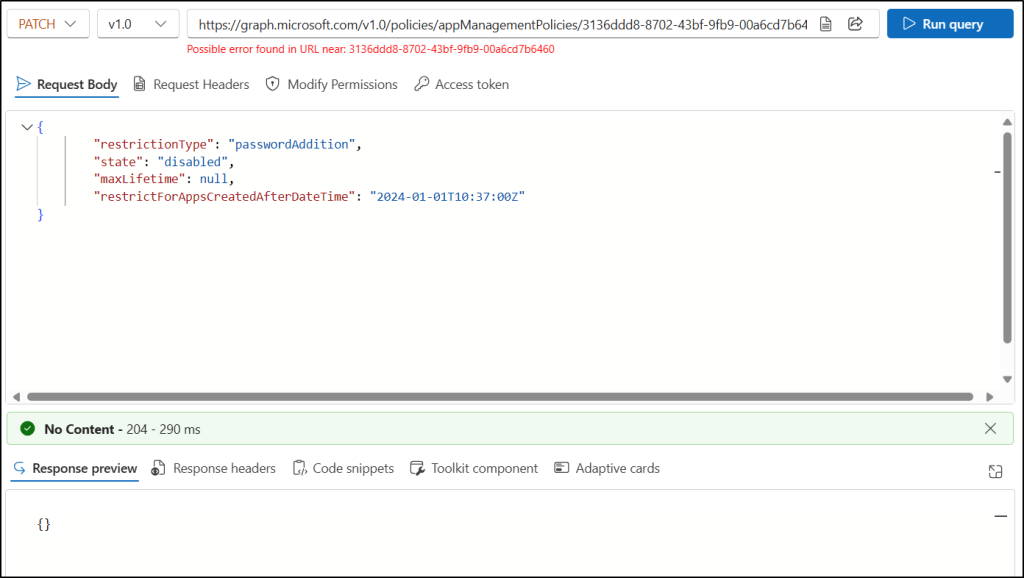
Handy Tip: You can set the state to enabled under the “passwordAddition” restriction in app management policy to block the creation of client secrets in specific Microsoft Entra applications.
4. Remove the App Management Policy from an Application
If a custom app management policy is no longer needed for a specific application, you can unassign it using the Microsoft Graph API.
- Sign in to Microsoft Graph Explorer with your Microsoft 365 account.
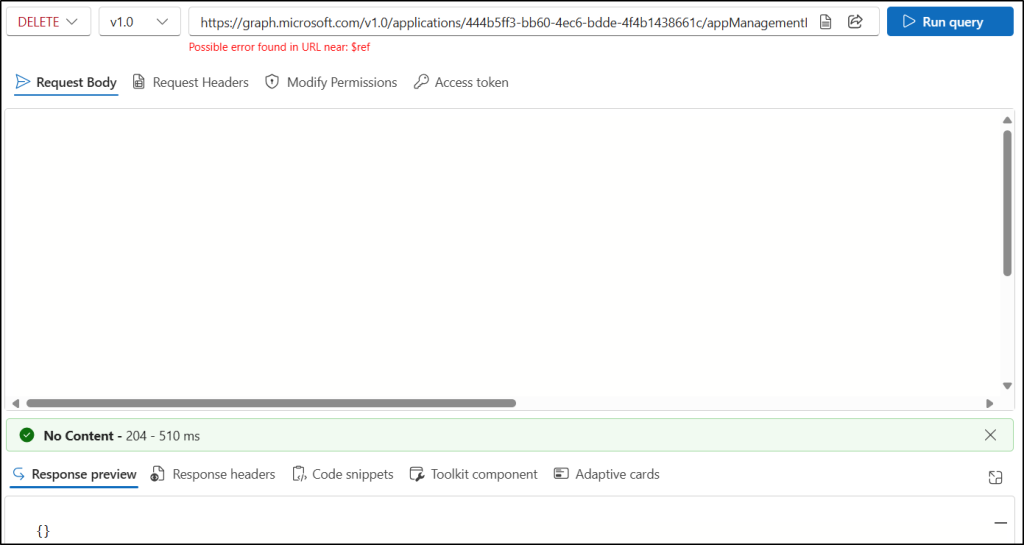
- Set the HTTP method to DELETE.
- Enter the following API in the HTTP request URL:
https://graph.microsoft.com/v1.0/applications/<AppObjectID>/appManagementPolicies/<PolicyID>/$ref
Replace <AppObjectID> and <PolicyID> with the IDs of the application and the app management policy you want to remove. - Click Run Query to execute the request.
If successful, this operation returns a “204 No Content response”, confirming that the policy has been removed from the application.
5. Delete the App Management Policy
When an app management policy is no longer required, such as when it becomes outdated or does not match current security standards, it should be reviewed for removal. Deleting the policy is especially important in use cases like decommissioning legacy applications, eliminating redundant access paths, or tightening security during audits or organizational restructuring.
Follow the steps below to delete the app management policy using Microsoft Graph Explorer.
- Sign in to Microsoft Graph Explorer with your Microsoft 365 account.
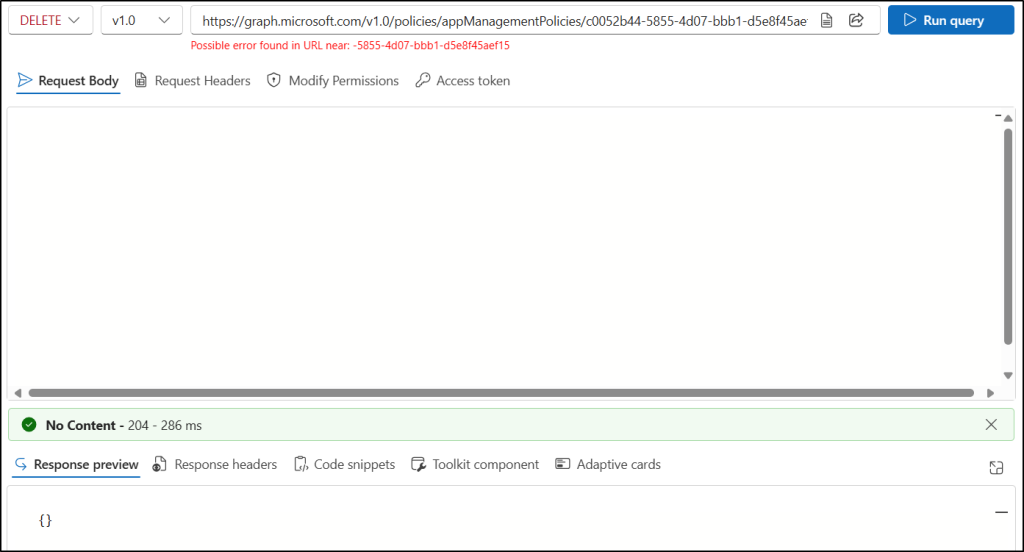
- In the HTTP request bar, set the HTTP method to DELETE.
- Set the HTTP request URL to the following API:
https://graph.microsoft.com/v1.0/policies/appManagementPolicies/<id>
Replace <id>with the ID of the policy you want to delete. - Go to the Modify Permissions tab and grant Consent to the Policy.Read.ApplicationConfiguration permission.
- Click Run Query to delete the specified app management policy from Microsoft 365.
If successful, this operation returns a 204 No Content response, indicating that the policy was deleted. No response body is returned.
Note: Just like outdated application management policies, outdated app credentials, or unused applications pose a significant security risk. They can create loopholes for attackers and increase your organization’s attack surface. Therefore, it is recommended to remove unused credentials from applications and delete outdated apps in Microsoft Entra.
While these policies help you secure the Microsoft Entra application secrets, it is also important to manage user consent to applications, review app permissions, and follow Secure Score recommendations for stronger protection.
We hope this blog has provided valuable insights into setting up and managing app management policies in Microsoft Entra. If you have any questions or need further assistance, feel free to leave a comment below.


