One suite for providing comprehensive protection across the entire organization = Microsoft 365 Defender portal.
Due to the increasing technology and versatility of Microsoft 365 workloads, it is challenging for administrators to implement security best practices and stay up to date. So, Microsoft launched Microsoft 365 Defender, an all-in-one tool designed to protect users and businesses from advanced phishing attacks, insider threats, and malicious URL intrusions.
However, too many security levels could ultimately limit a user’s ability to work efficiently. But if we err in configuring the security settings correctly, we might leave our workplace vulnerable to attacks.
Therefore, considering this, Microsoft introduced preset security policies in the Defender portal as a way of helping organizations overcome the misconfigurations of security policies.
What are Preset Security Policies in Microsoft 365 Defender?
Preset security policies are customizable templates for applying spam, malware, and phishing policies to users at once. The preset security policy templates include standard protection and strict protection.
Later, to the strict and standard protection list, Microsoft started to include built-in protection in Microsoft Defender.
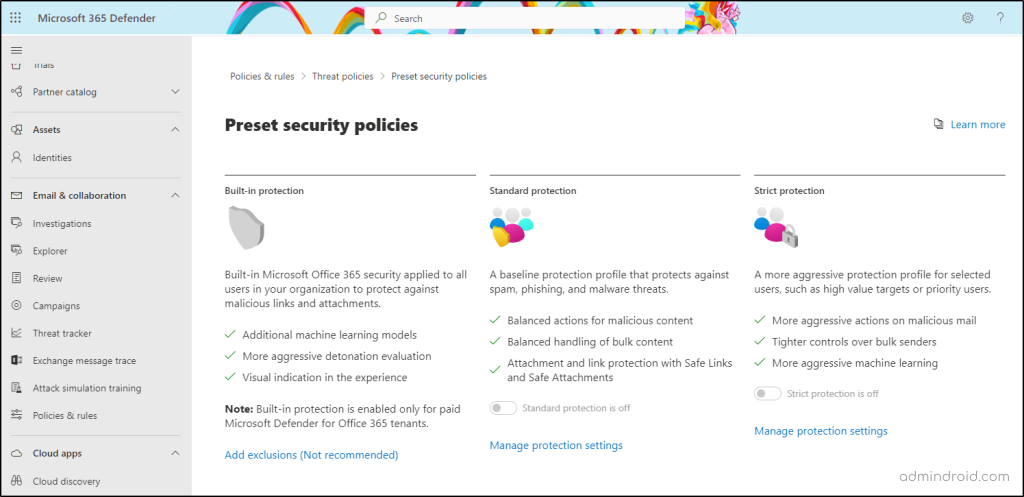
While admins cannot modify the policy actions directly, they can enable preset security policies (Standard and Strict) to effectively manage security measures. They also have the option to exclude or include specific subsets of users and groups, allowing you to apply recipients from the EOP protections to Defender for Office 365.
License Requirements for Preset Security Policies:
You need the following licenses to implement preset security policies in your organization.
- Microsoft Defender for Office 365 plan 1.
- Microsoft Defender for Office 365 plan 2.
- Exchange Online Protection.
- Microsoft 365 Defender.
‘Built-in Protection’ for Microsoft Defender
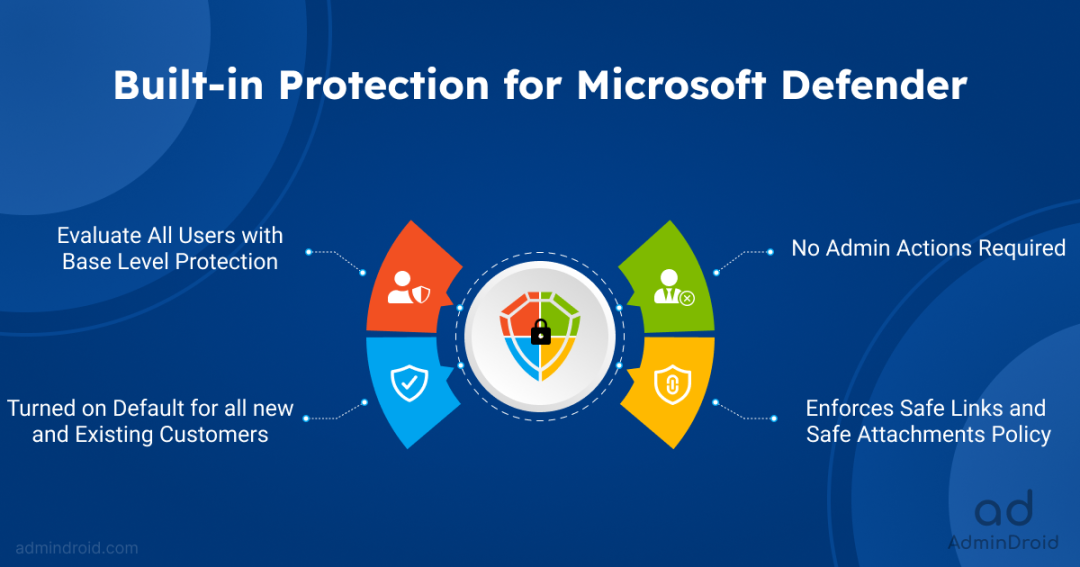
Generally, administrators assign Standard and Strict protection policies manually. But the built-in protection, the new third preset security policy, is being enabled by default only for the paid Microsoft Defender for Office 365 tenants.
✅ The built-in protection enforces the Safe Links and Safe Attachments policy and prevents users from malicious links & attachments, phishing attempts, and malware installations.
✅ For users with prior standard protection, strict protection, or other customized policies, built-in policies are not considered.
✅Lately, Microsoft rolled out the option to set exclusions for some users, groups, and domains. (This is not a recommended approach).
Overall, the purpose of this built-in policy is to provide users with a baseline level of security.
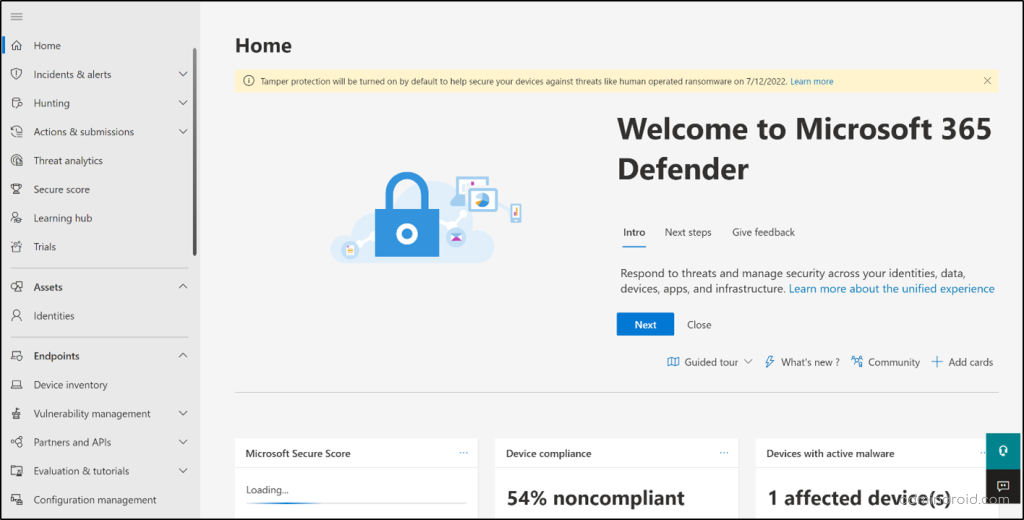
Microsoft has turned on Tamper Protection as part of its built-in protection and previously sent notifications about tamper protection to get it enabled.
Also, to view the rules that are set along with the Built-in protection policy, you can use the Get-ATPBuiltInProtectionRule cmdlet:

What is Tamper Protection in Microsoft Defender?
Attackers trick users with multiple attacks, like MFA fatigue and SIM swapping, to gain access to Office 365 accounts. Whenever a bad actor gets into a user’s account, he begin by tampering with it.
Tampering is an illicit technique of disabling the security features/settings used by hackers to start their threatening activities. This is the initial method used to intrude anywhere within your organization.
So, for this concern, Microsoft introduced Tamper Protection, a key technology to prevent users from modifying or turning off Microsoft Defender or any security settings in the organization.
Microsoft started to enable tamper protection by default for all new and existing customers with Defender for Endpoint Plan 2/Microsoft 365 E5 licenses.
What does Tamper Protection do?
Typically, tamper protection does not prevent viewing of the organization’s security settings. With tamper protection enabled, it prevents apps from taking actions such as:
- Disabling anti-virus and threat protection.
- Disabling real-time and cloud-delivered protection.
- Turning off behavior monitoring.
- Removing security intelligence updates.
- Suppressing notifications in the Windows Security app.
- Disabling scanning of archives and network files.
And it prevents security settings from being changed through apps and methods such as:
- Blocking any modifications in registry-based settings and files.
- Tampering with any running process on Windows clients.
- Modifying and deleting any security settings through Group Policy.
- Modifying the settings through PowerShell cmdlets.
Get Tamper Protection Status Using PowerShell
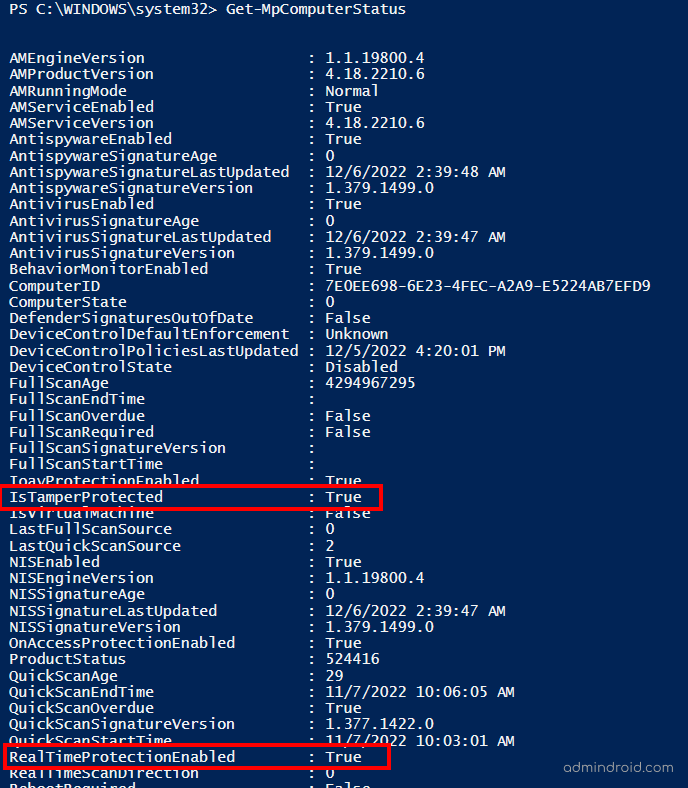
Now that Microsoft has enabled tamper protection for all users, you can check whether it is enabled or not using the following cmdlet.
Run the Get-MpComputerStatus cmdlet in Windows PowerShell and check the status of IsTamperProtected and RealTimeProtectionEnabled. The value ‘True’ denotes that tamper protection is already enabled.
Manage Tamper Protection Using Microsoft Defender
Tampering with devices and applications can result in hazardous consequences! And therefore, tamper protection was brought up and turned on by default for the entire organization. But if you want to customize the policy settings, we do have a way. ✅
- Manage tamper protection for the entire organization – Use the Microsoft 365 Defender portal.
- Manage tamper protection for specific users/devices – Use Microsoft Endpoint Manager. (Recommended method)
Note: In a hybrid environment, you should give priority to managing tamper protection through Intune rather than through M365 Defender.
Managing tamper protection organization-wide is simple and can be done & dusted in a jiffy! Whereas fine-tuning the tamper protection settings takes one’s time. 🫤 So, before getting started, make sure you meet the prerequisites for managing tamper protection in Microsoft Intune.
Manage Tamper Protection Using Microsoft Endpoint Manager:
The following steps will guide you through creating a policy that enables tamper protection in device types, users, or groups.
- Log in to the Microsoft Endpoint Manager admin center.
- Now, after sifting through into the endpoint manager portal, follow the below path:
Endpoint Security → Antivirus → Create Policy
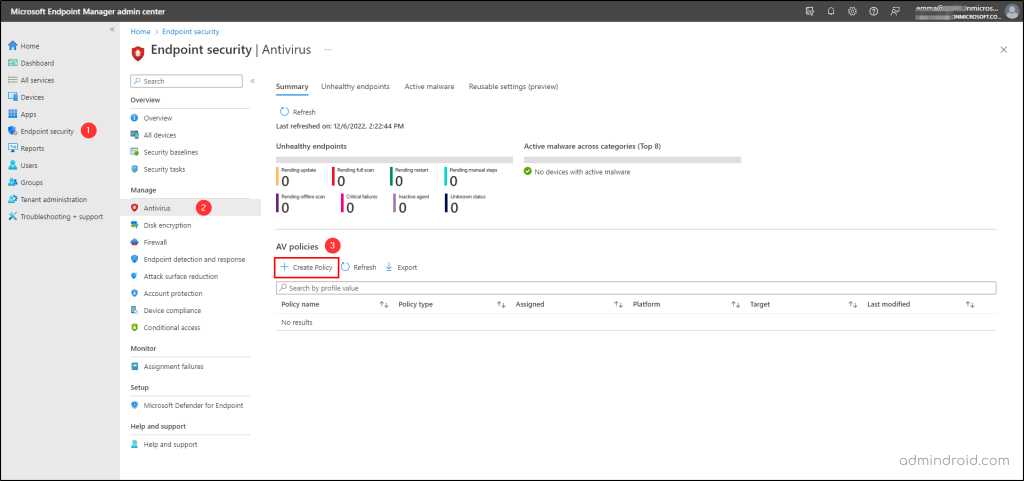
3. Next, it’ll take you to select the profile and platform. So, set the choice as below and proceed further.
Platform – Windows 10, Windows 11, and Windows Server
Profile – Windows Security Experience.
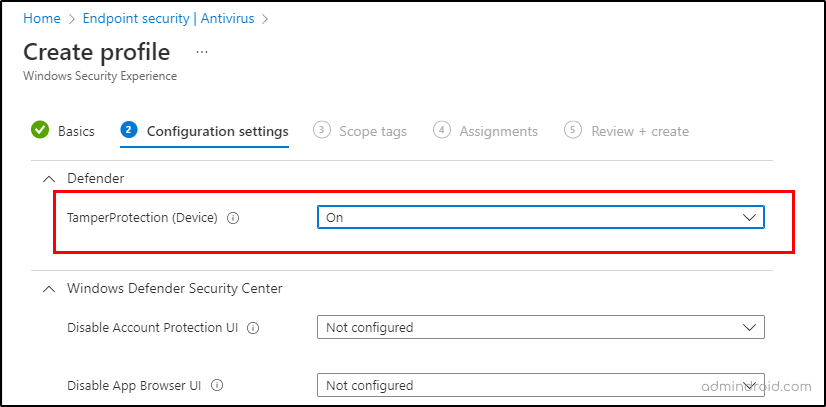
4. Upon completion of this step, it will prompt you for further details, such as the policy’s name and description. Provide the required details and set the following setting:
TamperProtection (Device): On
5. Further, this will allow you to assign the tamper protection policy to specific users, groups, and devices. So, fill this out as required and continue to Review + Create the policy.
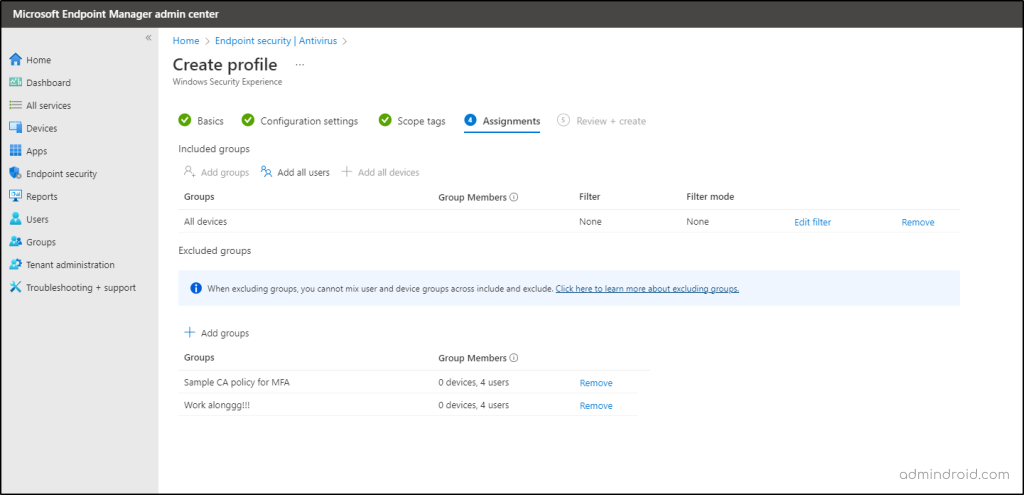
That’s it! Creating a tamper protection policy for specific subsets is done now! ✅Rest assured, Microsoft will block all disabling activities at the organization.
Lock out the cybercriminals in the first step itself! 🚩
To summarize, Microsoft’s decision to add tamper protection to Office 365 and enable built-in protection by default was a good one. As the technology is expediting, Microsoft is introducing various security features is paying off really wellLet’s hope for more best security settings from Microsoft in the future! Until then, start using Microsoft 365 Defender’s simple yet effective solutions, such as first contact safety tips, and zero-hour auto purges, and safeguard your organization from suspicious malicious attacks. Feel free to reach us for any queries.
