
For years, organizations using Microsoft 365 have surpassed the bulk email limits by using third-party solutions or on-premises servers. The reason? Using Exchange Online to send higher volumes of email often resulted in throttled user accounts, interrupting mail flow. Microsoft has made it clear that Exchange Online imposes outbound limits and is not designed for bulk emailing services. With the introduction of the Tenant External Recipient Rate Limit, organizations now face additional restrictions on sending external emails.
But that’s a thing of the past! Microsoft has rolled out the High Volume Email in Exchange Online to address these challenges, and it is now available in public preview as per MC765811. This breakthrough allows users to send large volumes of email seamlessly, without the need for additional tools or servers. In this blog post, we’ll explore how to enable High Volume Email (HVE) and simplify email management for businesses.
High Volume Email in Exchange Online
HVE allows you to send a higher volume of emails, designed specifically for line-of-business applications and high-volume SMTP scenarios. It exceeds the standard sending limits of Exchange Online, serving mainly for internal email communications.
HVE operates on a transactional model where costs are determined by the number of emails sent. However, during this public preview phase, the service is offered for free with certain recipient limitations. This allows users to take advantage of the following features without incurring any costs:
- With HVE, you can reach up to 100,000 recipients per day per tenant, a significant increase from the usual 10,000 recipients per day, increasing the limit by 10 times.
- Moreover, High Volume Email lifts the previous message rate limit, streamlining high-volume sending with no per-minute message limit.
- Additionally, HVE supports sending emails to 2,000 external recipients every day for each account.
When Exchange Online High Volume Email becomes generally available (starting September 2025 and expected to be completed by early October 2025.), admins can expect the ability to customize limits for each account and utilize a consumption-based billing model. Currently, HVE requires SMTP basic authentication. In addition, OAuth authentication for high-volume emails is now supported, enhancing security and ease of use for email communications.
NOTE: Any attempts to bypass the High Volume Email limits will be detected by Microsoft, and such emails will not be delivered.
Real-Time Use Cases of High Volume Email in Microsoft 365
High Volume Email in Microsoft 365 offers versatile applications for organizations, including:
- Eliminates the need for on-premises servers in Exchange hybrid environments for sending bulk emails.
- Automate email notifications for web form submissions, such as contact forms or survey responses, to ensure timely responses to user inquiries or feedback.
- Facilitates mass emails during the migration process in Microsoft 365.
- Sends scanned documents in bulk, like invoices, reports, or statements, to recipients within the organization.
- Broadcast company-wide announcements, newsletters, and updates to employees.
Tip: When you need to send bulk emails that still feel personal, mail merge in new Outlook makes it easy to customize each message while keeping the process efficient and automated.
Create High Volume Email Account in the Exchange Admin Center
To send a mass number of emails exceeding the usual Exchange Online outbound limits like ‘Recipient Rate Limit’ and ‘Message Rate Limit’, you’ll need to create an HVE account. Let’s see how to create an HVE account in Exchange Online in the following section.
- Sign in to the Exchange admin center.
- Navigate to the “Mail flow” section and select “High Volume Email (Preview)”.
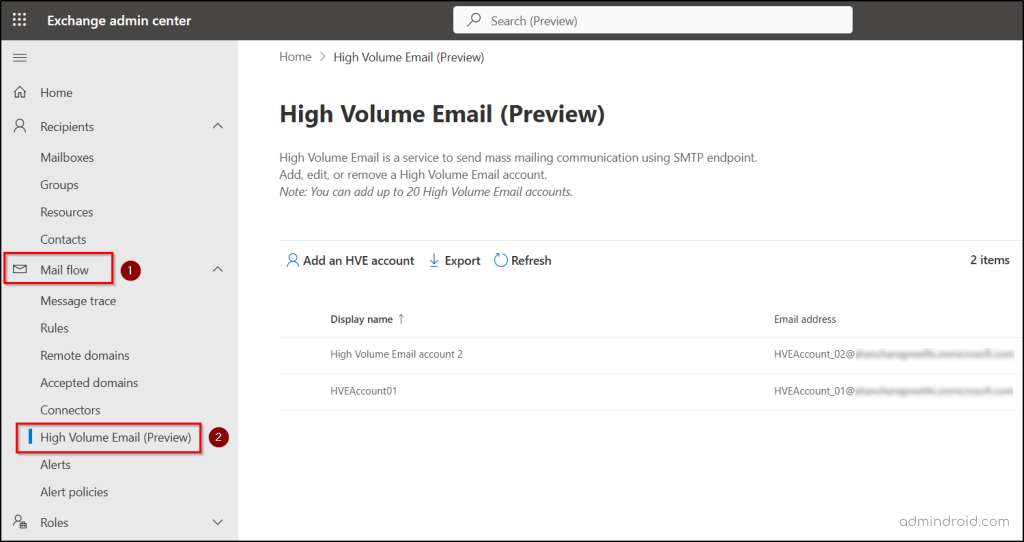
- Then, select “Add an HVE account”.
- Provide a valid display name, primary email address, and password, then select your managed domain from the drop-down next to the primary email address.
- You may also specify an alias (optional) and ensure the mentioned domain is part of the accepted domains list. Select “Next”.

- Validate the information provided on the review page and click “Create”.
- The new HVE account will be listed in the HVE accounts.
IMPORTANT: For now, Microsoft only allows adding 20 High Volume Email accounts in the Exchange Online. Also, avoid assigning licenses to HVE accounts, as they are different types of mail user accounts. If a license is assigned to an HVE account, it is automatically migrated from a MailUser to a UserMailbox. After this migration, if you try to send an email through that HVE endpoint, you will receive the following error:
“The SMTP server requires a secure connection or the client was not authenticated. The server response was: 5.7.57 Client not authenticated to send mail. Error: 451 4.7.0 Temporary server error. Please try again later AUTH2003.”
After creating your new HVE account, ensure that no authentication policies affect the enablement of SMTP authentication.
Add High Volume Email Account Using PowerShell
Apart from the Exchange admin center, you can also use PowerShell for a more streamlined approach to create a High Volume Email account. Here’s how you can add an HVE account using PowerShell.
- To begin, connect to the Exchange Online PowerShell module.
- Execute the “New-MailUser” cmdlet as shown below to create an HVE account providing the password directly. The password must be a secure string.
|
1 |
New-MailUser -HVEAccount -Name "HVEAccount01" -Password $securePassword -PrimarySmtpAddress HVEAccount_01@contoso.com |

- Alternatively, run the cmdlet below where you will be asked to provide a password for that account.
|
1 |
New-MailUser -HVEAccount -Name "HVEAccount01" -PrimarySmtpAddress HVEAccount_01@contoso.com |
Note: Before executing the cmdlet in your environment, ensure that you replace the Name and PrimarySmtpAddress accordingly. Additionally, federated domains are now compatible with HVE accounts, and any managed domain can be included in the Name field.
Manage High Volume Email Accounts using PowerShell
You can effortlessly manage High Volume Email accounts using PowerShell. With it, you can easily retrieve all HVE accounts, remove an HVE account, and change the display name of an HVE account. Here’s how you can perform these operations in the Exchange Online PowerShell.
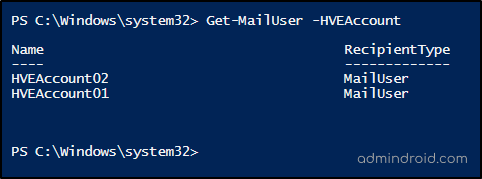
1. Get All High Volume Email Accounts Using PowerShell:
Run the “Get-MailUser” cmdlet to display all HVE accounts in your organization.
|
1 |
Get-MailUser –HVEAccount |
2. Remove a High Volume Email Account:
To delete a High Volume Email account, use the “Remove-MailUser” cmdlet as shown below.
|
1 |
Remove-MailUser -Identity "HVEAccount01" |

3. Change the HVE Display Name in Exchange Online PowerShell:
You can also conveniently change the display name of an HVE account using PowerShell. Use the “Set-MailUser” cmdlet for that purpose as shown below.
|
1 |
Set-MailUser -HVEAccount -Identity "HVEAccount02" -DisplayName "High Volume Email account 2" |

Note: Microsoft has replaced the LOBAppAccount parameter with HVEAccount in the New-MailUser cmdlet. The LOBAppAccount parameter is now obsolete and will no longer be supported for managing high-volume email accounts in Exchange Online PowerShell.
View High Volume Email Usage Reports in the Exchange Admin Center
Microsoft provides dedicated reports for the High Volume Email feature in Exchange Online, which are used to track usage in the organization. These reports allow admins to monitor and understand the overall message volumes. The reports list all HVE accounts and the total number of messages sent in the selected period. Here’s how you can access the usage reports:
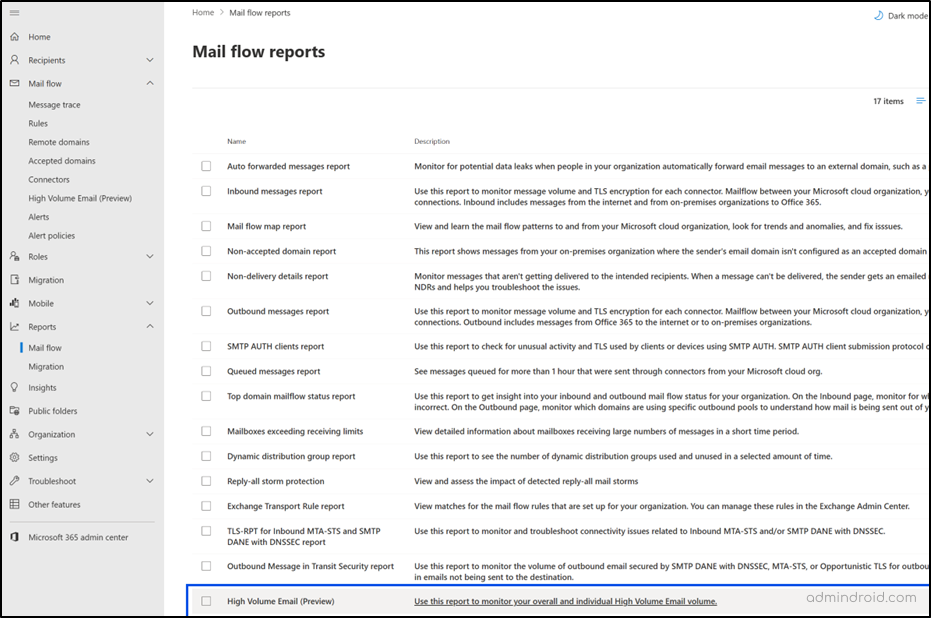
- Open the Exchange admin center.
- Go to “Reports” and select “Mail Flow” under it.
- From the list of mail flow reports, select “High Volume Email (Preview)”.
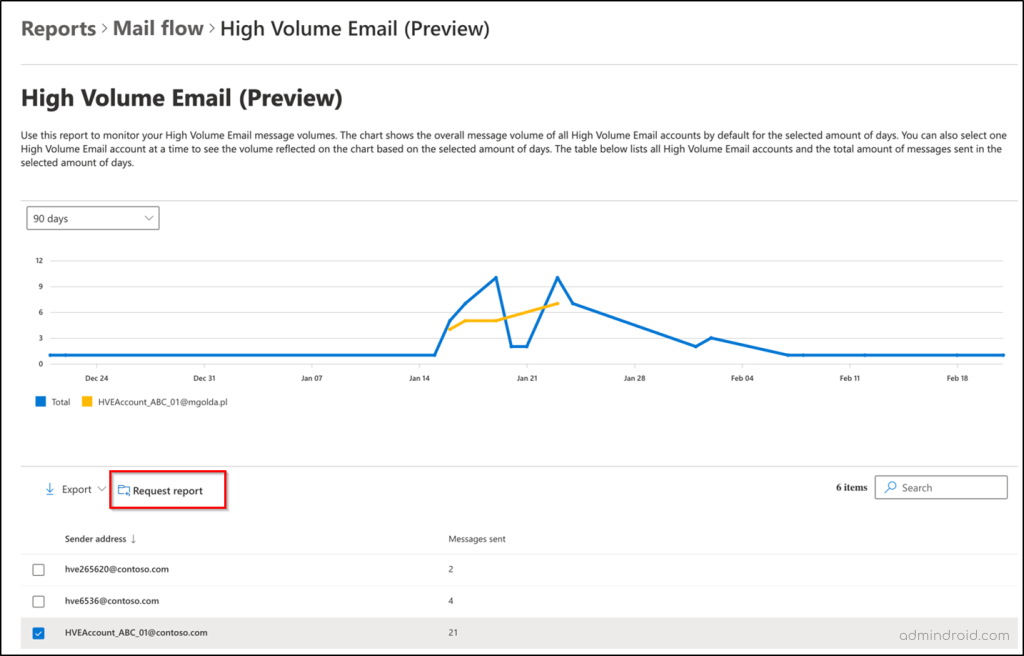
- The report displays usage data for the selected period across the tenant.
- Select a specific ” Sender address” to view the data usage for that account within the specified period.
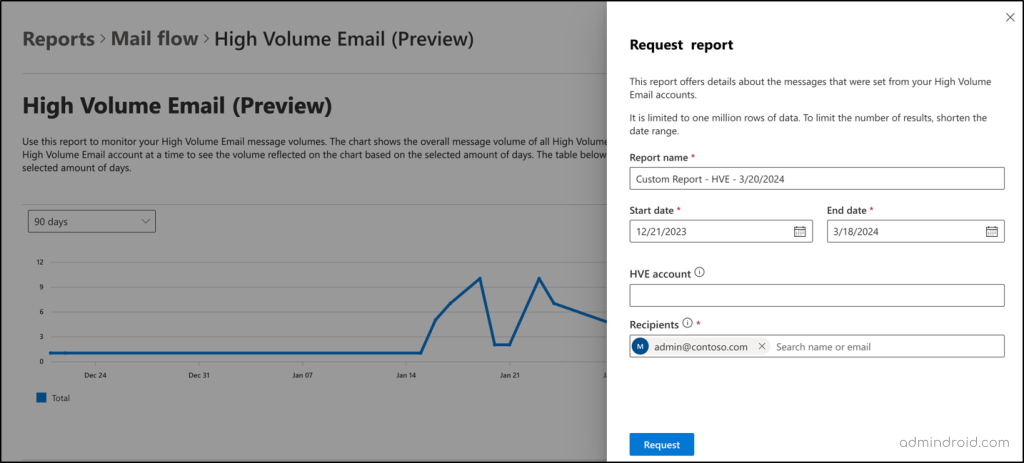
- Additionally, you can use the “Request report” option to get a detailed report regarding the messages sent from HVE.
- On the “Request Report” page, you can retrieve up to one million rows of data. To specify the report details and limit the results, follow these steps:
- Use the “Start date” and “End date” fields to define the period for the report.
- Define recipients by specifying email addresses in the “Recipient” field.
- If you enter a value in the “HVE account” field, you will get a detailed report only for this specified HVE account.
- Finally, select “Request” to initiate the report request.
Troubleshoot Issues in High Volume Email for Microsoft 365
Are you encountering errors while using High Volume Email accounts? Let’s troubleshoot some common problems faced during the setup of HVE accounts in Microsoft 365.
Issue 1: I set up my printer or LOB app for HVE, but it still can’t send email.
Solution: Follow the steps below to troubleshoot this issue.
- Cross check the Printer Settings:
- Server/smart host: smtp-hve.office365.com
- Port: 587
- TLS/StartTLS: Enabled
- Username/Email Address and Password: Use HVE account credentials
- Ensure your printer or application sends email from the same email address used as sign-in credentials during email setup.
- Double-check if the username and password entered are correct.
- Confirm that your HVE account and service are functioning correctly. You can use the SMTP component in the Power Automate platform for validation.
Issue 2: 535 5.7.3 Authentication unsuccessful or 535 5.7.139 Authentication unsuccessful, the organization configuration doesn’t allow this authentication request.
Solution: Try following the steps below to avoid this error.
- With Security Defaults enabled, all basic authentication methods, including SMTP authentication are disabled. Thus, HVE which relies on SMTP becomes non-functional with SMTP disabled.
To enable High Volume Email (HVE) functionality, disable Azure Security Defaults in your organization. Here’s how:- Log in to the Microsoft Entra admin center with a Security admin, Conditional Access admin, or Global administrator role.
- Navigate to the ‘Identity’ section and go to the ‘Overview’ page.
- On the Overview page, select ‘Properties’.
- Under Properties, select “Manage security defaults.”
- Switch the Enable security defaults toggle to No.
- Click ‘Save’.
- HVE accounts can operate even when SMTPClientAuthenticationDisabled is set to True within TransportConfig because of the use of a custom endpoint.
- You can apply custom authentication policies to the HVE accounts as required. Ensure that the AllowBasicAuthSmtp setting is enabled in the policy to prevent any impact from authentication policies.
Recommended Practices for Handling Errors Related to High Volume Email:
Here are some suggested practices for handling errors when using High Volume Email in Microsoft 365:
- Manage recipients with a static, flat Distribution List (DL) and send messages to one recipient: the DL.
- Use Active Directory (AD) tags with a Dynamic Distribution List (DDL) for frequently changing recipients and sending messages to one recipient: the DDL.
- Send flat listed recipients in batches, adhering to the maximum recipient limit (50), if you can’t rely on DLs or DDLs.
- Maintain the SMTP session and send messages one by one if you need to send them to a single recipient.
In summary, High Volume Email in Exchange Online allows us to avoid using on-premises servers or third-party tools for bulk emails. This provides a seamless experience for managing mass email scenarios and enhances Exchange Online management. Additionally, Microsoft has committed to enhancing this functionality as it moves into general availability. We hope this blog has provided you with valuable information on High Volume Email. For any queries or assistance, reach out to us through the comments section below. Happy reading!


