
Microsoft is consistently introducing exciting new features, earning praise from both admins and users. However, not every feature finds universal acclaim. In fact, some have sparked intense discussions, prompting admins to actively seek methods to disable or deactivate them.
In this blog, we spill the beans on the top 5 Microsoft 365 features that stirred up a little too much heat. Find out why folks are itching to hit the ‘disable’ button, and who knows, maybe you’ll want to join the club! Check your tenant, and if you haven’t disabled these yet, well, maybe it’s time to hit that ‘off’ switch. 😉
1. Self-service Purchase Capability for Microsoft 365 Products:
Self-service purchase in Microsoft 365 allows users within an organization to independently acquire certain Microsoft 365 products directly from Microsoft, without the need for intervention from IT administrators. While self-service purchase can empower users, organizations should carefully consider and manage this feature to ensure compliance, security, and cost control. As a result, many administrators prefer to disable self-service purchase and trial capability.
However, there is no tenant-wide option to turn off self-service purchase, and Microsoft continuously introduces new products under this feature. Admins must regularly check and block self-service purchases for newly launched products.
How to Turn-off Self-service Purchase for All Microsoft 365 Products:
To turn off self-service purchases for Microsoft 365 products, the only option available is through PowerShell. The code below helps disable self-service purchase for all products currently in an enabled state.
|
1 2 3 4 5 |
Install-Module -Name MSCommerce #once you install you should remove this line Import-Module -Name MSCommerce Connect-MSCommerce #sign-in with your global or billing administrator account when prompted Get-MSCommerceProductPolicies -PolicyId AllowSelfServicePurchase | Where { $_.PolicyValue -eq “Enabled”} | forEach { Update-MSCommerceProductPolicy -PolicyId AllowSelfServicePurchase -ProductId $_.ProductID -Enabled $false } |
Note: You need to run the above code periodically to disable the self-service purchase and trial capability for newly introduced products.
To view the self-service purchase status for all the supported products, you can run the below cmdlet.
|
1 |
Get-MSCommerceProductPolicies -PolicyId AllowSelfServicePurchase |
You can also block self-service purchases using Microsoft 365 admin center itself.
2. Microsoft Teams Opens Web Links in Edge by Default
Microsoft enforced the opening of Teams chat links in Edge to enable a new web and chat side-by-side experience, resembling the screenshot below.
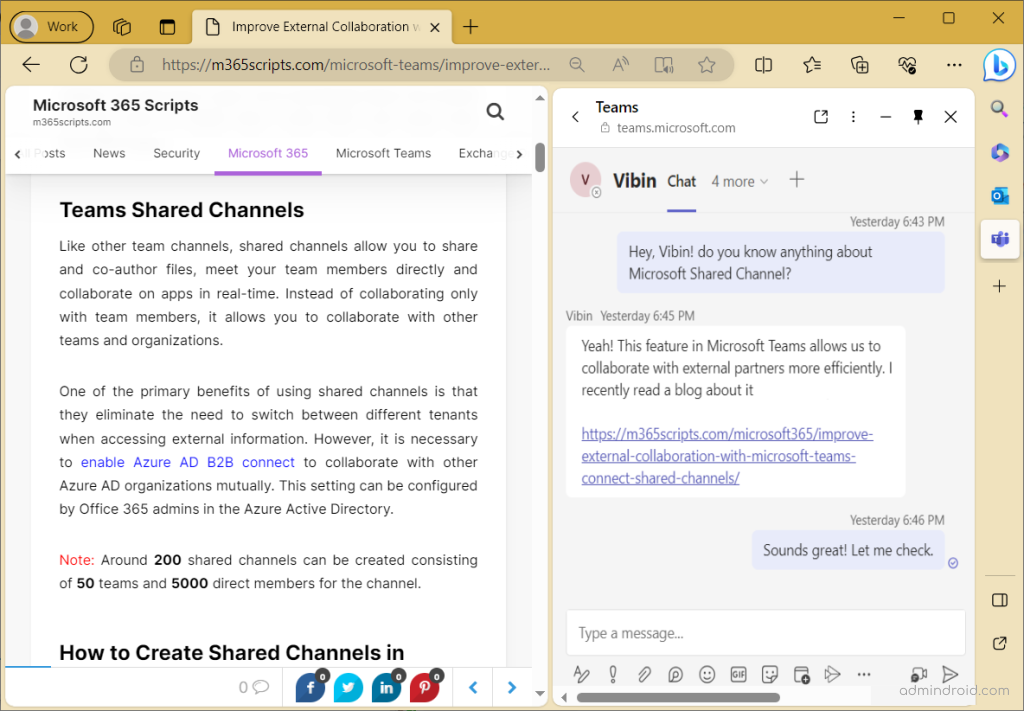
However, it overwrites default browser settings, leading to frustration among admins who feel that Microsoft is disrespecting user choice. As a result, admins have begun searching for options to stop links opening in Edge.
How to Set Microsoft Teams to Open Links in Default Browser:
To Stop Teams chat links from auto-opening in Microsoft Edge, you can configure in the ‘Cloud Policy’. Follow the steps below to open MS Teams chat links in the default browser.
- Sign in to the Microsoft 365 Apps admin center.
- Click on the ‘Go to Microsoft 365 Cloud Policy’ button under the Office policies.
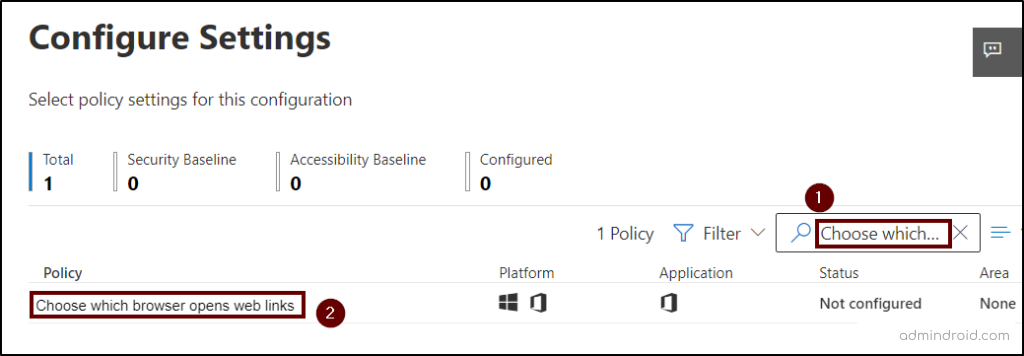
- ‘Create’ a new policy by providing basic details like name, description, scope and select ‘Choose which browser opens web links’ under Policies.
- Select the ‘Default Browser’ option from the configuration setting drop-down and select the ‘Apply’ button.
- Click on the ‘Next’ button to review the created configuration.
- Click on the ‘Create‘ button and patiently wait for the policy to be configured. Once completed, select ‘Done.’
Now, MS Teams chat links will open in the default browser. If the default browser is Chrome, all the Teams chat links will open in Chrome.
3. Roaming Signature in Outlook:
A roaming signature in Outlook is associated with an email account and syncs across different devices and email clients. This feature is particularly useful for individuals who use multiple devices to access their email and want a unified signature across all platforms.
Sounds like a cool feature, right? Absolutely. But here’s the catch: it ignores the Signature settings configured in the Set-MailboxMessageConfiguration cmdlet, which admins painstakingly set up. Due to this problem, most admins want to disable this feature.
How to Disable Roaming Signature in Outlook:
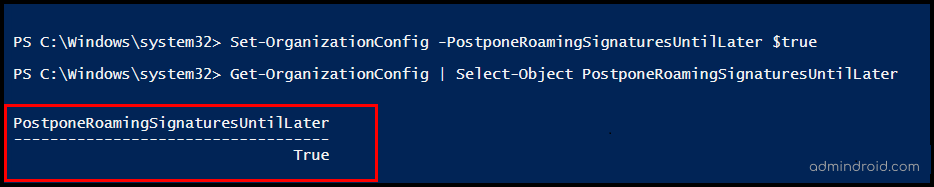
To turn off roaming signatures, you must connect to Exchange Online PowerShell and then run Set-OrganizationConfig with the PostponeRoamingSignaturesUntilLater value set to $false.
For example,
|
1 |
Set-OrganizationConfig -PostponeRoamingSignaturesUntilLater $true |
To verify the configuration, you can use the Get-OrganizationConfig cmdlet.
4. Anonymize User Data in Microsoft 365 Usage Reports
To comply with privacy regulations, Microsoft has anonymized user information in usage reports available in Microsoft 365 admin portals by default. As a result, admins may notice anonymous IDs in place of users’ names and data. While this improves privacy, many admins want to disable this setting because identifying users by name can provide more clarity and context in usage reports. So, here are the steps to enable identifying names in usage report.
How to Show Usernames Instead of IDs in M365 Usage Reports:
Global admins can revert this setting to show identifiable usernames, group names, and site instead of GUIDs.
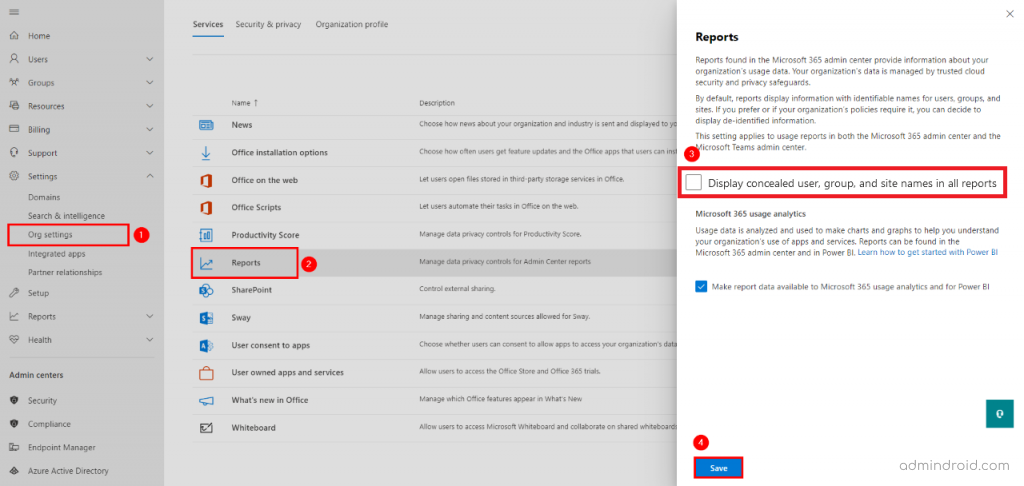
- In the Microsoft 365 admin center, go to ‘Settings‘.
- Go to ’Org settings‘ and then select ‘Reports‘.
- Deselect the “Display concealed user, group, and site names in all reports” option.
Now, you can see the actual usernames in the Microsoft 365 usage reports.
5. ‘Stay Signedin Prompt’ in Microsoft 365
After a user successfully signs in, the ‘Stay signed in?’ prompt, also known as Keep me signed in (KMSI), appears. However, keeping a session open for an extended period increases the risk of session hijacking. This vulnerability allows attackers to take over an active session and gain unauthorized access to the user’s account. So, most admins prefer to Disable “Keep me signed in” to enhance Microsoft 365 security.
How to Disable ‘Stay Signed in Prompt’ in Microsoft 365:
You can follow the below steps to turn off stay signed in prompt for the entire organization.
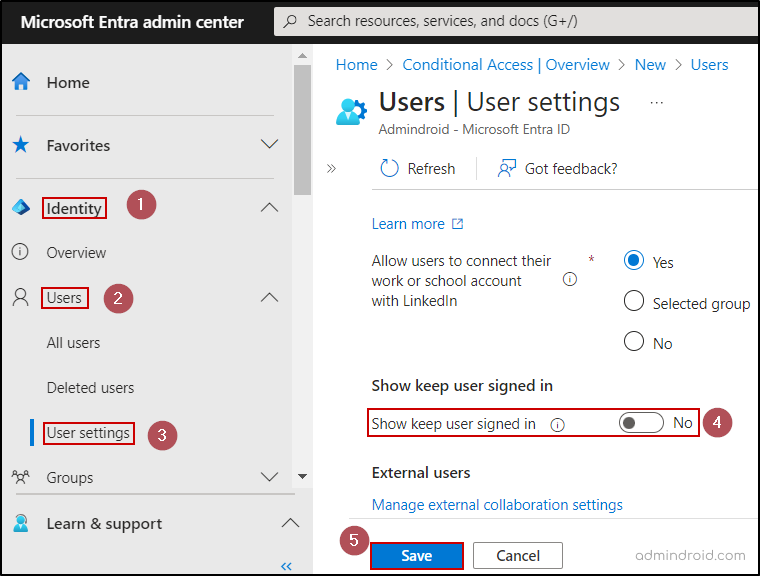
- Go to the Microsoft Entra admin center and navigate to the ‘Identity‘ tab.
- Select the ‘Users‘ tab and choose ‘User settings.‘
- Toggle the ‘Show keep user signed in‘ option to ‘No‘ to disable the Keep me signed in prompt.
- Click ‘Save‘ to apply the changes.
In this blog, we’ve highlighted the top 5 Microsoft 365 features that raise usability preferences, privacy issues, or security-related concerns. It’s important for admins to be aware of these features and consider whether disabling them aligns with their needs and preferences. So, take a moment to review your tenant settings, and if you haven’t disabled these features yet, now may be the time to do so.
Feel free to share any other settings you’ve disabled in your organization in the comment section below. Your insights could be invaluable for fellow admins looking to optimize their Microsoft 365 environment. Let’s help each other enhance security and efficiency!


