It’s Day 10 of Cybersecurity Awareness Month, and today, we’re excited to share how you can gain 15 points on your Microsoft Secure Score through Microsoft Information Protection (MIP)! Stay tuned for more in our Microsoft 365 Cybersecurity blog series.
Information/data are the lifeblood of any organization. Making their protection from harmful actors is a top priority for admins🛡️. Thankfully, Microsoft has equipped us with powerful tools like Data loss prevention (DLP), sensitivity labels, and a lot more through Microsoft Purview Information Protection. These features are designed to protect your data, whether it’s in transit, at rest, or anywhere in between.
To maximize the effectiveness of these protective tools, Microsoft’s Secure Score outlines six critical MIP configurations that every organization should enable. Implementing these settings guarantees that your sensitive data is fully protected, creating a secure environment that minimizes the risk of exposure and misuse.
In this blog, we will look at how to configure all six MIP-related Secure Score recommendations in detail.
6 Microsoft Information Protection Secure Score Recommendations
Following are the 6 recommended Microsoft Information Protection settings with respective secure points earned.
- Ensure DLP policies are enabled (5 points)
- Ensure DLP policies are enabled for Microsoft Teams (3 points)
- Ensure Microsoft 365 audit log search is enabled (3 points)
- Publish M365 sensitivity label data classification policies (2 points)
- Extend M365 sensitivity labeling to assets in Microsoft Purview data map (1 point)
- Ensure that Auto-labeling data classification policies are set up and used (1 point)
To access these recommendations, go to the Microsoft Defender portal and follow this path: Exposure Management > Secure Score > Recommendation actions. From there, apply the filter for Product > Microsoft Information Protection.
Now, let’s check each point in detail:
1. Ensure DLP Policies are Enabled
✅ License required: Exchange Online Plan 2
The challenge many organizations face is the accidental or unauthorized sharing of sensitive information, such as social security numbers, credit card details, or passwords, across various platforms like emails, devices, or Teams chats. This poses significant security risks, leading to regulatory violations.
To tackle this problem, Microsoft encourages setting up data loss prevention policies as part of the Secure Score. By applying DLP for SharePoint Online, Exchange Online, Teams, devices, and others, sensitive information across these platforms will be continuously scanned and secured.
Implementing at least one DLP policy in your environment not only enhances your organization’s data security but also earns you good Secure Score points.
How To Set Up Data Loss Prevention in Microsoft 365?
Let’s say you need a policy to prevent sensitive information from being shared via email. Here’s how to create a DLP policy that blocks the sharing of PAN numbers through emails:
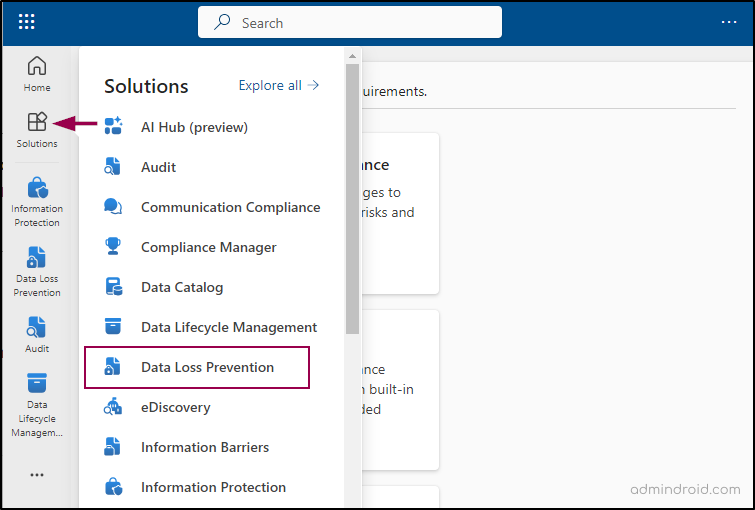
- Navigate to the Data loss prevention under ‘Solutions’ in the Microsoft Purview compliance portal.
- Navigate to Policies -> Create policy.
- Under Categories, choose Custom. Select Custom policy or choose a pre-made template that suits your needs.
- Enter a name for your policy. Click Next.
- If you want to restrict the policy to a specific set of users/groups, you can assign them in the ‘Assign admin units’ section. Otherwise, you can skip this part.
- On the Choose where to apply the policy page, select the locations where you want the policy to apply. Ensure that ‘Exchange email’ is selected for this case -> Click Next.
- On the next page, select Create or customize advanced DLP rules.
- Click on Create rule and provide a name for the rule.
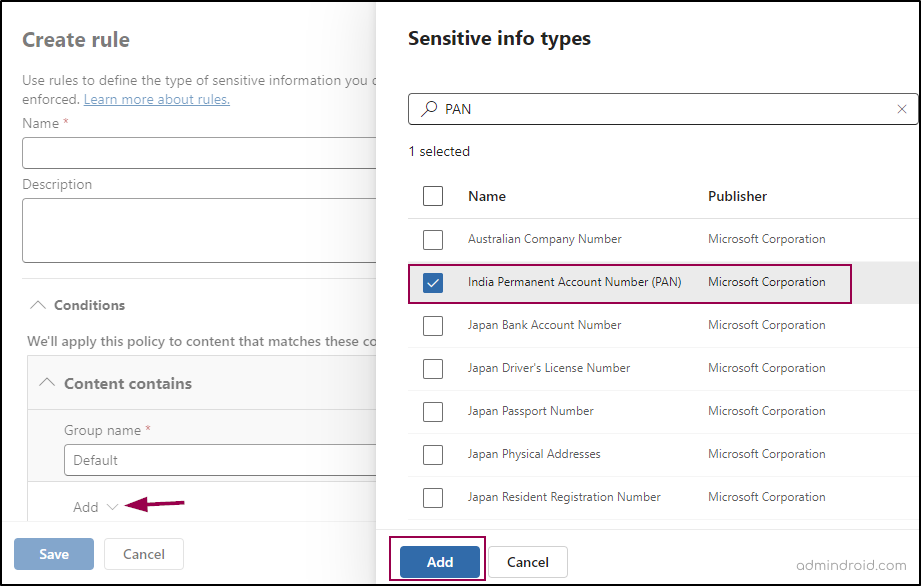
- In the Conditions section, click on Add condition -> Select Content contains.
- Click on the ‘Add’ dropdown and select Sensitive info types. Choose any sensitive info type of your choice.
- In this example, we will select ‘India Permanent Account Number (PAN)’ -> Click ‘Add’, and then save your changes.
- On the next page, specify what actions should occur if someone attempts to share sensitive information (e.g., block sharing, notify users, etc.).
- In the Policy mode section, select Turn the policy on immediately.
- Click Next. Review all the changes you made to ensure everything is set correctly.
- Click Submit to finalize and activate your custom policy.
Note: Microsoft provides built-in SITs that you can use when configuring DLP conditions, but you can also create custom sensitive information types to detect organization-specific data to enhance your security posture.
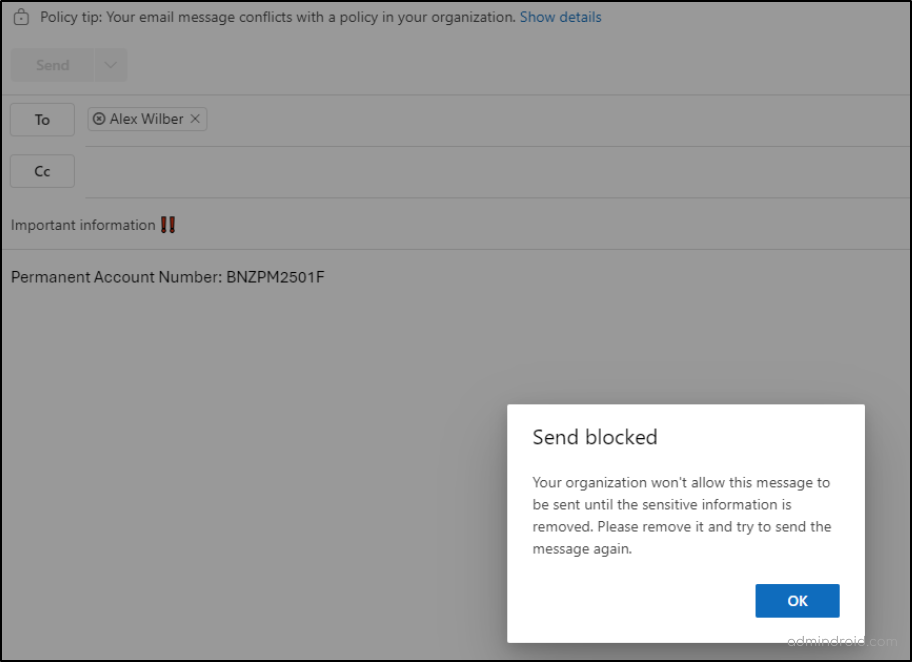
What Happens Next?
If someone tries to send an email containing a PAN number, they’ll get a message saying the email can’t be sent unless the sensitive information is removed.
2. Ensure DLP Policies are Enabled for Microsoft Teams
✅ License required: Microsoft Defender for Cloud Apps.
The challenge with collaboration tools like Microsoft Teams is that sensitive information can easily be shared accidentally in chats or channels, exposing your organization to potential data breaches. To prevent this, Microsoft recommends enabling data loss prevention policies for Teams. These policies automatically scan content for specific sensitive data types and block users before the information is shared. This policy is enabled by default.
How to Enable a Teams DLP Policy?
To enable a DLP policy in Microsoft Teams, follow the steps below.
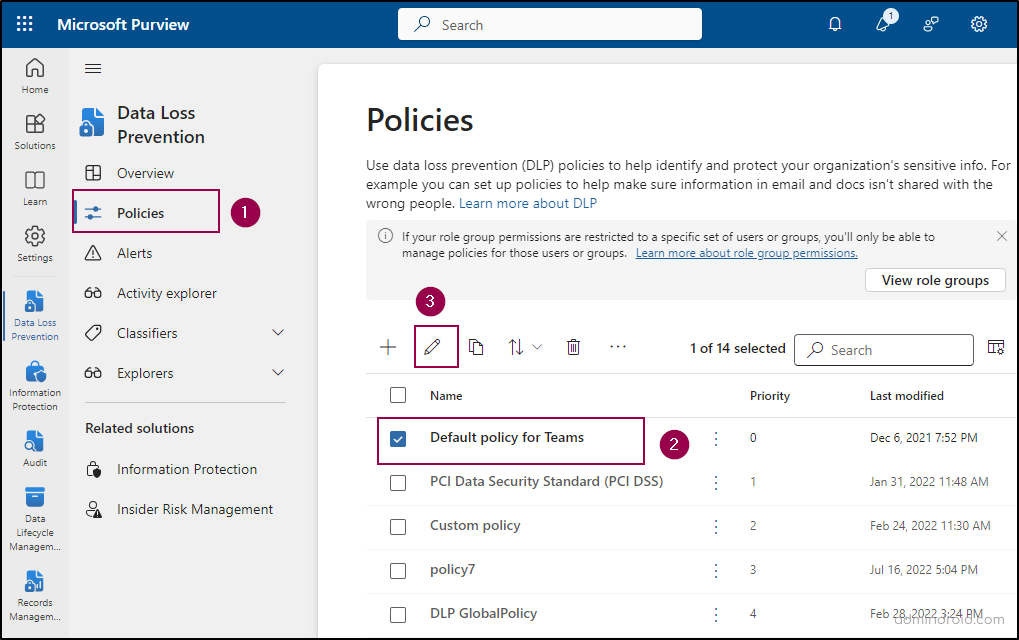
- Open the Microsoft Purview portal.
- Navigate to Solutions and select Data loss prevention.
- Click on Policies and find the Default policy for Teams.
- Select the Default policy for Teams and click the edit icon. Click Next.
- On the Choose where to apply the policy page, ensure ‘Teams chat and channel messages’ is selected, then click Next.
- In the Customize advanced DLP rules page, confirm that the default Teams DLP policy rule status is set to On, then click Next.
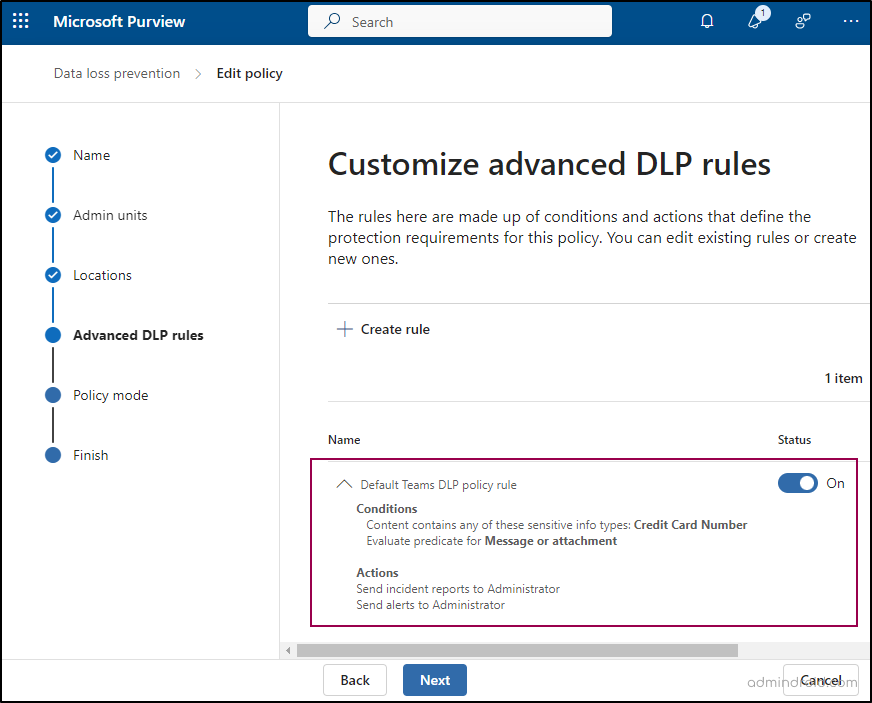
- Select Turn the policy on immediately.
- Click Review and finish, then submit.
- Click Done to complete the process.
3. Ensure Microsoft 365 Audit Log Search is Enabled
✅ License required: Microsoft Defender for Office 365 P2
Monitoring activities related to sensitive files is crucial for organizations, as content modifications can lead to compliance violations. Without a clear record of user and admin actions, it becomes challenging to safeguard sensitive information and respond swiftly to potential security incidents.
Microsoft recommends enabling the Audit Log Search feature in the Microsoft Purview compliance portal. By activating this feature, you can systematically track all user and admin activities involving sensitive files, with logs retained for 180 days. This visibility allows you to identify any irregularities on critical data.
How to Enable Microsoft 365 Auditing?
To enable Microsoft 365 audit log, follow the below steps.
- Go to the Microsoft Purview compliance portal.
- Select Audit under the Solutions section.
- Click Start recording user and admin activity, located next to the information warning at the top of the page.
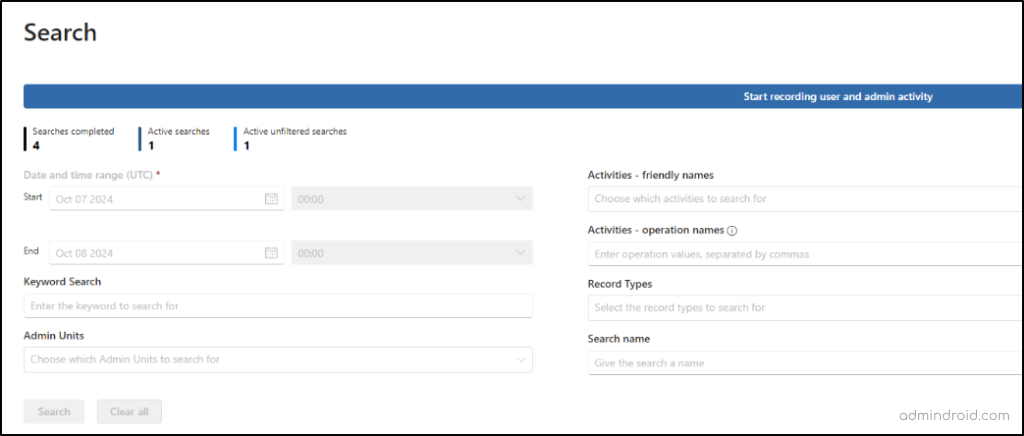
- In the confirmation dialog box that appears, click Yes to proceed.
Turn on Audit Log Search Using PowerShell
To enable the Microsoft 365 audit log using PowerShell, connect to the Exchange Online module and run the following cmdlet.
|
1 |
Set-AdminAuditLogConfig -UnifiedAuditLogIngestionEnabled $true |
4. Publish M365 Sensitivity Label Data Classification Policies
✅ License required: Azure Information Protection P2
Organizations are processing vast amounts of sensitive information in Office apps (like Outlook and Word), SharePoint sites, and Office 365 groups. Without proper categorization, this data can be exposed to breaches, complicating its protection.
To overcome these challenges, Microsoft suggests implementing data classification policies. These policies allow you to identify and organize your most important data, helping to secure it from unauthorized access and making investigations easier if a breach occurs.
How to Configure Microsoft 365 Sensitivity Labels?
To create and apply Microsoft 365 sensitivity labels, follow the steps below.
- Sign in to the Microsoft Purview compliance portal.
- Navigate to the Information Protection option under Solutions.
- Select Sensitivity labels -> Create a label.
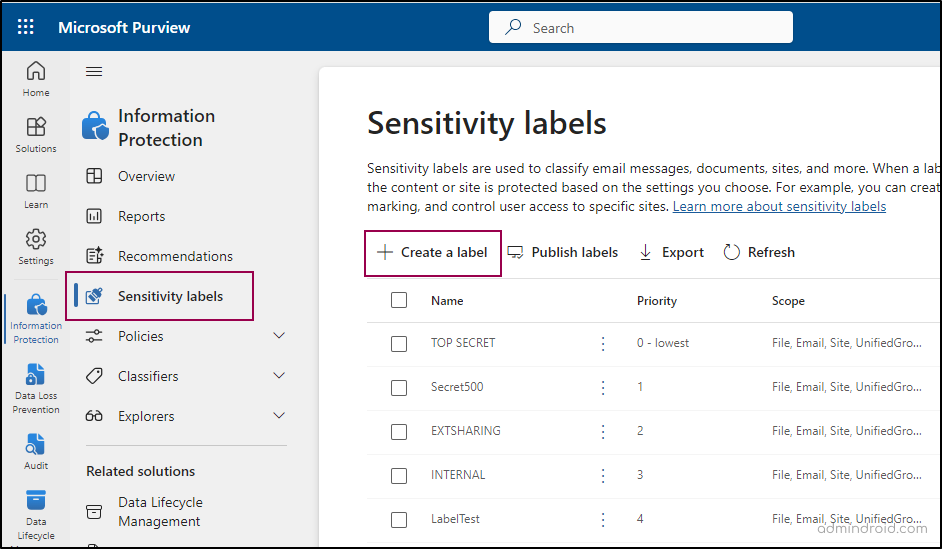
- Enter the name, display name, label priority, and description for your label, then click Next.
- On the Define the scope for this label page, choose where the label will apply (e.g., files, emails, Teams chats).
- Select protection settings for labeled items. You can control access, apply content marking, & protect Teams meetings and chats.
Note: Your organization requires a Teams Premium license to enable the ‘Protect Teams meetings and chats’ option.
- On the Access control page, set who can access and view the labeled items.
- On the Content marking page, enable this option to add a watermark, header, and footer to the content with this label.
- If you want labels to apply automatically based on conditions (e.g., detecting sensitive information like credit card numbers), enable ‘Auto-labeling’.
- Configure protection settings for groups and sites as needed, then click Next.
- Review your settings, then click Create label.
Publish Sensitivity Labels to Users and Groups:
Now that the label is created, the next step is to publish it to the relevant users or groups, so they can view and apply it as needed. Here’s how:
- Select the newly created sensitivity label from the list of labels -> Select Publish labels.
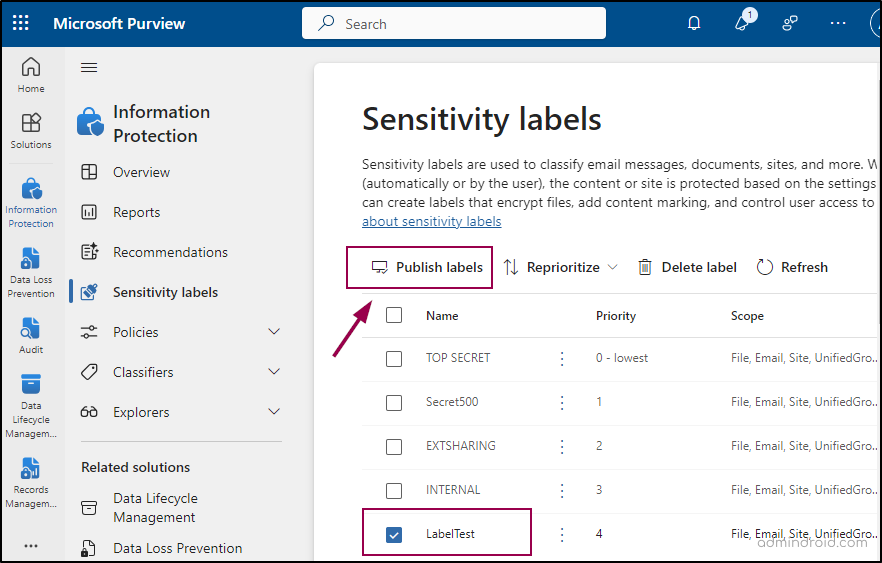
- In the Publish to users and groups section, choose the users or groups who can use the label.
- In the Policy Settings section, choose whether users must provide a justification for removing or lowering the classification of a label.
- Name your policy and click Submit to complete the process.
5. Extend M365 Sensitivity Labeling to Assets in Microsoft Purview Data Map
✅ License required: Microsoft 365 E5
Data flows both inside and outside organizations, moving across devices, apps, and services. This makes it challenging to keep your data secure while ensuring it meets your company’s security standards.
To help with this, Microsoft offers sensitivity labels through the Microsoft Purview Information Protection. These labels let you classify and protect your data based on how sensitive it is. Additionally, these labels can be extended to Microsoft Purview’s data map. When you label an office document and scan it into the data map, the label carries over, ensuring your data stays protected wherever it goes.
How to Automatically Apply Sensitivity Labels in Microsoft Purview Data Map?
To apply sensitivity labels to files in the Microsoft Purview data map, follow the steps below.
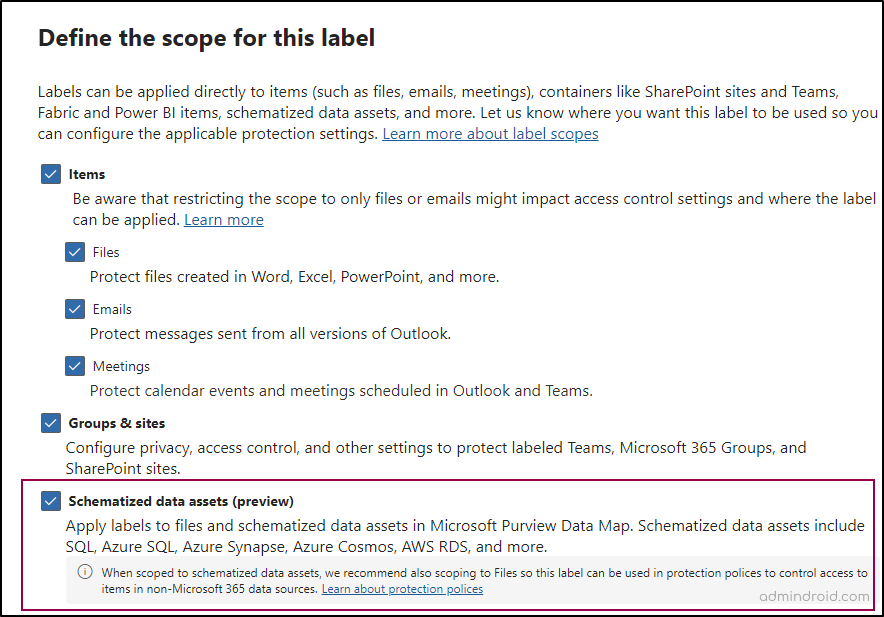
- Create a new sensitivity label or open an existing one.
- In the Define the scope for this label page, make sure to select the ‘Schematized data assets (preview)’ option.
- Configure others and click ‘Next’ until you reach the Auto-labeling for schematized data assets (preview) page.
- There, toggle the Auto-labeling for schematized data assets (preview) to ‘On’.
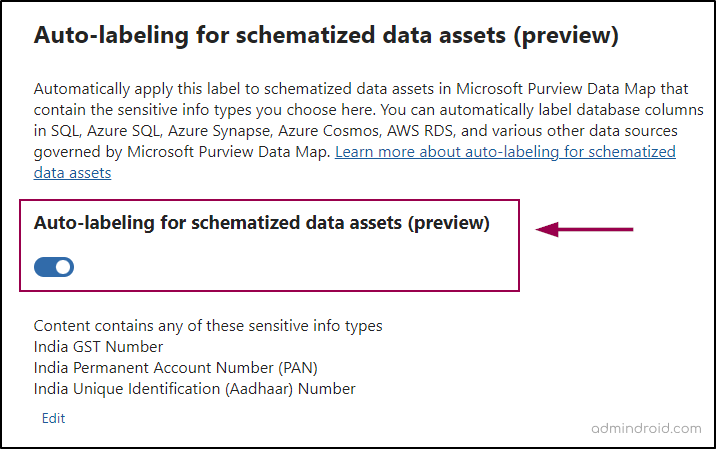
- Choose the sensitive data type of your choice and click Add.
- Review and save the label.
By following these steps, you enable the automatic application of sensitivity labels to schematized data assets, ensuring that sensitive information is classified and protected consistently across your data landscape.
6. Ensure That Auto-labeling Data Classification Policies are Set Up and Used
✅ License required: Microsoft 365 E5
Automatically applying sensitivity labels to emails and files in OneDrive and SharePoint is a crucial step in protecting sensitive information. With auto-labeling policies, you don’t need to train users on how to classify data or depend on them to do it accurately. This removes the burden from users, allowing them to focus on their tasks while ensuring compliance and data protection behind the scenes.
How to Apply Sensitivity Labels to Content Automatically?
To auto-label data in Microsoft 365, follow the steps below.
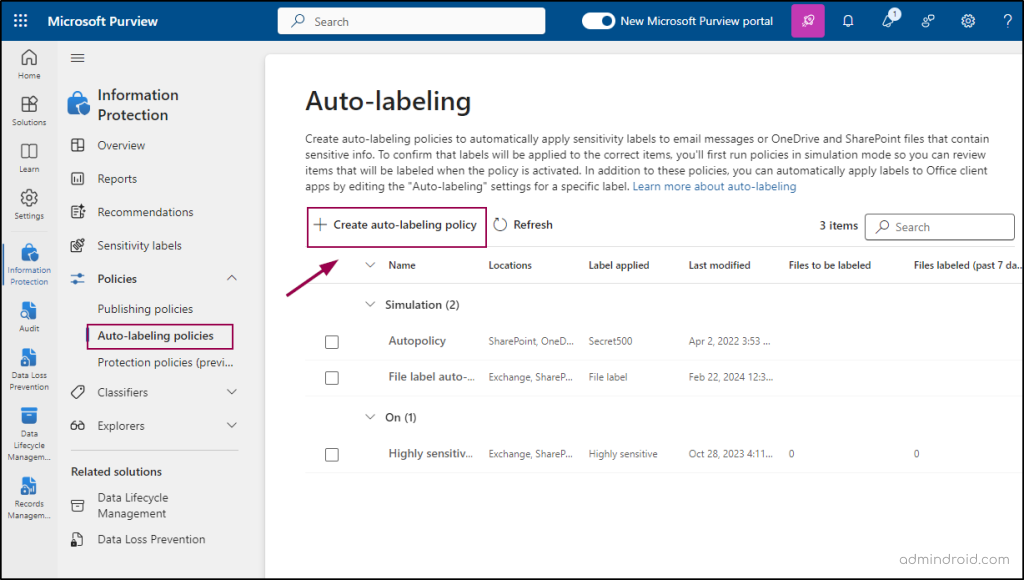
- Access the Microsoft Purview Compliance Portal.
- Navigate to the “Solutions” section and select Information Protection.
- Under “Policies,” click on Auto-labeling policies.
- Select Create auto-labeling policy.
- Follow the steps to create and publish your sensitivity labels as shown in the above section.
- Ensure that the labels are published to all users.
We hope this blog has given you insights on how to improve your Microsoft Secure Score using MIP recommendations. Additionally, make tracking Secure Score changes a regular habit to prevent misconfigurations. Thanks for reading. If you have any further queries , reach out to us through the comments section.


