On Day 20 of Cybersecurity Awareness Month, discover how to activate preset security policies in Microsoft 365 and apply advanced security recommendations instantly. Stay tuned for more tips in our Microsoft 365 Cybersecurity blog series!
“Effective cybersecurity is not a product, but a process.” – Jim Langevin
Absolutely true! Cybersecurity is indeed a continuous process, especially within Microsoft 365. But let’s face it—configuring every security recommendation can be overwhelming with the growing complexity of workloads and services. It’s exhausting to ensure Microsoft 365 security is fully in place without slowing users down.
To help strike the right balance and avoid misconfigurations, Microsoft offers preset security policies in Microsoft Defender! These pre-configured policies can be activated in just a few clicks, saving time and effort. In this blog, we’ll explore how to enable these preset security policies in Microsoft 365, why they matter, and how they strengthen your security posture.
What are Preset Security Policies in Microsoft 365?
Preset security policies in Microsoft 365 are pre-configured settings designed to simplify the process of protecting your organization’s data and users. Instead of manually configuring each control, these best-practice configurations can be quickly applied across your environment.
They provide key protection features from tools like Exchange Online Protection (EOP), Microsoft Defender for Office 365, and more. These policies defend against common threats, offering essential layers of security such as email protection, anti-phishing, anti-malware, etc. By enabling them, you ensure robust, balanced security with minimal effort, enhancing your organization’s defenses without requiring deep technical expertise.
Types of Preset Security Policies in Microsoft 365
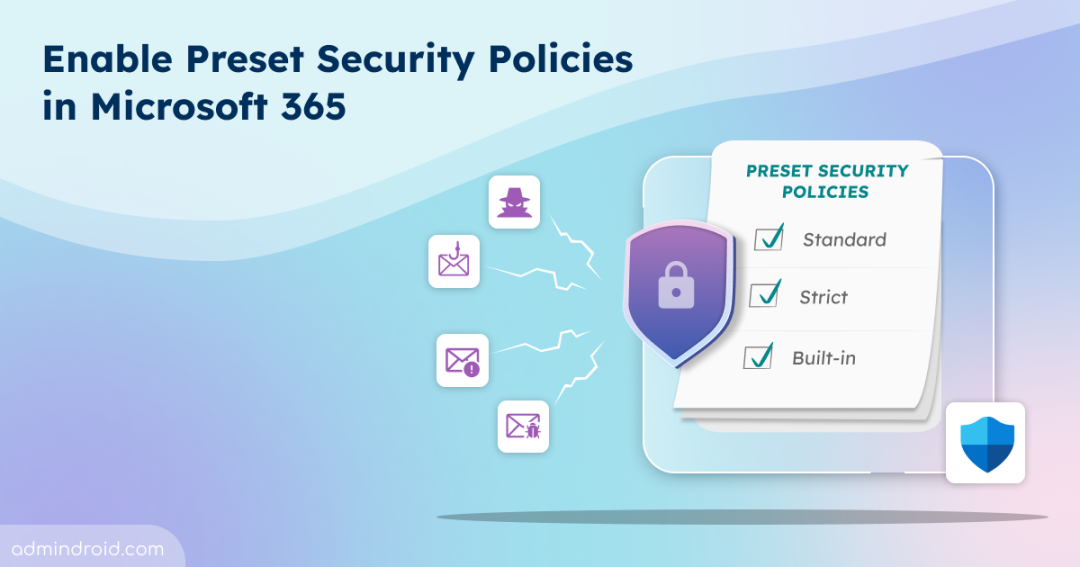
Microsoft 365 offers three preset security policies to protect users from evolving threats like phishing attacks, impersonation, and so on. They are,
Standard Preset Security Policy
The Standard preset security policy provides a baseline defense against common email threats, including spam, phishing, and malware. It balances actions for malicious content and manages bulk senders with moderation. Additionally, it uses Safe Links and Safe Attachments to scan links and attachments for potential risks.
Strict Protection Preset Security Policy
The Strict preset security policy protects priority accounts from advanced threats like spear phishing and provides extra security for high-value targets. It employs more aggressive actions against malicious emails, enforces stricter controls on bulk senders, and utilizes advanced machine learning to improve threat detection.
Built-in Protection Preset Security Policy
The Built-in Protection for Microsoft Defender is the default policy applied to all users, offering protection against malicious links and attachments.
- It’s automatically enabled for all paid Microsoft Defender for Office 365 tenants.
- While admins cannot modify its actions, they can add exclusions to customize its scope.
- This baseline security policy is not applied to users already covered by Standard & Strict preset security policies or other customized policies.
Since built-in protection is the default policy, the next sections will break down the key differences between Standard and Strict policies, guide you on when to use each, and show you how to enable them. Let’s dive in!
Difference between Standard and Strict Preset Security Policies
Fundamentally, individual policy settings within the protection profiles cannot be modified. However, there are distinct differences between the meaningful policy settings in the Standard and Strict preset security policies.
The following table summarizes these differences, highlighting how various security settings are configured across the two profiles.
| Policies & Their Configurations | Standard Preset Security Policy | Strict Preset Security Policy |
| Anti-spam policy | ||
| 1. Bulk compliant level (BCL) detection action | Move message to Junk Email folder | Quarantine message |
| 2. Bulk email threshold | 6 | 5 |
| 3. Spam detection action | Move message to Junk Email folder | Quarantine message |
| Anti-phishing policy | ||
| 1. Spoof detection action | Move message to Junk Email folder | Quarantine message |
| 2. Enable first contact safety tip | Selected | Selected |
| 3. Impersonated user detection | Move message to Junk Email folder | Quarantine message |
| 4. Phishing email threshold | 3 – More aggressive | 4 – Most aggressive |
| Anti-malware policy | No difference | No difference |
| Safe Attachments policy | No difference | No difference |
| Safe Links policy | No difference | No difference |
Choose Between Standard and Strict Preset Security Policies
To determine whether to implement the Standard or Strict preset security policy, consider the following:
- User Sensitivity: Collect a list of users who require more aggressive detection measures. Typically, this includes executives, their support staff, and users with a history of being targeted by attackers.
- Admin Involvement: Ensure that the selected users have adequate admin support to review and release emails that may be mistakenly flagged as suspicious. Admins will need to be involved in decisions regarding which blocked emails are released to end users.
If the identified users meet the above criteria for higher security needs, place them in the Strict preset security policy. Otherwise, the Standard policy will suffice.
How to Enable Preset Security Policies in Microsoft 365 Defender?
Enabling preset security policies helps safeguard your organization from various threats by using built-in protection templates. Follow the steps below to enable them:
Prerequisites:
✅ Microsoft Defender for Office 365 Plan 1 or higher (Included in E5)
✅ Security Administrator role
- Sign in to Microsoft 365 Defender.
- Navigate to Email & collaboration > Policies & rules > Threat policies > Preset Security Policies.
- On the Preset Security Policies page, choose either Standard protection or Strict protection, depending on your preference.
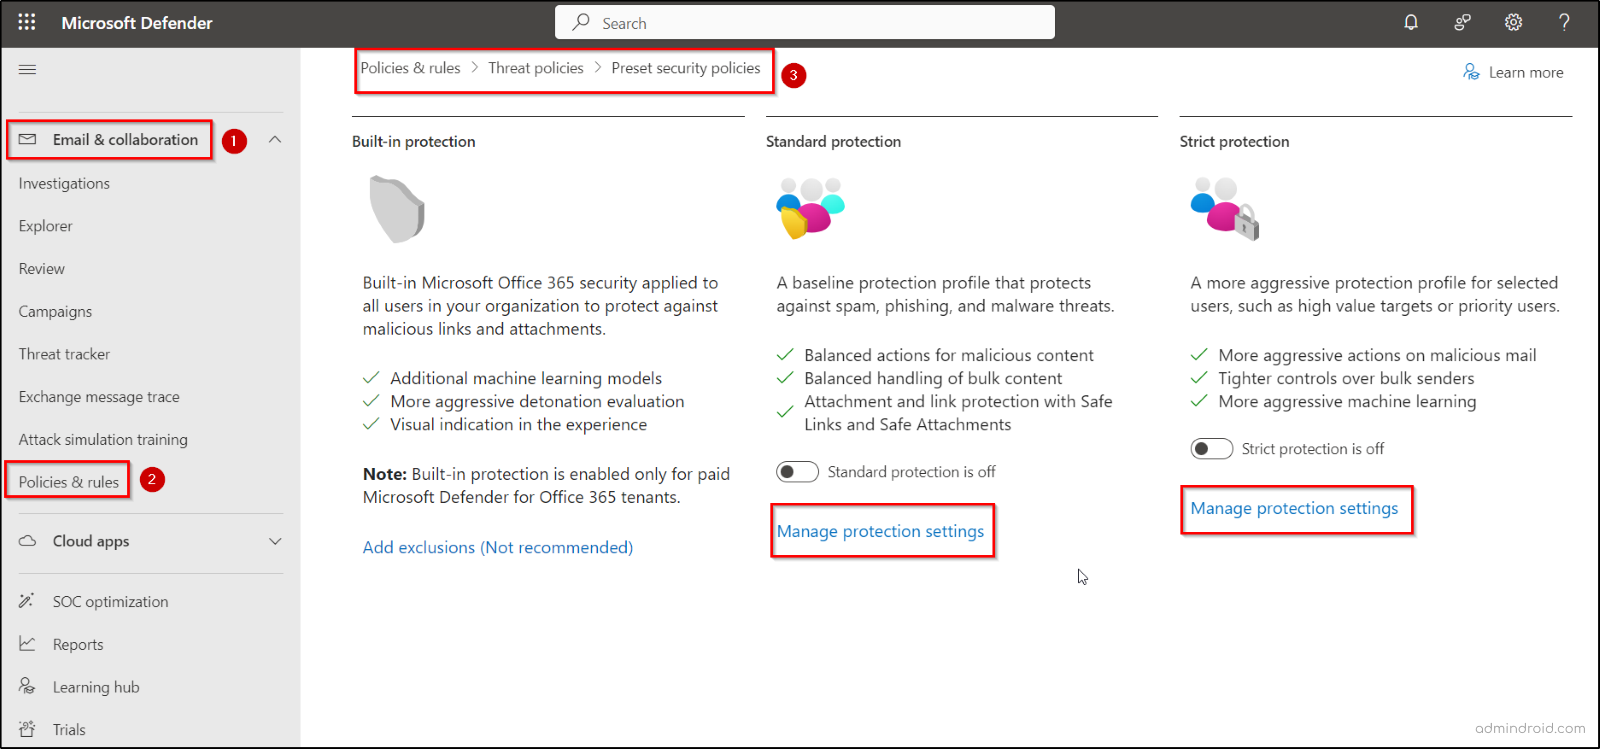
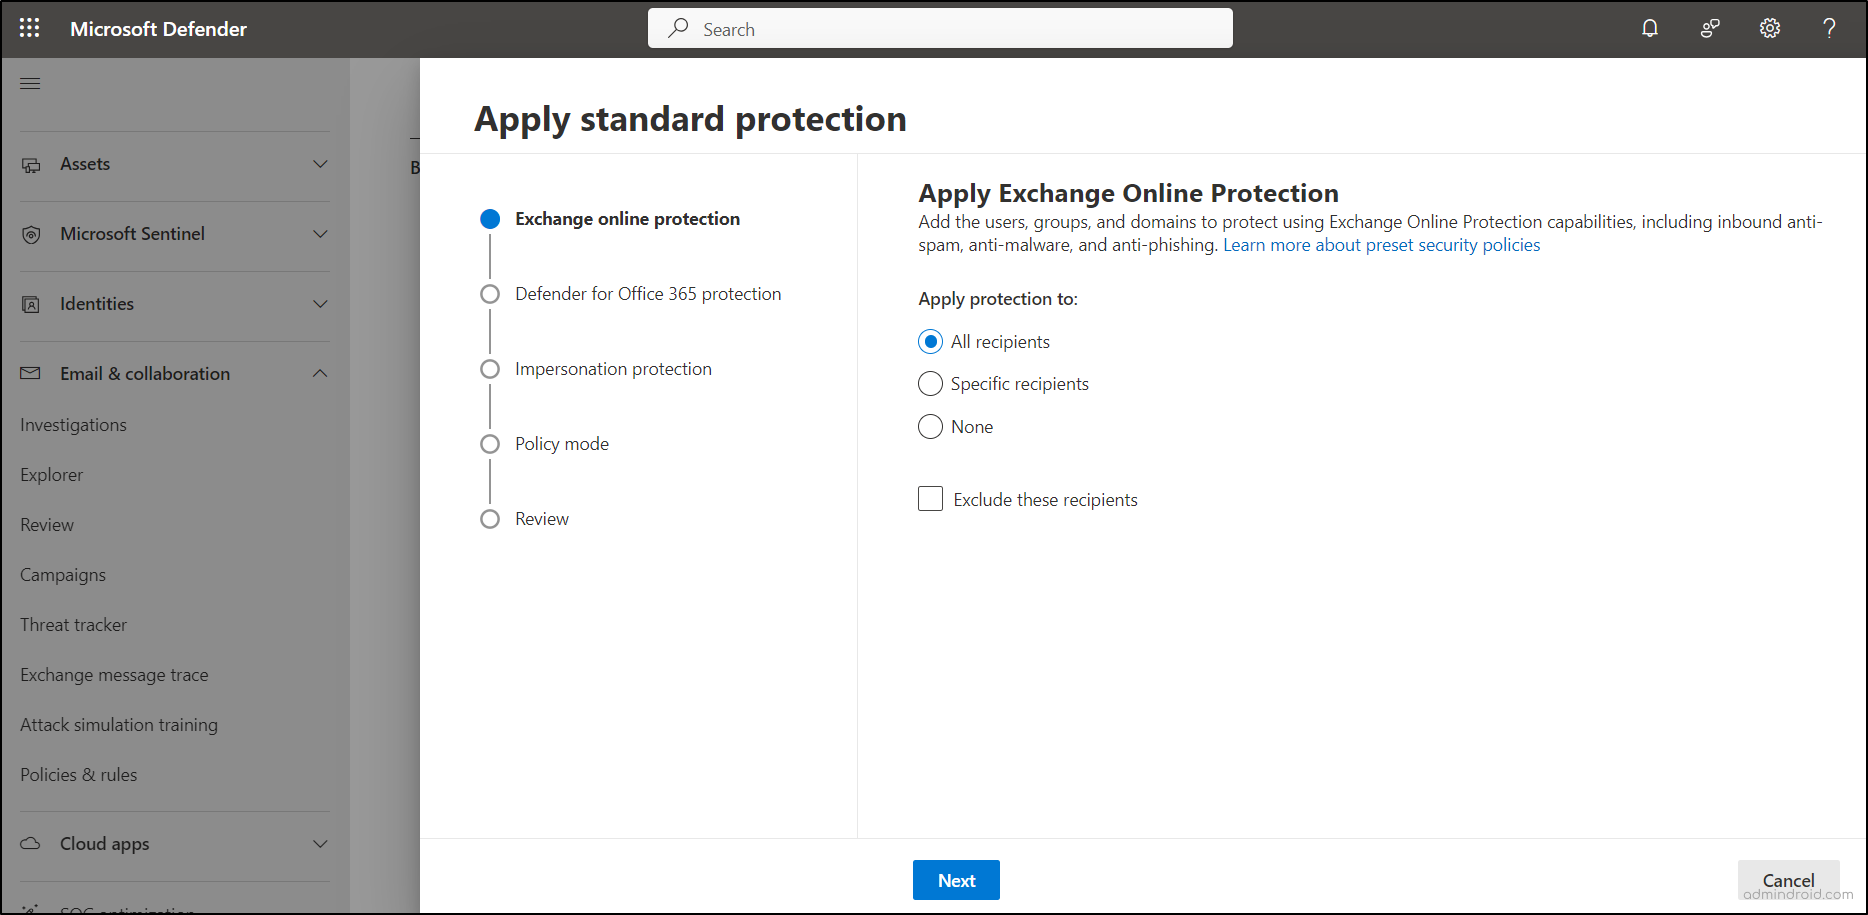
- Under the Protection settings, click Manage protection settings.
- Select All Recipients to apply Exchange Online Protection tenant-wide, or choose Specific recipients to manually add users, groups, or domains for the protection policy. Click Next.
- Similarly, on the Defender for Office 365 Protection page, select All recipients to apply the configuration tenant-wide.
- If you’d like to keep the same recipients you selected on the previous Exchange Online protection page, consider selecting ‘Previously selected recipients’.
- Alternatively, you can choose Specific recipients to manually add users, groups, or domains for the protection policy. Click Next.
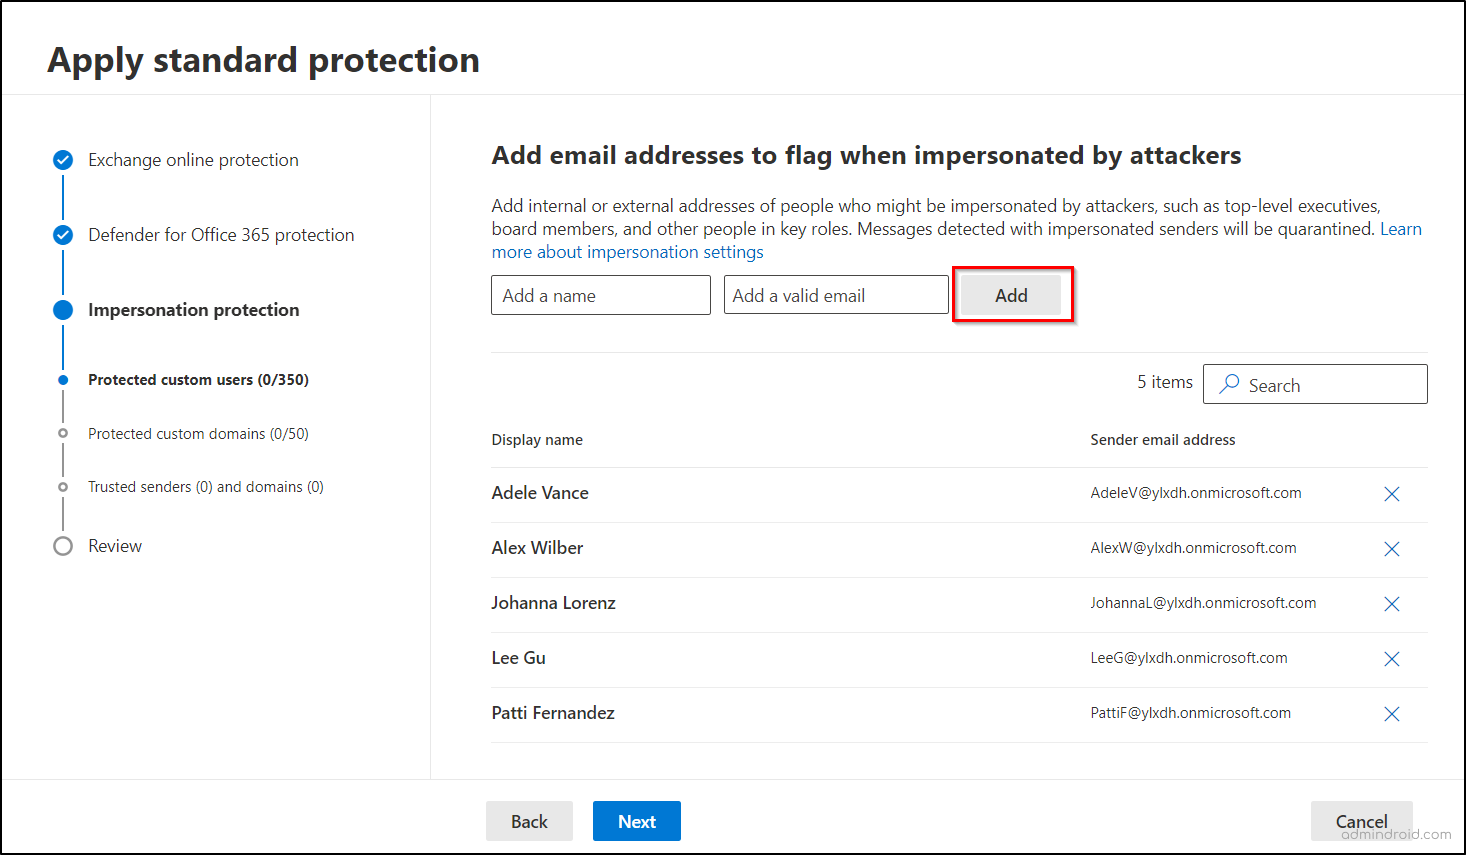
- In the Impersonation Protection section, add email addresses and domains in their respective tabs for users or entities you believe are likely to be impersonated. Then, select Next.
- Specify any trusted senders and domains you don’t want the impersonation protection to apply to, then press Next.
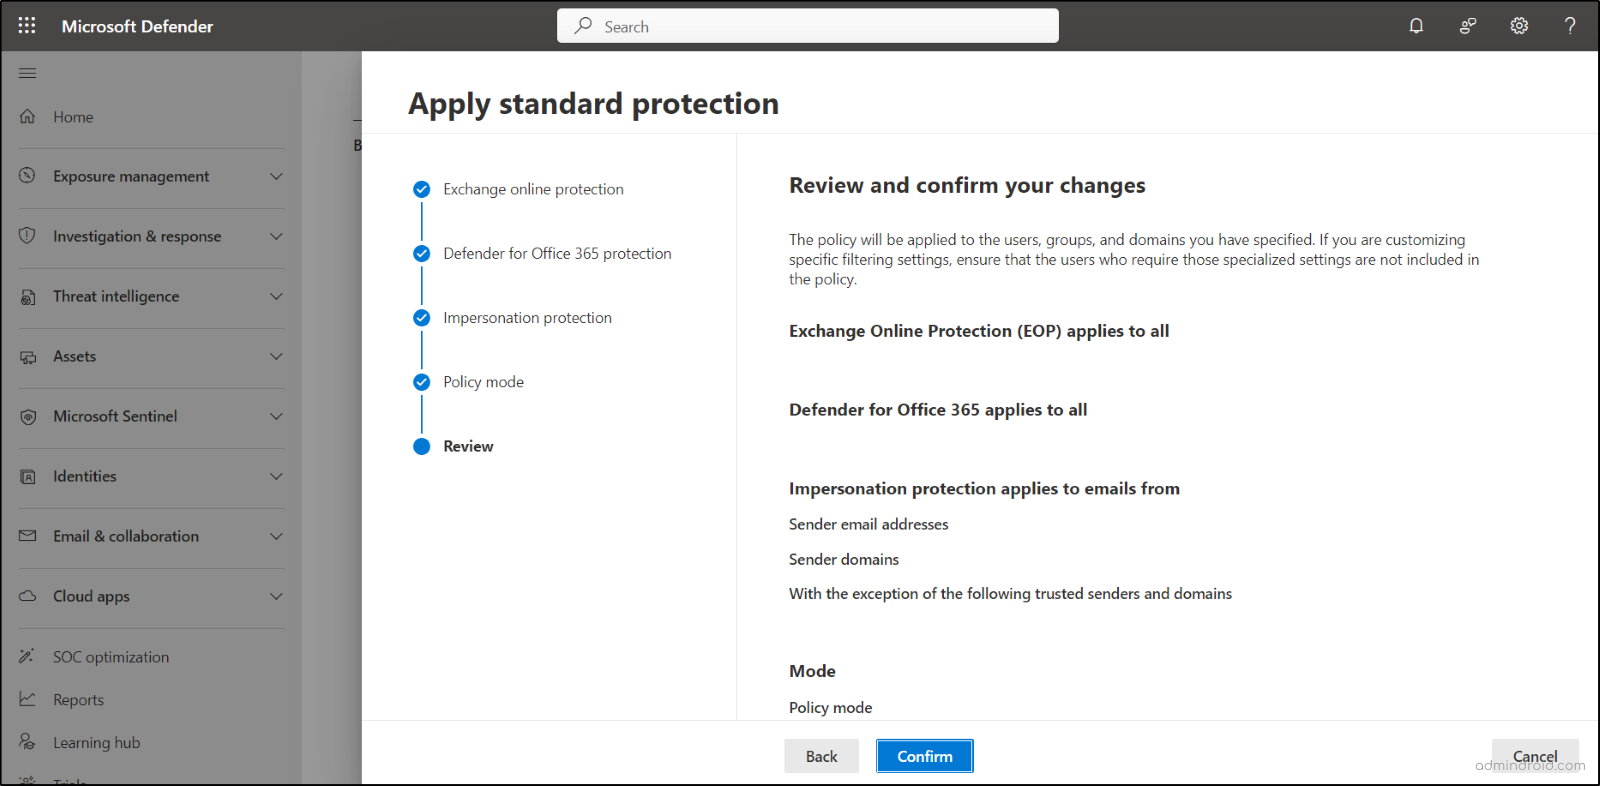
- On the Policy mode page, select the option to Turn the policy on when finished.
- Click the Confirm button to finalize your settings.
Points to Remember:
- You can specify up to 350 users for user impersonation protection in both Standard and Strict preset security policies.
- User impersonation protection in Microsoft 365 becomes ineffective if the sender and recipient have previously communicated via email. It only applies when the sender is the first contact of the recipient.
- You can add up to 50 custom domains for domain impersonation protection under the Standard or Strict preset security policy.
- Trusted domain entries do not include subdomains. You’ll need to add each subdomain individually.
- To ensure your security policies align with Microsoft’s best practices, use the Configuration Analyzer to quickly identify and correct any policies that fall below the Standard or Strict protection profiles.
Note: You can also view and manage individual security policies within preset security policies using Exchange Online PowerShell. However, without enabling the preset security policies in Microsoft Defender, these policies and rules won’t be available. Lastly, avoid creating, modifying, or removing any individual policies linked to the preset security policies.
Why Use Microsoft 365 Preset Security Policies?
Preset security policies serve as essential baseline security settings recommended by Microsoft 365. Here are the key reasons why they are important:
- Automatic Updates: As new threat protection features are introduced, your organization automatically receives updates to these settings, ensuring you stay protected with the latest advancements.
- Reduced Maintenance: By minimizing manual policy maintenance, preset security policies make it easier to manage and maintain a secure posture.
- Alignment with Evolving Threats: Designed with Microsoft’s recommended security controls, these policies enhance your defenses against emerging threats.
- Streamlined Protection: Preset security policies in Exchange Online provide an easy way to implement recommended spam, malware, and phishing protections across your organization.
In conclusion, enable preset security policies to simplify and strengthen your Microsoft 365 security efficiently. Whether you choose Standard or Strict, these policies automatically apply best practices, saving you from complex configurations. By enabling them, you ensure strong, consistent protection with minimal effort. Feel free to drop your comments below if you have any questions or thoughts!


