SharePoint Online environments often grew without control, with sites staying active long after projects ended, members never being cleaned up, and sharing left open. This led to oversharing and content sprawl, with many sites lacking clear ownership and proper governance.
Without automation, managing site lifecycles across hundreds or thousands of sites became a manual, unscalable task. Just like Entra ID access reviews, Microsoft introduced site attestation policy with the same review-driven approach, and it’s now generally available. Let’s explore!
Why We Need to Configure Site Attestation Policy?
Site attestation policy is an opt-in feature and part of the SharePoint Lifecycle Management suite. It’s from SharePoint Advanced Management, which enables admins to request periodical verification from the site owners or admins for the site details like site owners, members, sharing settings, and all. By reviewing these areas regularly, site owners can proactively avoid the below scenarios:
- Reduce SharePoint storage: Prevent obsolete sites from remaining active after projects end, saving storage and improving site hygiene.
- Avoid unmanaged sites: Ensure every site has an active owner to manage permissions, review shared links, and protect sensitive content.
- Prevent unauthorized access: Remove outdated or inactive members to reduce insider threats and unwanted access.
- Reduce the risk of oversharing: Manage sharing and access by ensuring external sharing is limited appropriately.
- Avoid broken inheritance: Check for misconfigured access levels and break inheritance only at the site level to avoid compliance risks and strengthen SharePoint security.
How Site Attestation Policy Works?
The working of a site attestation policy is simple, let’s take a closer look at the details step-by-step.
- Site owners receive periodic attestation requests based on configured criteria such as site type, creation method, sensitivity labels, or retention hold status.
- During attestation, site owners review the site settings and explicitly approve the attestation by clicking the confirmation action.
- Attestation requests are generated at the configured frequency (for example, every 3 months).
- If a site owner does not respond to the attestation request and its 3 monthly reminder notifications, the site continues to be marked as unattested.
- For unattested sites, the policy can take actions such as:
- Making the site read-only.
- Archiving the site.
Hope you now understood the overall working of it. Let’s delve into how to configure them after the pre-requisites.
Licensing Requirements for Creating a Site Attestation Policy
To create a site attestation policy in the SharePoint admin center, you need the below right administrator and licensing permissions.
Administrator Requirements: SharePoint administrator or any equivalent permissions.
Licensing Requirements:
- Must have one of the below base licenses:
- Office 365 E3, E5, or A5
- Microsoft 365 E1, E3, E5, or A5
- Additionally, must have one of the following:
- Microsoft 365 Copilot license (at least one user)
- SharePoint Advanced Management (SAM) license
How to Create Site Attestation Policies in SharePoint Admin Center?
Once the prerequisites are in place, let’s follow the below steps to create and request recurring site attestations for SharePoint sites.
- Sign in to the SharePoint admin center and navigate to Policies → Site lifecycle management.
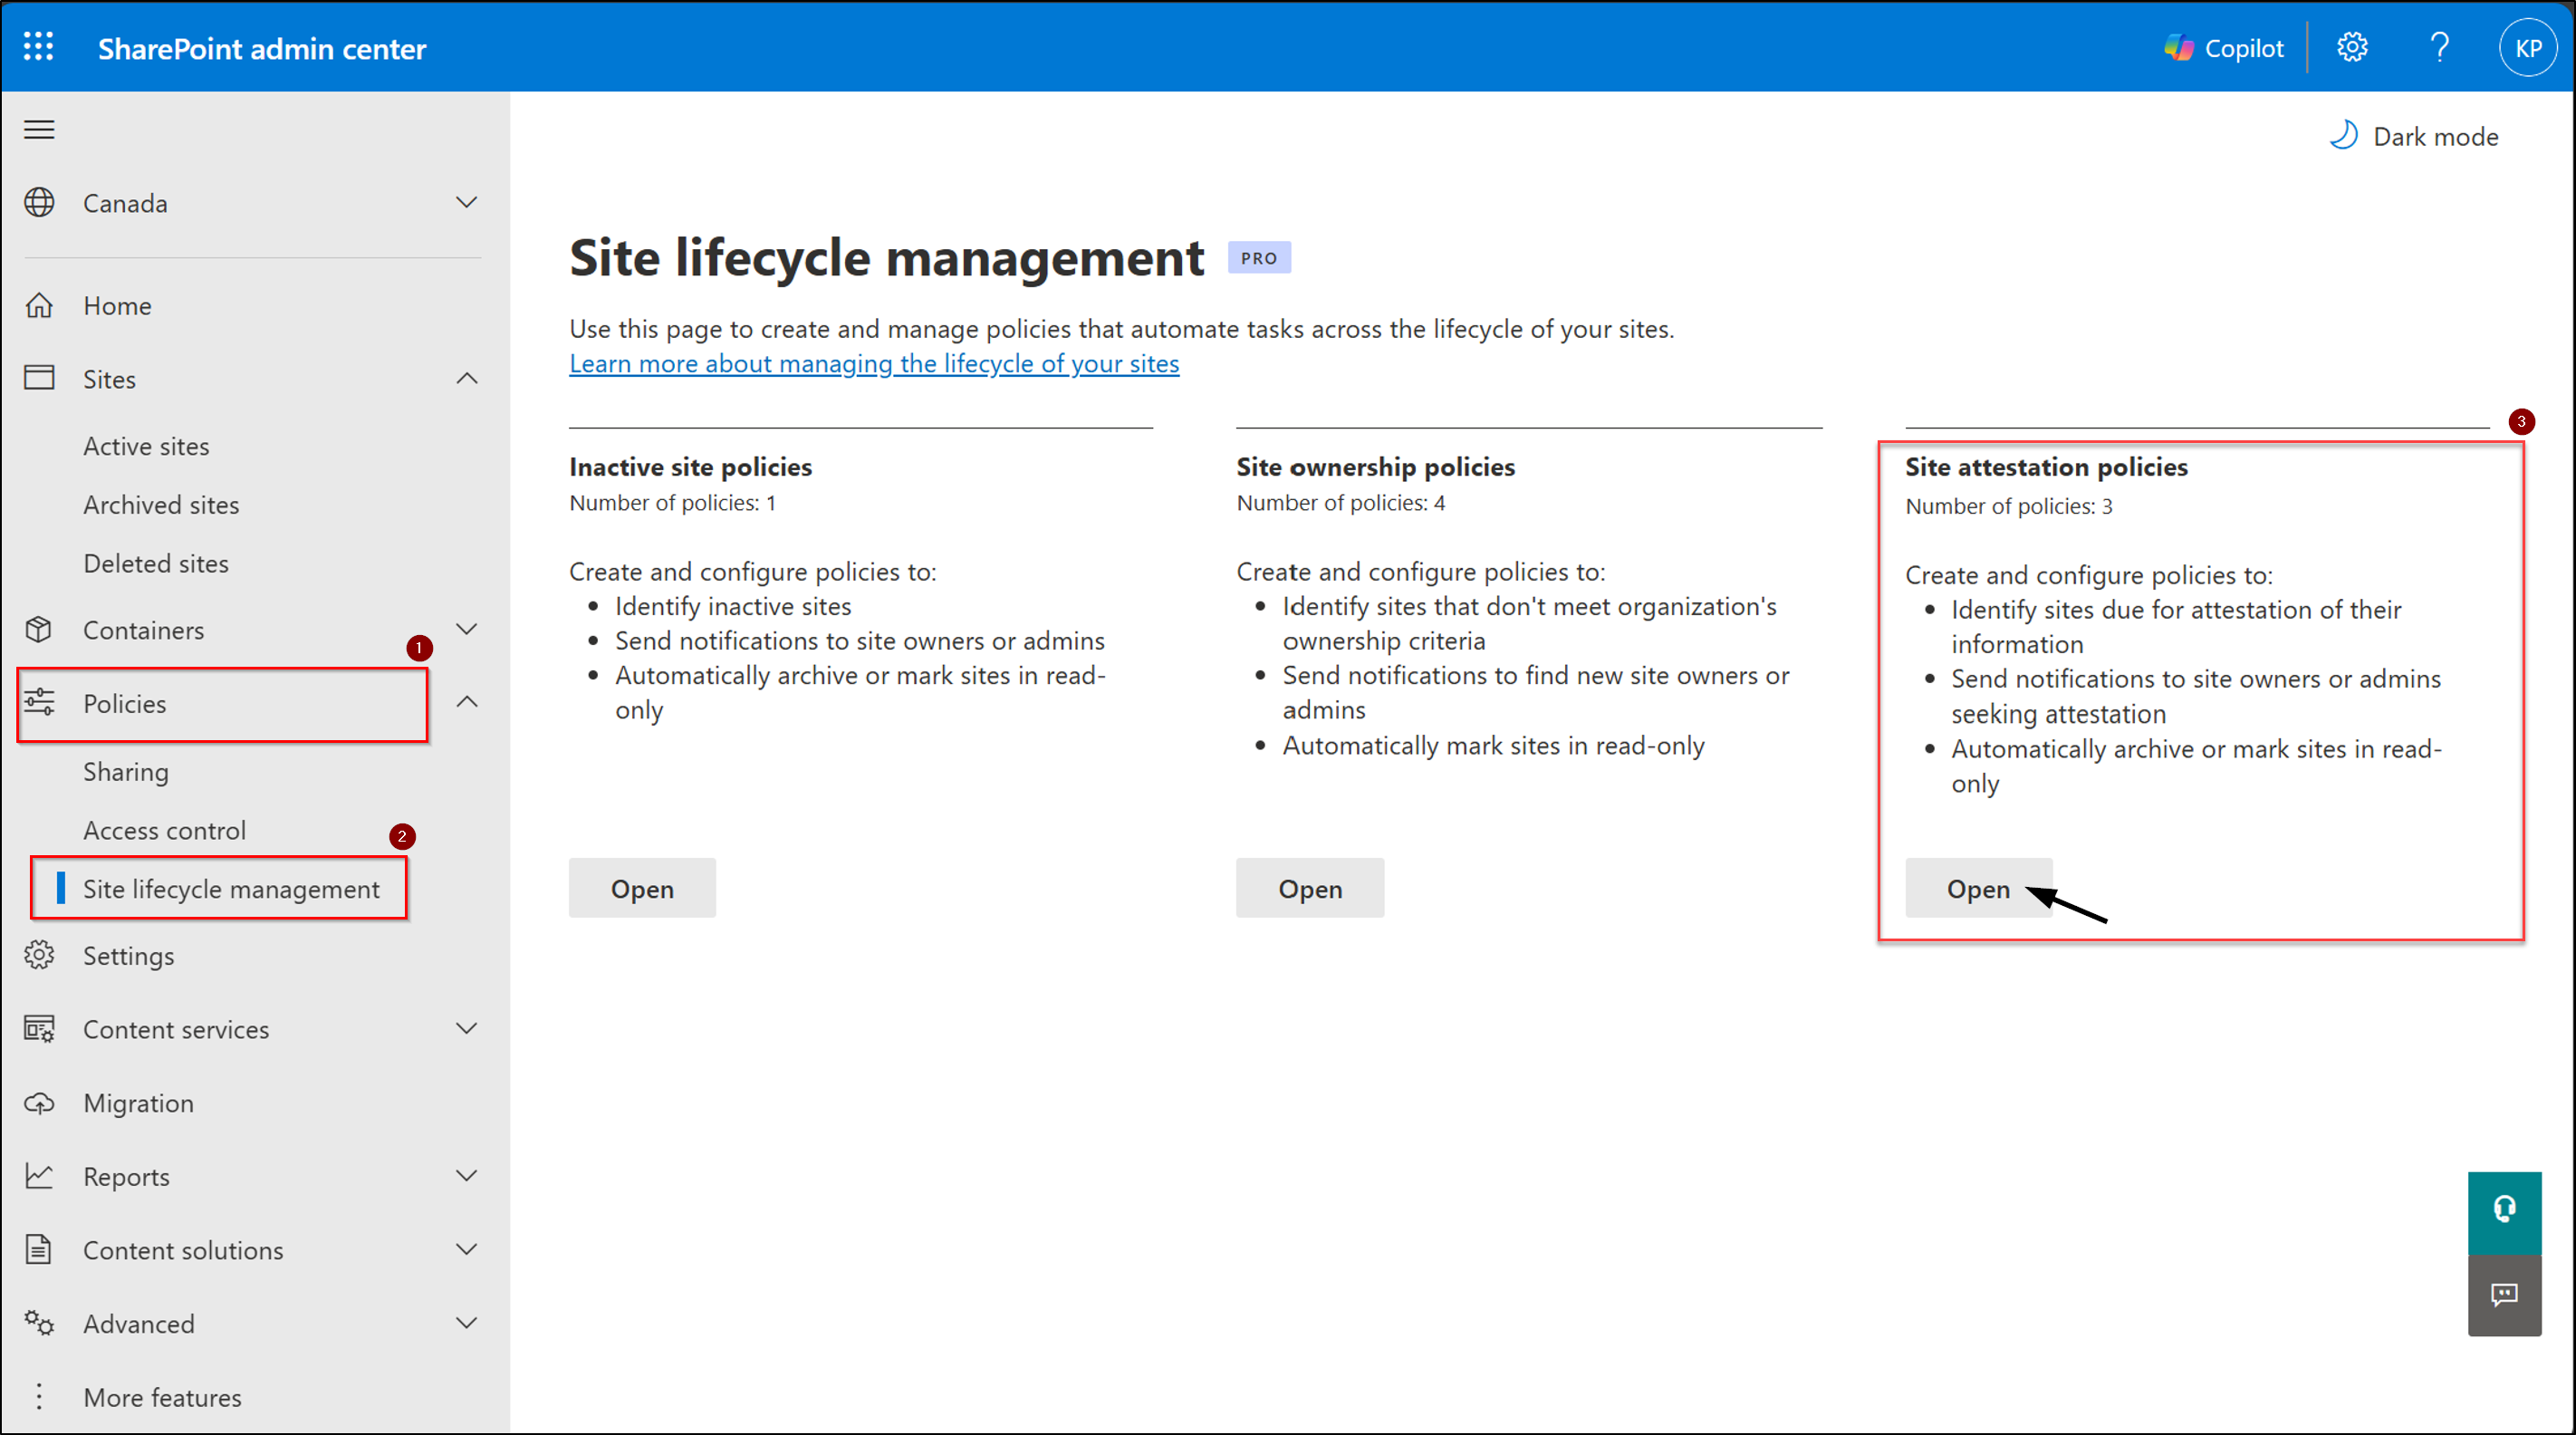
- Under Site attestation policies, select Open and then click Create a policy to begin.
- On the Overview page of Manage site attestation, just click Next to move into defining your policy scope.
- Define the scope for policy:
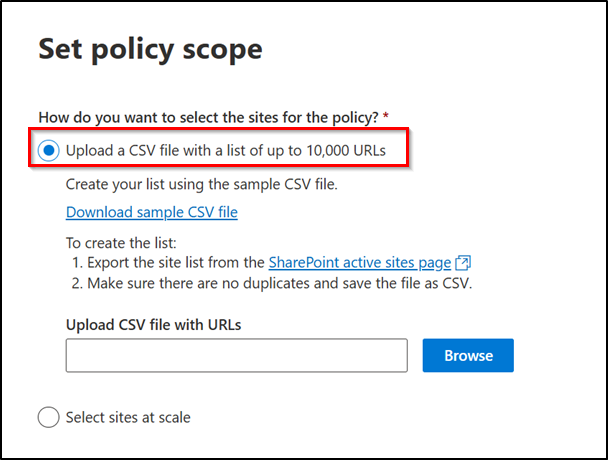
On the Select policy scope page, choose which sites should be reviewed/part of this attestation cycle. You have two common ways to pick sites:
- (i) Upload a CSV file with a list of up to 10,000 URLs: You can export the site list directly from the active sites page in the SharePoint admin center and upload that csv file here.
4. (ii) Select sites at scale: Instead of listing sites as above method, you can choose this option to define rules to automatically include sites that match your criteria.
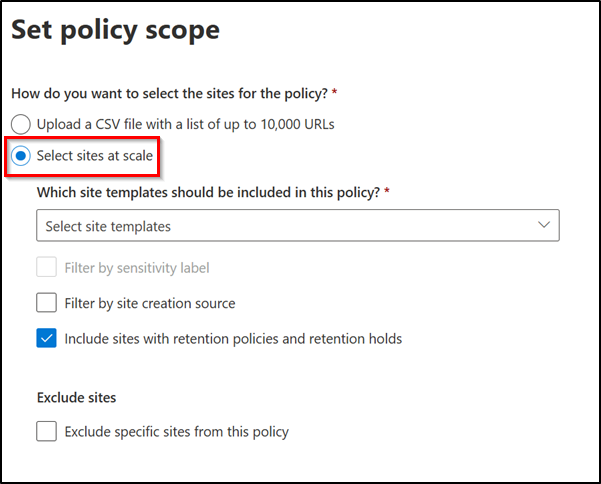
a) Select Site Template Types: As part of the configuration, select the SharePoint site types that should be covered by this policy, such as:
- All sites
- Classic sites
- Communication sites
- Group connected sites without teams
- Team sites without Microsoft 365 group
- Teams-connected sites
b) Apply Additional Filters: Next, refine the policy scope by configuring filters like sensitivity labels (if available in your tenant) and site creation source, including SharePoint Home, SharePoint admin center, PowerShell, PnP, or Teams.
c) Include or Exclude Specific Sites: During configuration, choose whether to include sites under retention policies, retention holds, read-only, or locked states (enabled by default), and optionally configure exclusions for up to 100 specific site URLs.

- After completing the scope configuration, select Next to proceed with the remaining site attestation policy settings.
- Set the Policy Detail:
On the site attestation settings page, you can decide a few key things:
- How often owners should respond (every 3, 6, or 12 months)
- Who should be asked to attest (site owners, site admins, or both)
- Whether to exclude certain owners or groups from receiving requests
- Once the site owner or admin does not respond, the site is marked as unattested and three monthly attestation reminders are sent. Below are the enforcement actions and what happens at each stage if a site remains unattested.
| Enforcement Action | Monthly Attestation Requests | After 3 Months | After Next 3 Months | Policy Report Status | How to Revert actions |
| Do nothing | 3 monthly reminders | No changes made to the site. | If still unattested after 6 months, monthly requests resume. | Site marked as “Unactioned”. | N/A |
| Read-only access | 3 monthly reminders | If still unattested, site is set to read-only. | Still read-only mode, users can view content but cannot make changes. | Status updated as “site in read-only mode” | Go to Active sites, select the site, and click Unlock. (Tenant admin only) |
| Archive after read-only period | 3 monthly reminders | If still unattested, site is set to read-only for a set period (3, 6, 9, or 12 months). | After the read-only period, site is archived using Microsoft 365 archive. | Status updated as “site archived” in policy report. | Go to Sites → Archived sites, select the site, and click Reactivate. (Tenant admin only) |

- After setting your preferences, click Next, give the policy a name, an optional description, and choose one of the policy modes below:
- Active: Runs monthly and can enforce actions on unattested sites.
- Simulation: Runs once and generates a report. Once validated, it can be converted into an active policy.
- Finally, click Finish to save the policy.
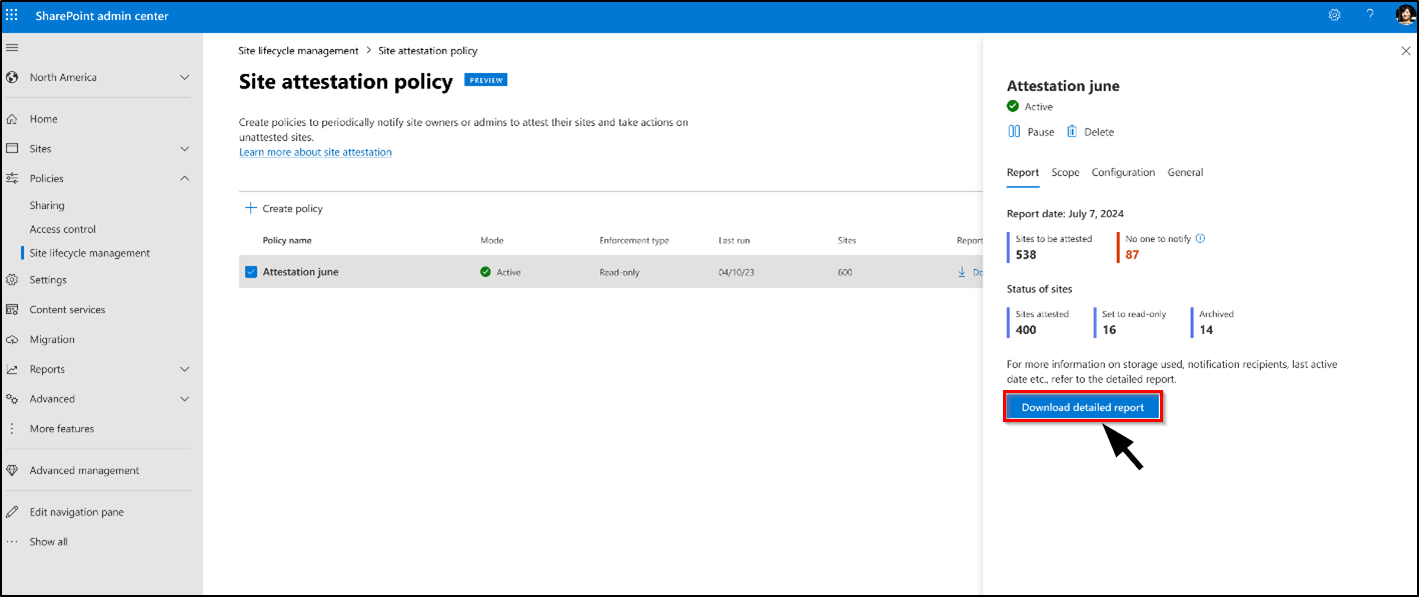
Monitor Site Attestation Status Report in SharePoint Admin Center
After the site attestation policy runs, reports appear in the Site lifecycle management > Site attestation policy dashboard, where admins can track how the policy is performing. From this view, you can quickly see how many sites are due for attestation, successfully attested, moved to read-only, or archived, and export a detailed CSV report with the following columns for audits, follow-ups, or governance reviews:
- Site name & URL,
- Sensitivity label & retention policy,
- Last attested by & last attestation date,
- Action status of policy & action taken on, etc.
Points to Note:
- How sites managed by multiple policies:
- If a site falls under multiple site lifecycle management policies of the same type (site ownership, inactive site, or site attestation), notifications are not repeated within 30 days.
- If a site receives a notification from one attestation policy, no further notifications from other policies of the same type are sent for 30 days.
- The policy execution report shows the status as “Notified by another policy”.
- Policy enforcement actions:
- Once an enforcement action is successfully applied, no further notifications are sent.
- The site and its status are included in the monthly report.
- Unattested sites configured with read-only enforcement trigger additional notifications to site owners when the site enters read-only mode.
That’s it! You’ve now seen how to create a site attestation policy and monitor its status in the SharePoint admin center. Stay tuned for more upcoming Microsoft 365 updates!


