Imagine your organization has configured retention policies to keep important data for the required period and delete it when it is no longer needed. These policies help balance compliance and retention requirements with storage and cost considerations and may be managed by different admins based on their responsibilities. Now, consider a situation where an admin shortens a retention period, removes a location from the policy, or even deletes the policy altogether. Such changes could be made deliberately without authorization or happen accidentally.
Either way, such changes can weaken the retention settings that were put in place and may affect your organization’s data retention and compliance requirements. But admin changes are not the only concern. Certain compliance requirements may require retention settings to remain protected even when administrators have permission to manage the policies.
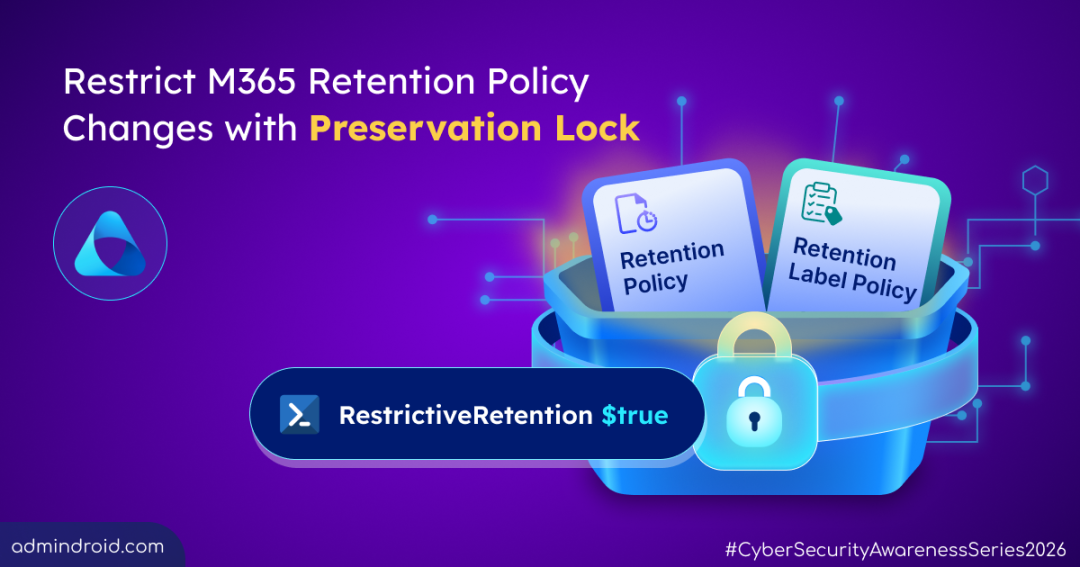
This is where Preservation Lock adds another layer of protection. In this blog, let’s walk through Preservation Lock in Microsoft 365 and how to configure it to protect your retention policy and label policy effectively.
What is Preservation Lock in Microsoft Purview?
Preservation Lock is a Microsoft Purview setting that you can apply to a retention policy or retention label policy.
- Retention policy: A retention policy sets how long content should be kept at specific locations, such as SharePoint sites or Exchange mailboxes. It can also define what happens to the content after the retention period ends.
- Retention label policy: A retention label policy makes retention labels available to users or specific locations. These labels can then be applied to individual items to control how long that content should be retained.
If a retention policy or retention label policy needs to be protected from changes, enabling Preservation Lock is recommended. This protects the policies from unwanted changes that could weaken its retention requirements.
Think of it as sealing the policy in a tamper-proof box. You can add more restrictions, but you cannot remove them later.
Once locked, the policy can still evolve, but only in a direction that strengthens retention. Even Global Administrators cannot remove the lock or make changes that would weaken the policy.
Preservation Lock works through the following key protections:
- Policy Protection: The retention policy cannot be disabled or deleted, so the retention requirements remain in place.
- Location Protection: You can add new locations to the policy, but you cannot remove locations that are already covered.
- Retention Period Protection: You can extend the retention period when needed, but you cannot shorten it after the policy is locked.
Important Points to Remember
- For retention label policies, Preservation Lock has an additional requirement. At least one retention label in the policy must mark content as a regulatory record. A policy containing only standard retention labels cannot be locked.
- Preservation Lock also currently does not support adaptive policy scopes. If a retention policy uses an adaptive scope, you cannot apply Preservation Lock to it.
With this understanding, let’s look at how to configure Preservation Lock for data retention policies.
How to Configure Preservation Lock to Restrict Changes to Retention Policy and Retention Label Policy?
Before configuring Preservation Lock, make sure the admin account has a Microsoft 365 E5 license and is assigned to at least Compliance Administrator role.
Preservation Lock cannot be configured from the Microsoft Purview portal because there is no setting or toggle for it. Instead, you need to use Security & Compliance PowerShell to apply the lock.
Follow the steps below to enable Preservation Lock for retention policy.
- Run the following script to check for the required Exchange Online PowerShell module. If the module is not available, the script asks for confirmation before installing it. It then imports the module and connects to Security & Compliance PowerShell:
123456789101112131415$Module = Get-InstalledModule ExchangeOnlineManagement -ErrorAction SilentlyContinueif ($Module.Version -ne "3.2.0") {Write-Host "Exchange Online PowerShell V3.2.0 module is not available" -ForegroundColor Yellow$Confirm = Read-Host "Are you sure you want to install the module? [Y] Yes [N] No"if ($Confirm -match "[yY]") {Write-Host "Installing Exchange Online PowerShell module version 3.2.0"Install-Module -Name ExchangeOnlineManagementImport-Module ExchangeOnlineManagement} else {Write-Host "EXO V3.2.0 module is required to connect to Exchange Online. Please install the module using the Install-Module ExchangeOnlineManagement cmdlet."Exit}}Write-Host "Connecting to Security and Compliance PowerShell..."Connect-IPPSSession
- Before applying Preservation Lock, identify the policy you want to lock. Run the following cmdlet to list the retention policies and retention label policies in your Microsoft 365 tenant:
1Get-RetentionCompliancePolicy
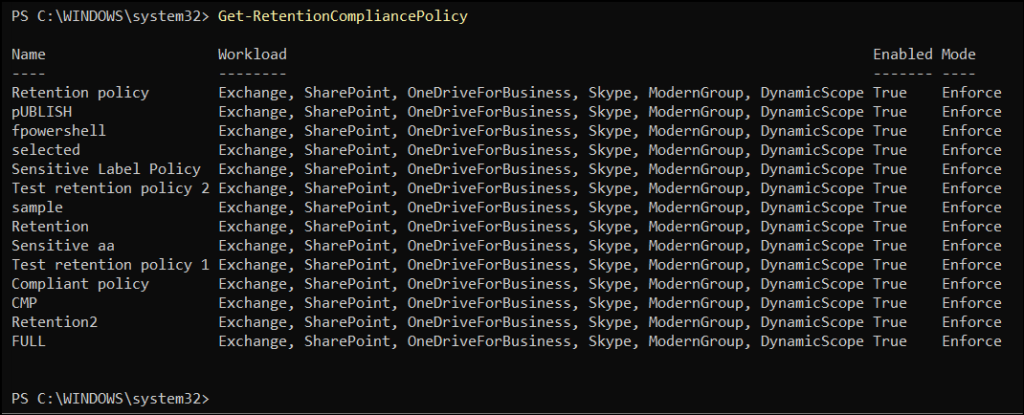
Review the policies returned and note the name of the policy you want to lock.
- (i) For a single policy, run the following cmdlet by replacing <Policy Name> with the name of the target retention policy:
1Set-RetentionCompliancePolicy –Identity “<Policy Name>” -RestrictiveRetention $true
Make sure -RestrictiveRetention is set to $true to enable Preservation Lock for the selected policy. When you run the cmdlet, PowerShell prompts you to acknowledge that the change is irreversible. Review the prompt carefully and enter Y to confirm and apply Preservation Lock.
(ii) If you need to apply Preservation Lock to multiple retention policies, you can list the policies in a CSV file instead of entering each policy name manually. Create a CSV file with a PolicyName column and add the names of the retention policies you want to lock as below: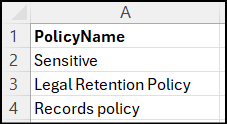
Once the CSV file is ready, replace <CSVInputFilePath> with the path to the file and run the following script:
1234567891011$Policies = Import-Csv -Path "<CSVInputFilePath>"foreach ($Policy in $Policies) {Write-Host "`nPolicy: $($Policy.PolicyName)" -ForegroundColor Cyan$Confirm = Read-Host "Apply Preservation Lock to this policy? [Y] Yes [N] No"if ($Confirm -match "^[Yy]$") {Set-RetentionCompliancePolicy -Identity $Policy.PolicyName -RestrictiveRetention $true}else {Write-Host "Skipped: $($Policy.PolicyName)" -ForegroundColor Yellow}} - Once done, Preservation Lock is applied to the target retention policies. To verify that the restrictive retention setting has been applied, replace <Policy Name> with the name of the target policy and run the following cmdlet:
1Get-RetentionCompliancePolicy -Identity "<Policy Name>” | Format-List Name,Enabled,Mode,RestrictiveRetention

Now that you have enabled Preservation Lock for a retention policy or retention label policy, let’s see how it restricts changes to a retention policy.
What Happens When a Rogue Admin Changes a Retention Policy Under Preservation Lock?
Imagine a rogue admin or compromised account wants a SharePoint site to escape retention so its content can later be deleted without a trace. The site is covered by a retention policy protected with Preservation Lock.
The rogue admin starts with the obvious approach of removing the site from the policy. They go to Microsoft Purview portal –> Solutions –> Data Lifecycle Management –> Policies –> Retention policies, select the policy, and choose Edit. Under Locations, they find the SharePoint sites location, remove the site, and try to save the change. But the change is blocked, and an error appears displaying:
You can’t remove users or site locations from this policy because it has Preservation Lock turned on. You can only add users or site locations to locked policies.
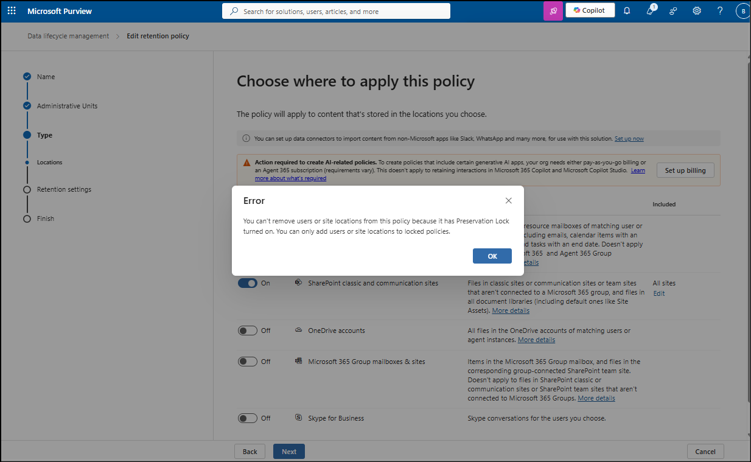
The unauthorized admin then tries another approach: reducing the retention period. They edit the policy, shorten the retention period, and try to save it. Again, the change is blocked with an error:
You can’t shorten the time frame to preserve the content because this is a restrictive policy.
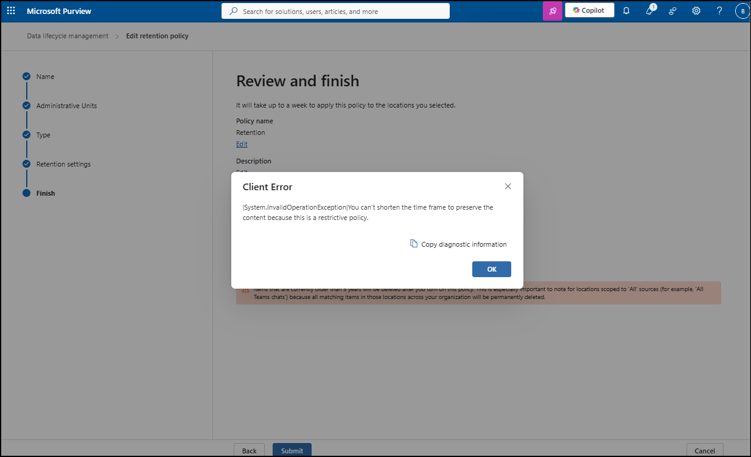
This is the key protection provided by Preservation Lock. Even administrators with high-level permissions, including Global Administrators, cannot make changes that would make the protected retention policy less restrictive.
While rogue or unauthorized admin changes are one concern, what happens if Preservation Lock itself is enabled by mistake.
How to Disable a Mistakenly Applied Preservation Lock in Microsoft 365?
A common question often admins asks is: “What if I enable Preservation Lock by mistake? Can I remove it?” Even if it was enabled unintentionally, there is no option to turn off or remove Preservation Lock after it has been applied. The lock prevents anyone, including Global Administrators, from disabling or deleting it, removing locations, or making the retention settings less restrictive. So, once it is enabled, you cannot simply go back to the policy settings and undo it.
For a critical business scenario where the lock was applied incorrectly or needs to be addressed urgently, raise a service request with Microsoft Support and explain the situation. They can assess the specific tenant and policy configuration and advise on the available options.
Think you’ve mastered Preservation Lock? Let’s put your knowledge to the test!
⚡Take the rapid-fire challenge and find out if you can crack it! https://admindroid.com/cybersecurity-awareness-month-2026?play=7
Best Practices for Configuring Preservation Lock in Microsoft 365
Preservation Lock is not something you want to configure and forget. A few simple practices can help you avoid mistakes and manage locked policies more easily.
- Test Preservation Lock Before Enabling: Create a small test policy and apply it to a test mailbox. Enable Preservation Lock and try to disable, delete, or shorten the policy. This helps you see which changes are blocked.
- Plan for Retention Storage Growth: A locked retention policy cannot be shortened later, so content may need to remain retained for the full retention period. In SharePoint and OneDrive, this retained content can remain in hidden locations such as the Preservation Hold Library, which can consume storage. So, consider the potential storage impact before locking the policy and monitor storage usage regularly.
- Review Locked Retention Policies: Keep track of the retention policies that have Preservation Lock enabled so you know which policies have permanent restrictions on changes. Use the Get-RetentionCompliancePolicy | Where-Object { $_.RestrictiveRetention -eq $true } cmdlet to identify these policies and review them regularly.
- Limit Access to Retention Policies: Apply the principle of least privilege and grant roles such as Compliance Administrator only to users who need to manage retention policies. This helps reduce the risk of unintended changes to other retention settings, even when Preservation Lock is enabled.
Final Thoughts
Preservation Lock is simple to configure but cannot be undone once enabled, which is why it deserves careful planning. Before locking a retention policy or retention label policy, make sure you understand the impact and confirm that it is required for your organization.
We hope this blog helped you understand how to utilize Preservation lock to strengthen data retention with confidence. If you have any questions or experiences to share, drop them in the comments section below. We’d be happy to hear from you. Stay tuned for more blogs!