When you check your SharePoint storage limit, it will be shown as 25600 GB (25 TB) by default. But are you aware that 25 TB is not your actual storage quota in SharePoint Online? The fact is that Microsoft provides only 1 TB of default storage, and the rest depends upon various factors in the organization. Then, why is the site collection limit shown as 25 TB? If your storage quota is about to reach its limit, you can increase the limit up to 25 TB. Still, confused? Let’s dig deep into how it works.
- What is SharePoint storage and how is it calculated?
- How to configure site storage limits in SharePoint Online?
- How to avoid sites from getting into a read-only mode?
What is SharePoint Storage and How is it Calculated?
SharePoint storage is the total storage allocated per organization and the number of licenses you have plus any Microsoft 365 Extra File Storage add-on purchased. Microsoft provides 1 TB of default storage for each tenant and an additional 10 GB is provided for each licensed user.
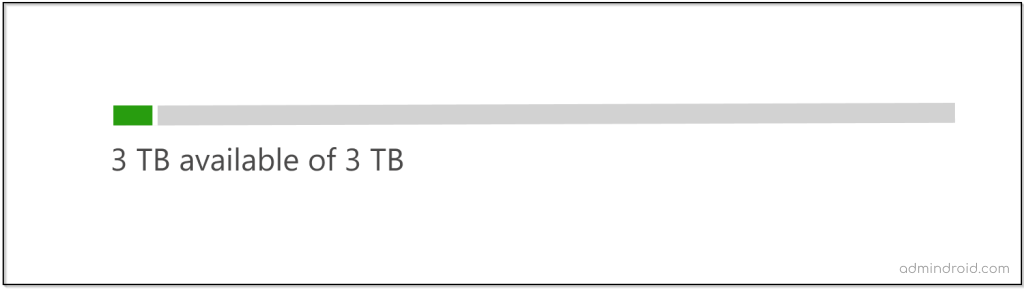
For example, if you have 200 licensed users, the total SharePoint online storage would be calculated as 1 TB + (10 GB x 200) = 3 TB. After consuming the whole storage quota, you will have to buy additional storage!
Note: You can see the total storage for your subscription and the amount of available storage at the top right corner of your SharePoint admin center.
📝 Note: Version history in SharePoint stores previous copies of files whenever edits are made. These versions also consume storage, so a heavily edited document library can use more storage than expected. Managing version history is essential to prevent reaching storage limits prematurely.
Eligible Licensing Plans for 10 GB Storage Quota
The 10 GB quota is provided based on the licensing plan in your organization. To make it clear, we have listed different plans and their SharePoint storage below which allows you to plan your license purchase accordingly.
| 10 GB per license available for | 10 GB per license unavailable for |
| Microsoft 365 Business Basic, Standard and Premium Teams Essential (MSA and AAD) Microsoft 365 A3, E3 and G3 Microsoft 365 A5, E5 and G5 Office 365 A3, E3, G3 Office 365 A5, E5, G5 Office 365 A1, E1, G1 SharePoint Plan 1 or 2 | Microsoft 365 F1 Microsoft 365 F3 Office 365 F3 |
Site Collection Storage Management
The maximum storage capacity for each site collection is 25 TB. It means that 25 TB is not provided for each site collection by default, but you can extend the storage up to 25 TB. So, you can allocate SharePoint storage limit based on respective site usage and available storage quota. You can set up an automatic site storage limit or a manual setting based on your requirements.
Note: You can check the available storage space of an individual site collection from the storage metrics section under site settings->site collection administration.
What are the Minimum and Maximum SharePoint Storage Limits You Can Set for a Site Collection?
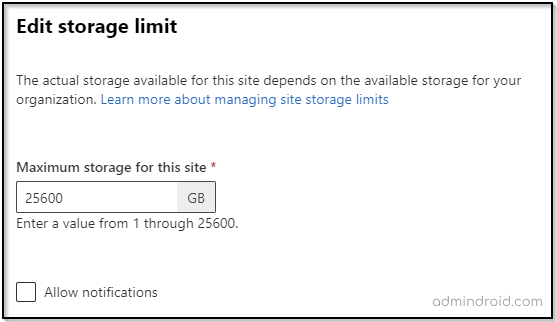
The minimum storage limit that you can set for a site collection is 1 GB and you can extend it up to 25 TB based on your available organization quota. When you set the value to be less than 1024, it is rounded up to 1 GB and it is reflected in the quota value.
How to Configure Site Storage Limits in SharePoint Online?
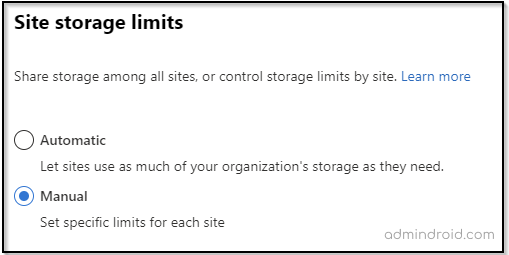
You can configure SharePoint site storage limits in the following two ways.
Automatic – This setting lets your sites consume as much storage as they require without any limitations. SharePoint automates the process of storage allocation across site collections by using a concept called “Storage Pool”. But as admins, you can also choose to set them manually if you prefer specifying individual site storage limits.
Manual – This setting lets you decide and set storage quota for each site collection based on the site’s needs and usage.
When Should You Go for Manual Storage Limit Configuration?
Consider your overall SharePoint storage is only 1 TB, and you have configured automatic site storage consumption. Let’s say an employee uploads a video that consumes 1000 GB to any of your site collections. Immediately, you will run out of storage, and all the site collections getting into ‘read-only’ mode. To avoid such situations, you should opt for a manual storage limit configuration for each site collection based on site usage.
You can enable manual storage limit setting by navigating to SharePoint Admin center -> Settings -> Site storage limits -> Select your option -> Then Save.
How to Set Up Storage Quota for Each Site Collection Manually?
You can manage SharePoint site storage limits manually using both the SharePoint Admin Center and PowerShell.
Set Site Storage Quota Using SharePoint Admin Center
Follow the steps below to set a storage quota for your site collection.
Step 1: Head out to your SharePoint Admin Center.
Step 2: Go to Active Sites from sites.
Step3: Now, set the value ranging from 1 to 25600 in GB.
Set Site Storage Quota Using PowerShell Scripts:
First, you should connect to the SharePoint Online PowerShell using the Connect-SPOService cmdlet and then run the following scripts.
|
1 2 3 4 |
$SiteURL="https://m365scripts.sharepoint.com/sites/test" Set-SPOSite -Identity $SiteURL -StorageQuota 2048 –StorageQuotaWarningLevel 1024 |
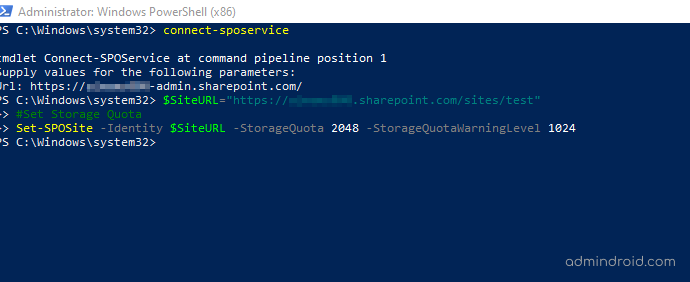
One important thing to remember when you set SharePoint storage limits using PowerShell is that you have to enter the storage values in MB.
How to Avoid Sites from Getting into a Read-only Mode?
In order to avoid sites getting into read-only mode due to insufficient storage, follow the steps given below.
Set Email Notifications When Sites Reach the Storage Limit
As an admin, you should manage the site collection storage without exceeding the storage limit. To avoid sites getting into read-only mode, you should set email alerts that notify site owners and site admins when a site collection consumes the maximum storage capacity.
You can set the limit in % from the edit storage limit section.
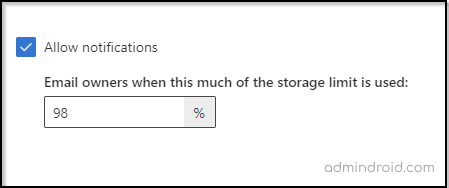
In the above picture, the alert limit is set to 98%. That is when the site storage consumes 98% of the total SharePoint storage limit, the site admin and the site owner receive an email notification.
Get a Microsoft 365 Extra Storage Add-on for Your Subscription
As a site collection administrator, you can request the global administrator for more quota by following these steps.
- Go to the site settings page.
- Select Storage Metrics under Site Collection Administration.
- Select Request More Quota.
This request is sent as an email notification to the global administrator.
Upon request by the site admin, the global administrator can increase the storage for US$0.20 per GB per month in the following way.
Step 1: Login to your Microsoft Admin Center.
Step 2: Go to the Billing->Purchase services page.
Step 3: From the add-ons section, find and select Office 365 Extra file storage.
Step 4: Enter the amount of storage you want in GB.
Step 5: Select Check out now-> Place an order and start enjoying!
Is Microsoft 365 Extra File Storage Available for All Subscriptions?
No, the extra storage add-on is limited to the following subscriptions.
- Office 365 Enterprise E1, E2, E3.
- Office 365 A3 (faculty), A5 (faculty).
- Office for the web with SharePoint Plan 1 and Plan 2.
- SharePoint Online Plan 1 and Plan 2.
- Microsoft 365 Business Basic, Standard, and Premium.
- Microsoft 365 E3 and E5.
- Microsoft 365 F1 and F3.
Know What Counts on Your Storage Quota!
Before purchasing additional storage, analyze different SharePoint Online site usage reports to understand actual need for the storage in sites and plan accordingly.
- Files sitting in the first and second recycle bins.
- Multiple versions of files, especially when version history controls are enabled. To improve storage management, consider implementing intelligent versioning in SharePoint Online.
- Files retained based on the retention policy.
You can delete the unnecessary resources to free up space and optimize SharePoint storage, helping you avoid excessive storage consumption.
Hope, we have helped you to manage the SharePoint online storage effectively. Please don’t forget to drop a comment for any assistance!


