
As part of Microsoft’s ongoing effort to improve the functionality and user experience of Microsoft Teams, new updates are regularly rolling out like Microsoft Loop Components. Microsoft has recently released a preview of the new version of Teams, which promises a completely redesigned experience that aims to make it easier and more intuitive to use.
UPDATE! Microsoft has officially made available the new Microsoft Teams app for Windows and Mac making it accessible to both enterprise and education customers as of October 5, 2023.
For web users, starting November 17, 2023, the new Teams on web for Edge and Chrome will be generally available and will see the same ‘Try the new Teams toggle’ as desktop users.
According to Microsoft, the new Teams app now has achieved near-complete feature parity, meaning that almost all functionalities are fully available. Microsoft also added that the classic Teams app will be renamed as Microsoft Teams Classic for Windows 10 and Mac devices, and as Microsoft Teams Classic (work or school) for Windows 11.
For organizations using the default policy, existing Teams users will be automatically switched to the new Teams and they will have the ability to switch back to Classic Teams for a limited period.
Note: The classic Teams users will be automatically updated to new Teams in the coming months.
New Microsoft Teams – Twice as Faster!
✅ Lightning-fast collaboration: The new Teams for Windows is optimized for 2X faster channel load times by utilizing 50% less memory when compared to the classic experience.
✅ Multi-tenant support: With MTO support, users can stay signed into multiple accounts and organizations simultaneously and receive notifications from all of them. Multitenant organization capabilities in Microsoft 365 supports various features of Teams such as People Search, cross-tenant collaboration, meeting bypass, etc.
✅ User-friendly interface: The new channel experience shows posts from top to bottom, with the most recent one at the top. In addition to this, organization charts are now easier to access and view by simply hovering over a user’s profile icon anywhere in Teams, providing a quick and intuitive way to understand team structures.
✅ Copilot: Teams’ Meeting Magic: Teams’ Copilot simplifies conversation catch-up and meeting efficiency with instant summaries of key points, action items, and alignment, enhancing productivity in chats and meetings.
✅ Connect in a 3D Immersive Space: Immerse in a world of 3D virtual environments using avatars and spatial audio technology.
Overall, the new Microsoft Teams app offers an improved and more efficient way of collaborating and communicating with others.
As admins, it is essential to know how to enable the New Microsoft Teams for users in the organization. Before jumping into that, let us first know how to enable Teams public preview! Because to enjoy the latest updates, it is recommended to turn on the public preview feature first!
Enable Microsoft Teams Public Preview
To enable public preview in Microsoft Teams, you’ll need to set the Teams update policy in the Microsoft Teams Admin Center. Once this is done, you can switch to public preview on your Teams desktop and web clients to start exploring the latest updates.
Find how to enable Teams public preview to get early access to preview features rolling out currently.
To do so,
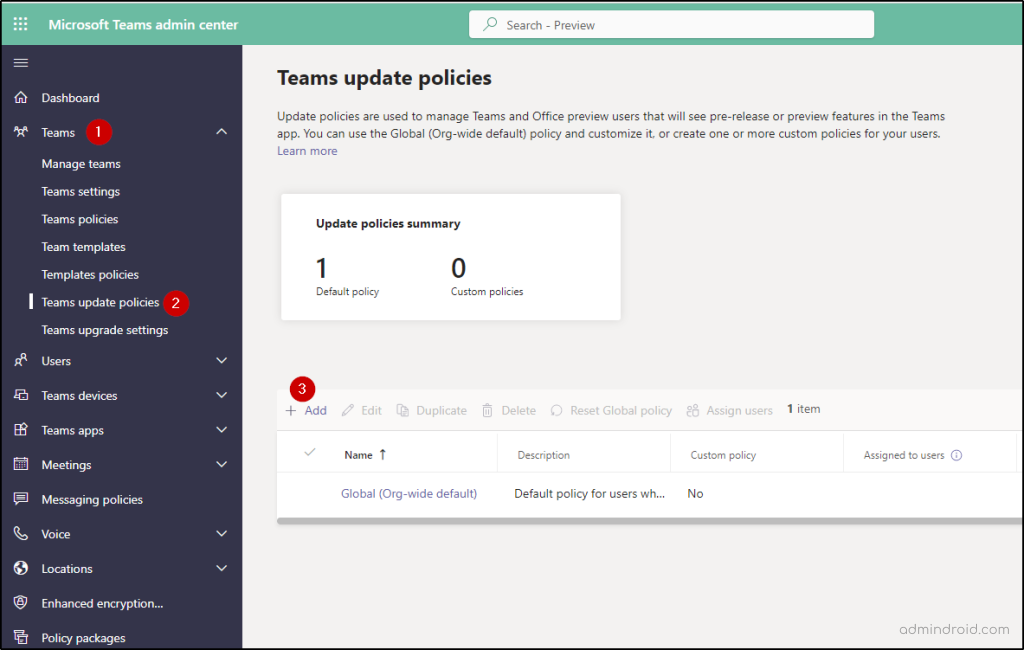
Step 1: Sign in to the Microsoft Teams admin center.
Step 2: Select ‘Teams update policies’ under ‘Teams’.
Step 3: Create a new policy by giving the name and description.
Step 4: From the ‘Allow public preview’ dropdown, select the option based on your requirement. There are four options available.
- Not enabled: Public preview won’t be available for the users.
- Enabled: Enables Teams public preview for users after opting in to public preview via Teams app.
- Follow Office preview: This is the default option. Users enrolled in the Office will be automatically enabled for public preview features.
- Forced: Admins can opt for the ‘Forced’ option as all users in the organization need to experience the New Teams Desktop client.
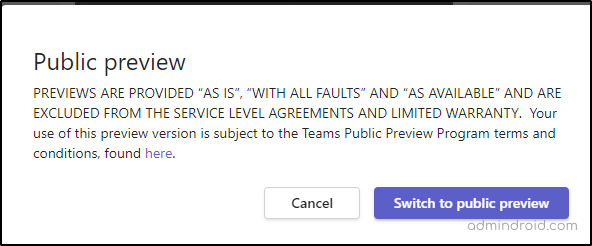
If the public preview option was set to Enabled, then do follow this step. After creating the Teams update policy, users need to switch on the Teams public preview from the app by navigating to the ellipsis near the profile -> About -> Public preview -> Switch to public preview. This step is applicable only if the option was set to ‘Enabled’.
Note: Microsoft will soon allow admins to deploy the new Teams client directly to PCs within their organization. The rollout is set to begin in mid-July 2023.
Enabling the Teams Public Preview for All Users in Your Organization – Is It a Safe Option?
No, it is not a good decision to enable the public preview for all users without testing it. As an admin, you can enable the Teams public preview for yourself or a group of admins before making it available to all users in your organization. Once you have enabled public preview for your organization, you can choose to enable it for individual users by following the steps given below.
Step 1: Select the global (Org-wide default) policy or any custom policy you have created.
Step 2: Click on the ‘Assign users’ option.
Step 3: Select the user or group of users you want to enable public preview for.
Step 4: Click on ‘Apply’ and save your changes.
After enabling the public preview, the selected users will be able to access the new features and updates before they are released to the general public.
How to Enable the New Microsoft Teams?
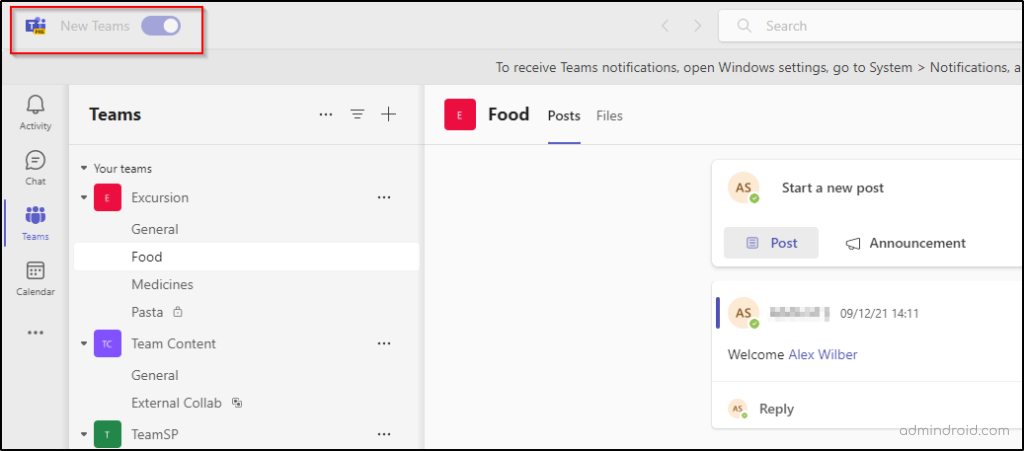
As an admin, you will have the option to enable the new Teams desktop client for Windows for your organization. Once the new Teams is made available to the users, they can start enjoying it by just toggling the ‘Try the new Teams’ button from the top-left corner of their Teams app as shown below.
There are two ways to handle the new settings for Teams
Let’s examine each of these methods separately.
Enable the New Microsoft Teams Using the Teams Admin Center
Step 1: Sign in to the Teams admin center.
Step 2: Reach out to Teams -> Teams update policies.
Step 3: Select the existing one or create a new policy by giving a name and description. If you are creating a new policy, make sure to leave the Allow public preview ‘Enabled’.
Step 4: To manage which users can see the toggle to the new Teams, use the Teams setting ‘UseNewTeamsClient’ under ‘Teams update management policy’ and opt in for “Users can choose”.
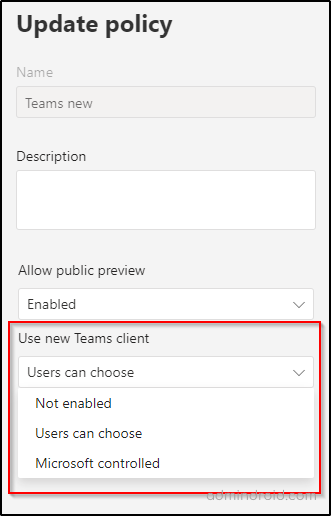
The available three options that admins can opt-in are
Not enabled: This option is used to hide the new Teams toggle from the user’s Teams app.
Users can choose: This option allows users to switch to the New Teams or toggle back to the classic experience at any time.
Microsoft controlled (Default): This option lets Microsoft decide whether to show the new Teams toggle based on product readiness.
How to Enable the New Microsoft Teams Using PowerShell?
First, install the latest Microsoft Teams PowerShell version using the following cmdlet.
|
1 |
Install-Module -Name MicrosoftTeams |
Then, use the following command to connect to Microsoft Teams PowerShell.
|
1 2 |
Connect-MicrosoftTeams |
To update ‘Use new Teams client’ setting for the existing policy, follow the below command.
|
1 2 3 |
Set-CsTeamsUpdateManagementPolicy –identity <policy name> -UseNewTeamsClient UserChoice |
To create a new ‘Teams update policy’ and to define the use new Teams client setting option, use the following cmdlet.
|
1 2 3 |
New-CsTeamsUpdateManagementPolicy -identity <policy name> -UseNewTeamsClient AdminDisabled |
You can use ‘AdminDisabled’ if you wish to disable the feature for your organization.
After creating the new policy, in order to apply it to the users, make use of the cmdlet that follows.
|
1 2 3 |
Grant-CsTeamsUpdateManagementPolicy -identity admin@contoso.org -PolicyName <newpolicyname> |
If some users face installation issues while switching to the new Teams, admins can troubleshoot the cause by setting value for ‘App package Development’ as ‘Not Configured’ for the following.
- Prevent non-admins users from installing packaged Windows apps
- Allow all trusted apps to install
How to Uninstall the New Microsoft Teams Client?
To uninstall and prevent users from using the client, admins can use the following cmdlet.
|
1 2 3 |
Get-AppxPackage *MSTeams* -AllUsers |Remove-AppxPackage -AllUsers |
For users who are using the new Teams before the policy is created have to manually opt-out by using the Toggle button. Once they opt out, the toggle won’t appear after relaunching. However, the new Microsoft Teams is missing several features that we enjoyed in the classic version. Microsoft has addressed a few in their official documentation and has promised to fix them before general availability.
New Microsoft Teams with Microsoft 365 Apps
Starting in September 2023, Microsoft will be installing the new Microsoft Teams as part of the M365 app installation for Windows. However, as an admin, you have opt-out control for this installation if you don’t wish to have the new Teams installed automatically. Here’s how you can opt-out.
Sign in to the Microsoft 365 apps admin center -> Customization -> Device configuration -> Modern apps -> Settings ->Select Microsoft Teams -> Disable automatic installation of new Microsoft Teams.
Conclusion
To ensure a safer and more collaborative environment in the new Microsoft Teams, it is also essential to adhere to necessary security practices in addition to implementing the new enhancements. Also, you can check out the interesting features on New chat and channels experience in MS Teams and let us know your comments.
I hope this blog will take you through the steps necessary to manage the new Microsoft Teams setting for users as admins. Refer the official Microsoft documentation for more recent updates.
Feel free to reach us in the comments for any assistance.


