Leave management is an essential part of any organization, yet there is no dedicated solution within Microsoft 365 for handling it natively. As a result, organizations rely on SharePoint lists, email threads, calendars, or third-party tools to manage and track employee leave requests and approvals. While this approach does work, it can gradually lead to scattered records, slower approval cycles, and limited visibility into leave availability. 😥
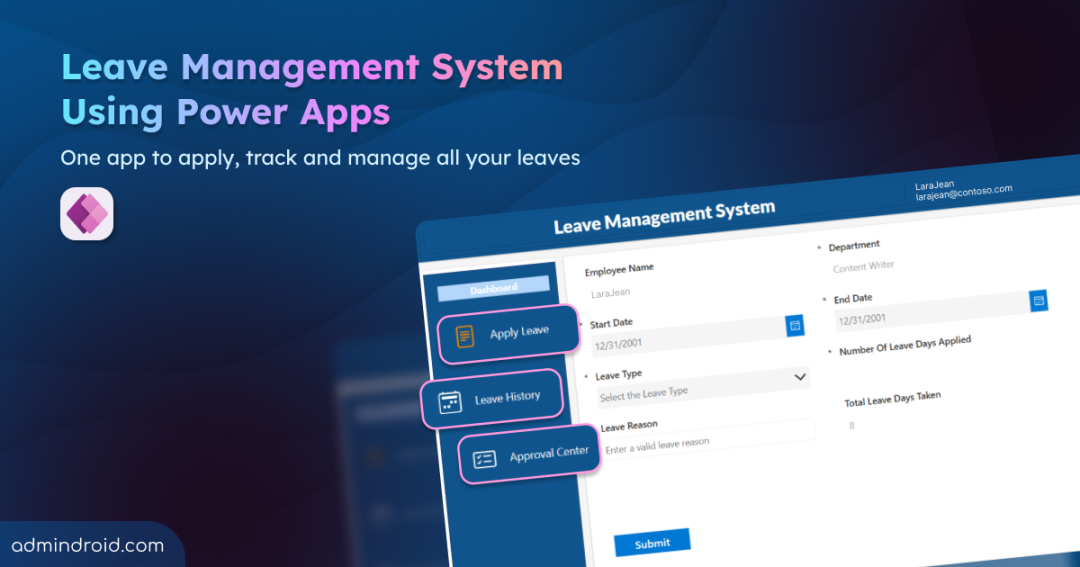
To address these challenges, we’ve built a centralized leave management application using Microsoft Power Apps. In this blog, we’ll walk through how the app works and how you can easily deploy and use it in your environment.
What is Leave Tracking System and Why Do We Need It?
Leave tracking system helps organizations manage employee leave requests in a structured and centralized way. It allows employees to apply leave, view their leave history, and track the approval status of their requests in real time. Managers can easily review, approve, or reject leave requests, without switching between multiple platforms.
In many organizations, this makes it difficult for employees to get visibility into their leave status and for managers to track team availability effectively. That’s why a centralized management system is needed.
A proper leave tracking system solves these challenges by bringing everything into a single platform. It improves transparency, reduces manual effort, and ensures faster and more organized approval workflows.
What Makes the Leave Management Solution Built Using Power Apps Stand Out?
To make all these capabilities seamless and modern, Power Apps becomes the ideal solution. Power Apps is a low-code/no-code platform that enables users to build custom applications quickly with minimal coding effort. This enables automated end-to-end leave request processing with real-time tracking and approvals, making the entire system faster, simpler, and more reliable. Below are the features of the app:
- User-friendly experience – The app has an intuitive and modern interface since it is built using canvas. This makes it much easier to use compared to Excel sheets, email threads, SharePoint lists, or other third-party tools.
- Connectors and automated workflows – Power Apps work with Power Automate and Microsoft 365 connectors to automate admin tasks like approvals, notifications, reminders, and status updates automatically.
- Notifications and alerts – Employees and managers get real-time updates through email and Microsoft Teams to stay informed about the status of leave requests.
- Smart leave tracking and visibility – The system automatically calculates the number of days and total leaves taken, while also categorizing requests as approved, rejected, and pending requests for better tracking.
- Access to leave request reports – Users can easily check past leave records, and reports can be filtered based on different needs for better visibility and decisions.
- Multi-device support and flexibility – The app works smoothly across desktop, tablet, and mobile with a responsive design. Built using canvas app, it is flexible and can be easily customized or extended based on organizational needs without rebuilding the system.
- Privacy and security – Leave requests are sent only to the right managers, ensuring proper access control and secure handling of data.
- Low complexity setup – The solution is easy to deploy. You can simply import the app and start using it with minimal configuration.
- Multi-platform integration – The app can be accessed directly inside Microsoft Teams or SharePoint pages, so users don’t need to switch between multiple tools or portals.
Now, let’s take a look at how the leave management system works in a real-world scenario.
How Microsoft Power Apps-Based Leave Management System Works?
Before exploring the workflow, let’s first get familiar with the three main pages available under the dashboard of the application.
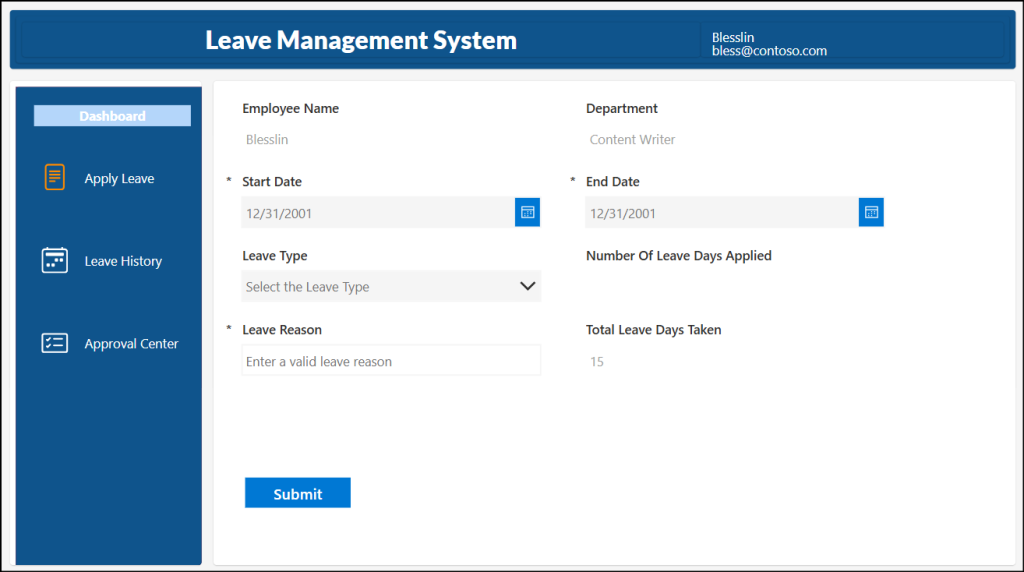
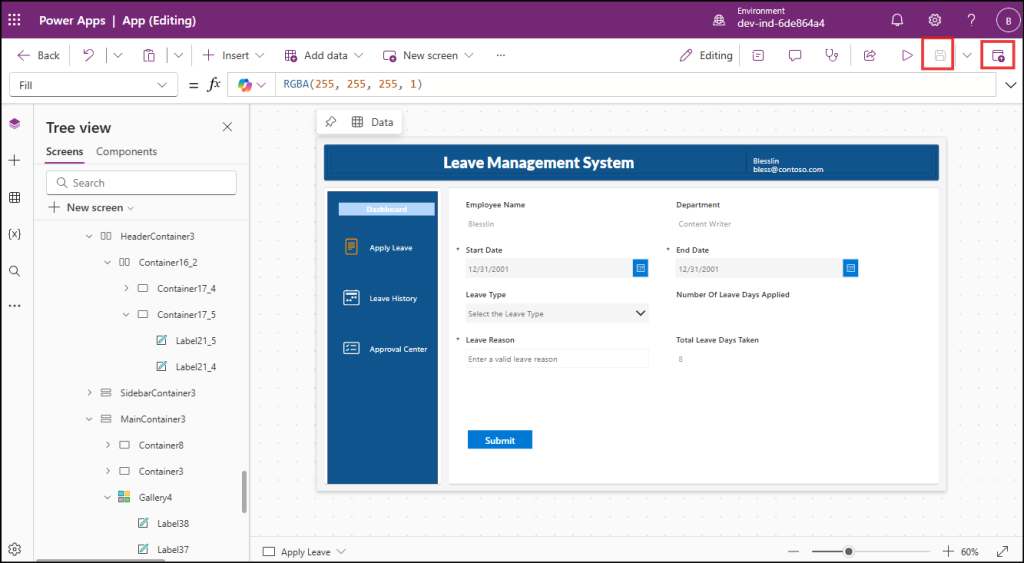
1. Apply Leave Page to Submit a Leave Request
This is the landing page of the application where the users can apply leave requests. The form allows users to enter details such as leave type, start date, end date, and reason for leave.
- Employee Name and Department are auto-filled based on the logged-in user’s details from Microsoft Entra ID properties.
- Number Of Leave Days Applied field is automatically calculated based on the selected start date and end date of the current leave request.
- Total Leave Days Taken field is calculated using the UserLeaveSummary SharePoint list, which stores the total leaves already taken by the employee.
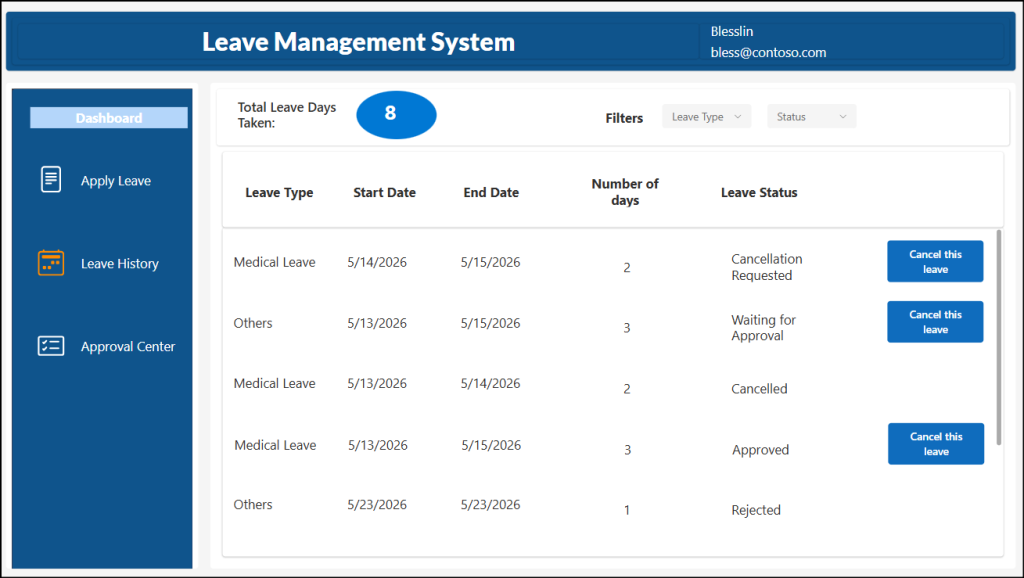
2. View Leave History Page to Check Applied Leaves and Their Status
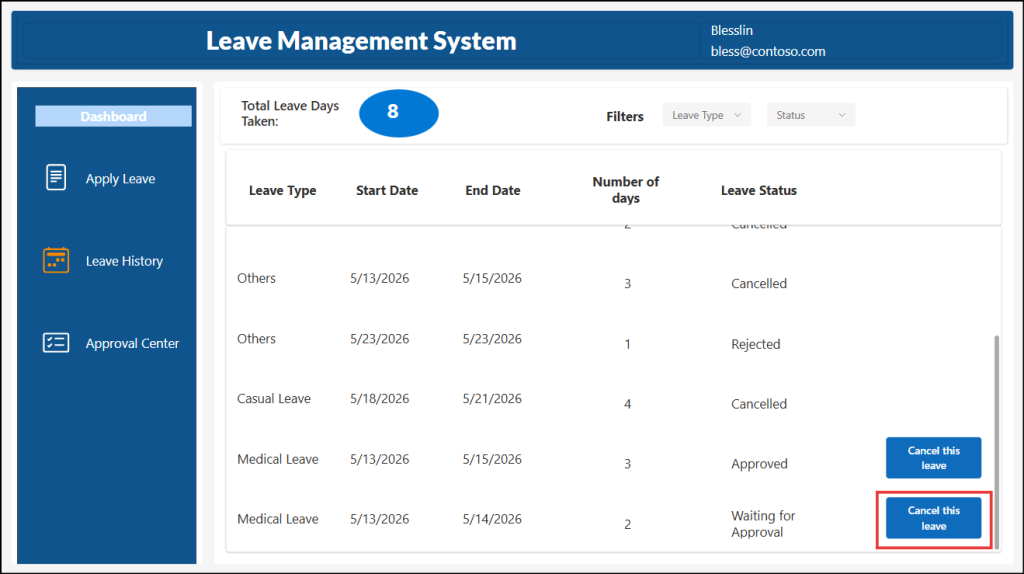
Once a leave request is submitted, users can track their leaves from the ‘Leave History’ page. It displays important details such as leave type, start date, end date, number of days applied, total number of leaves taken and the status of the current request.
From this page, users can track status of their leave requests such as Waiting for Approval, Approved, Rejected, Cancellation Requested, and Cancelled. Additionally, users can filter their leave history by filters like Leave Type and Status, making it easier to find specific records.
If needed, users can cancel their leave directly from this page.
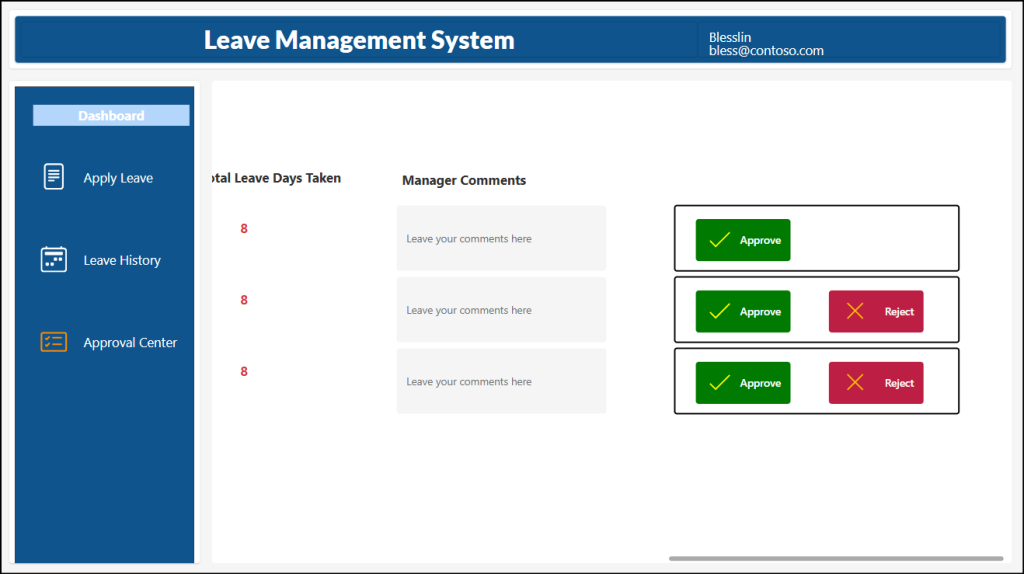
3. Approval Center Page for Managers to Approve or Reject Requests
The Approval Center is accessible only to managers assigned in Microsoft Entra ID. Here, managers can view respective leave and cancellation requests submitted by their direct reports. Leave requests are categorized under tabs such as Waiting for Approval, Approved, and Rejected, making it easier to review.
The ‘Waiting for Approval’ tab includes both new leave requests and leave cancellation requests. Managers can review and approve or reject new leave requests directly from this tab. For cancellation requests, only the ‘Approve’ option is available to confirm the leave cancellation.
The other tabs like ‘Approved’ and ‘Rejected’ displays only approved and rejected leave requests respectively. They are used for tracking and reporting purposes, allowing managers to easily monitor the status of past requests.
Prerequisites to Set Up a Leave Management Application in Your Organization
Before importing the leave management application into your environment, ensure the following prerequisites are in place.
- Environment requirement: You must import the solution directly into a Production environment to implement it. If testing is required, you can first use a Sandbox environment and then move it to production after validation.
- Role Requirement: You must be assigned either the System Administrator or Environment Maker role in Power Apps.
- SharePoint Permission: You must have Site Owner permission to create and configure the required SharePoint lists inside a Sharepoint site.
- License Requirement: You must have an active Power Apps license assigned to your account. This is included in Microsoft 365 plans such as E5 developer.
- Manager assignment in Microsoft Entra ID: Managers must be properly assigned to users in Entra ID, as the leave approval workflow automatically routes requests to the respective manager.
- Mailbox and Teams Access: Both users and managers must have an active email mailbox and access to Microsoft Teams to receive leave notifications, approvals, and updates.
Once the prerequisites are in place, you can now start to import the leave management system using Power apps.
Set Up Required SharePoint Lists for the Leave Management Application
Before importing the app, you need to create SharePoint lists to store leave requests and track the number of leave days taken by users. When these SharePoint lists are integrated into Power Apps, they act as data sources to manage the data collected through the application. Below are the steps to create them:
- Create the ‘Leave Application Form’ in SharePoint Online
- Create the ‘UserLeavesSummary’ SharePoint list
1. Create the ‘Leave Application Form’ in SharePoint Online
The Leave Application Form SharePoint list acts as the employee leave request form used by the application.
To create the leave application SharePoint list form, follow the steps below:
- Sign in to your Microsoft SharePoint site, either a communication site or a Microsoft Teams site.
- Click + New and select Lists form from the dropdown.
- Provide the name as “Leave Application Form”. Ensure the name matches exactly, as it is case-sensitive and referenced directly by the application. Then, click Create.
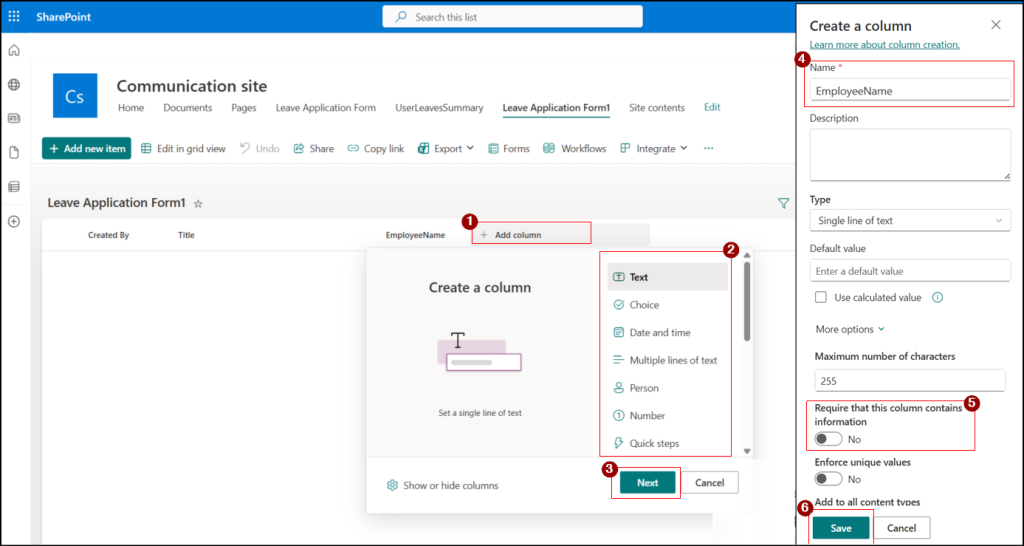
- Click + Add column in the created list, provide the appropriate values as given in the table, and configure them accordingly. Ensure the column names match exactly as specified to avoid errors in the application. Then click Save.
| Column name | Data Type | Required | If Type = Choice, add these in Choices |
| EmployeeName | Text | No | |
| Department | Text | No | |
| StartDate | Date and Time | Yes | |
| EndDate | Date and Time | Yes | |
| LeaveType | Choice | Yes | Medical Leave – Half Day Medical Leave Casual Leave Others – Half Day Others |
| NumberOfLeaveDaysApplied | Number | No | |
| TotalLeaveDaysTaken | Number | No | |
| LeaveReason | Text | Yes | |
| CancellationReason | Text | No | |
| Status | Choice | No | Waiting for Approval Approved Rejected Cancellation Requested Cancelled |
2. Create the ‘UserLeavesSummary’ SharePoint list
The next step is to create a SharePoint list named UserLeaveSummary. This list stores employee details along with the number of leaves they have already taken. It helps track and maintain the total leave count accurately for every employee.
If no values are manually provided in the list, the leave count starts from 0 and is automatically updated based on the leave requests submitted through the application. If values are already available in the list, the system continues calculating from the existing count and adds newly approved leaves to it automatically.
To create this SharePoint list, follow the steps below:
- Sign in to your SharePoint site.
- Click + New and select List from the dropdown.
- Under Create from blank, choose List.
- Enter the name as UserLeavesSummary and click Create. Ensure the name matches exactly, as it is referenced as a data source in the app.
- Click + Add column, choose Text, name it as EmployeeName, and click Save.
- Again click + Add column, choose Text, name it as TotalLeavesTaken, and click Save.
How to Import the Leave Tracker Solution Package into Your Environment?
Once all the SharePoint lists are created, you can configure the leave tracker solution in your Power Apps environment. The leave tracker solution package consists of a canvas app, and cloud flows required for the application.
To set up the leave management portal in your organization, you must follow the steps below:
Import the ‘Leave Management App’ into Your Power Apps Environment
Once both the SharePoint list and configuration are ready, you can proceed to import the application into your environment. Download the application package provided below.
Download App: LeaveManagementApp.zip
Once downloaded, you must add the solution package in your Power Apps by following the steps below:
- Sign in to Power Apps.
- Navigate to Solutions and click Import solution.
- Click Browse and select the downloaded ZIP file, then click Next.
- Review the details and click Next.
- In the Connections section, toggle ‘Review and update all required connections’ and ensure all required connections are properly configured. Sign in to any required services, then click Next.
- In the Environment Variables section, select the SharePoint site URL where the SharePoint lists are created and click Import.
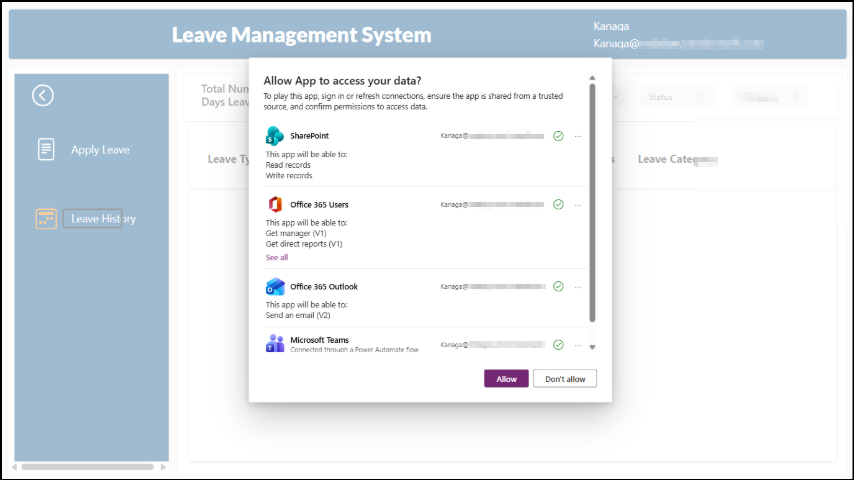
Once the import is completed, the solution will be available under Solutions → Unmanaged. Open the imported solution, go to Objects in the left navigation pane, and select the “Leave Application App”. After opening the app, you will be prompted to allow the app to access the data. Click Allow before making any changes and then the app will be visible to you in edit mode.
Validate Proper Data Source Configuration and Power Automate Flows
Once the app is opened, verify that all the following connections are properly configured from the Data section from the left navigation pane.
- Office365Users
- Office365Outlook
- Leave Application Form
- UserLeavesSummary
- NavMenuColl
To ensure proper functioning, click the three dots (…) next to each data source and select Refresh.
Next, you need to make a few updates to the Power Automate flows. Follow the steps below:
- Once opened the app, click the three dots (⋯) in the left navigation pane.
- Select Power Automate to view all associated flows. Click the three dots (⋯) near it.
- Open the flow named NotifyTeamsChannelOnApproval.
- Select the appropriate Team and then choose the required channel where notifications should be posted.
- Click Save.
Similarly, update the NotifyTeamsChannelOnCancel flow by selecting the correct Team and Channel.
If required, you can customize the app based on your requirement, such as modifying leave types (e.g., Medical Leave, Casual Leave, etc.). However, note that if you change these values, you must also update the corresponding Power Fx formulas in the app to ensure it continues to function correctly. Once the changes are made, click Save and then Publish to make the app available to all users.
End User Experience of Leave Management App
Once the application is published, the admin can share the app link directly with users so that they can start using it. The app can also be added to a Microsoft Teams channel or integrate app into a SharePoint page depending on organizational needs.
User Experience Flow
From a user perspective, the process is simple and seamless:
- Users open the application and apply for leave by filling in the required details.
- After submission, the leave request is automatically sent to the assigned manager for approval, and the user will be notified in Teams chat and outlook.
- The request status is initially set to “Waiting for Approval”, which can be tracked in the Leave History page. Users can view the progress of their request in real time until it is approved or rejected.
- Once the manager approves the request, the status is updated to ‘Approved’, and the user is notified accordingly.
- Users can also cancel a leave from the Leave History page:
- If the status is “Waiting for Approval”, the leave can be cancelled directly using the Cancel This Leave button.
- If the status is Approved, the user must click on the “Cancel this leave” button and they will see a pop-up prompting them to enter the cancellation reason and click OK.
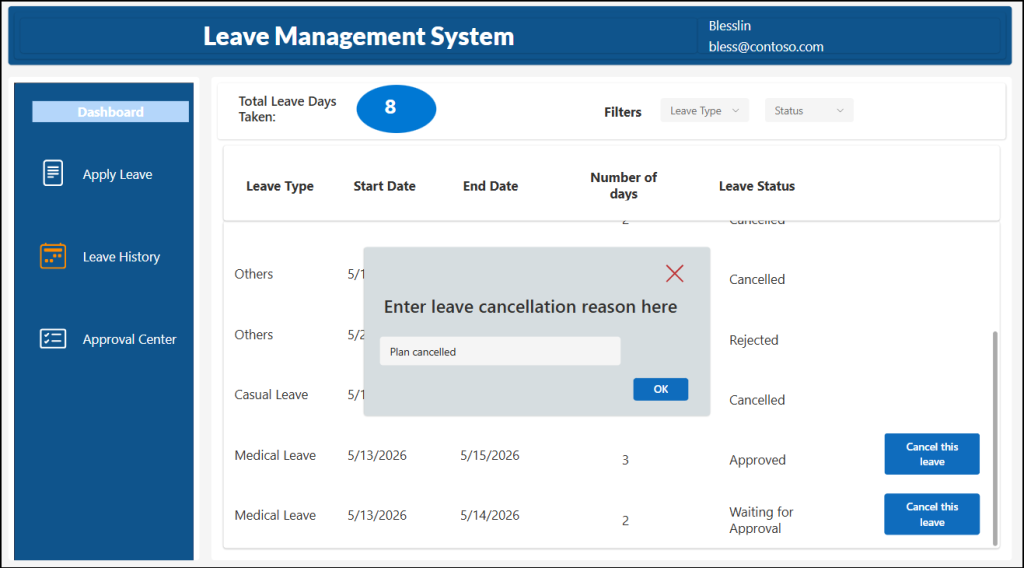
- Once submitted, the status changes to Cancellation Requested, and the manager’s approval is required to finalize the cancellation.
- After approval, the status is updated to Cancelled.
- If the status is “Waiting for Approval”, the leave can be cancelled directly using the Cancel This Leave button.
Manager Experience Flow
- As soon as a user submits a leave request, the manager is notified via Microsoft Teams.
- Leave requests submitted by team members appear in the Approval Center.
- Managers can review the request details and either approve or reject them.
- If the manager approves the request:
- The user is notified via Microsoft Teams chat and Outlook mail.
- An approval update is also posted to a common Teams channel for visibility
- The same flow applies for leave cancellation approvals
- If the manager rejects the request:
- The user is notified via Microsoft Teams chat and email
That’s it! We hope that the leave management system using Power Apps helps improve your organization’s leave management experience through a modern and user-friendly approach. Feel free to download the application, explore its features, and share your feedback with us in the comments. Stay tuned for more upcoming blogs and solutions from us!


