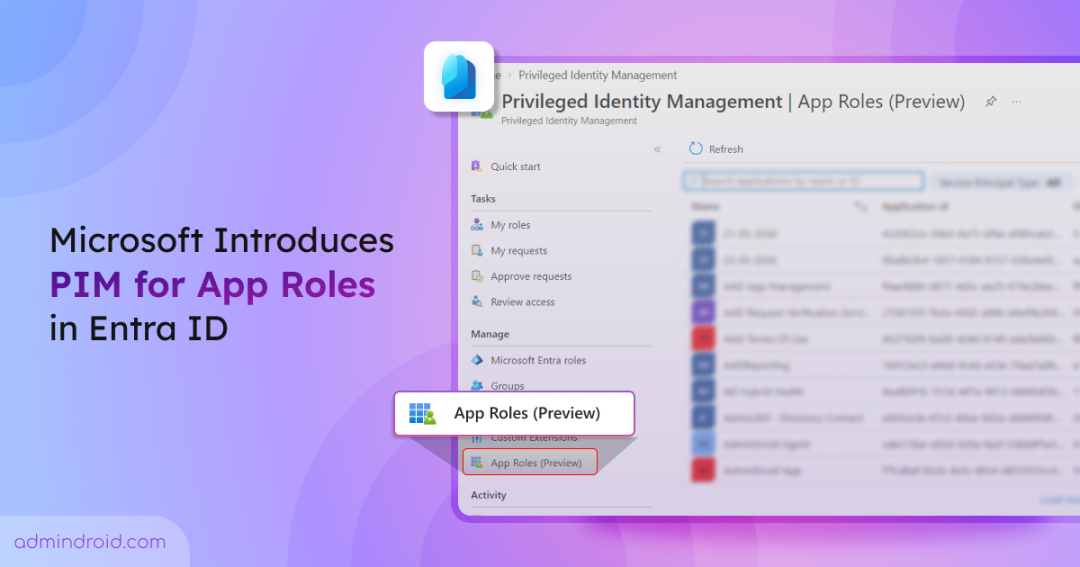
Microsoft Entra Privileged Identity Management (PIM) helps organizations reduce standing privileged access by allowing users to activate roles only when needed. But what about the privileged roles assigned within enterprise applications?
Consider an employee who needs an Admin role in a business application only occasionally. Even though the role is rarely used, the permission remains active until an administrator removes it. If that employee’s account gets compromised, the attacker can also use the application’s admin privileges.
Until now, organizations typically relied on PIM for Groups to provide just-in-time access to these application roles. Microsoft is now extending PIM support directly to application roles. With the new PIM for App Roles (Preview) capability, admins can make application role assignments eligible instead of keeping them permanently active.
Let’s see how this differs from the existing approach, what the preview supports, and how to configure it.
What Is PIM for App Roles in Microsoft Entra?
App roles define what an identity can do within an application, such as Admin, Approver, or Reader. Admins can assign these roles to users, groups, or other applications. When an identity authenticates, Microsoft Entra ID includes the assigned role in the token, and the application uses it to grant the corresponding permissions.
Previously, these assignments remained active until an admin manually removed them. With PIM for App Roles, admins can now manage these assignments through Privileged Identity Management.
What Does PIM for App Roles Support?
Preview supports the following capabilities.
| Capability | Supported options |
| Assignment type | Eligible or Active |
| Supported identities | Users, groups, enterprise applications, agent blueprint principals, and agent identities |
| Assignment duration | Permanent or time-bound |
| Management actions | Add assignments, Activation control, Extend, Delete, Settings, and Export |
PIM for App Roles also supports agent blueprint principals and agent identities, extending role assignment management beyond users and groups. However, Microsoft hasn’t clarified how these non-interactive identities would activate an eligible role.
PIM for App Roles vs PIM for Groups: What’s Different?
Consider an application with two roles: Reader and Admin. To provide just-in-time access to the Admin role, admins used the following PIM for Groups approach:
- Create a group for users who need the Reader role and assign active membership.
- Create another group for users who need the Admin role.
- Assign the respective application roles to these groups.
- Onboard the privileged group to PIM for Groups and configure eligible membership.
When a user needs admin access, they activate their membership in the privileged group through PIM. While this works, it adds an extra layer of group management. If you have multiple applications with different privileged roles, you’ll need to create and manage groups for those roles as well.
With PIM for App Roles, you can directly create an eligible assignment for an application’s role.
How to Configure PIM for App Roles in Microsoft Entra
Before proceeding, make sure you have Microsoft Entra ID Governance licensing and an application with app roles already defined.
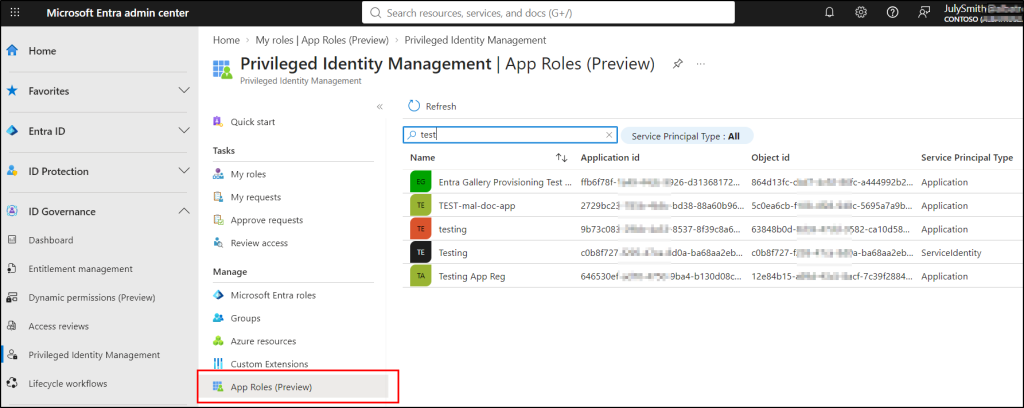
Step 1: Navigate to PIM for App Roles
- Sign in to the Microsoft Entra admin center.
- Navigate to ID Governance –> Privileged Identity Management.
- Select App Roles (Preview).
This page will show a list of applications available in your tenant.
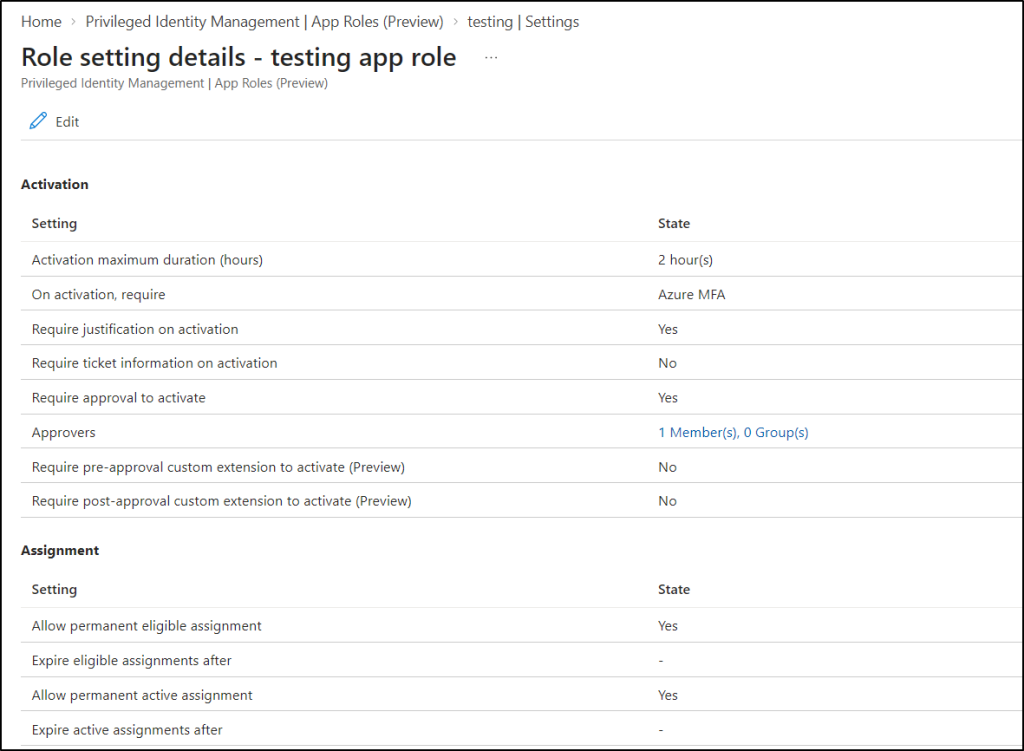
Step 2: Configure Activation Settings for the App Role
Before assigning the app role, configure its activation requirements to control how privileged access is granted.
- Search for the application, select it, and then select Settings under Manage.
- Choose the required app role and click Edit.
- Review the following settings based on your security requirements.
- Activation maximum duration (hours): Set how long the role can remain active after activation.
- On activation, require: Configure additional authentication requirements for activation.
- Require justification / ticket information on activation: Require users to provide a reason or ticket details when activating the role.
- Require approval to activate: Route requests to approvers.
- Allow permanent eligible assignment: Disable this option if you want eligible assignments to expire.
For high-privilege app roles, consider requiring additional authentication and approval before granting access.
Step 3: Add an App Role Assignment
To add an app role assignment, select Assignments (Preview).
- Click Add assignments.
- Under the Membership tab, click Select role.
- Choose the application role you want to assign.
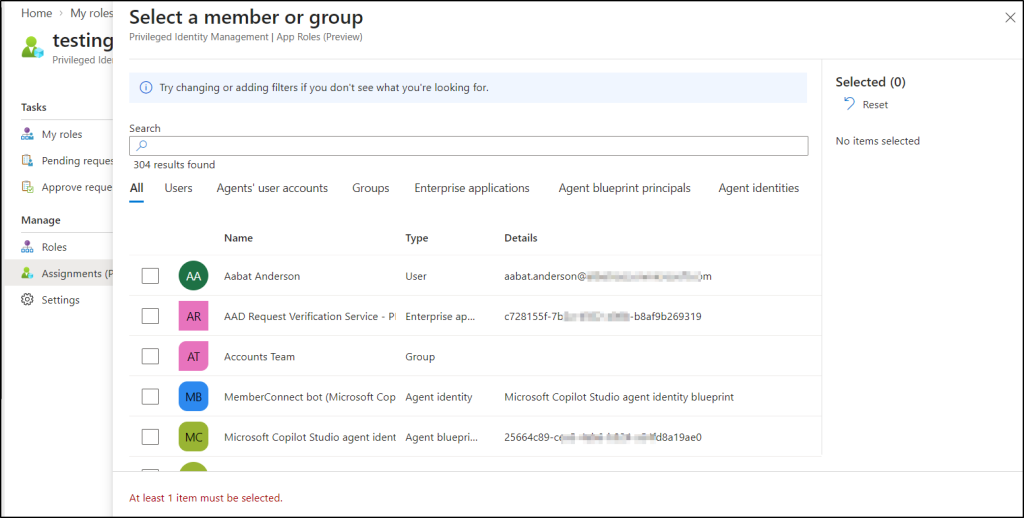
- Click Select member(s) and select the required identity.
You can assign roles to users, groups, enterprise applications, agent blueprint principals, agents’ user accounts, and agent identities.
Step 4: Configure Eligible or Active Assignment
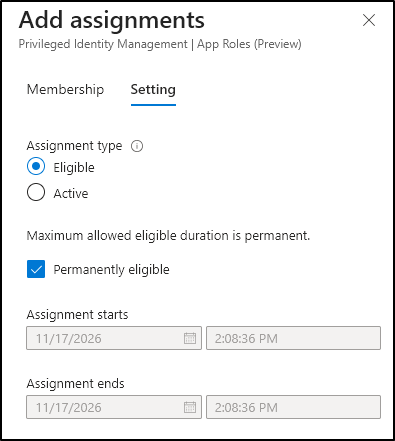
Once you’ve selected the role and members, move to the Setting tab. Under Assignment type, you’ll find two options:
- Eligible
- Active
Choose Eligible if you want to avoid keeping the privileged application role continuously active. The Permanently eligible option is enabled by default. When this option is selected, the identity remains eligible for the role without an expiration date. If you want the eligibility to expire after a specific period, uncheck Permanently eligible and configure the start and end dates.
Step 5: Review the App Role Assignment
Once the assignment is created, navigate to the Eligible Assignments tab. You can see the assigned role, application scope, and membership type, such as Direct.
The assignment page also provides options to manage existing assignments, including extending, deleting, and exporting them.
Step 6: Activate the Eligible App Role
Once the assignment is configured, the eligible user can activate the app role when needed.
- Sign in to Entra admin center and navigate to ID Governance –> Privileged Identity Management.
- Under Tasks, select My roles.
- Under Activate, select App Roles (Preview).
- Navigate to the Eligible assignments tab.
- Find the required app role and click Activate to start the activation request.
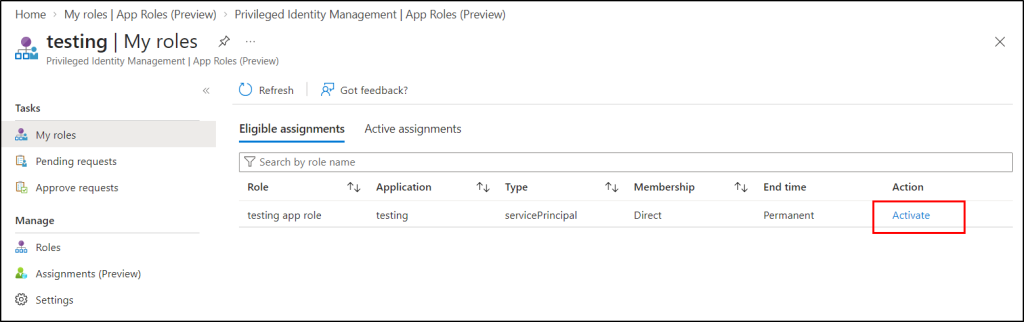
Once the role is activated, it appears under the Active assignments tab. Users can also deactivate it when no longer needed.
Things to Consider Before Using PIM for App Roles
PIM for App Roles is currently in preview, and Microsoft hasn’t yet published detailed documentation covering all its behaviors.
So, before moving existing privileged application roles to PIM, consider the following.
- Test with a non-production app: Assign an eligible role to a test identity and verify that activation and access removal work as expected.
- Keep an active admin for recovery: Keep at least one active assignment for the app’s admin role so the application stays manageable if activation fails during the preview.
- Check SCIM provisioning: Microsoft hasn’t documented whether app role activation triggers SCIM provisioning. For now, consider using PIM for Groups for SCIM-dependent applications.
Wrap-up
Application roles can provide access to sensitive information, configuration settings, and critical business operations. With PIM for App Roles, you can now manage these permissions through PIM without relying on additional groups for every privileged role.
If this feature has started appearing in your tenant, give it a try and share your experience!