As an Active Directory admin, you know that tense moment before hitting Apply on a new policy or running a custom PowerShell script. A little voice in your head whispers, “What if this breaks everything?” You’re right to be cautious. In a production Active Directory environment, even a single mistake can trigger account lockouts, broken permissions, or service disruptions that impact your entire organization.
That’s why having a dedicated Active Directory test environment isn’t optional — it’s essential. An AD test lab gives you a secure, isolated space to test policies, validate scripts, and simulate real-world scenarios without risking your live infrastructure.
So, without further delay, let’s walk through how to create and use an Active Directory test lab, step by step.
How to Set Up an Active Directory Test Environment
One of the most efficient ways to build an Active Directory test environment is by deploying Windows Server on a virtual machine (VM). Follow the steps below to create your AD test lab from scratch.
- Download Windows Server
- Set up VM VirtualBox
- Install Windows Server on a Virtual Machine
- Install Active Directory on Windows Server
- Promote the Server to Domain Controller
- Verify Active Directory installation
1. Download Microsoft Windows Server
Microsoft allows you to download Windows Server for free and use it for a trial period. Follow these steps to set up a free Active Directory server for your lab.
- Go to the Windows Server 2022 page and click “Download the ISO” under the Get started for free section.
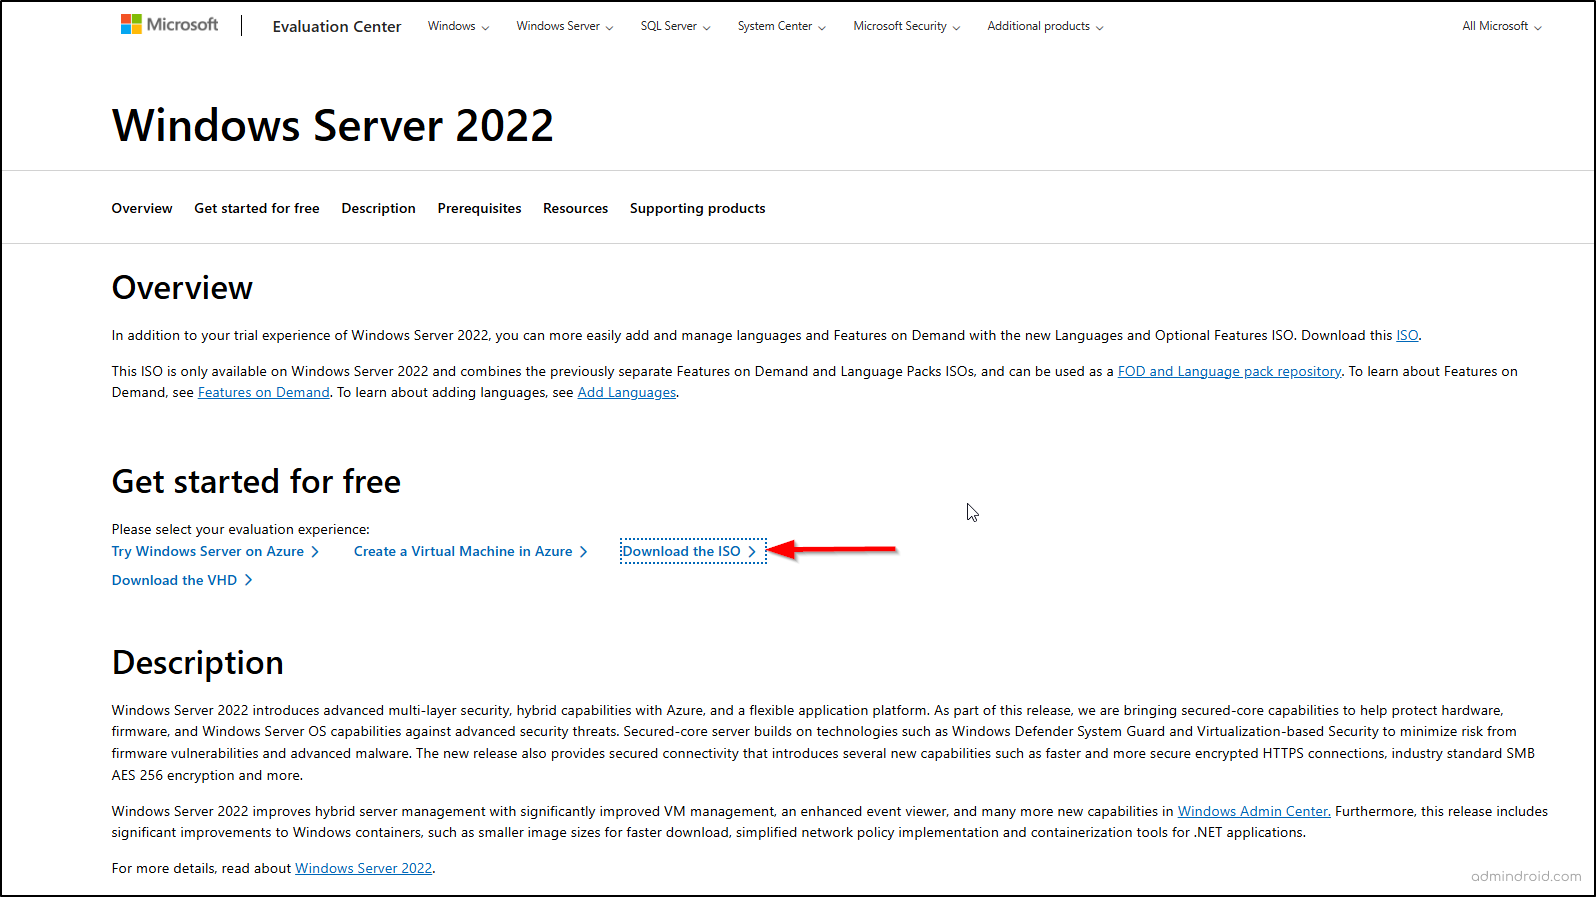
- On the page that opens, scroll down and register for your free trial to access the ISO download.
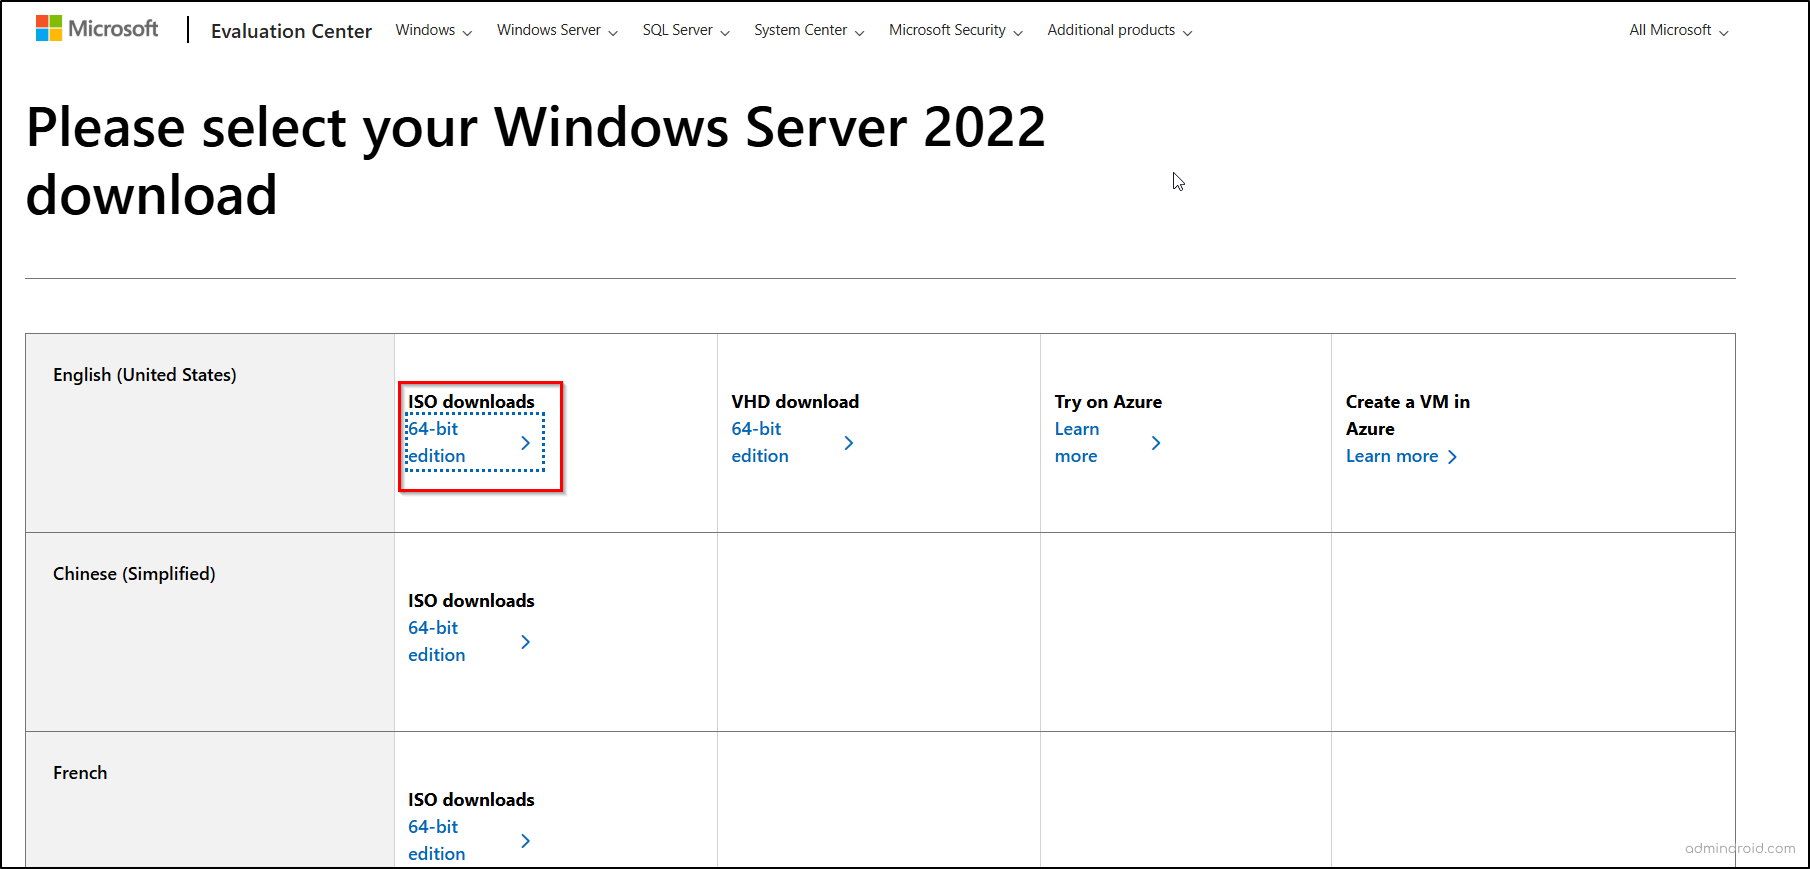
- Then, select the 64-bit edition under ISO downloads for English (United States), or choose any other preferred version.
- After the installation of Windows Server 2022, it is time to configure the virtual machine for use.
2. Set up a Virtual Machine Using VirtualBox
The next step in building your Active Directory test environment is to create a virtual machine using a hypervisor. VirtualBox is a free and widely used hypervisor, but you can also use VMware or Hyper-V based on your preference.
Follow these steps to install VirtualBox:
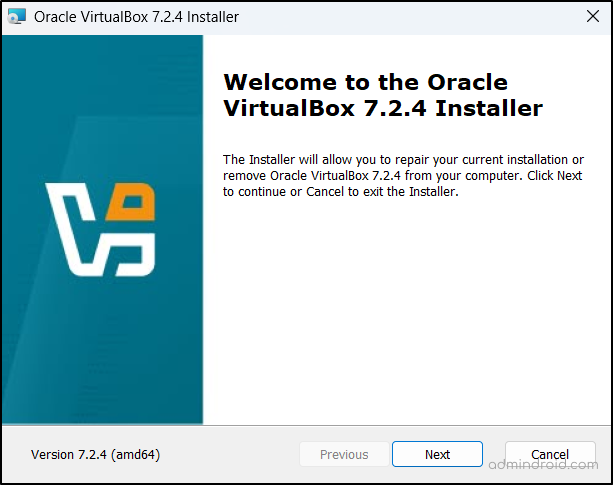
- Download the VirtualBox installer for your operating system from the official VirtualBox website. For Windows users, click Windows hosts to get the correct version.
- Once the download is complete, run the installer file. On the Welcome screen, click Next to proceed.
- Keep the default settings for the installation path and components, or modify them if needed, then click Next when prompted.
- Approve any warnings, click Install, and once the process completes, select Finish to launch VirtualBox.
You now have your virtualization platform ready to host your Active Directory test environment.
3. Install Windows Server on the Virtual Machine
With your virtual machine ready, install Windows Server to lay the groundwork for configuring and running Active Directory in your test lab.
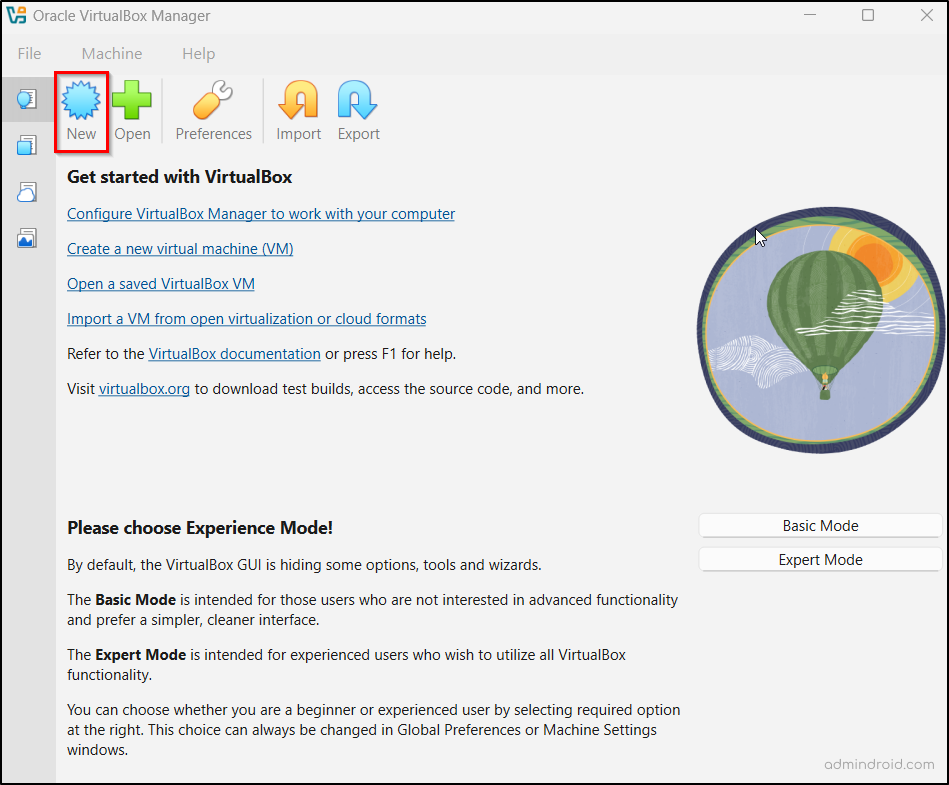
- Open VirtualBox and click New to create a new virtual machine.
- Enter a name for your VM, specify the machine folder path, set the OS type to Microsoft Windows, and choose Windows Server 2022 (64-bit) as the OS version.
- Under ISO Image, upload the Windows Server installation file you downloaded earlier.
- You can check Proceed with unattended installation to automate the setup process, or leave it unchecked if you prefer to install the guest operating system manually later.
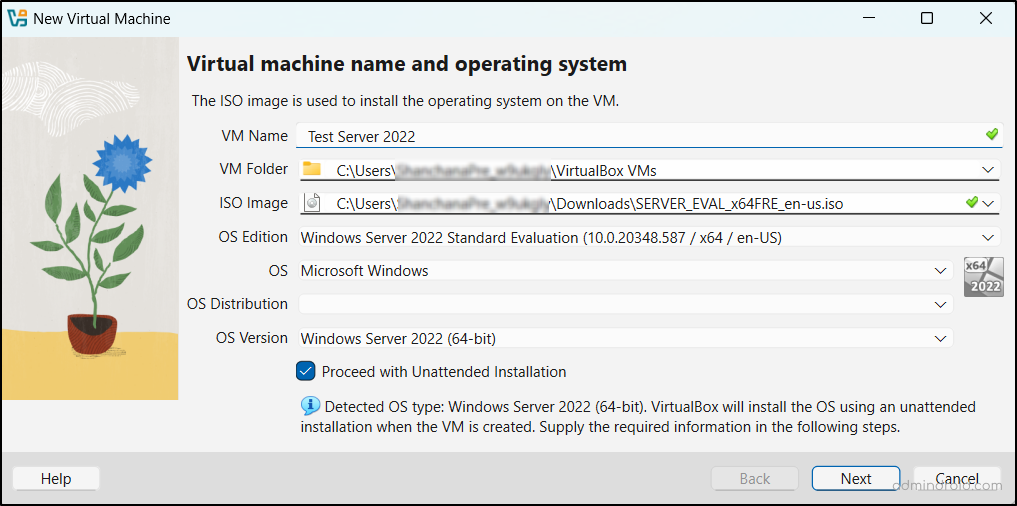
- Then, under Set up unattended guest installation, enter your username, password, and configure your operating system installation options. Once done, click Next.
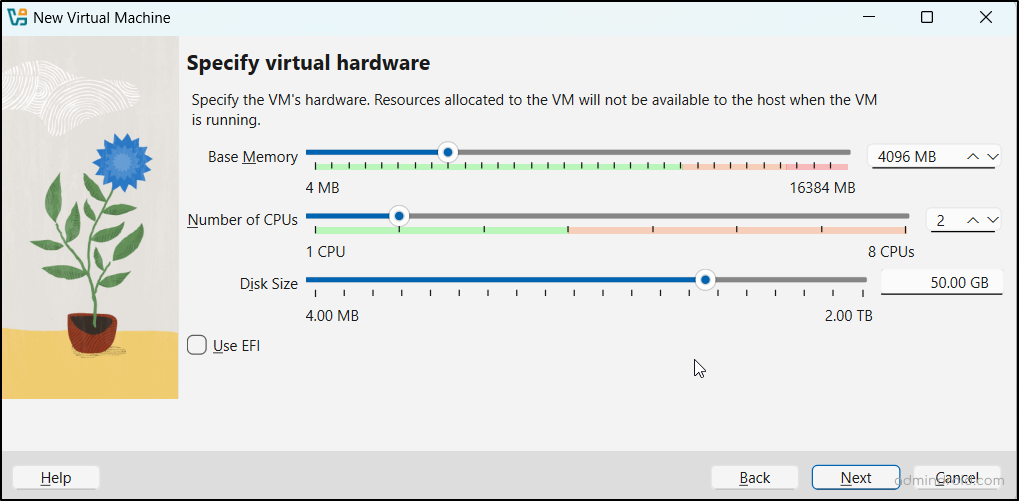
- Next, in the Specify virtual hardware section, allocate the desired RAM, number of processors, and disk space for your VM. It’s recommended to assign at least 4 GB of memory and 2 CPUs for smooth performance.
- After configuring the hardware, click Next to continue.
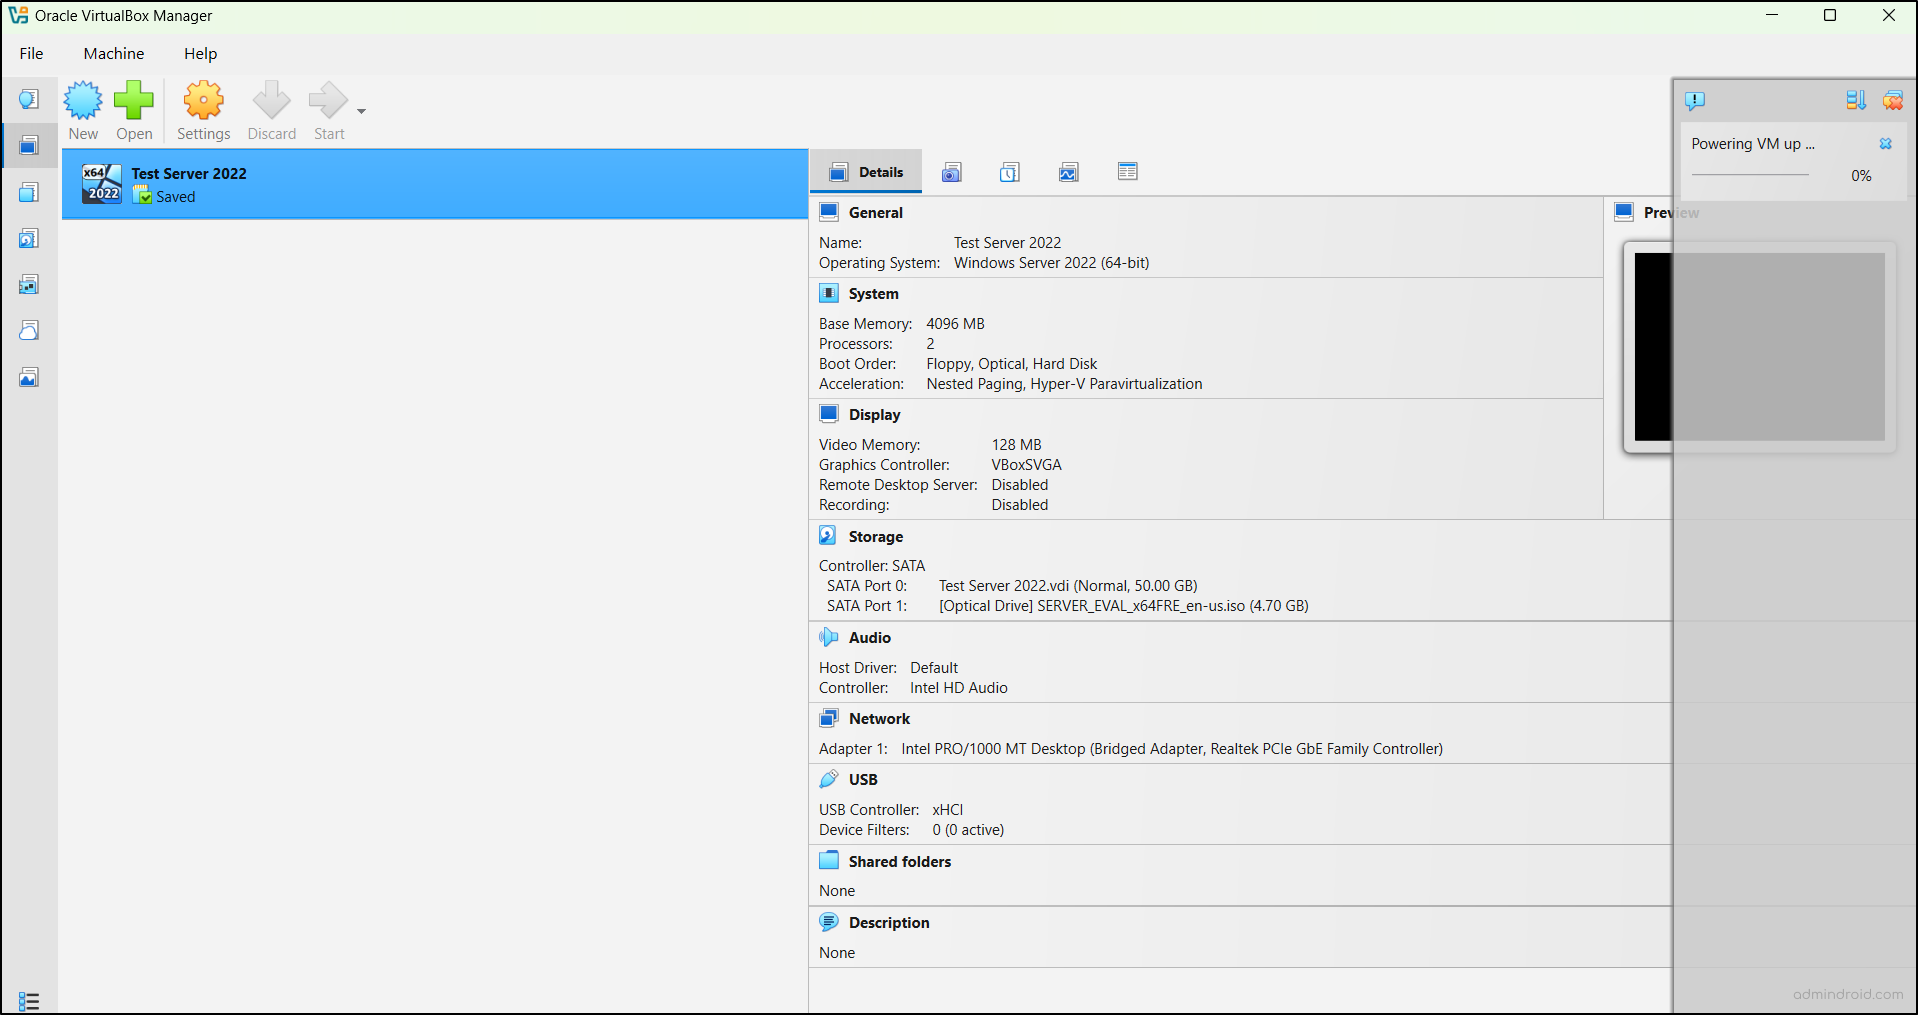
- Then, review your configuration settings and click Finish to create the virtual machine.
- Now, select your newly created VM in Oracle VirtualBox and click Start to begin the installation. Wait for the setup files to load before proceeding.
- Next, choose your language, time, and regional preferences, then click Next to proceed with the Windows Server setup.

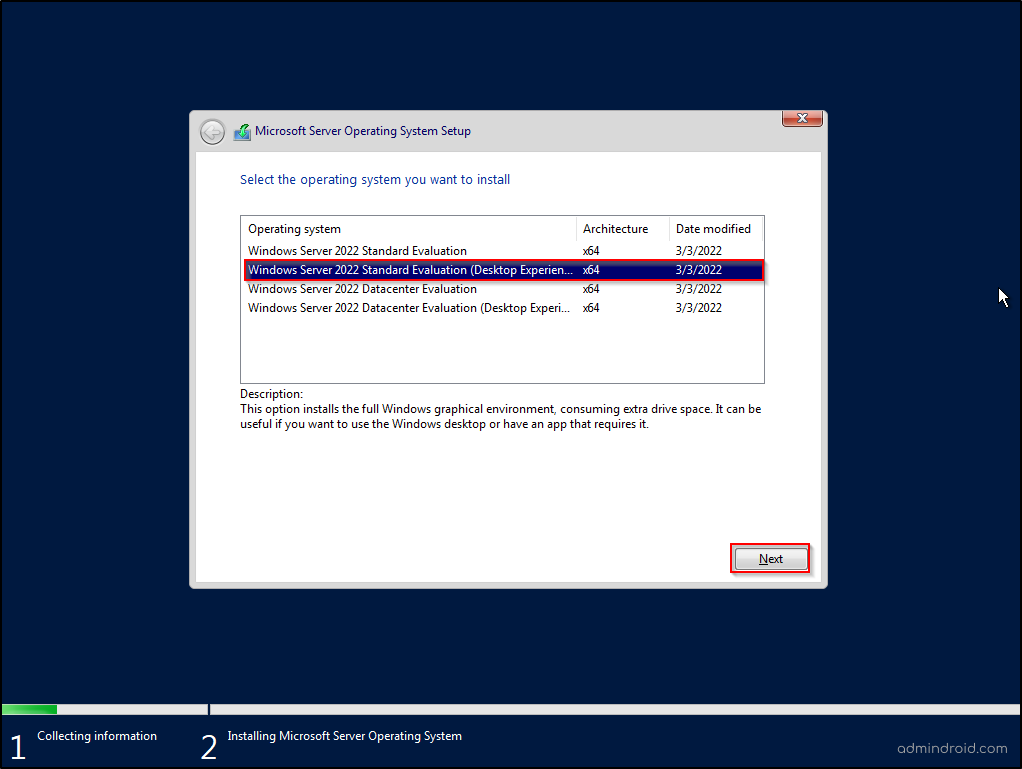
- Then, select Windows Server 2022 Standard Evaluation (Desktop Experience) as the edition and click Next.
- Review and accept the license terms by checking the box that says “I accept the Microsoft Software License Terms. If an organization is licensing it, I am authorized to bind the organization.” Click Next to continue.
- When prompted to choose the installation type, select Custom: Install Microsoft Server Operating System only (advanced) to perform a fresh installation.

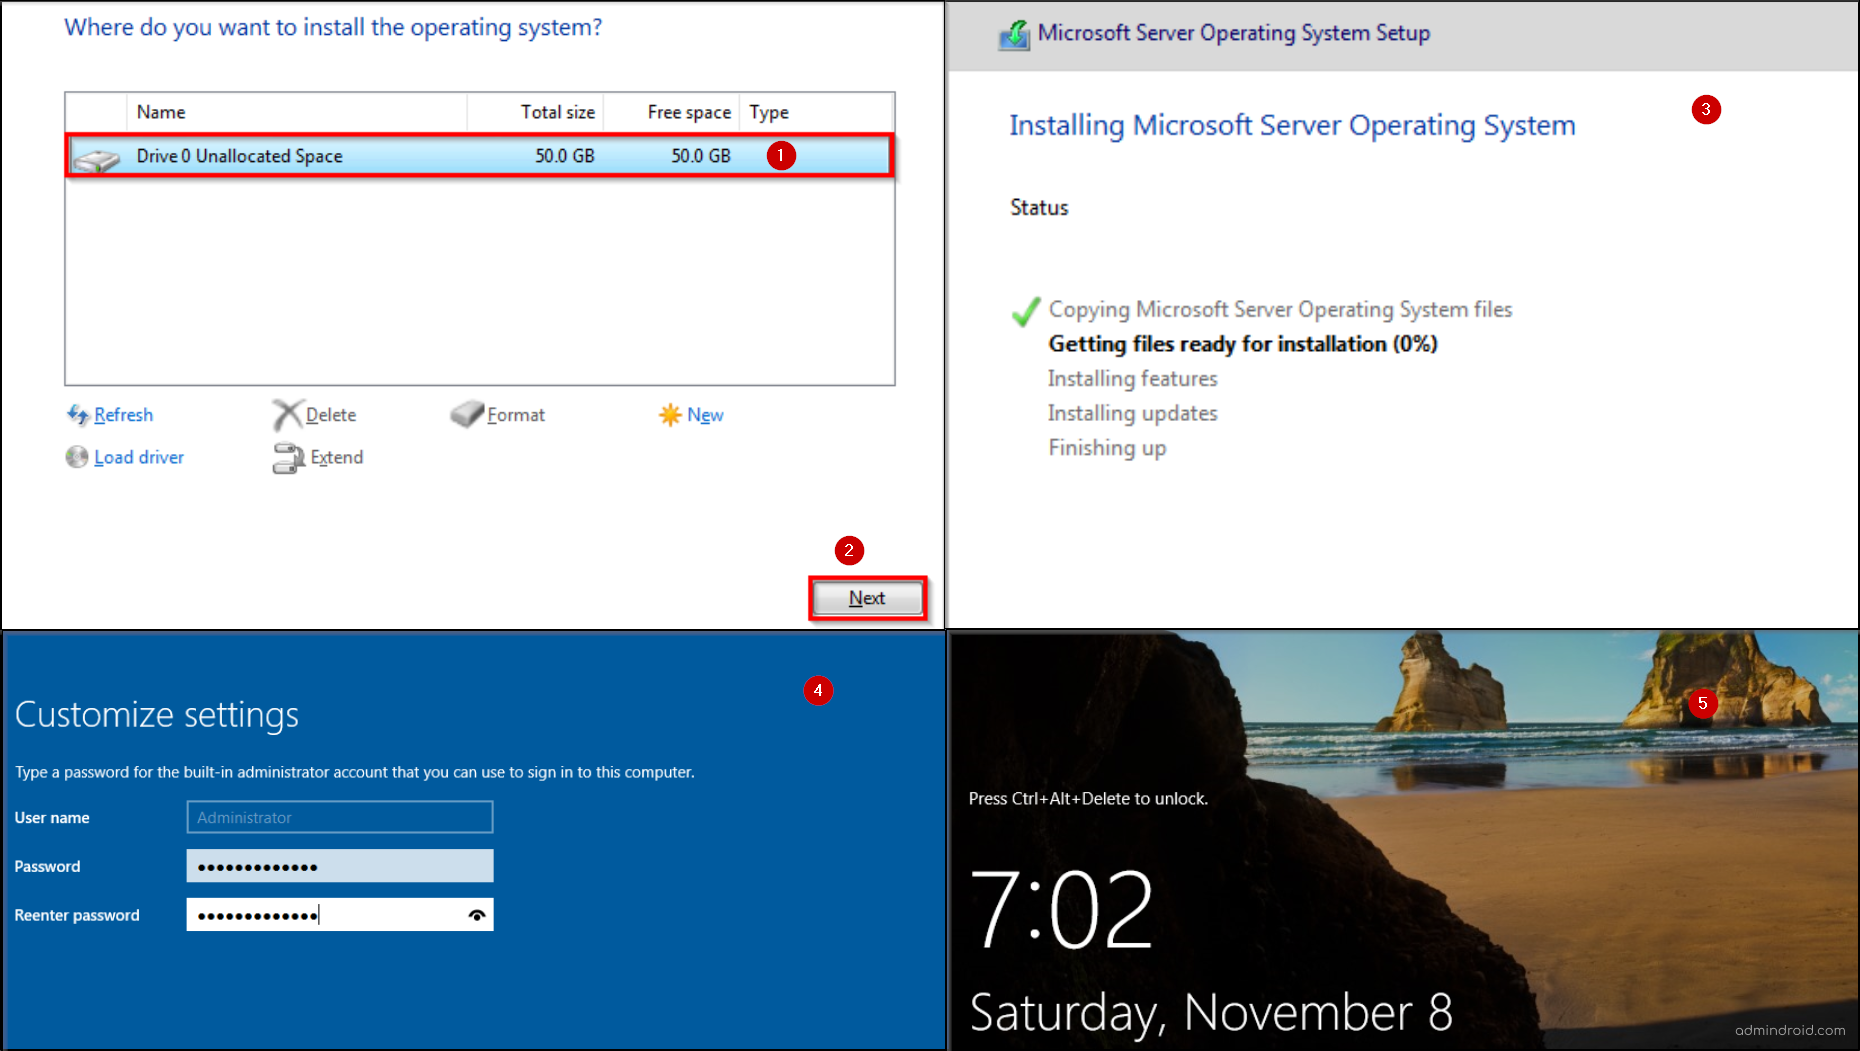
- Next, select your virtual disk and click Next to begin the installation. The Microsoft Server operating system will now start installing — this process may take several minutes.
- Once the installation is complete, the system will restart automatically. During the reboot, make sure not to press any key to avoid interrupting the boot sequence.
- After the restart, you’ll be prompted to set up the Administrator account. Enter a secure password and click Finish to complete the setup.
4. Install Active Directory Domain Services on Windows Server
Now that you have a fully functional Windows Server 2022 trial running inside your VirtualBox virtual machine, it’s time to install and configure Active Directory Domain Services (AD DS). Follow these steps to get started:
- To unlock the screen, go to Input → Keyboard → Ctrl+Alt+Delete in the VirtualBox menu.
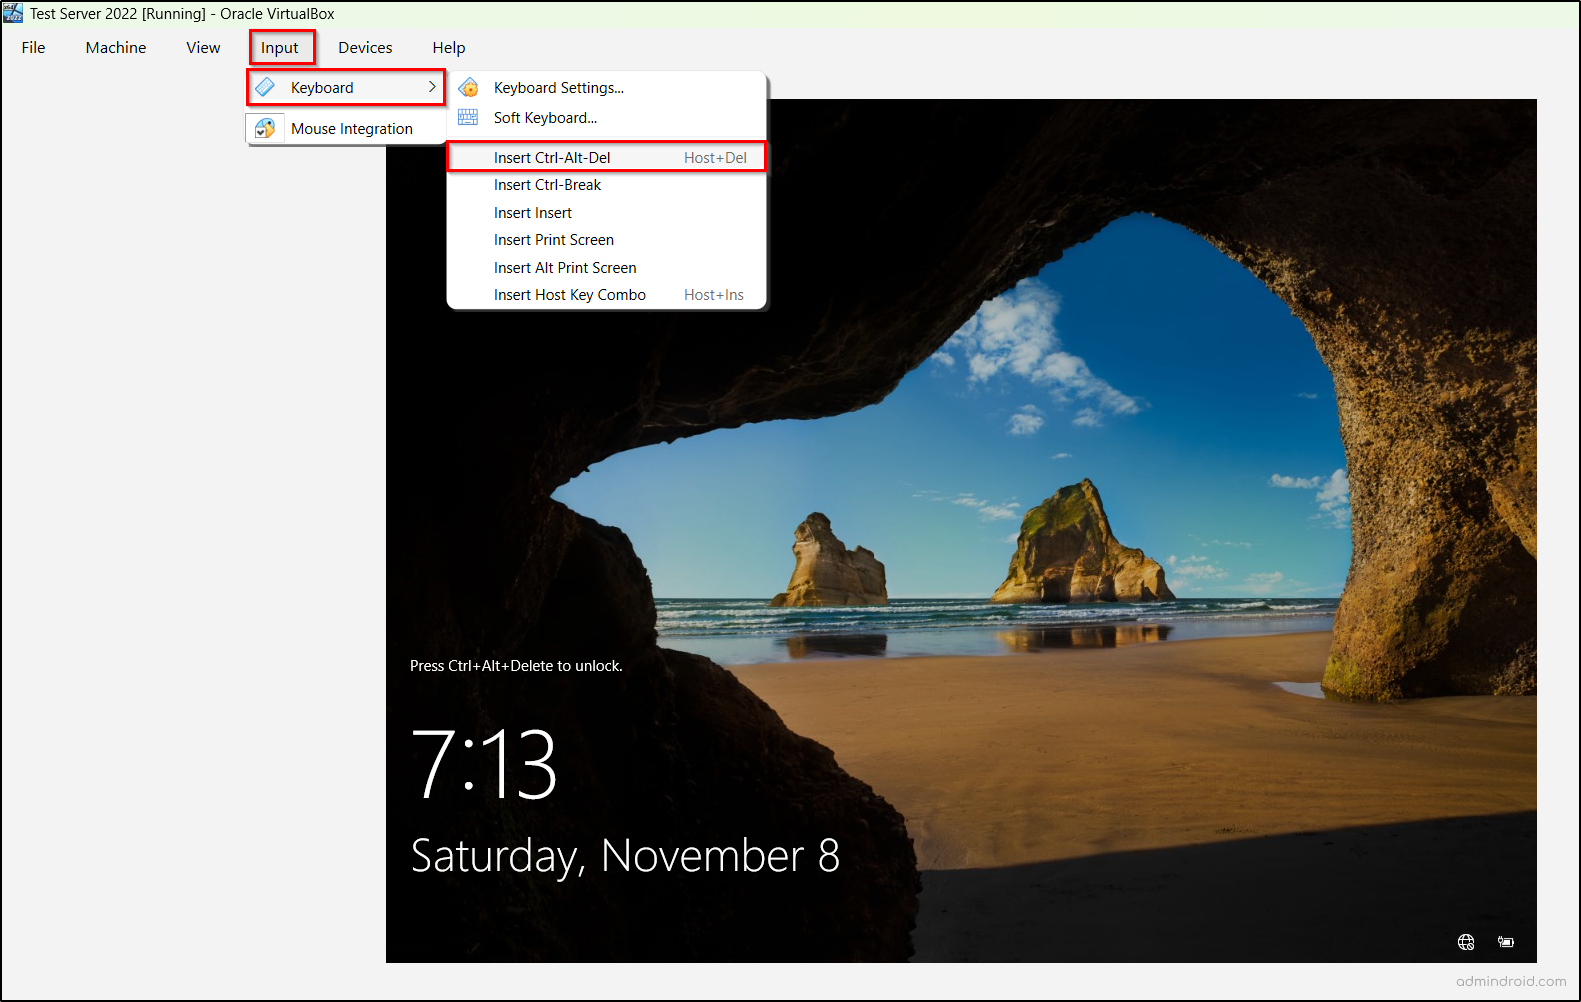
- Once the screen is unlocked, enter the Administrator password you created earlier and log in to the server.
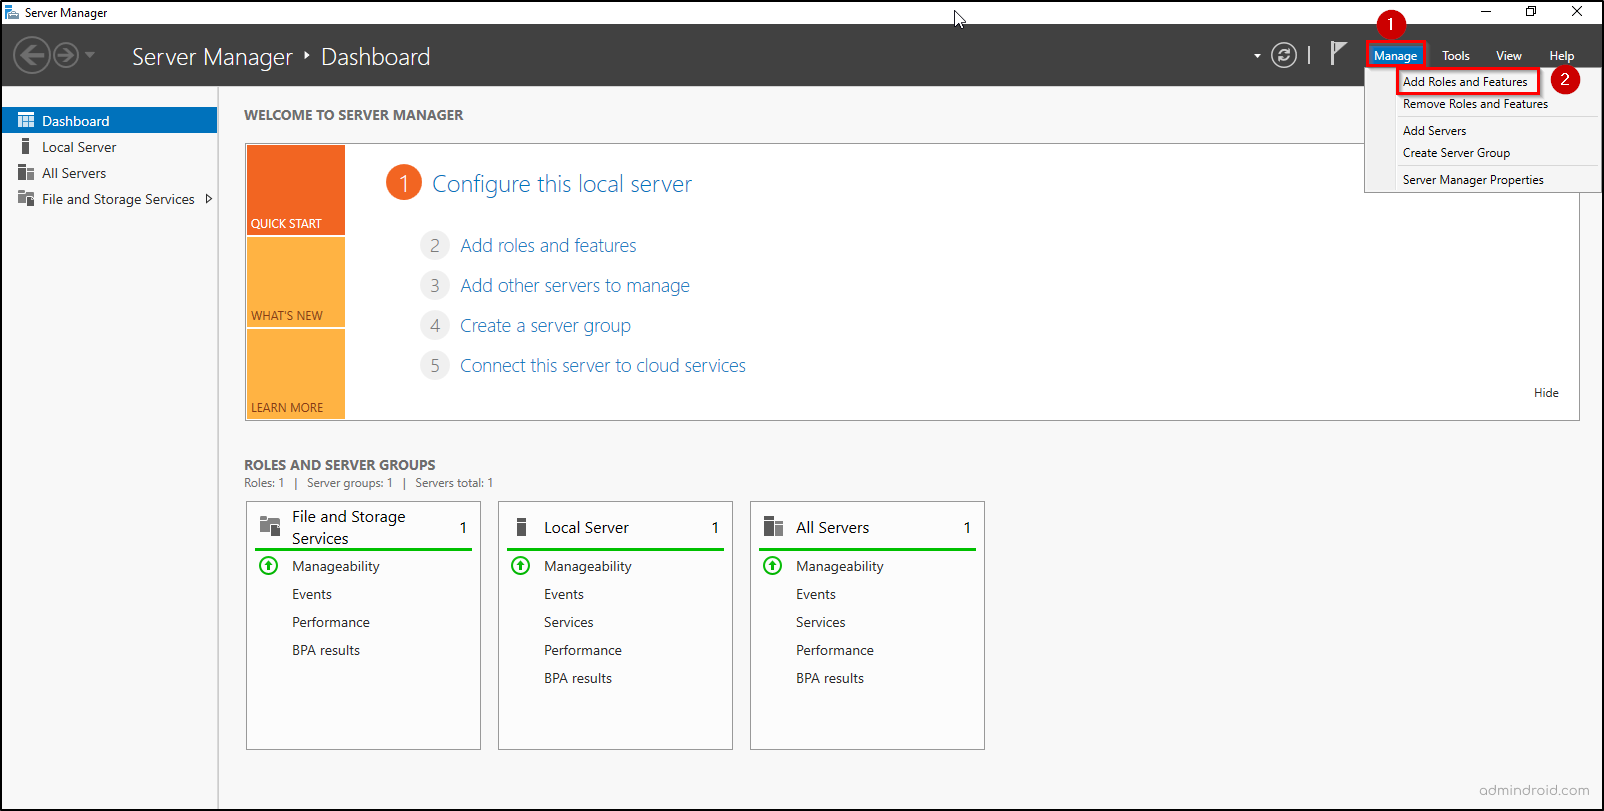
- Open Server Manager from the Start menu, then go to Manage → Add Roles and Features.
- In the Add Roles and Features Wizard, the Before You Begin page provides an overview of the setup process. Click Next to continue.
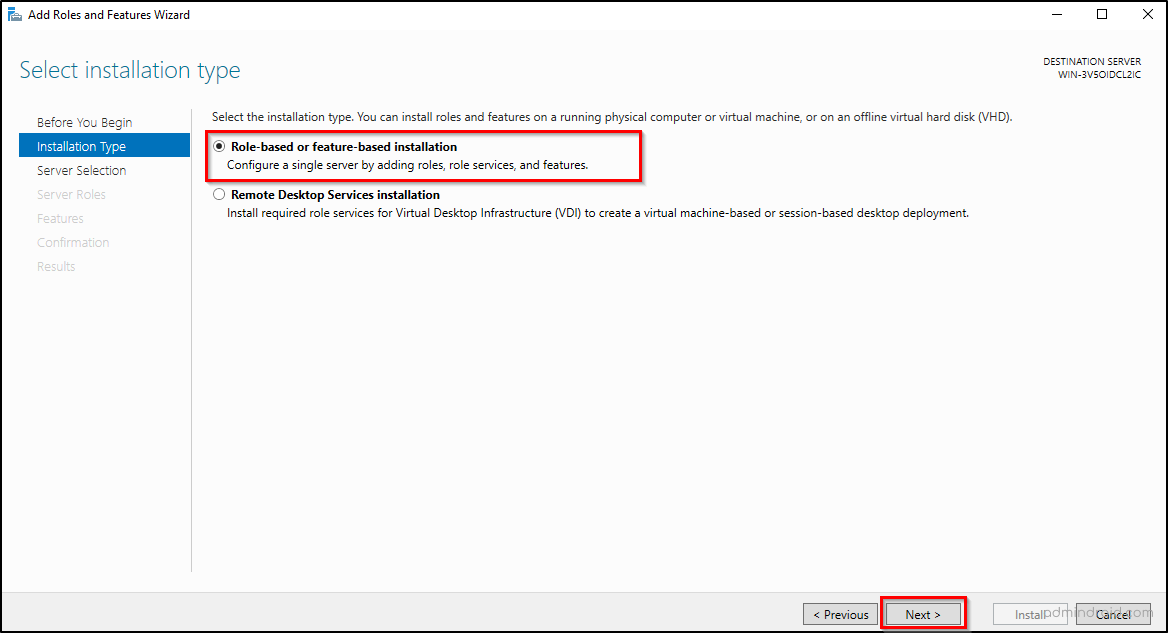
- On the Installation Type page, select Role-based or feature-based installation, then click Next.
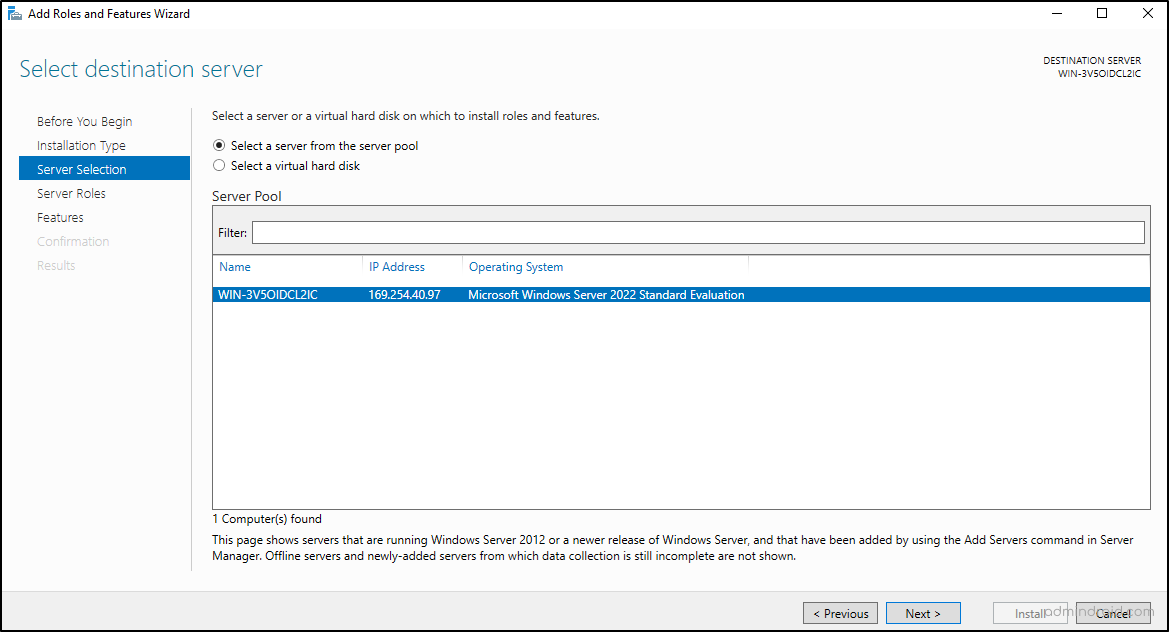
- The Select Destination Server page will list available servers. Your current server should be selected by default—verify it’s correct, then click Next.
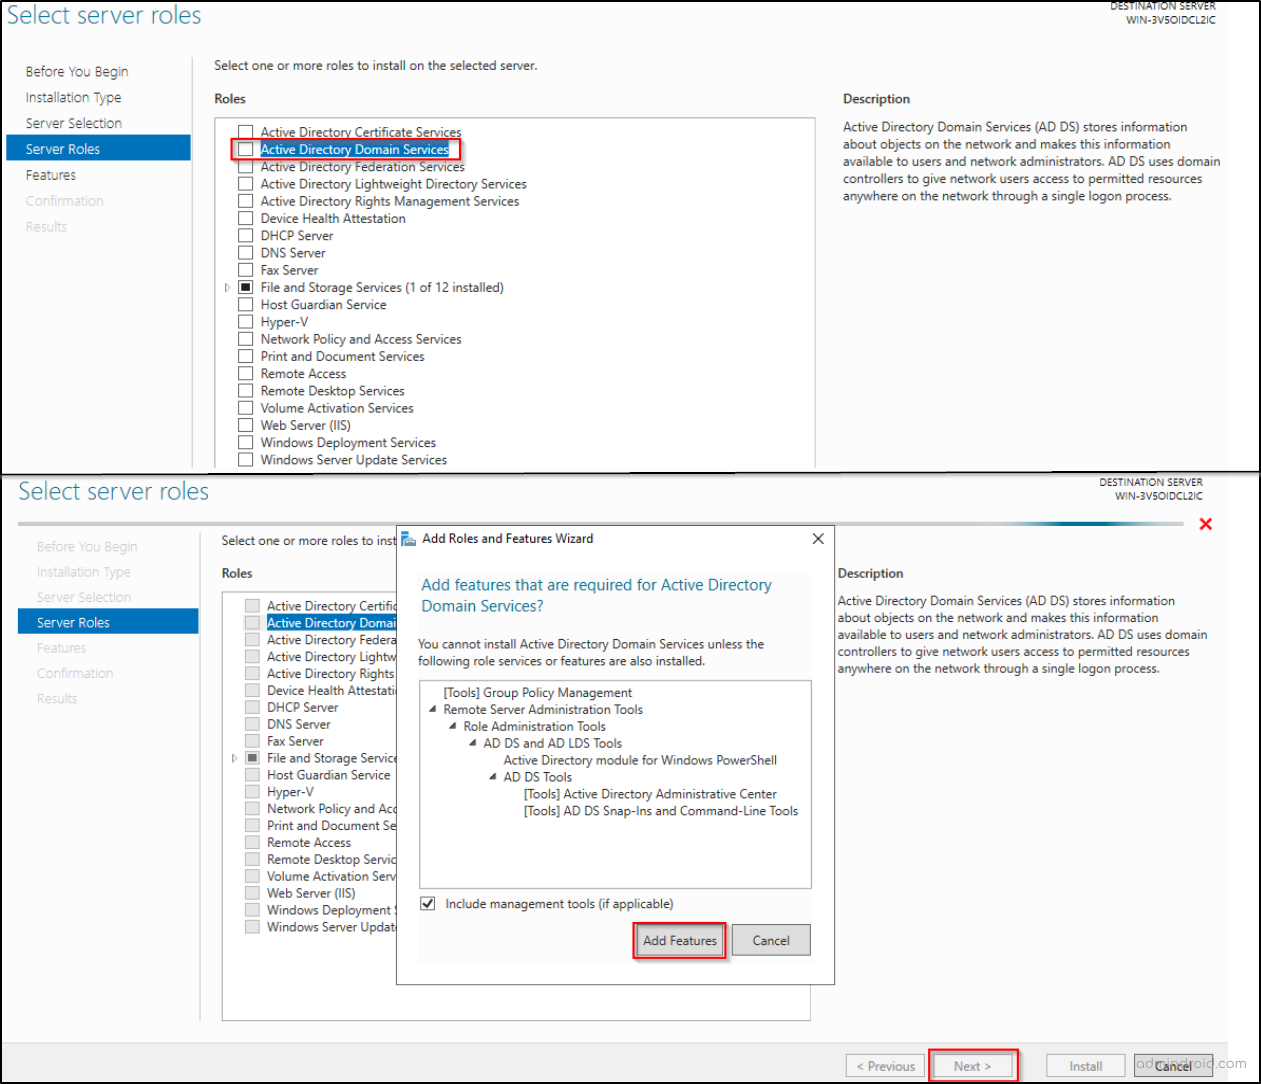
- On the Select Server Roles page, check the box for Active Directory Domain Services (AD DS). A prompt will appear asking to add the required features for AD DS. Click Add Features, then click Next.
- On the Select Features page, keep the default selections and click Next.
- On the Active Directory Domain Services information page, review the details and click Next.
- Finally, review your selections on the Confirmation page and click Install.
- Once the installation is complete, click Close to finish.
5. Promote the Windows Server to Domain Controller
A regular Active Directory installed server cannot handle authentication and authorization requests in an Active Directory environment. To enable these functions, the server must be promoted to a Domain Controller (DC). Here’s how to do it.
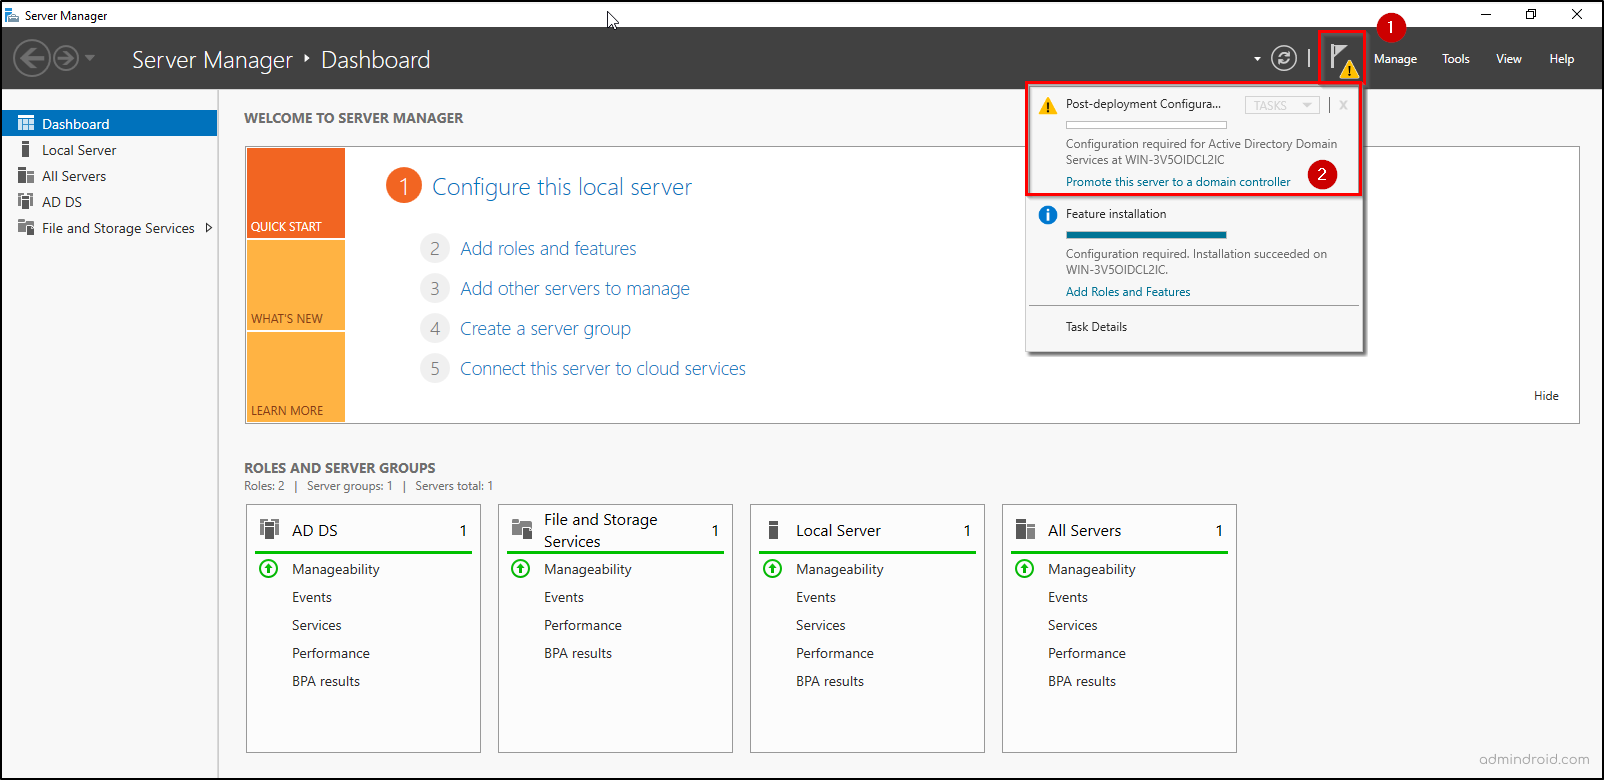
- In Server Manager, click the notification flag with a yellow exclamation mark ⚠️.
- Then, select Promote this server to a domain controller option.
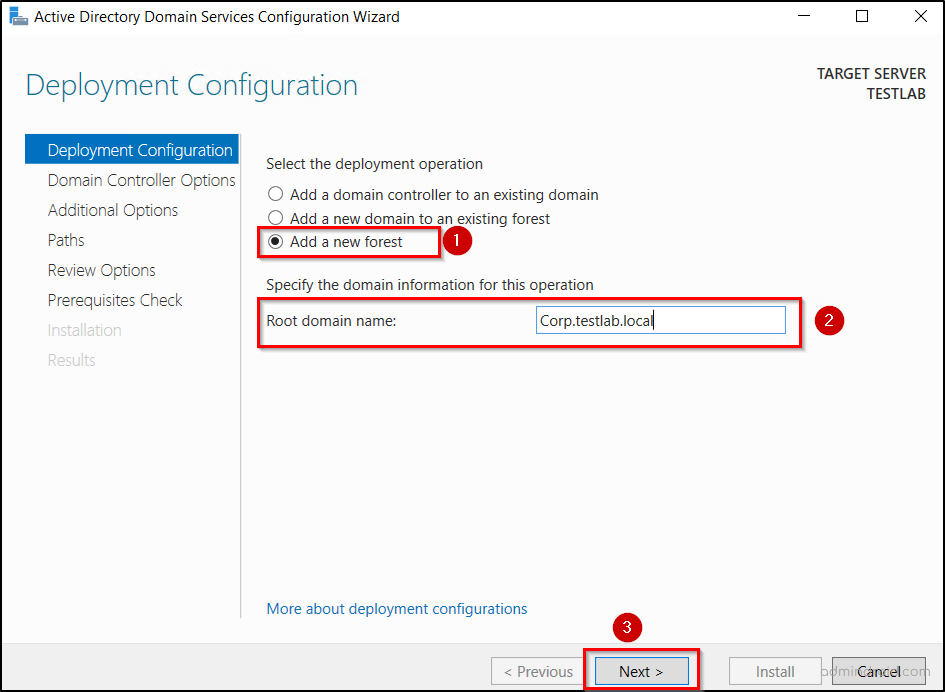
- In the Active Directory Domain Services Configuration Wizard, choose Add a new forest and enter a root domain name (for example, corp.testlab.local). Click Next.
- A forest is the top-most logical layer within Active Directory structures that defines the security boundary of your environment.
- Keep the default settings for domain and forest functional levels, and enter a Directory Services Restore Mode (DSRM) password. This password is used for the local Administrator account during recovery operations. Click Next.
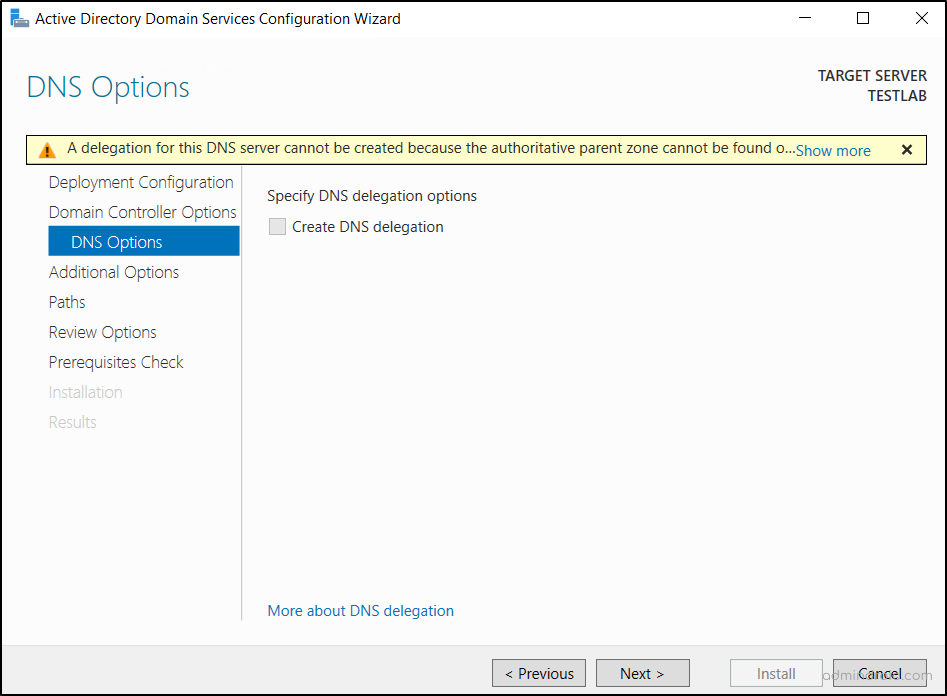
- If a warning about DNS delegation appears, you can safely ignore it and click Next to continue.
- Next, based on your root domain name, a NetBIOS name will be automatically assigned to the domain. It is mainly used for network communication. Review it, and if necessary, make changes before clicking Next.
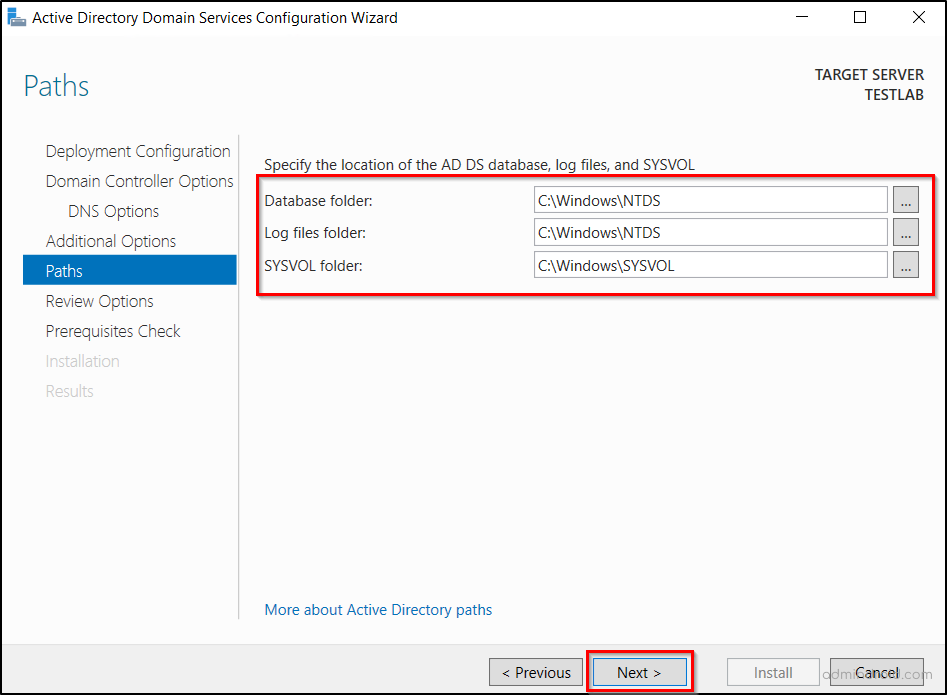
- On the following screen, confirm or modify the default paths for the AD DS database, log files, and SYSVOL folders, then click Next.
- Review your configuration selections and click Next to proceed. The wizard will now perform prerequisite checks.
- If no critical issues are found, click Install to start the promotion process.
- Once the promotion is complete, the server will restart automatically to finalize the setup of your test domain on Windows Server.
6. Verify Active Directory Installation
After promoting the server to a Domain Controller, the local Administrator account is converted into the domain’s built-in Administrator account. Once the server restarts, sign in using the Active Directory Administrator credentials you created during the server setup (Section 3). To confirm that the Active Directory Domain Services installation was successful, follow these steps:
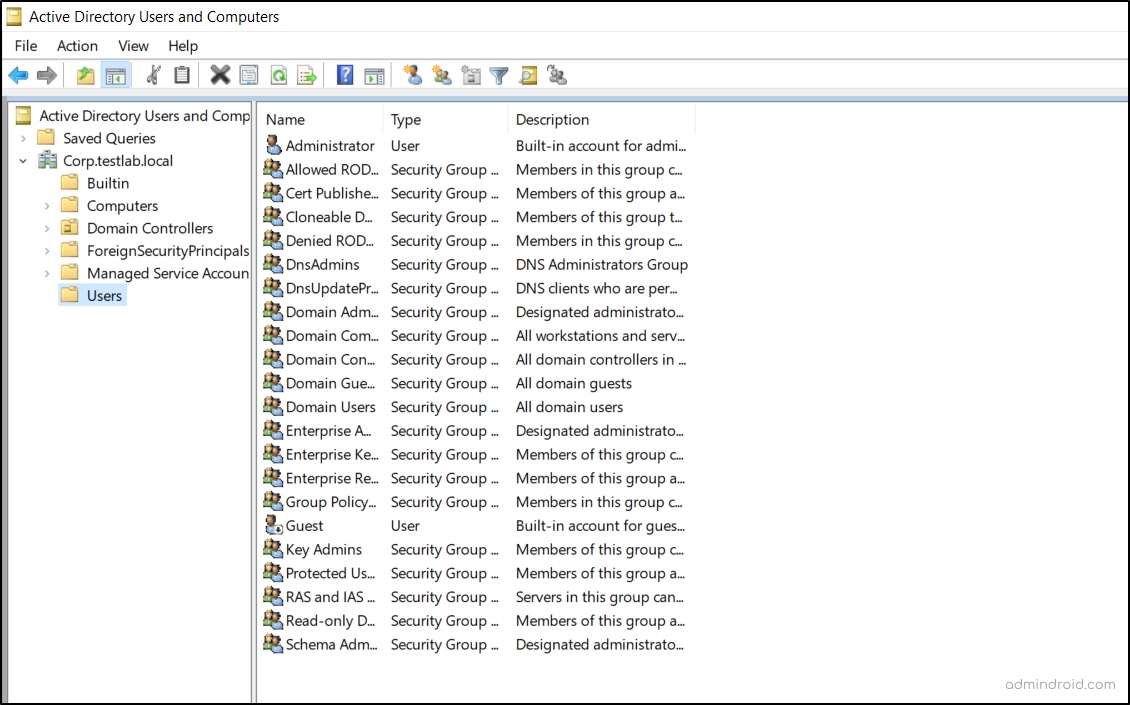
- Open Server Manager and select Tools → Active Directory Users and Computers.
- In the console that appears, expand your domain name to verify that it’s listed and accessible.
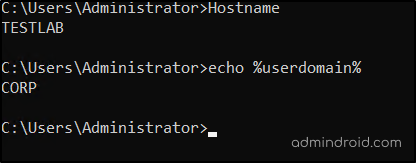
- You can also use Command Prompt to verify the domain controller and domain name by running the following commands.
|
1 2 3 4 |
#To check the domain controller name. Hostname #To verify the domain name, you’re connected to. echo %userdomain% |
If these checks succeed, your Windows Server has been successfully promoted to a Domain Controller, and your Active Directory home lab is now ready for use.
With that, you’ve successfully set up your AD test environment and confirmed it’s working. Now, let’s look at how to make the most of it.
How to Use Your Active Directory Test Lab
You can start by performing basic administrative tasks and gradually move to advanced testing in your virtual Windows Active Directory domain.
- Create and Manage AD Objects: Begin by creating users, groups, computers, and organizational units (OUs) to simulate your production structure.
- Join Client Workstations to the Domain: Add Windows client machines to your test domain to replicate real-world login and authentication scenarios.
- Test Policies and Configurations: Apply fine-grained password policies, Group Policies, and other policies to see how they affect users and devices before rolling them out organization-wide.
- To know how replication works: Add a domain controller to existing domain to validate replication, DNS configuration, and multi-DC behavior before implementing similar changes in production.
- Rehearse KRBTGT Password Reset Procedure: Stimulate the two-stage KRBTGT password reset process and understand how the changes replicate across domain controllers before performing it in production.
- Run and Validate PowerShell Scripts: Safely execute custom scripts to automate user management, policy deployment, or reporting without risking production data.
- Simulate Security and Access Scenarios: Experiment with permissions, delegation, and access control to verify your security configurations.
- Perform Attack Simulation and Defense Testing: Safely execute known AD attacks to test incident response approach. This includes simulating hybrid identity attacks to ensure your on-premises AD is resilient before identity is extended to the cloud.
- Recreate and Troubleshoot Issues: Reproduce potential AD issues, test fixes, and confirm their effectiveness before applying them to live environments.
- Use for Training and Learning: Let administrators and helpdesk staff practice domain management tasks, recovery procedures, or policy configurations safely.
That’s it! Now you can finally answer those burning questions: What happens if I apply that GPO? How will a risky script run? Can I recover this object? Your AD test lab is the perfect setup to experiment, troubleshoot, and validate configurations confidently before applying them in a live environment.
Building and maintaining a test lab is one of the best practices to secure your Active Directory. Hope this guide helped you set up an Active Directory home lab—now go ahead, experiment freely, and happy testing!


