On Day 6 of Cybersecurity Awareness Month, learn how to get started with Data Security Posture Management (DSPM) in Microsoft Purview. More insights coming up in our Cybersecurity blog series.
One of the biggest challenges Microsoft 365 organizations face today is not knowing where their sensitive data lives and how protected or unprotected it is. With information scattered across cloud platforms, apps, and even AI tools, admins struggle to track what’s secured, what’s exposed, and who’s accessing it.
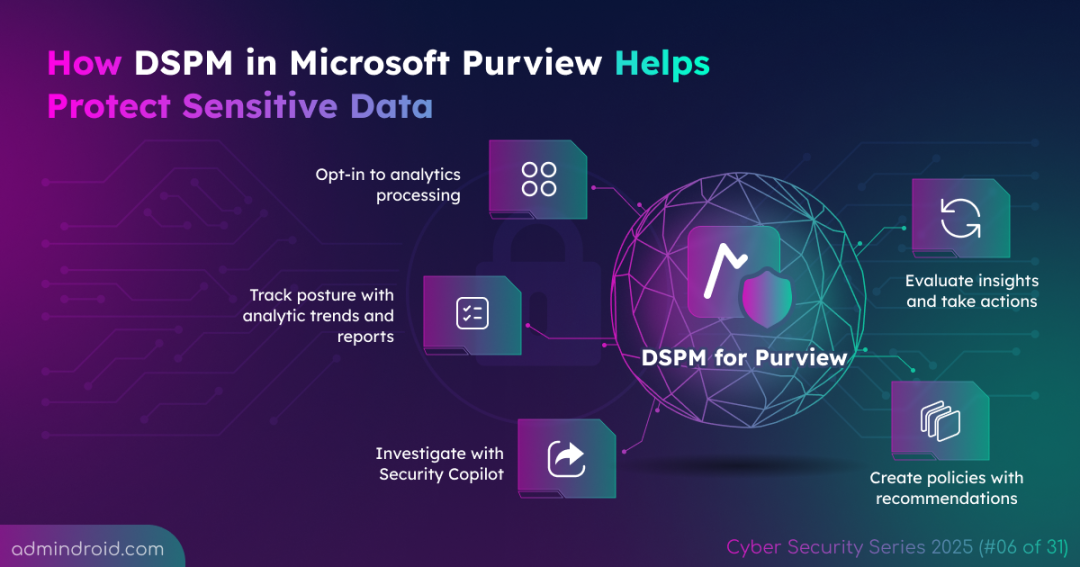
That’s why organizations need a strong data security management strategy. In this blog, we will explore how Data Security Posture Management (DSPM) in Microsoft Purview helps monitor risks in real time through dynamic reports & analytics before they turn into costly breaches.
What is DSPM in Microsoft Purview?
Data Security Posture Management (DSPM) is a built-in feature in Microsoft Purview. It provides a centralized place to evaluate data security policies, identify unprotected sensitive assets, and detect risky user activities.
DSPM pulls insights from multiple Microsoft Purview solutions, including:
By correlating insights from these solutions, DSPM delivers actionable outputs like recommendations, analytical reports, and trends that organizations can use to create or refine policies.
For organizations new to Microsoft Purview, DSPM helps automatically create and configure policies tailored to the sensitive data present in your environment. If your organization is already using Microsoft Purview solutions like DLP, Information Protection, etc, DSPM can quickly highlight any gaps in your current policies, without the need to manually review each one.
Licensing and Role Requirements for DSPM
To use DSPM, your organization must have either a Microsoft 365 E5 or a Microsoft 365 E5 Compliance (Microsoft Purview Suite) subscription.
Admins also need to ensure the correct roles are assigned. Any one of these roles is sufficient:
- Data Security Management role group
- Data Security Viewer role
- Insider Risk Management Admin role
- Microsoft Entra ID Global Administrator role
- Microsoft Entra Compliance Administrator role
If permissions are restricted within specific administrative units in your organization, access to DSPM will not be available.
How to Configure DSPM in Microsoft Purview?
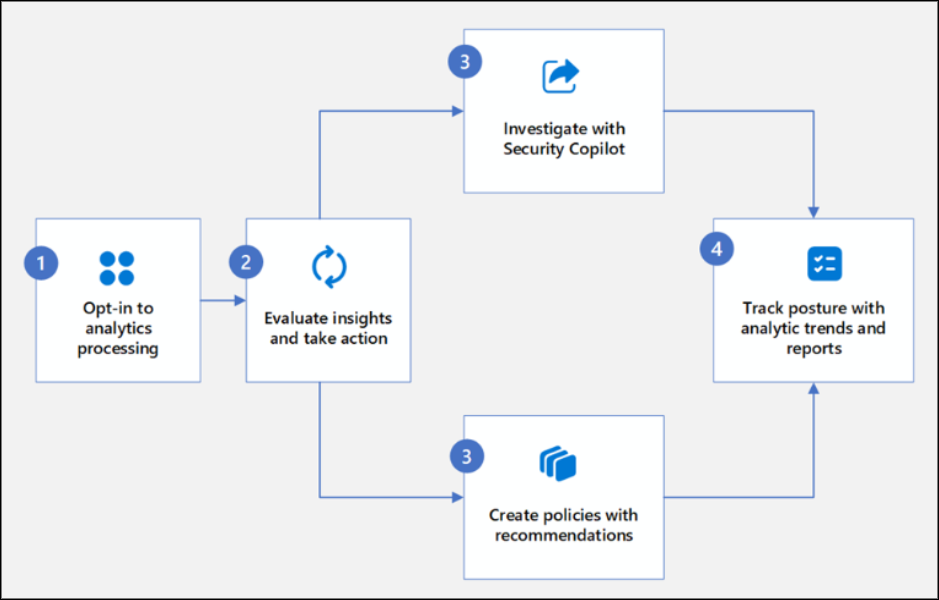
The DSPM workflow involves a four-step process: opting into analytics, evaluating insights, investigating or creating policies, and tracking your data security posture with reports. Let’s look at them one by one.
1. Opt-in to Analytics Processing
To begin, you must opt into analytics processing. In Microsoft Purview, when you enable DSPM analytics, Insider Risk Management and Data Loss Prevention analytics are automatically activated, and vice versa—enabling IRM and DLP analytics will also turn on DSPM.
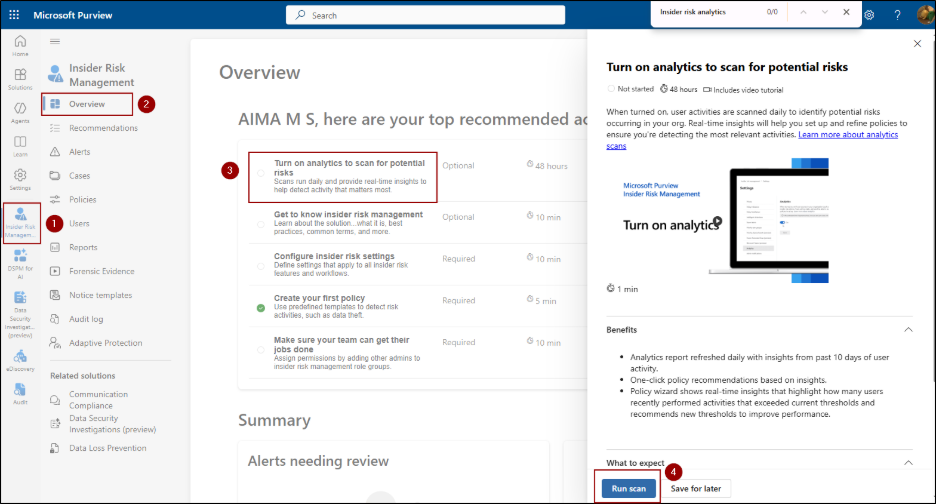
Enable Analytics in Insider Risk Management
To enable insider risk analytics, make sure your account has one of these roles: Insider Risk Management, Insider Risk Management Admins, or Microsoft 365 Global Admin.
Next, navigate to,
Microsoft Purview portal -> Solutions -> Insider Risk Management -> Overview -> Turn on analytics to scan for potential risks -> Run Scan.
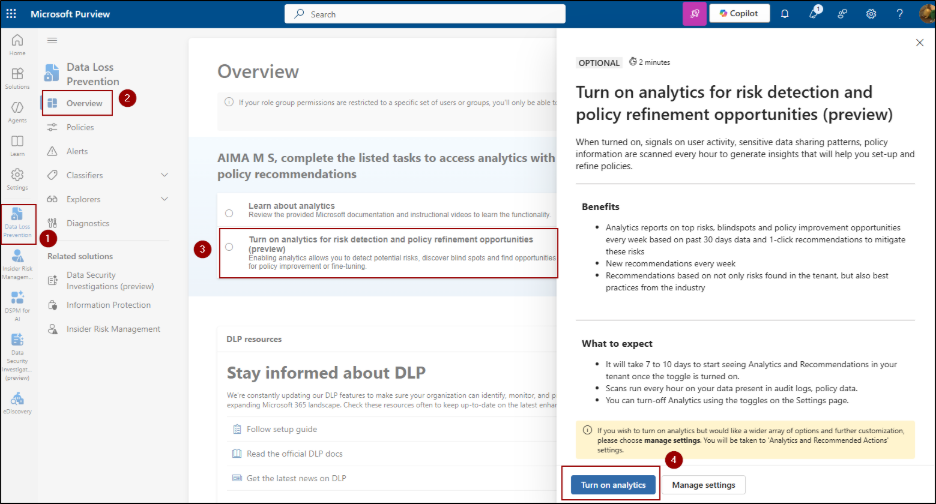
Enable Analytics in Data Loss Prevention
To access DLP analytics, your account must have one of these roles: Global admin or Compliance Administrator.
Then, navigate to,
Microsoft Purview portal -> Solutions -> Data Loss Prevention -> Overview -> Turn on analytics for risk detection and policy refinement opportunities (preview) -> Turn on analytics.
Turn On DSPM Analytics
To turn on analytics from the DSPM page, navigate to,
Microsoft Purview portal -> Solutions -> Data Security Posture Management -> Overview -> Turn on analytics
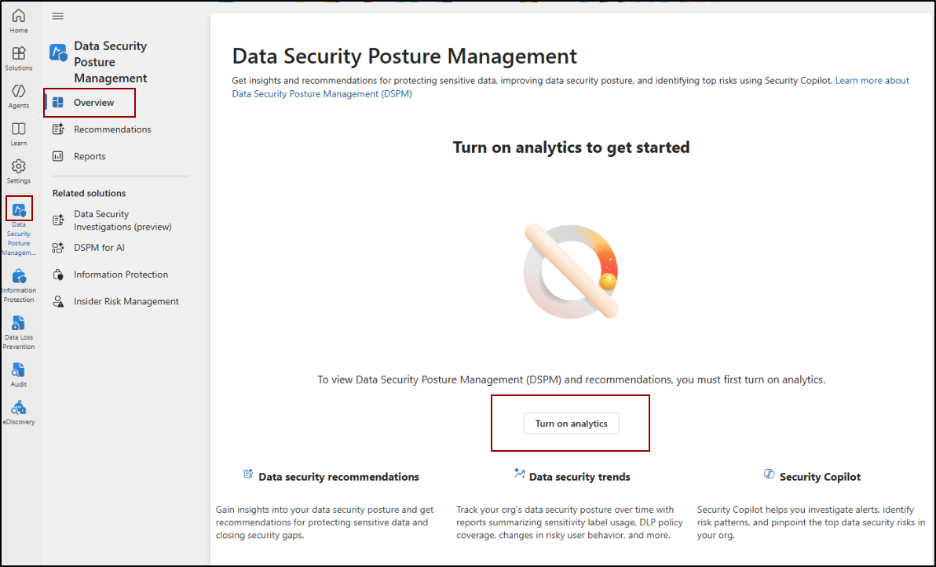
Once you complete the opt-in process, Microsoft Purview automatically starts scanning your organization’s data and user activities. DSPM works behind the scenes using Purview’s built-in classifiers and advanced analytics to identify sensitive or unprotected data and monitor user behavior. Depending on your organization’s size and data volume, this process can take one to three days.
2. Evaluate Insights and Take Action
After enabling analytics, DSPM starts analyzing your Microsoft 365 organization’s data and user activities. The next step is to review the insights it provides to identify potential risks and sensitive data exposure.
To help with this, you can investigate the findings using Security Copilot. Security Copilot acts as your assistant, helping you dig deeper into flagged activities or sensitive data so you can understand the risks and decide what actions to take.
Investigate DSPM Findings with Security Copilot
To use Security Copilot in DSPM, your organization must be configured for Microsoft Security Copilot, and you must have the Data Security Viewer role.
Copilot for DSPM offers the following ways to investigate and protect data:
- Built-in promptbooks: Promptbooks are built-in prompts that make it easy to explore and learn about your data security. You can use them to quickly investigate risky user activities or check for sensitive data exposure. Examples:
- Risky user investigation – A six-step promptbook that helps you check how a user handles sensitive data. It shows their activities, any unusual behavior, and related alerts. Just enter the user’s UPN and a time period in days, and the prompts run automatically.
- Sensitive data protection – This six-step promptbook helps you find unprotected sensitive data and monitor for possible leaks. By entering a classifier, sensitivity label, or sensitive information type (SIT) along with a time period, it automatically runs prompts that highlight risky data handling and suggest DLP or policy changes.
- Custom prompts: Create your own prompts to generate AI-driven insights tailored to your organization’s scanned data.
- Copilot prompt gallery: Gives you access to additional built-in prompts for alerts and policies, data at risk, risky users, suspicious activity, and sensitive data.
In addition to investigating findings with Security Copilot, you can also use DSPM’s recommendations to evaluate insights and identify risks that need immediate action.
Use DSPM Recommendations to Define Policies
DSPM analyzes the last 30 days of user activity and the state of unprotected sensitive assets to generate actionable data security risk recommendations. To display and review recommendations, go to,
Microsoft Purview portal -> Data Security Posture Management > Overview or Recommendations page.

- Each recommendation describes the risky activity, shows metrics (number of activities, users involved, type of protection), and suggests a policy to mitigate risks.
- The Overview page displays the top 2 data security recommendations. To view the complete list, navigate to the Recommendations page.
- From a recommendation, you can create Insider Risk Management (IRM) and/or Data Loss Prevention (DLP) policies. For example, if the recommendation is to stop users from copying sensitive files to network shares, you can set up an IRM policy to detect risky user actions and a DLP policy to block sharing of the sensitive data.
- By default, if more than one policy applies to a recommendation, the option to create multiple policies is selected.
- Instead of always creating new policies, you can also use the insights from recommendations to update or refine existing IRM or DLP policies.
- Policies come with pre-filled settings based on the recommendation and can be customized.
- New policies appear in the relevant solution and start generating alerts after 24 hours. If admin notifications are turned on, you get an email when this alert occurs.
- As the process continues, recommendations older than 30 days are automatically removed.
3. Track Posture with Analytics Trends and Reports
DSPM doesn’t just give you recommendations; it also provides analytics reports and trend-based insights that help you monitor data security over time.
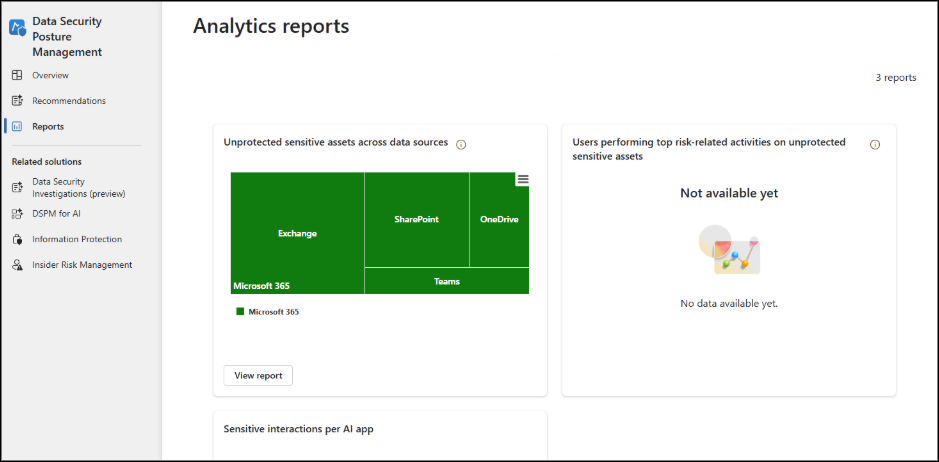
Reports:
The key reports include:
a) Unprotected sensitive assets across data sources: Shows where sensitive information is stored in locations like Exchange, OneDrive, SharePoint, and Teams without the right protection. These assets may not be secured by a Data Loss Prevention (DLP) policy that blocks exfiltration activities, or they may lack a sensitivity label that controls access.
b) Users performing top risk-related activities on unprotected sensitive assets: Highlights which users are engaging in risky actions involving sensitive data. This could include activities like sending sensitive files to external domains, printing or exfiltrating files, or other behaviors flagged by Insider Risk Management. These users are often categorized as high-risk, such as departing employees, disgruntled users, or those with potentially risky patterns.
Tip: Use Microsoft Purview reports to get a more detailed view of your organization’s sensitive assets and risky activities. These insights help you maintain compliance with data protection policies and regulatory requirements.
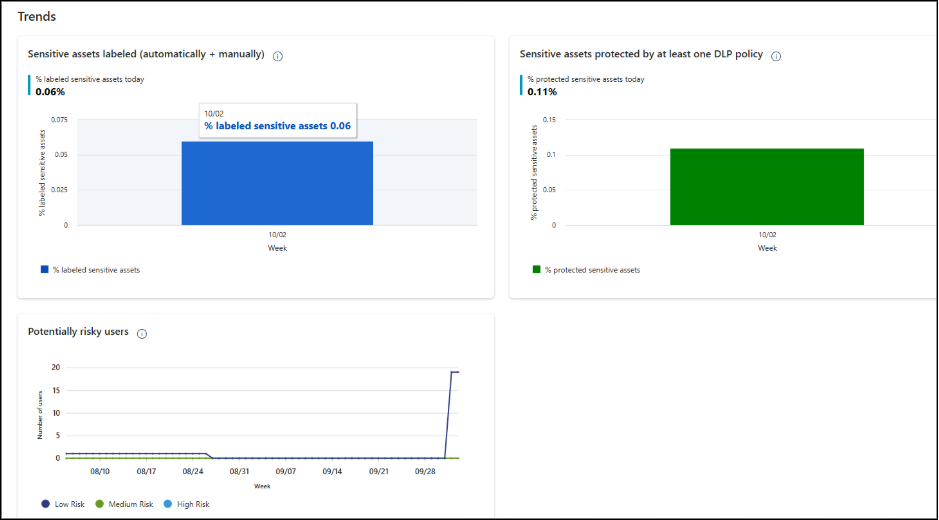
Trends:
Trends help you see the recent history of sensitive data assets and user activities in your organization. They allow you to monitor your data security posture over time and track the status of protected assets.
You can find these trends on the Overview page of DSPM:
- Track the percentage of sensitive assets labeled manually or auto-labeling policies each week.
- Monitor the percentage of sensitive assets protected by at least one DLP policy.
- Analyze the number of potentially risky users per week based on Insider Risk Management severity levels (Low, Medium, High).
You also have the option to export the report as a .csv file with all included values.
With these insights, you can identify risks in time, safeguard sensitive assets, and reduce the chance of security incidents.
That’s a wrap! Hopefully, this gave you a good understanding about DSPM in Microsoft Purview. In our upcoming blog, we’ll dive into DSPM for AI. Stay tuned, and thanks for reading!


